Page 4 of 14
Posted: Sun Nov 28, 2010 4:53 pm
by simon_manning
this build and paint work is very absorbing and it keeps me guessing, trial and error and going back to mistakes will be the theme, credit to those small scale plastic kit builders how they make them look so good. regards simon.

Posted: Sun Nov 28, 2010 5:11 pm
by Paul Morris
Hi Simon.
Even so far the model is a credit to you, I can see the time you have taken with the wheels alone, you will be rivaling your King Tiger I can see it coming. Keep up the good work..it will be a showstopper when complete.
Best wishes Paul and Vinnie

Posted: Sun Nov 28, 2010 6:05 pm
by Steve Norris
Simon.
Great work !
How did you achieve the worn paint effect ?
Regards
Steve
Posted: Mon Nov 29, 2010 10:26 pm
by simon_manning
Posted: Tue Nov 30, 2010 6:36 am
by Paul Morris
Hi Simon.
No chance of any laughter while watching your progress the work you have done so far is superb always interesting to see your progress, looking forward to the next chapter.
Best wishes Paul
Posted: Tue Nov 30, 2010 5:34 pm
by Tim Bowman
Hi Simon
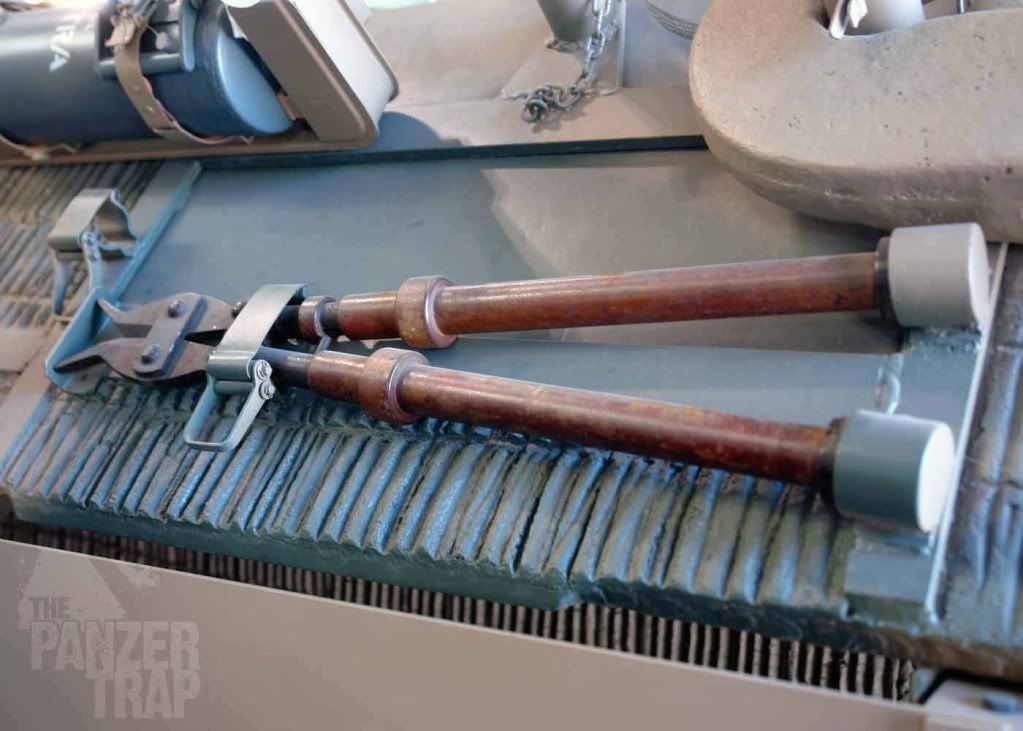
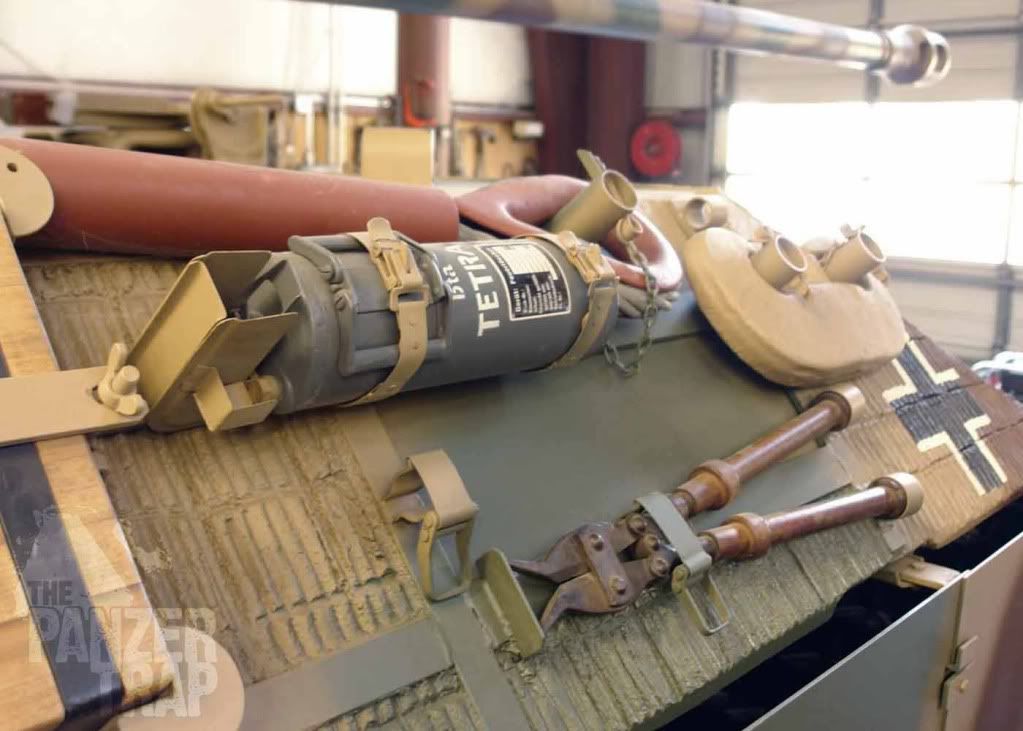
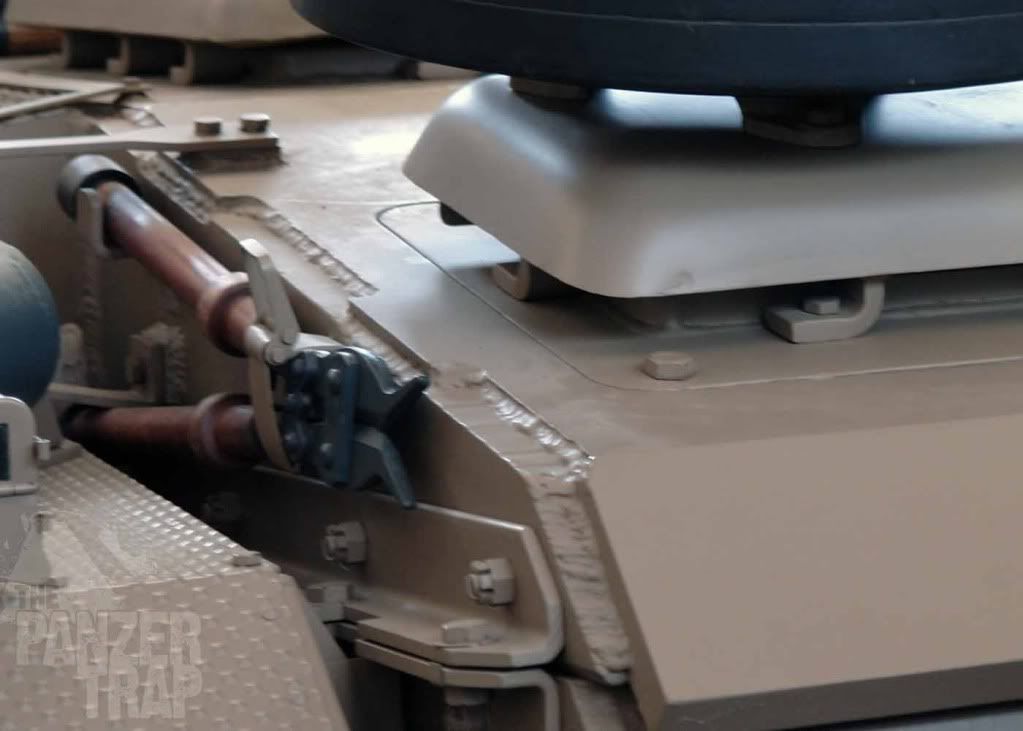
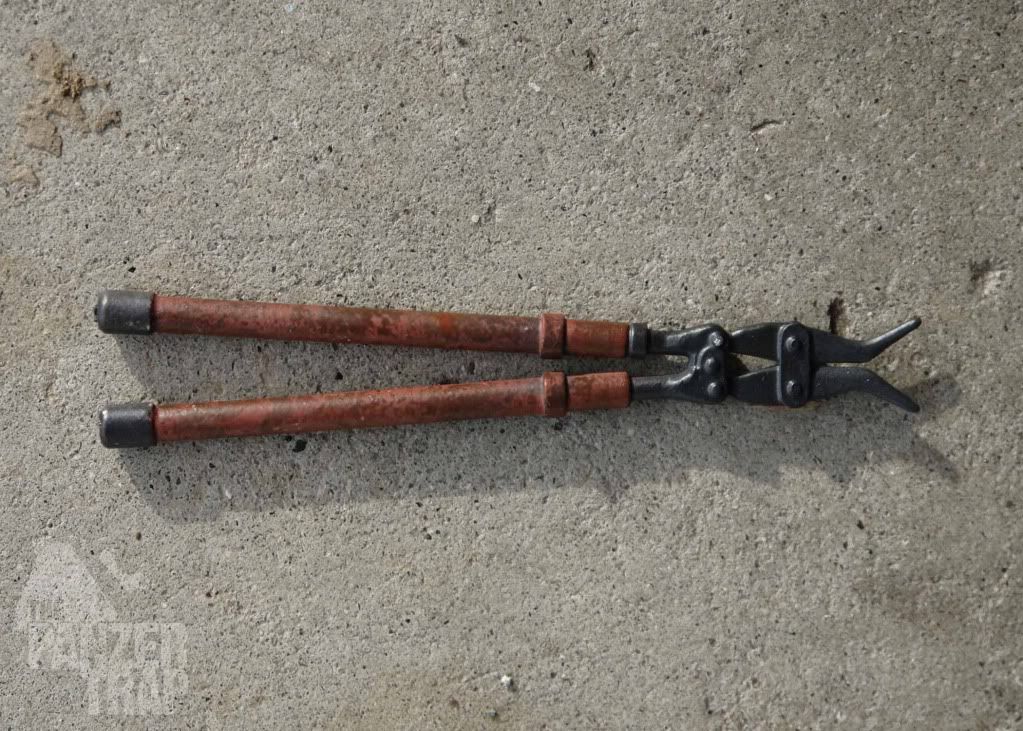
Enjoying every photo! One thing I noticed(not meant to be nit-picky or negative comment) is the wire cutters. Below are some photos of the real thing. The handles are made from a Bakelite-type material as opposed to wood. If you need a better photo of them, I can take one.
I tried the same method used on my Panthers periscopes. Base coat of primer red, mottled with rust/black mixture.

Keep up the great work!
Tim
Posted: Tue Nov 30, 2010 6:40 pm
by simon_manning
great pictures tim and thank you, once i have the hull all complete i will go back over the paint and make changes, colours, shades, bits i'm not happy with, the spade handle to me looks the wrong colour, the photos i've put on the forum always show more white .it must be the lighting in my workshop. good to know the build keeps you interested and others, i like getting referance photos and build tips. regards simon.
Posted: Tue Nov 30, 2010 7:46 pm
by Stephen White
Simon
Glad you've enjoyed using the Promodeller wash. The results look stunning. They've now introduced a line of pigments and I used the dark dirt to do the jacking block on my Pz III. Very pleased with the results if used in moderation. It's hard to be restrained in weathering when it's so satisfying.
All the best.
Stephen
Posted: Thu Dec 02, 2010 3:18 pm
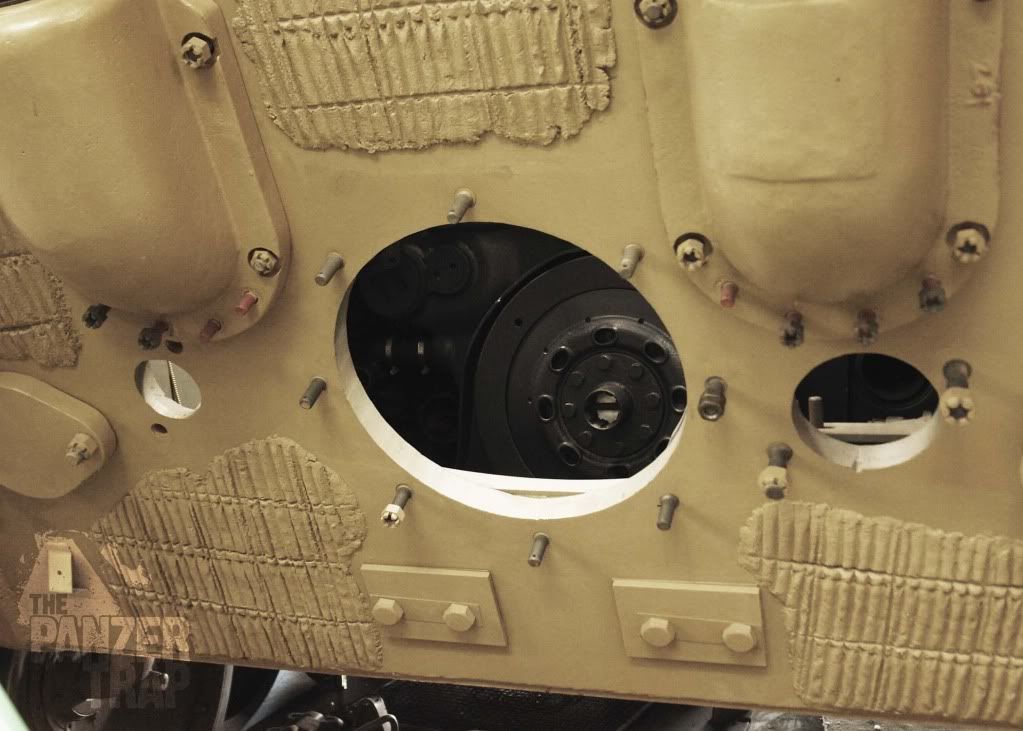
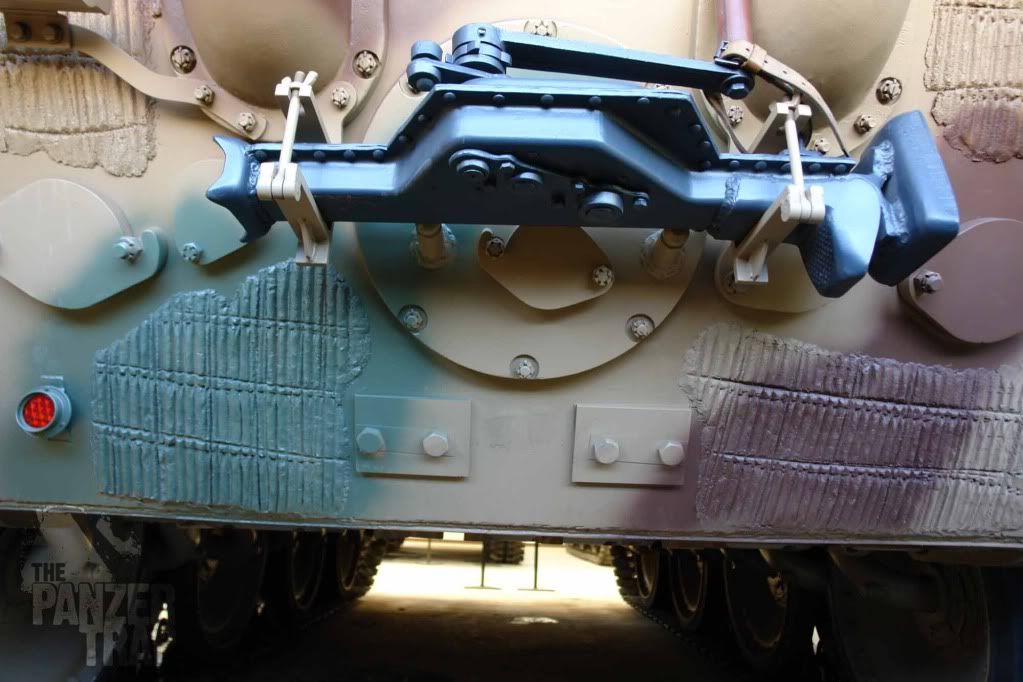
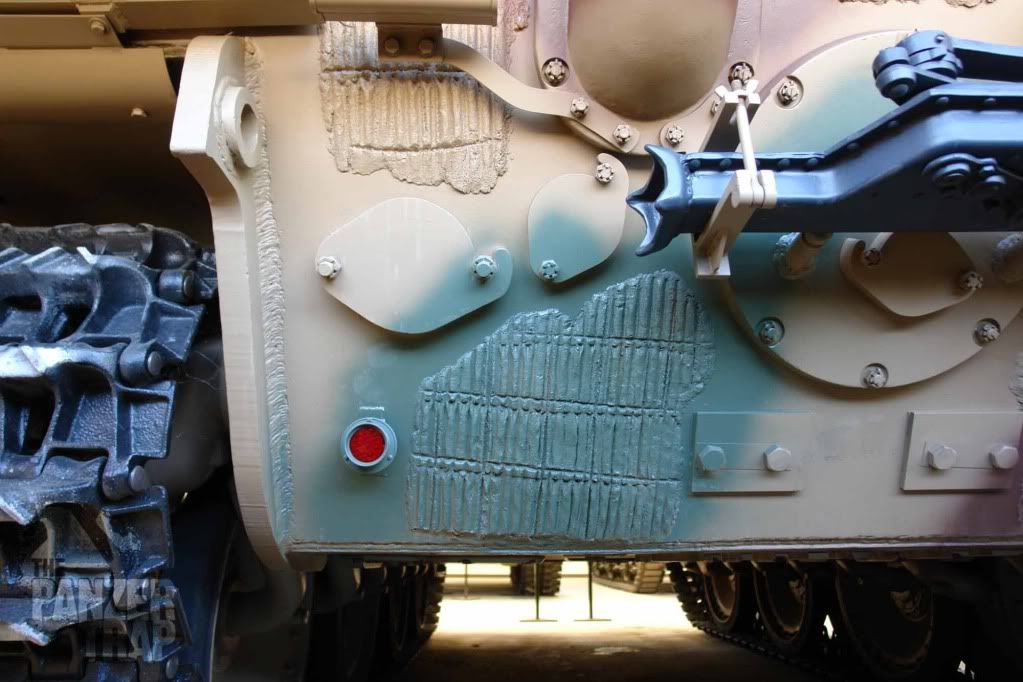
by simon_manning
could someone please tell me, does the tow bracket/ round starter plate on the rear hull shown in my photo, is it fixed with castle nuts, many thanks simon
Posted: Thu Dec 02, 2010 4:45 pm
by Tim Bowman
Hi Simon
I'd say castle nuts.
Best regards
Tim
Posted: Sat Dec 04, 2010 11:50 am
by Kent Wiik
simon_manning wrote:could someone please tell me, does the tow bracket/ round starter plate on the rear hull shown in my photo, is it fixed with castle nuts, many thanks simon
Hi Simon
Those nuts were "normal" nuts + a split pin.
Yes, some in museum restored Panther has castle nuts but that is wrong.
Please look at the 2 photos below taken from Panther manuals.


Hope this was of use.
Kind regards
Kent
Posted: Sat Dec 04, 2010 5:44 pm
by leesellars
Hello Kent
Your Knowledge is always of help.
Lee
Posted: Sat Dec 04, 2010 6:20 pm
by simon_manning
the main panther man is back on, good news in the kingdom, shall i use 4 normal nuts and 4 castle nuts, then i've got it covered! regards simon.
Posted: Sun Dec 05, 2010 9:39 pm
by simon_manning
Posted: Mon Dec 06, 2010 9:39 am
by simon_manning
trying to compare shades and tones in photographs is difficult, my workshop lights make my build look very bright, i might push the tank outside to have a look in daylight. simon.


