Page 3 of 7
Posted: Mon Aug 06, 2007 1:04 am
by Tim Bowman
Roland,
I like your thinking!
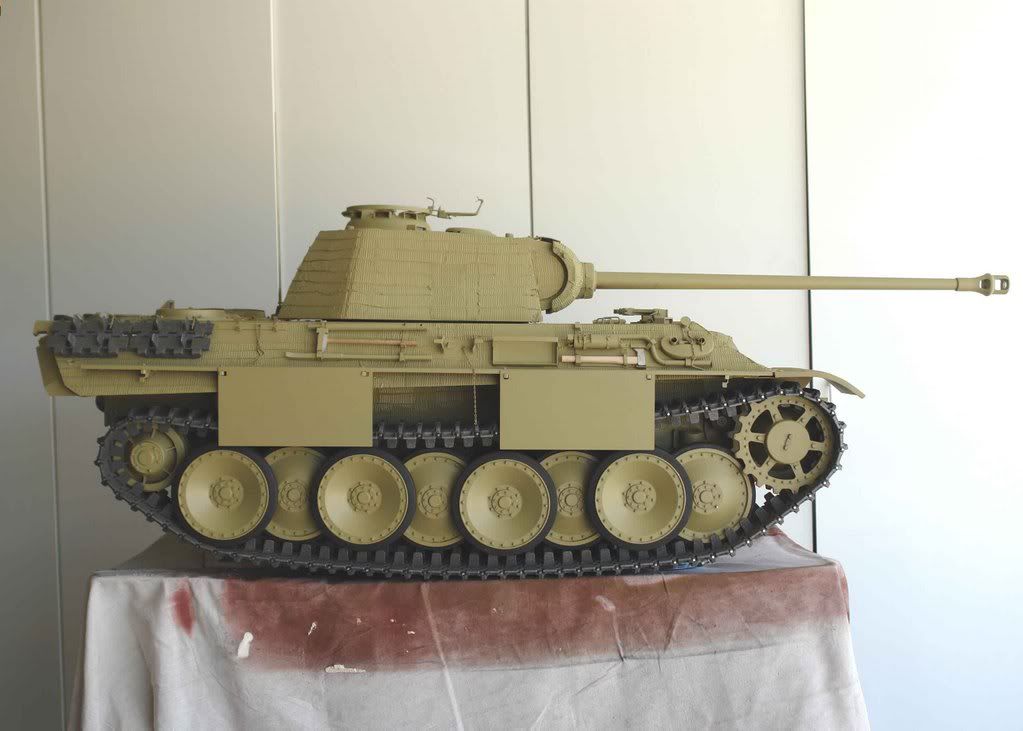
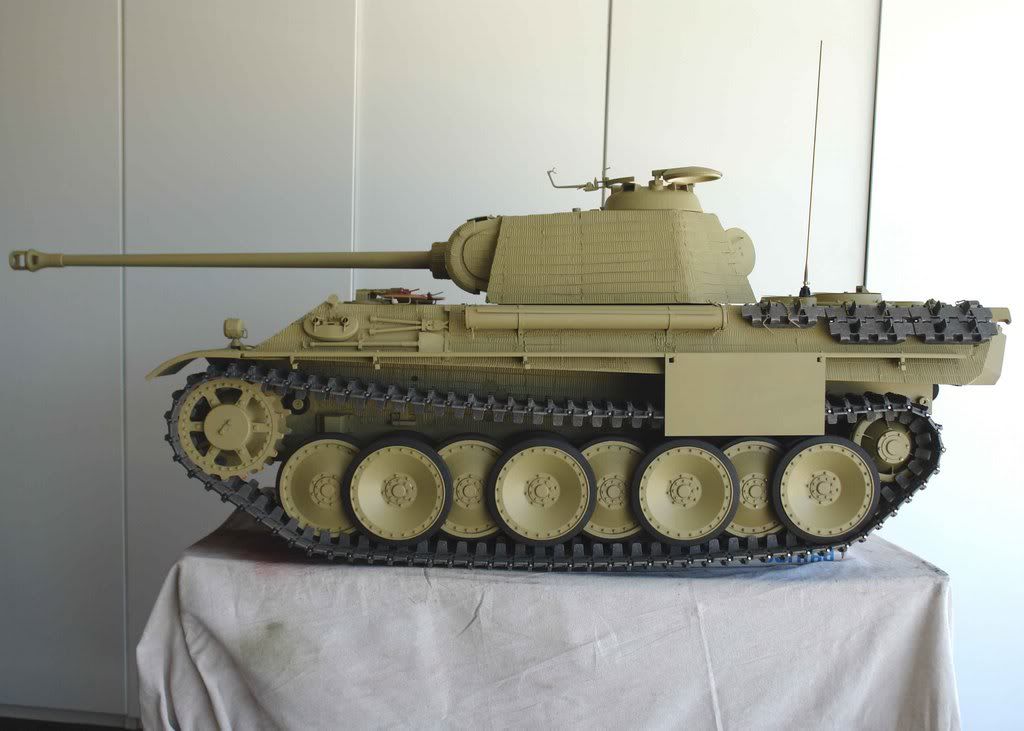
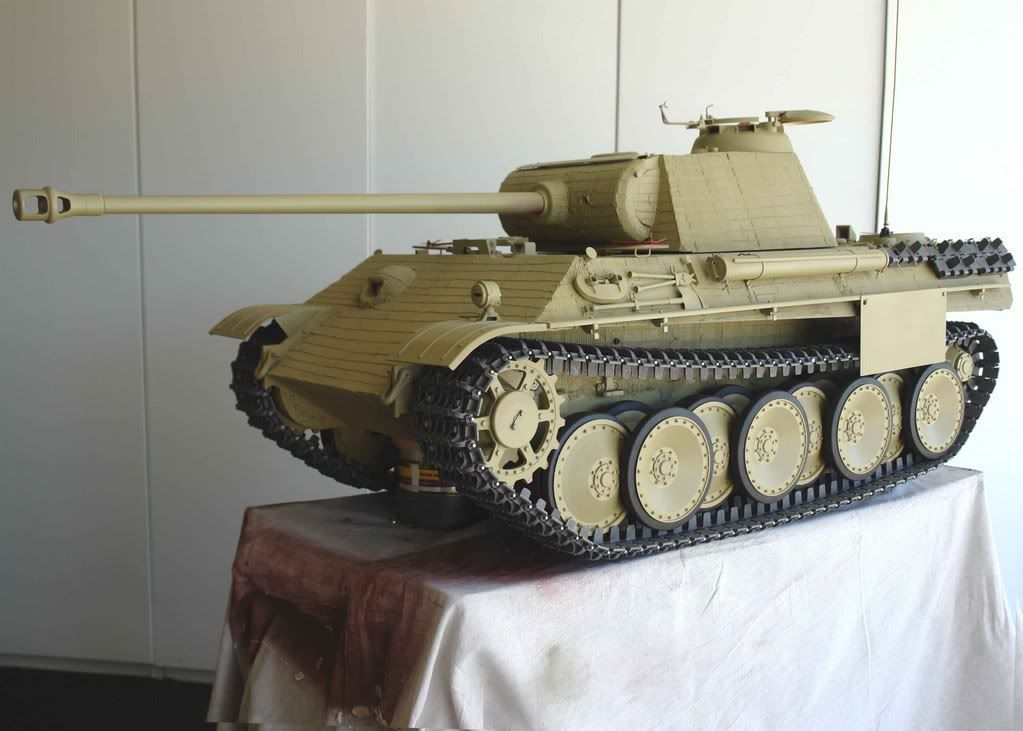
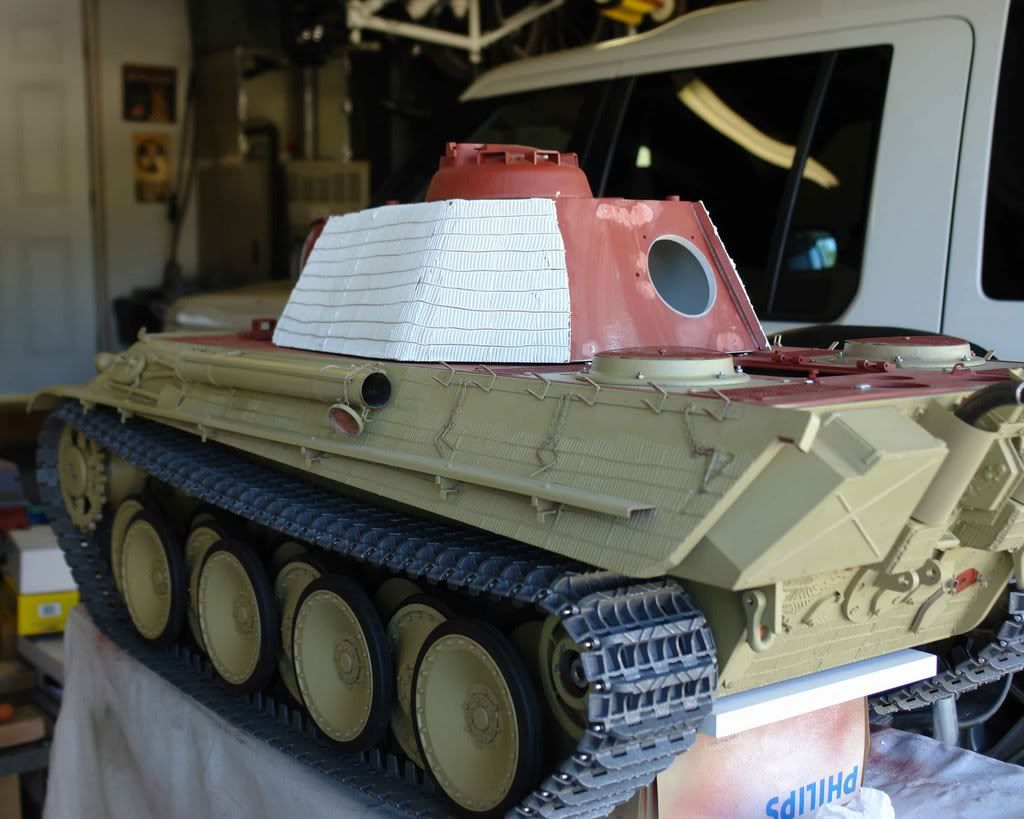
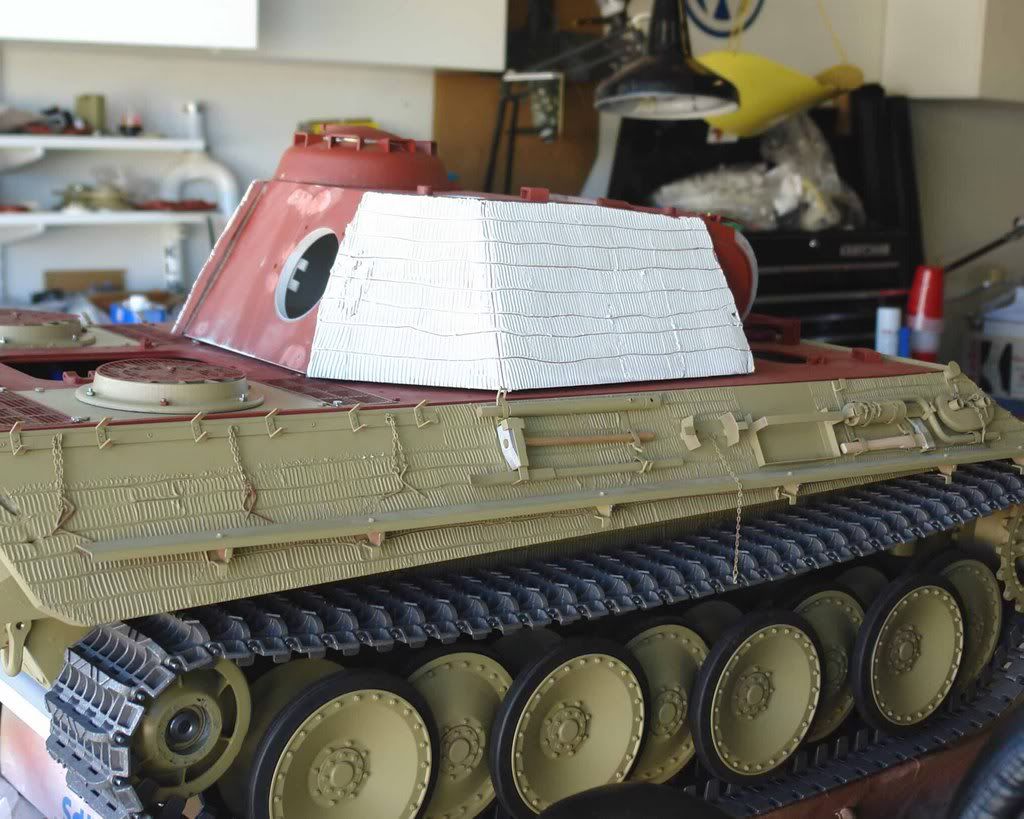
on another note, I just finished applying the zimmerit to my turret sides.

Posted: Fri Aug 10, 2007 9:32 pm
by Tim Bowman
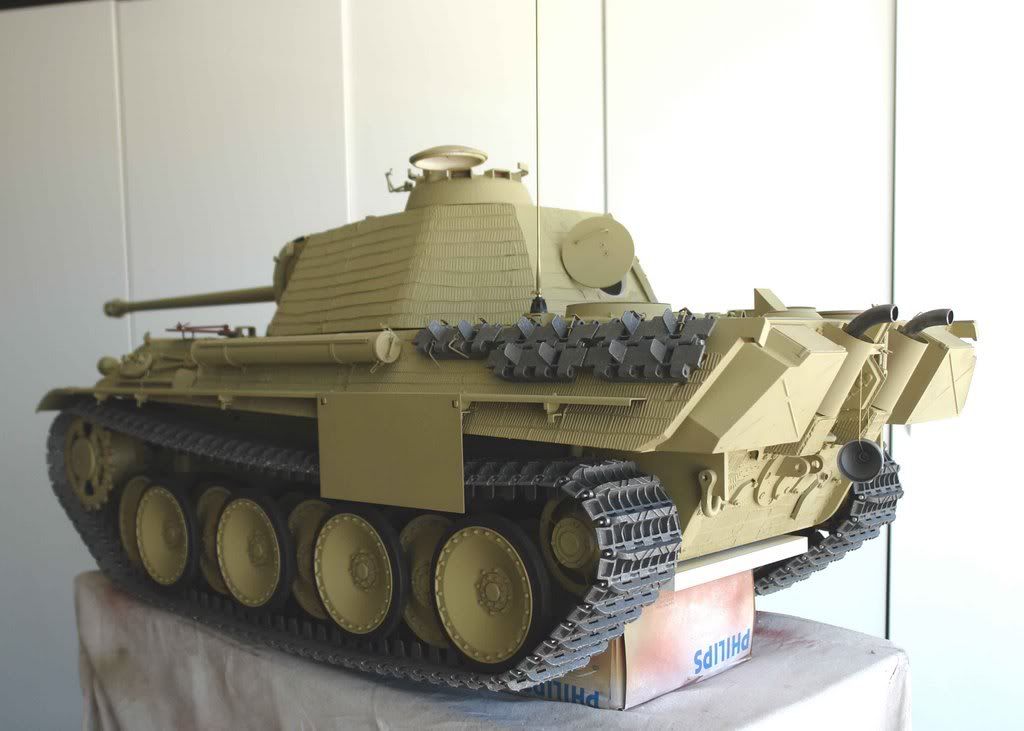
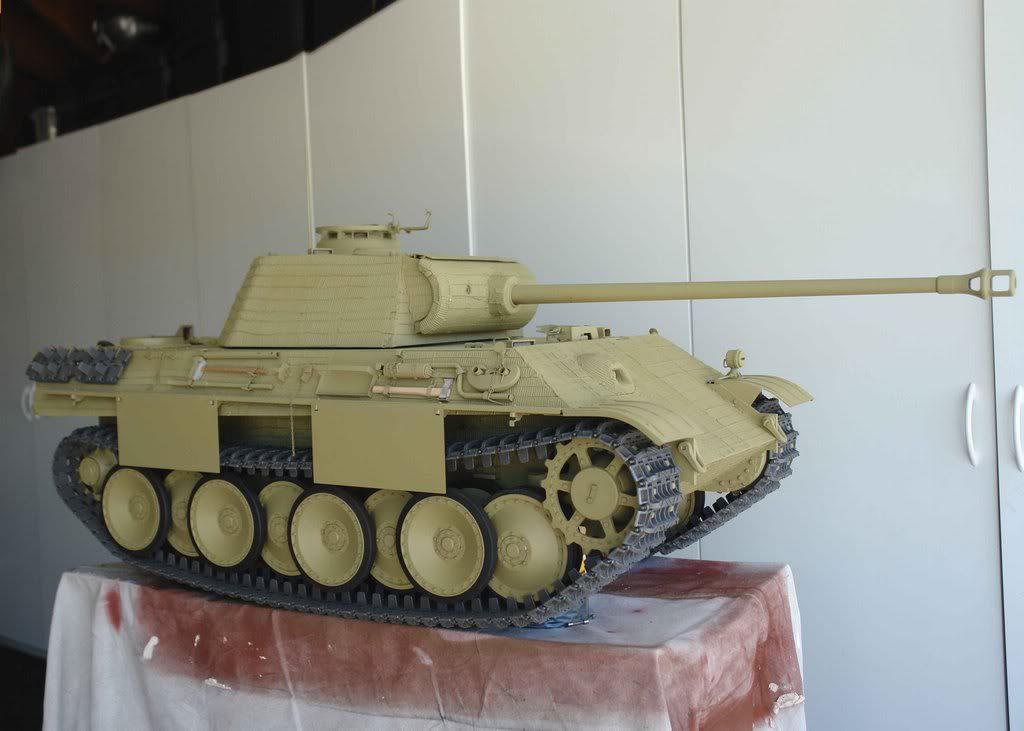
zimmerit
Posted: Sat Aug 11, 2007 6:53 am
by Dale jordan
Thats the best Zimmerit job I have seen. Top work Tim . What did you use for the zimmerit ?? Also Tim do you have a photo before you painted it. Plus your Dark yellow is very nice . Dale.
Posted: Sat Aug 11, 2007 9:49 am
by Kent Wiik
Awesome Tim and thanks for posting those photos.
Fantastic work on the zimmerit - very well done.
Nice to see what I can expect to have 3 years from now as I am the total opposite from you being the world’s most patient one

If you want the Panther historical accurate you shall zimm the stowage bins.
Keep up the good work
Kent
Posted: Sat Aug 11, 2007 9:50 am
by Gerrit Haarhoff
A very nice looking Panther you've got there Tim. Well done. I'll second Dale with his comment on your zimmerit. Stunning!
Gerrit
Posted: Sun Aug 12, 2007 1:15 am
by Tim Bowman
Thank you all for the kind words.
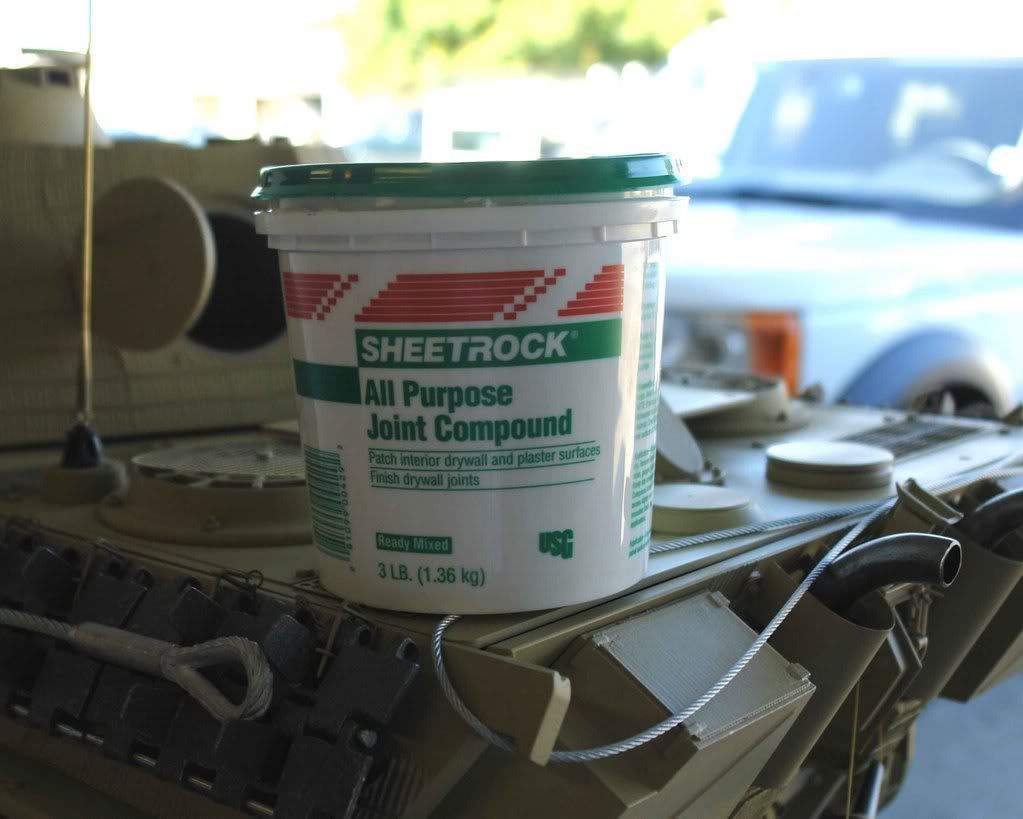
It was my first attempt at zimmerit so I was alittle nervous. I tried several other materials and then settled on this one(see photo). It looked most like the reference photos I had of war time factory applied zimmerit. It is inexpensive and you can find it in smaller containers then this. I was worrieid that my application was too sloppy but once painted, I was quite pleased and again, looking at the real photos, I actually liked the ones that aren't perfect. I'm sure it was difficult to achieve perfection between allied bombing raids in 1944.
The work time with this stuff is a few minutes depending on how thick. The best part is that if you screw up, you can get it off with water and a rag and then redo. I had to do this on the mantel.
I wasn't sure about durability but now that it's been on there awhile and has been banged, it seems to hold up just fine. I figure the real stuff got banged up and knocked off anyways so no big deal.
Some spots on mine are better then others but oh well..good practice for my Tiger

Dale here's what I used and some photos pre paint.
Reagrds
Tim
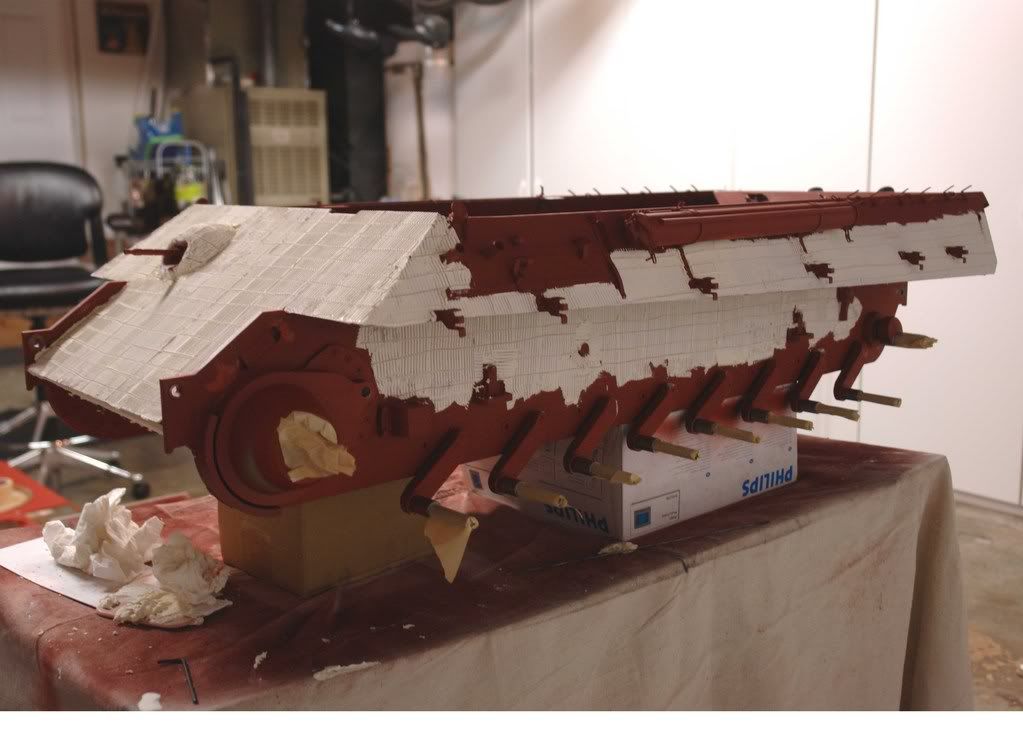
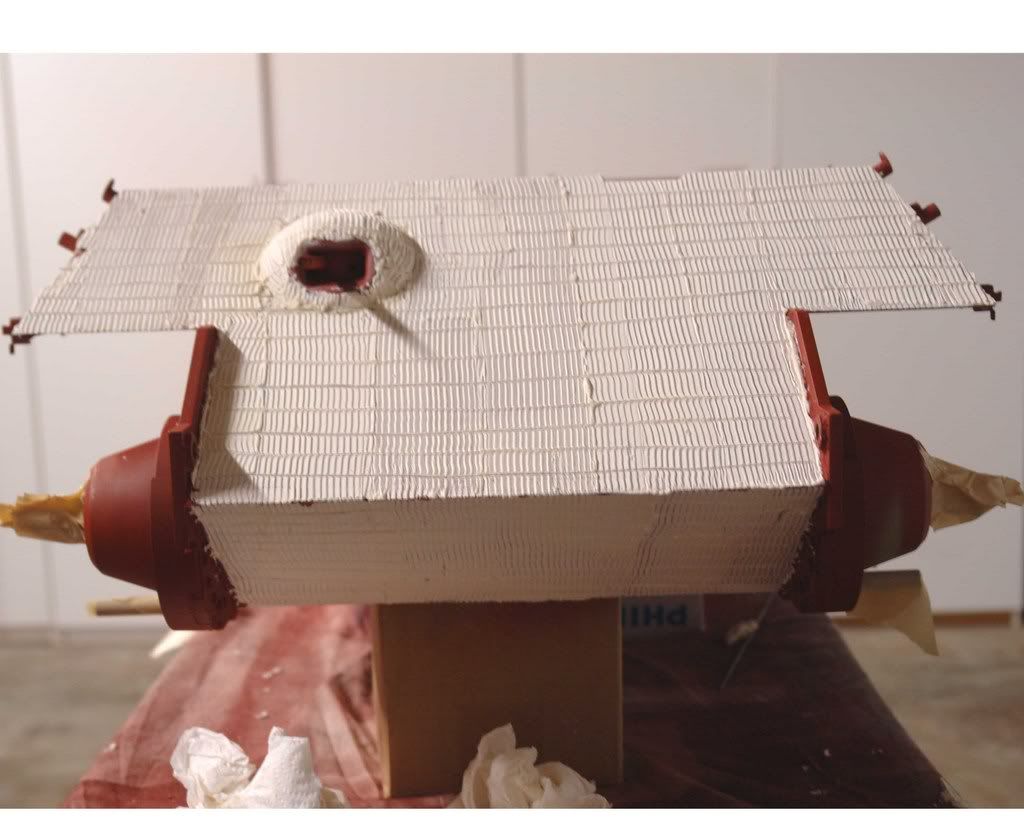

Zimmerit
Posted: Sun Aug 12, 2007 5:26 am
by Dale jordan
Spot on !!! Just like the real thing. I have used that stuff before ! One more question Tim . Did you use a 1/6 scale metal rake .Dale
Posted: Sun Aug 12, 2007 6:24 am
by Tim Bowman
Hi Dale
Yes. I used Mike Stannard's zimmerit tools set #2 . Worked like a charm. Those and all of his and Steve Winstone's great parts really help bring this model together. I'm looking forward to getting my rear convoy and fender mounted, front lights working.
Good time to say thanks to both of them.
I'm currently working on modified spare track links(adding cut-outs and detail to the guides) and track hangers for the turret now as well as tuning the running gear. Will post more pics soon.
Tim
Posted: Sun Aug 12, 2007 6:54 pm
by Tim Bowman
Kent Wiik wrote:
Nice to see what I can expect to have 3 years from now as I am the total opposite from you being the world’s most patient one
If you want the Panther historical accurate you shall zimm the stowage bins.
Kent,
That explains why your models look like the real thing when you get done with them.
I'll zimm the bins
Tim
Posted: Sun Aug 12, 2007 7:41 pm
by chris fry
hello tim,
excelent looking panther, just want to know if the joint compound you used for the zimmerit drys quite soft, i know when i was looking for a material to use i tried this but found it very soft when dry, so if you nock it it breaks off quite easily, so in the end i used trusty milliput, what are your views as the joint compoud looks easier to use and apply.
thanks, chris.
Posted: Sun Aug 12, 2007 9:17 pm
by Antony Rowley
Hi Tim,
Just wanted to echo all the setiments above
. A really excellent job
. Your Panther is looking fantastic. Very well done

Thanks Antony
Posted: Sun Aug 12, 2007 10:30 pm
by Tim Bowman
Hi Chris
I had the same feeling as far as durability goes. I did a few test boards with two part epoxy putty, and then a body filler(like bondo) and then with the joint compound. It is definately softer then the first two but for me it was acceptable. I could scuff and ding the bondo too when I was comparing them and I couldnt get the milliput type epoxy putty to look descent(probably due to my novice modeling skills). Also ease of application, work time was super with the compound! The "general purpose" is slightly more durable then the "finishing" compound. or so I've been told by my brother who is in the construction business.
I also figured that the real thing wasn't bullet proof anyways so nicks and dings that occur over time aren't going to bother me that much. Once it was primed with several coats and then painted, it actually is pretty tough.
Bottom line I guess is it worked for me but might not be the best if one is worried about dinging it up.
Thats just my humble opinion. Hope that answers your question
Thanks Chris and Antony for the nice words.
Tim
Posted: Sun Aug 19, 2007 4:00 am
by Tim Bowman
HI all,
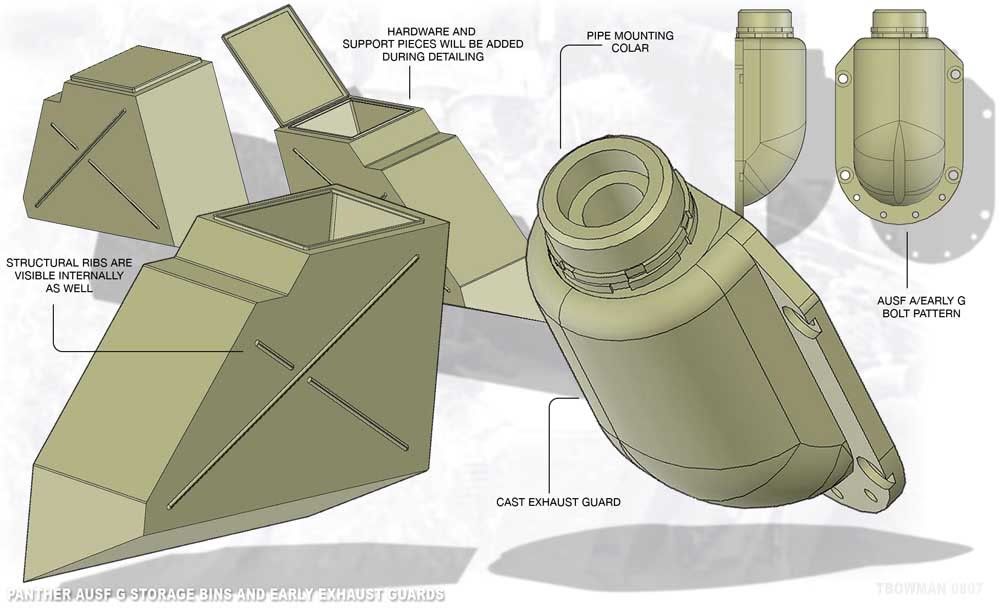
Here's the next parts I should have by the end of next week for my Panther.
Storage boxes are just the basic box and lid. The details (hinges,latches and support pieces along back edges)will be added.
Cheers
Tim
Posted: Sun Aug 19, 2007 9:23 am
by Kent Wiik
Yes, Nice, I love them!
Has notice noting to add/change on them - maybe that the exhaust guards sometimes had cast numbers but was also sometimes seen without having them.
Tim, count me in for a pair of each please.
Will the boxes be in brass?
And do you plan to make the pipes as well?
Keep up the good work
Kent
Posted: Sun Aug 19, 2007 11:54 pm
by Robert E Morey
Tim,
Your work is fabulous on your Panther. Wow have I got my work cut out for me on mine! You're like Vince, a couple of weeks and you've got a bunch of stuff changed and all new photos! It takes me weeks to make 1 part.
Thanks for the inspiration! Your zimm is the perfect scale, but I think I will do mine in milliput. Great photos. I can't wait to see your camo scheme, as I'm sure it will be awesome.
Fantastic job all around. How do you work so dang fast!!!
Bob