Page 3 of 17
Posted: Fri Mar 06, 2009 1:03 am
by Robert E Morey
Derek,
You stug is looking fantastic. Excellent job on the engineering and machining! I like stirring up the grey matter to. Whether using CNC or manual machines there is a lot of thinking that must be done for them to come out right. Your work is inspirational to me.
Keep us posted on your progress - you will be one of the lucky few in the world with a Stug III! How cool is that?
Bob
Posted: Mon Mar 09, 2009 9:40 pm
by Dale jordan
Hi Derek .. I thought this might be of interest to you .. for your scratch built fighting compartment... Dale

Posted: Mon Mar 09, 2009 9:40 pm
by Dale jordan
How good would this look in 1/6 Dale

Posted: Mon Mar 09, 2009 9:55 pm
by Derek Attree
Hi Dale
The top picture is good.
the lower one is a bit like what I am going for but with a gun!!!

Derek
Posted: Tue Mar 10, 2009 8:19 pm
by Derek Attree
So Guys
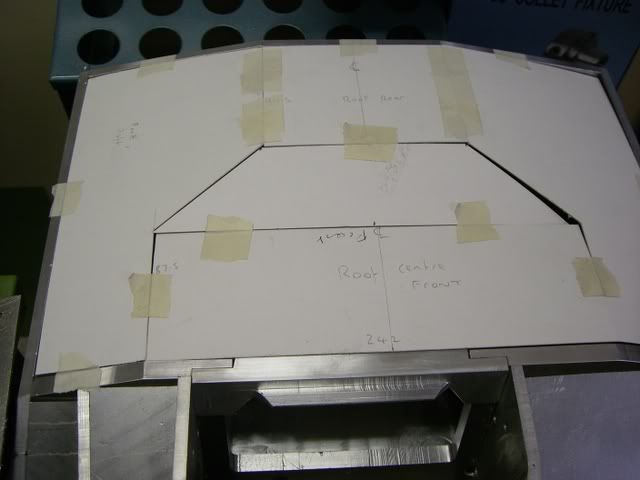
I have been doing some more work on the mantlet and the roof. Pictures below....This is the first part of the recoil tube added to mantlet and also back plate shaped,
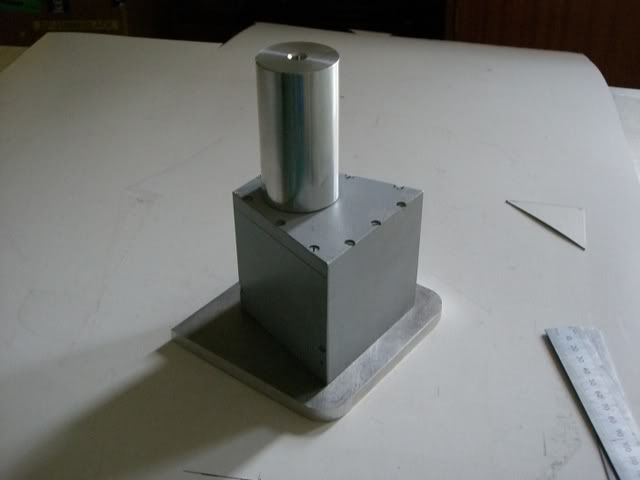
Easy in card.
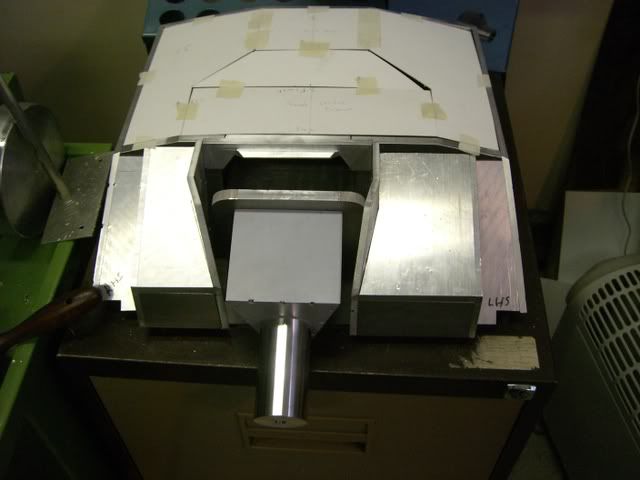
This gives the templates for cutting metal.
The choice was 2mm thick alloy sheet This was a mistake

After welding I have ground things back but the plates have badly pulled out of shape.
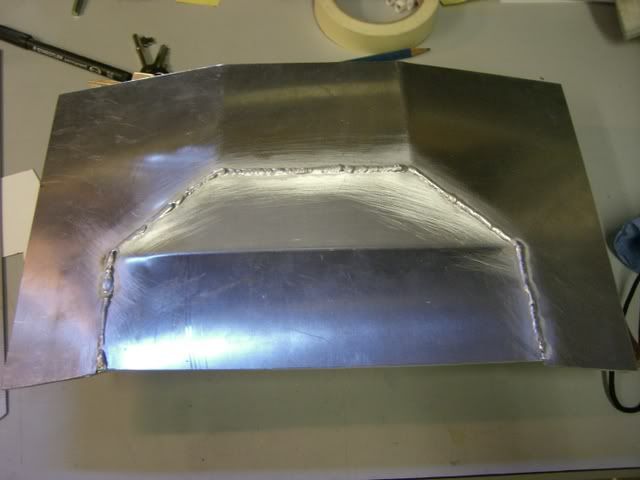
I have since cut the holes for hatches and I have decided to remake the roof from steel plate if I can find a supply of 2mm mild steel.

In the mean time I will go back to the gun and the elevation and turning mounting mechanism.
Regards
Derek
Posted: Tue Mar 10, 2009 8:46 pm
by Dale jordan
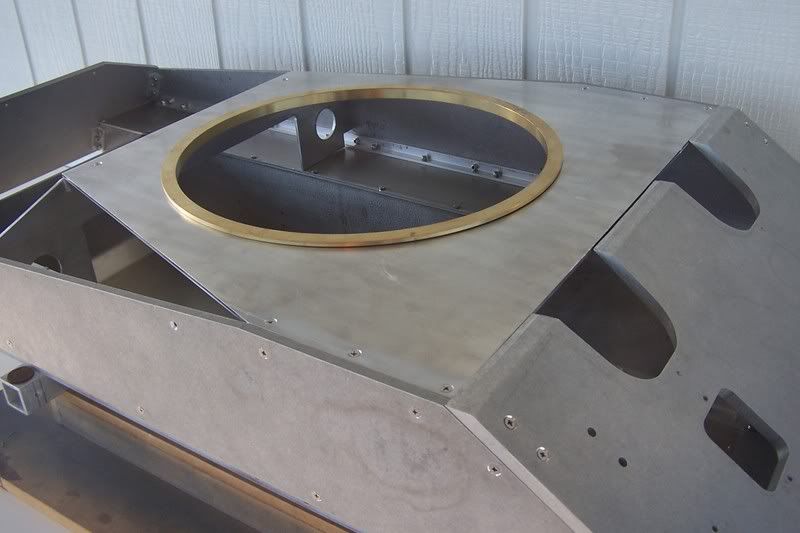
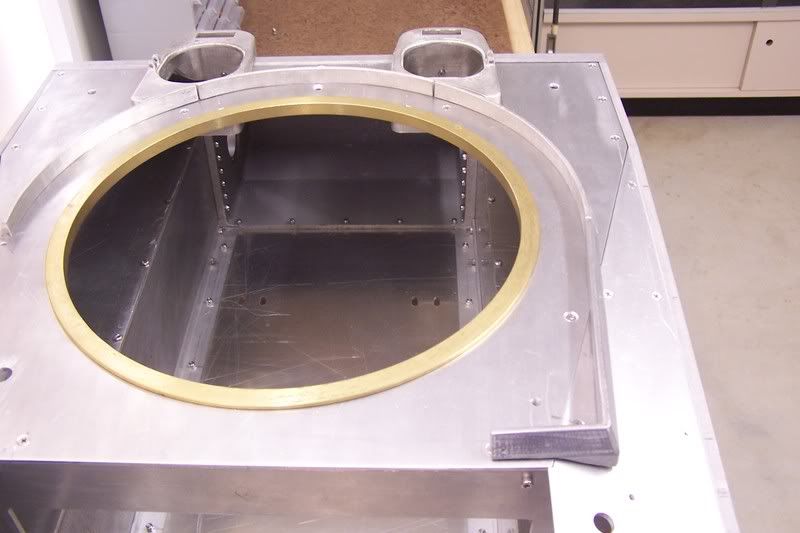
Hi Derek . When I made my new alloy deck for my Sherman which has some angles like your stugs roof . I had the parts cut to the templetes and then , I had angles brackets bent up out of 3mm x 30mm alloy plate folded down the middle to the profile angle and I then bolted it togerther with SS countersunk bolts and then filled the holes with P38 , this will give you the sharp lines and good fit for your roof that you are after ... Dale
Posted: Tue Mar 10, 2009 9:17 pm
by Dale jordan
Derek You can see the countersunk bolts in the photo holding the plate togerther instead of welding . I hope this helps .. Dale
Posted: Wed Mar 11, 2009 2:08 am
by Robert E Morey
Dale is 100% correct Derek, use screws instead of welding. Even using thicker plate may have still warped it. I ruined my Sherman deck by welding it and having it warp - and it is 3mm thick. Not to say you cannot straighten it out by pounding on it! But screws are plenty strong and will not warp the plates.
Bob
Posted: Wed Mar 11, 2009 7:39 am
by Derek Attree
Hi Dale and Bob
That is what I planing to do however the problem with the stug
roof is the large hole for the coupler 125mm diameter that cuts
through a 4 way join in the roof and I wonder about strength in this area.
I will post a picture in the next couple of days of the roof with the holes so you can see what I mean.
Regards
Derek
Posted: Wed Mar 11, 2009 8:23 am
by Adrian Harris
Looking at the position of the cupula in the models earlier in the thread, that looks to be a horrible selection of angles

How about a disk or ring of mild steel, mounted under the roof as a support, and held place with countersunk screws

It could also act as the bracket between the different roof panels in that area.
Was your roof TIG welded

Adrian.
Posted: Wed Mar 11, 2009 1:33 pm
by Derek Attree
Hi Adrian
You are not kidding about the angles.
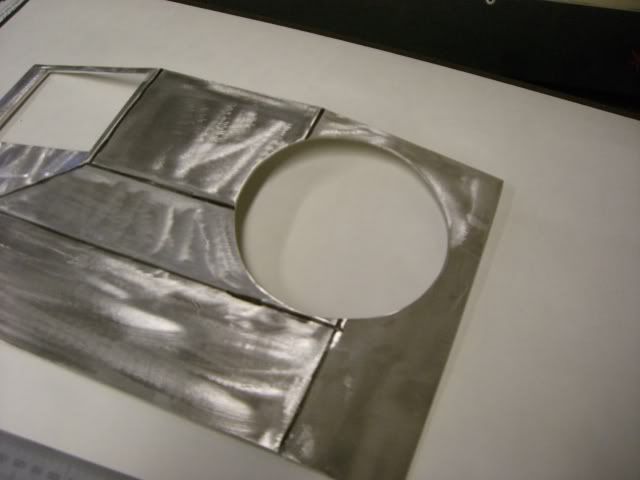
This is the first roof with the holes cut.
I am going to have the coupler tube going through
the roof and then add brackets or blocks to hold it in place
I will probably make it up as I go along

That normally works for me

I have Dave Dibb's coupler top with the the scopes and the hatch.
Not sure what the welding was?
Derek
Posted: Wed Mar 18, 2009 8:39 am
by Derek Attree
Hi Guys
I have started to do a new roof and I have added roof supports.
The following 3 pictures show the roof supports and lots of M3 screws.
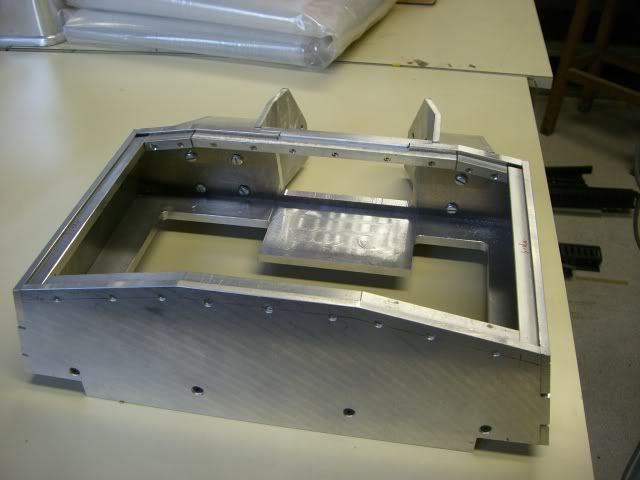
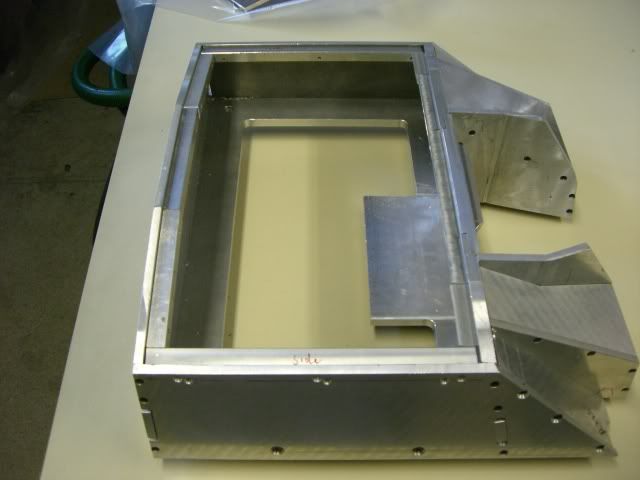
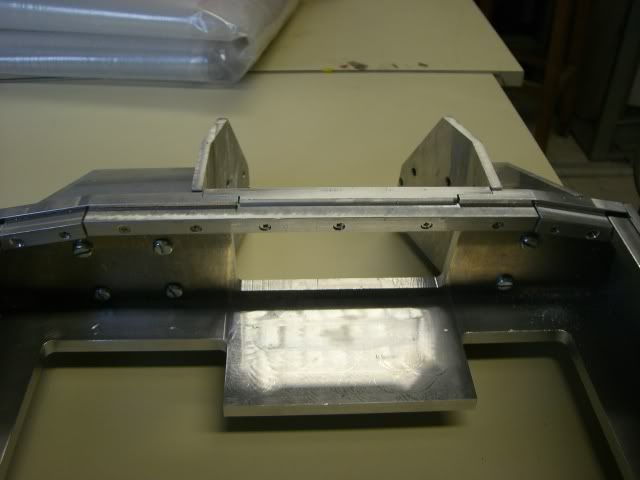
This is the first roof panel
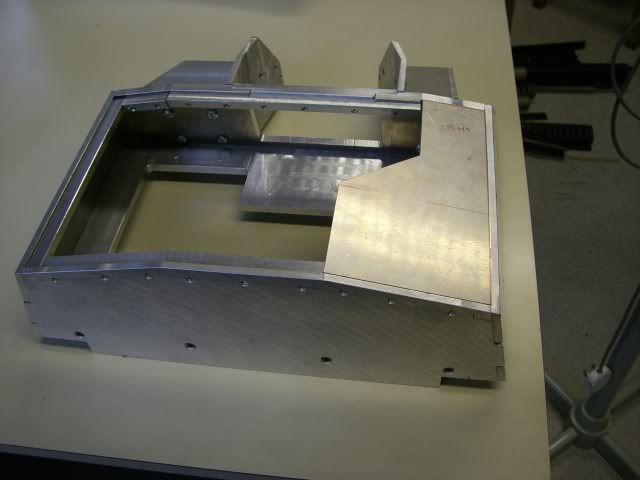
second section
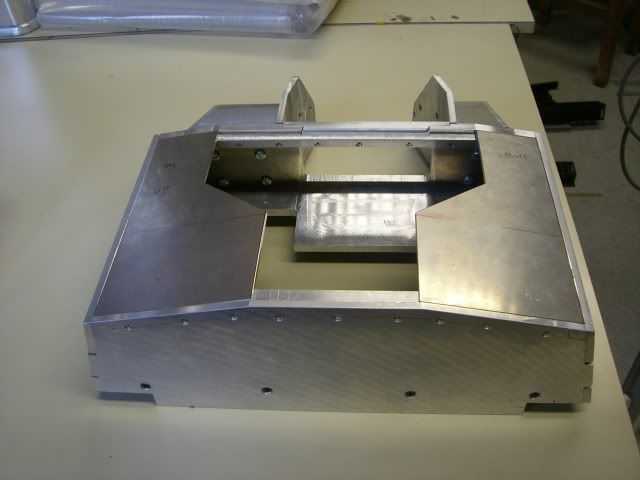
Mid section in place.
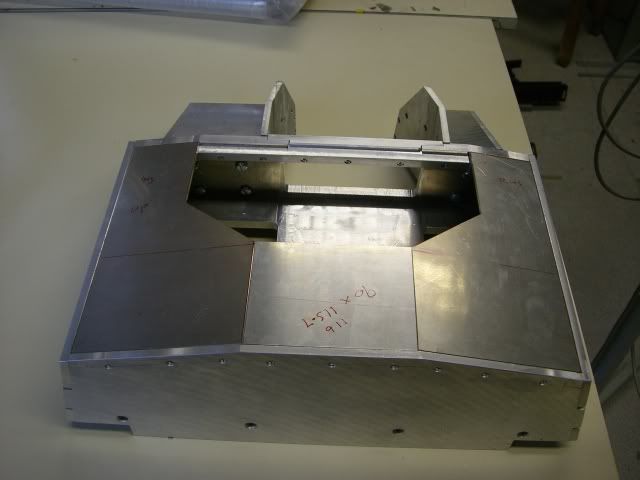
Final bits in place now it all needs screwing in place like the real thing.
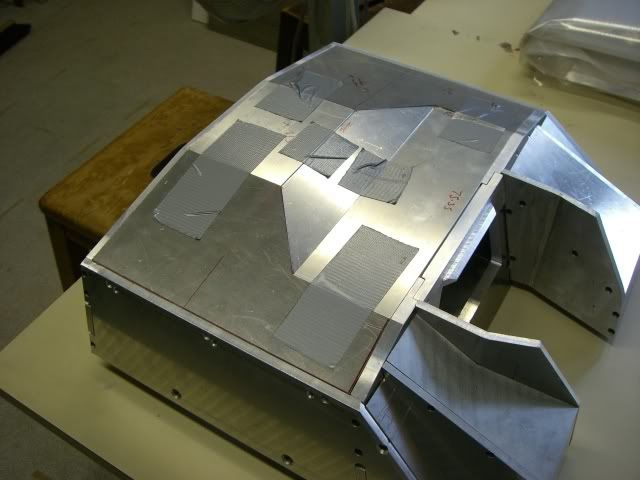
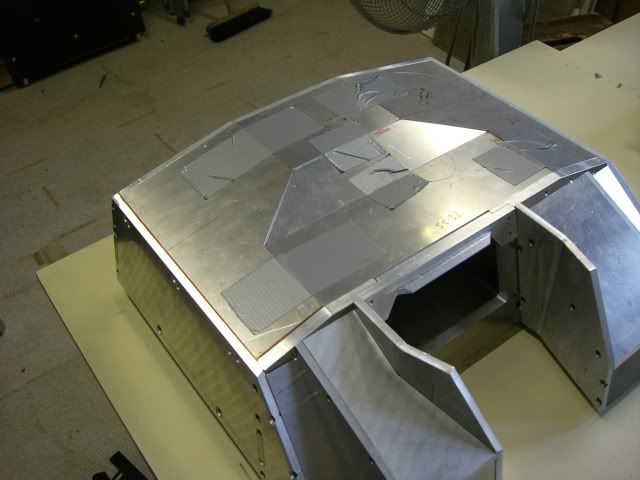
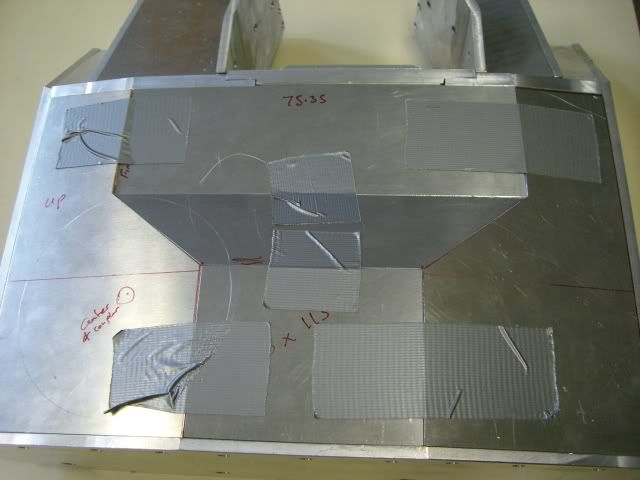
I have used over scale 3mm alloy plate as suggested by Dale and the result is much better.
The angles on this baby are a real challenge and cutting the holes should be interesting with the thicker plate. I will post more photos when this is done.
Derek

Posted: Wed Mar 18, 2009 10:15 am
by Fredrik Jorgensen
I am stunned Derek!!!!!!!
Great craftmanship skills.
Wish i could work that kind of thikness at home
But i havent goth the machines nor the space for them

Excellent work!!!!
Freddie
Posted: Wed Mar 18, 2009 10:44 am
by Jeffrey Goff
Hi Derek, I have been watching your progress on your Stug build, with fascination, superb workmanship, keep us up to date
regards
Jeff
Posted: Wed Mar 18, 2009 7:44 pm
by Dale jordan
Good work .. Derek .This is the way I would have done it . By having the deck supports in , it give you a good base to work from . Derek with the hole I would scribe it out then cut each peace separately ... just stick to the lines ...Dale


