Steve,
Your solution looks great, and the external look of the grates flat with the deck is exactly what's desired. I do have a couple of comments: I'm curious as to how you'll fasten down the rear deck portion, as there seems little room left for bolt-down points or hull-mounted magnets. What's your plan there? Also, the rear armorplate, while perhaps scale thickness in its lower portions vs the side hull plates, should be approximately the same thickness on its visible upper edge of the side plates, as Rich and I have fashioned it. As pictured, your solution leaves unsolved the overscale thickness of the top edge of this rear armorplate. Not intending to nitpick, but when you've gone to such lengths to make the deck right, you might want to consider that rear armorplate issue. If you decide to reduce that part and instead go for the milled ledge, Pete Fertl has just the part for you to fill in the gap left at the front edge of the deck by moving the whole deck back a few mms. He fashioned for me a ledge/spacer that closed up the gap at the forward edge of the hull deck, while supporting it at the same time. If Pete's still out there listening, perhaps he'll chime in with some info about that.
At any rate, this is a fascinating thread, and I'm gratified to hear that Armortek will attend to this detail in their upcoming Tiger I release, thereby relieving all future buyers of this nasty chore.
Lowering the Rear Deck
-
Doug Pinkerton
- Posts: 67
- Joined: Thu Jul 12, 2007 2:25 pm
- Location: Charleston, SC
-
Steve Norris
- Posts: 1231
- Joined: Thu Jul 12, 2007 11:42 am
- Location: Manchester
- Has liked: 8 times
- Been liked: 701 times
Doug,
Dont worry about nitpicking, constructive comments help everyone.
The hull rear deck will be held down with magnets, If you look at picture No6 there is a space on either side of the supports fitted to the hull rear plate. I intend using cheap and readily available magnets from B&Q in the UK (i am sure the US will have equivalent items). A unpredicted bonus with this mod is that the front of the rear deck is held under the rear of the forward deck and therfore only 2 relativly small magnets are needed to hold the rear down.
Your comment about the overscale thickness of the rear plate is quite right but my intention with this mod was to show what could be done fairly easily and with no machining. I think the end result is a worthwhile improvement over the "as supplied" deck and the small overscale thickness is not realy noticable.
Regards
Steve
-
Doug Pinkerton
- Posts: 67
- Joined: Thu Jul 12, 2007 2:25 pm
- Location: Charleston, SC
It's all relative
Hi Steve,
Reviewing your methods, I can see more similarities than differences between what you have done and what I did, except for the milling of the rear armorplate. Without the milling and thinning of the rear armorplate, your method and mine (and perhaps Rich's, although I don't presume to speak for him), are very similar. The immensely complicating factor was the thinning of the rear armorplate, which, in addition to requiring milling of that part, necessitated a whole string of adjustments to accommodate the shifting of the whole deck assembly a few mm's aftward. In retrospect, I think it clearly demonstrates the law of diminishing returns, which means the effort to make incremental improvements increases exponentially by degree of perfection one seeks, to decreasingly noticeable results.
If I had it to do over again, it's hard to say whether or not I'd go to the trouble I went to. I can say without equivocation that for future Tigers, if I'm fortunate enough to buy one, I will leave Armortek to the deck improvements, and hope that they address both the level of the rear deck grates and the thickness of the upper edge of the rear armorplate. That will eliminate one of the most time-consuming and labor-intensive tasks that confront the modeller seeking a truly accurate rendition of whatever version of the Tiger I they choose.
Doug
-
Steve Norris
- Posts: 1231
- Joined: Thu Jul 12, 2007 11:42 am
- Location: Manchester
- Has liked: 8 times
- Been liked: 701 times
Finally completed my lowered rear deck, I have also added the following details.
1:- Kents rolled armour treatment to the engine hatch.
2:- Reprofiled the engine hatch hinges.
3:- Detailed the engine hatch air intake.
4:- Added engine hatch locks.
5:- Detailed the radiator intakes and exhausts.
6:- Added casting numbers.
7:- Added Mr Surfacer to the castings
8:- Added tie downs.
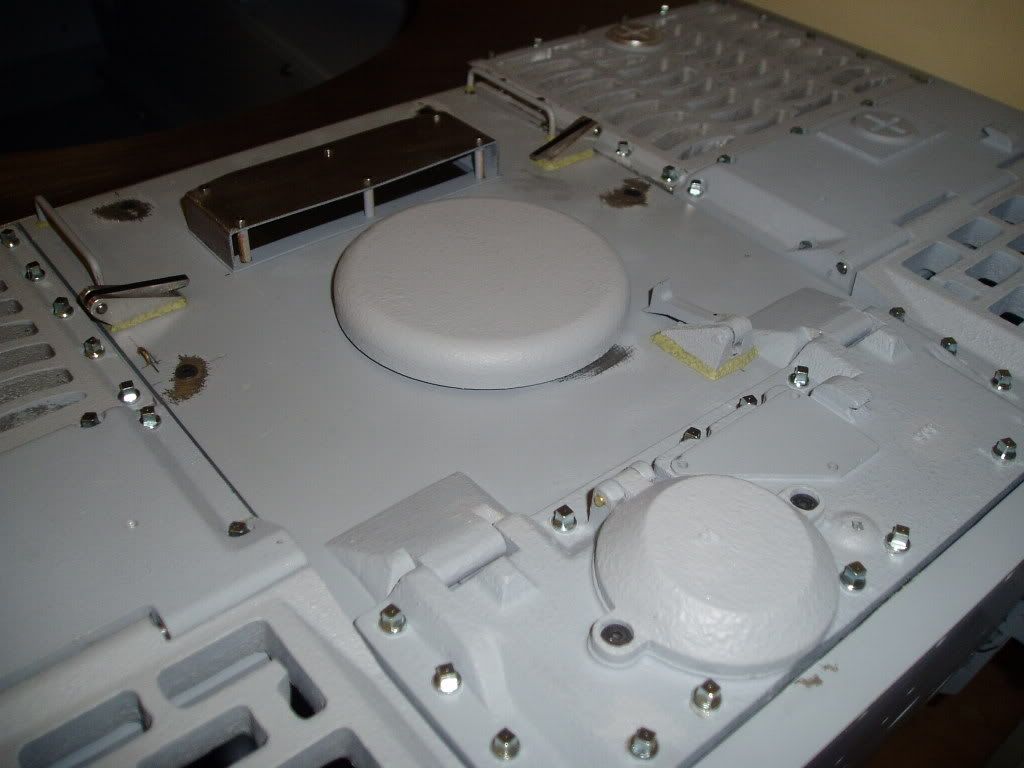
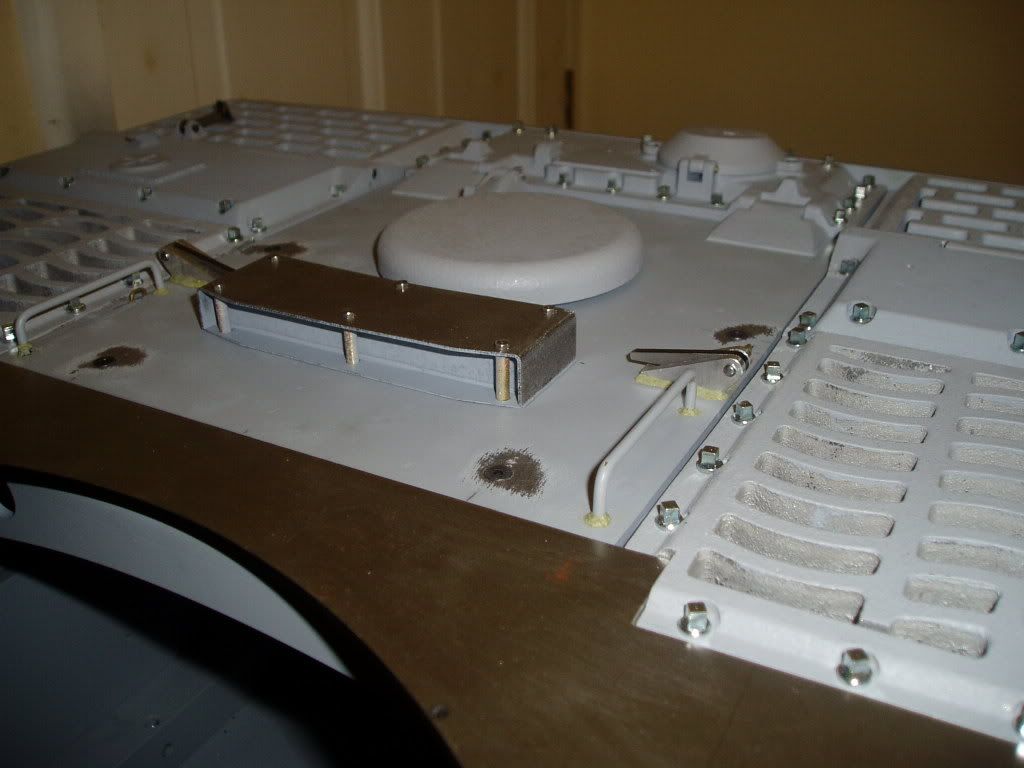
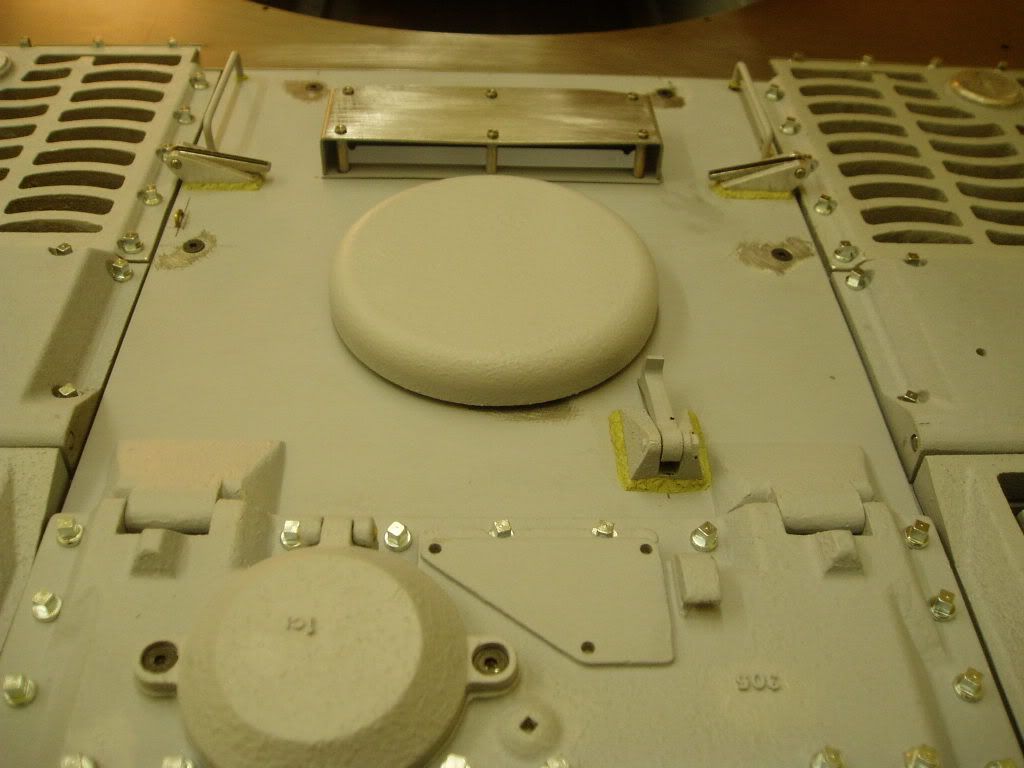
Although not shown in the photos i have also lowered all the exhaust and starter plate attachment holes as part of the rear plate lowering.
On to the wheels next,
Regards
Steve
1:- Kents rolled armour treatment to the engine hatch.
2:- Reprofiled the engine hatch hinges.
3:- Detailed the engine hatch air intake.
4:- Added engine hatch locks.
5:- Detailed the radiator intakes and exhausts.
6:- Added casting numbers.
7:- Added Mr Surfacer to the castings
8:- Added tie downs.
Although not shown in the photos i have also lowered all the exhaust and starter plate attachment holes as part of the rear plate lowering.
On to the wheels next,
Regards
Steve
-
Jeffrey Goff
- Posts: 805
- Joined: Thu Jul 12, 2007 12:52 pm
- Location: NORTHAMPTON
- Has liked: 20 times
- Been liked: 737 times
Hi Steve great work,I see you have the bit between your teeth, I have been looking at your 222 build, and working on mine I can see just how much detail you have put into it, absolutely first class, the problem with the forum is unless you have built a particular model you have no comprehension in the effort and time on each of the modifications the builders make
keep up the good work and keep the pictures coming
regards
Jeff
keep up the good work and keep the pictures coming
regards
Jeff
-
Kent Wiik
-
simon_manning
- Posts: 2061
- Joined: Fri Nov 02, 2007 8:51 pm
- Location: new forest,hampshire,u.k.
- Been liked: 1767 times
-
Tim Bowman
- Posts: 1762
- Joined: Fri Jul 13, 2007 4:53 am
- Location: Northern California
- Been liked: 177 times
- Contact:
Hi Steve
I have gone back and forth over the past week trying to decide whether or not to reduce the thickness of the rear armor plate while lowering the grills. My hull is still at the point where I can semi-easily remove the rear armor if needed for machining. My indecision is holding me up on other detailing I'd like to do on the hull.
However, looking at your beautiful photos I've decided to go the same route as you and leave the rear armor thickness as is. As Kent said, your texturing and cast-in numbers are SUPERB!
Many thanks for the inspiration. Excellent work (as always)
Kind regards
Tim
"So long as one isn't carrying one's head under one's arm, things aren't too bad." – Erwin Rommel
-
Steve Norris
- Posts: 1231
- Joined: Thu Jul 12, 2007 11:42 am
- Location: Manchester
- Has liked: 8 times
- Been liked: 701 times
Tim
Thanks for the kind words.
Just to cast some more doubt into your mind, I would have reduced the rear plate thickness if i had easy access to a milling machine. The mod i carried out used hand tools only (hard work lowering the rear plate ! ).
The finished result looks right but if you can reduce the thickness you will KNOW it is right.
Hope i have not caused you to much of a problem
Steve
-
Tim Bowman
- Posts: 1762
- Joined: Fri Jul 13, 2007 4:53 am
- Location: Northern California
- Been liked: 177 times
- Contact:
Thanks Steve
I'm rethinking it again. No big deal. I guess if I'm going to do the modification I should go ahead and make the whole modification more accurate while I'm at it. Easier now then later.
Best wishes
Tim
I'm rethinking it again.
Best wishes
Tim
"So long as one isn't carrying one's head under one's arm, things aren't too bad." – Erwin Rommel
-
Steve Stuart
- Posts: 779
- Joined: Fri Apr 18, 2008 11:34 pm
- Location: Oxford
- Has liked: 264 times
- Been liked: 195 times
Lowering the deck, What bolts are used?
Hi,
I have spent the last couple of weeks lowering the rear deck, a large amount of reading, looking at photos and thinking how to do it! Now it is done, but now looking at the books and pictures again, I am confused as what bolts are used to hold the rear deck castings down, are they square headed bolts or are they actually allen bolts? It is not clear, for it appears that some of them are actually well recessed.
I would really appreciate your help and advice.
Regards
Steve
-
Lionel Champ
- Posts: 67
- Joined: Sat May 24, 2008 10:52 am
- Location: Dartford,Kent
- Been liked: 1 time
Hi everyone,
I am at present lowering my engine decks and have just reduced the height of the rear armoured plate to meet the height of the rear engine grills. What i'm not sure about is whether the armour plate top edge is horizontal to the floor and rest of the tank, or is it sloping ( is it a 90 degree cut to the armour plate, bearing in mind that the armour slopes backwards causing the top end to be not horizontal).
Any help would be appreciated.
Lionel
-
Tim Bowman
- Posts: 1762
- Joined: Fri Jul 13, 2007 4:53 am
- Location: Northern California
- Been liked: 177 times
- Contact:
-
Lionel Champ
- Posts: 67
- Joined: Sat May 24, 2008 10:52 am
- Location: Dartford,Kent
- Been liked: 1 time
Cheers Tim,
That is good news, as it means less filing for me to do. I don't have access to any milling machines,so it is being chopped away with hand tools at the moment. I've reduced the height down to the deck level and I am working on the ledge to support the plate holding the deck furniture. I have done something similar to Steve Norris, except I did'nt use the old half of decking that is cut off. I have replaced it with a new aluminium deck plate which (so far) looks promising.
Cheers again Tim,
Lionel
Ps- I think my Dremel needs a holiday?
-
Allan Richards
- Posts: 743
- Joined: Thu Jul 12, 2007 10:34 am
- Location: Kent
- Been liked: 10 times