Page 17 of 29
Finnishing off the Hull wiring
Posted: Tue Dec 28, 2010 5:39 pm
by phil fitzpatrick
Receiver fitted on little shelf
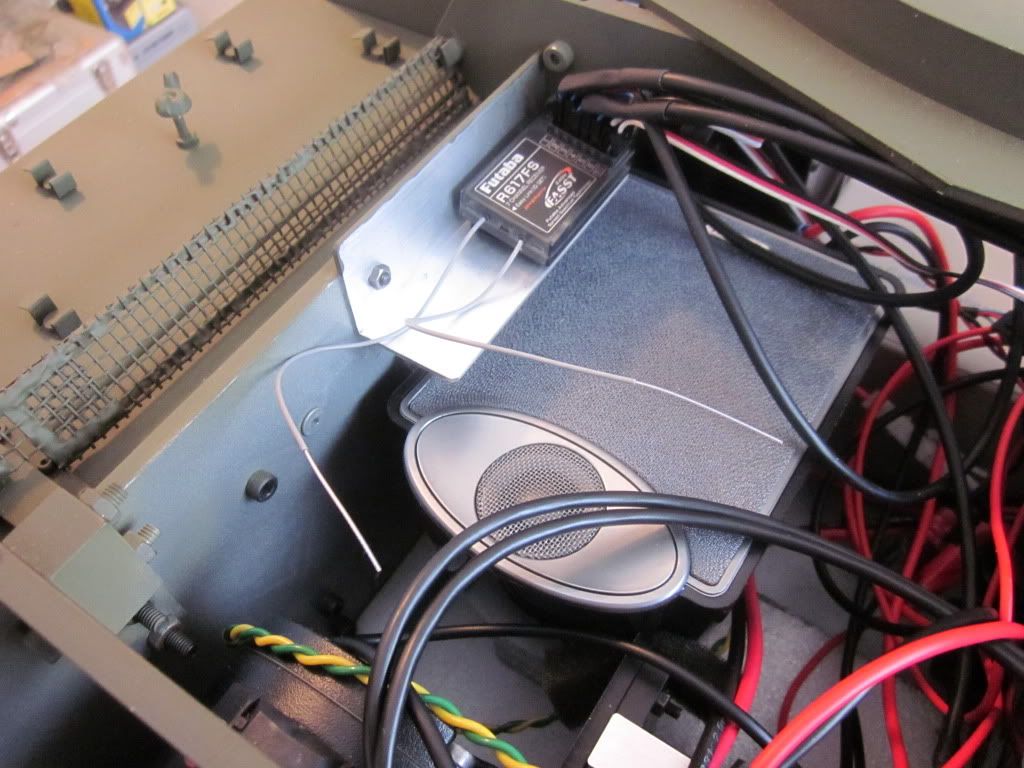
Hull wiring nearly finnished
Battery and Charger cables brought out to the rear
Switches and smoker wiring to shelf at back for access through engine
hatch doors
Comet Exhaust Vidio
Posted: Tue Dec 28, 2010 5:54 pm
by phil fitzpatrick
Comet exhaust vidio
CLICK ON THE PICTURE TO SEE THE COMET EXHAUST ON
PHOTOBUCKET
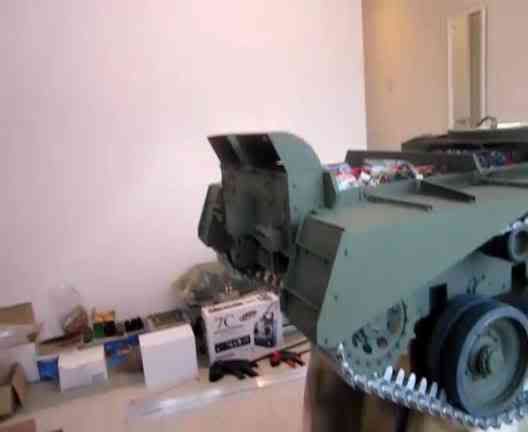
Must remember to open the windows next time when I adjust it a bit

That was fully turned up

Posted: Tue Dec 28, 2010 9:40 pm
by Steve Stuart
Is this one of Mr Wignal's Patent Kippering Devices?
Once tuned they are a fine addition to any machine my Early Tiger has one of his on the first try it belted out enough to fill my garage with a thick fog!
Steve
Exhaust
Posted: Tue Dec 28, 2010 10:10 pm
by phil fitzpatrick
Hi Steve
Yes its one of Richie's,I'm well pleased with it,I know its a different
environment out in the wind.
I had left a space for my Armortek smoker for extra volume because I
wasnt sure what it would look like coming out of the Normandy cowls.
Richie said it would only need one.
I managed to get the Exhaust U bend as close as I could to the mesh so
not too much smoke escaped elsewhere.
I shall still be sleaping tonight with a bit of baby oil smoke in the air
Cheers
Phil
exhaust smoke +gun flash
Posted: Wed Dec 29, 2010 10:35 am
by Nick Farrugia
Hi phil
just seen your video of the smoker great fun ,the only thing mising is the wife looming out of the fog to give you an ear bashing ,like my wife did bless her.
Also watched your machinegun flasher and moving gun for about three seconds before my retiners burnt out .Thats one hell of a bright led ,great fun good job thanks for posting
best wishes
nick
MG & Exhaust
Posted: Wed Dec 29, 2010 11:13 am
by phil fitzpatrick
Thanks Nick
The Turret Mg will be the same and now I can feel the urge coming on to
have a go at the main Gun flash sometime.
The Barrel on the Comet is already bored out,I think the Panzer barrel needed boring through some more.
Cheers Phil
Posted: Wed Dec 29, 2010 2:22 pm
by robert michael hilton
Hello Phil.....loving it....loving it....loving it.
Nice video.....you will be in so much trouble

.
Couple of questions....do I use any grease/lub on the brass turret ring.
I am guessing that the brackets positioned to the rear, are your own design, plus the switches. Are they to do with the 'smoker.'
I am repainting the inner hull, 'aluminium' having seen the 'Littlefield' Comet. This would appear to be the correct colour.
Keep on posting Phil.....Mick.
P S managed to break off my loaders hatch 'catch,' thought the hatch had stuck, completely forgot I had 'fastened it back with the fastener
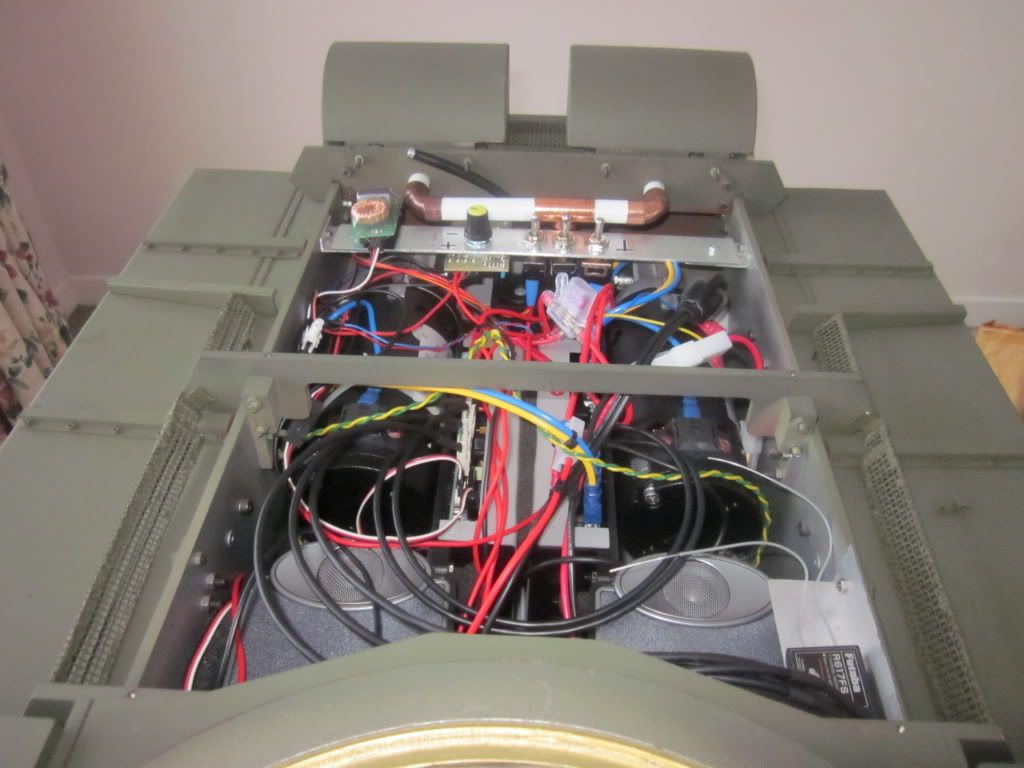
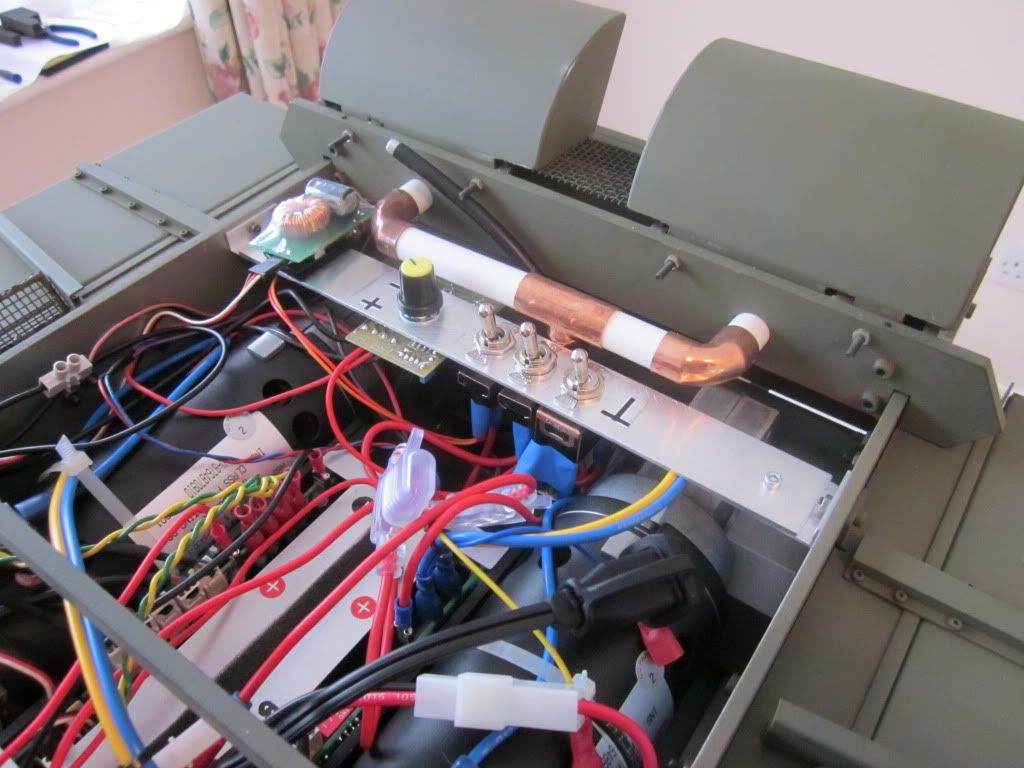
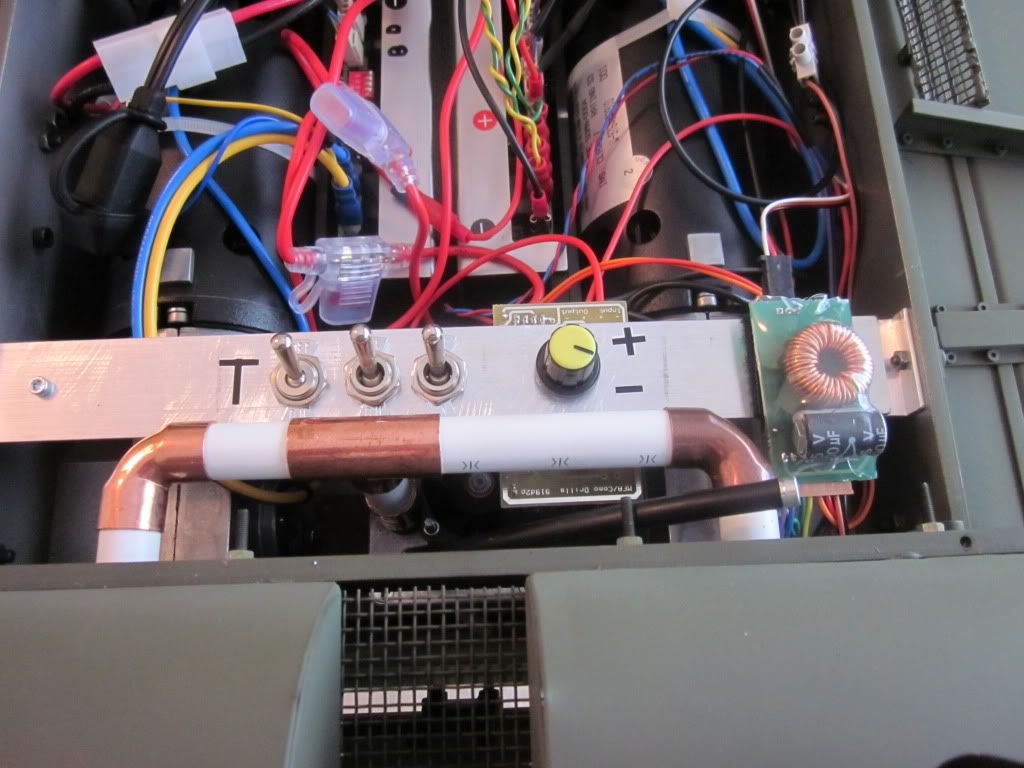
Switches and brackets
Posted: Wed Dec 29, 2010 4:02 pm
by phil fitzpatrick
Hi Mick
I had near miss with a cupola latch but I spotted it in time.
There are some very delicate Armorpax parts with the Comet kit.
Another one is the handle on the smoke discharger where it is notched out
to latch the bottom tray.
You guessed it
I broke one after I had been round with my Air Brush
and the foolowing day when I lifted the handle it had stuck with the paint
and broke at the notch.
I made a new one out of brass strip and for the hinge pin I used some
copper stripped from some flat twin and earth cable,Its 1mm or 1.5mm
cant remember
The bracket for my receiver and for the switches etc are just aluminium
angle and flat from B&Q.
Two of the switches are for the exhaust and the third is an Isolator switch
Yes I used a smear of some Tamiya ceramic grease I had got left from a kit,its like milky white stuff.
Its not as sticky and tenaciouse as the Kilopoise grease.
Another bit for a little lube when you get to it is the lead screw nut where
it travels up and down the elevation mount,it gives that little motor a bit of
help with the main gun
Cheers
Phil
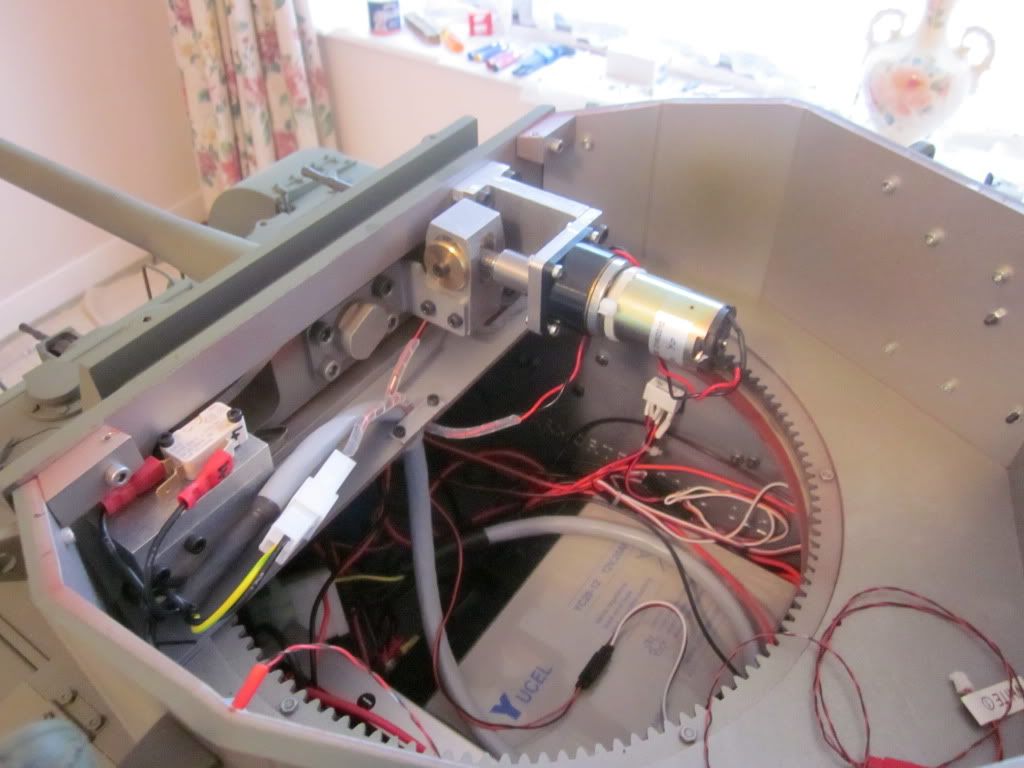
Elevation System
Posted: Fri Dec 31, 2010 4:06 pm
by phil fitzpatrick
Limit switch arrangement for the Elevation motor
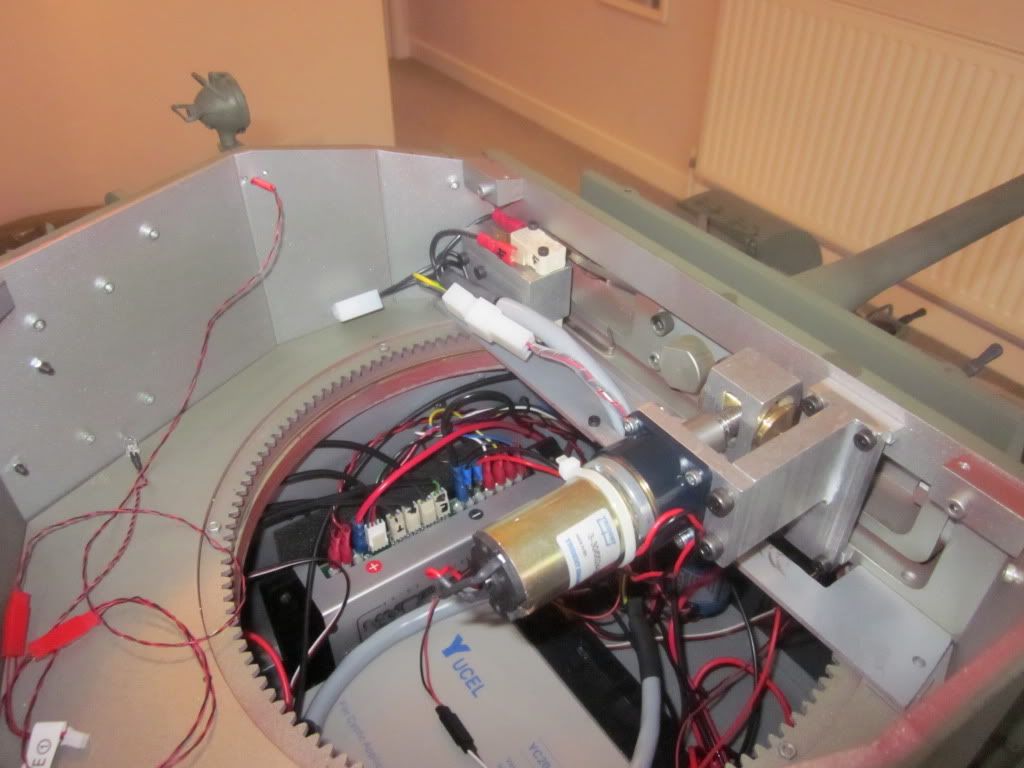
Elevation motor and Brackets fitted
My Lead screw was touching the turret front in the up travel and I didnt seem to have much of a range of travel,so I packed out the Elevation
bracket with 6mm square and got the full range of lead screw movement
giving a lot more range.
Turret and Hull Mg vidio
Posted: Fri Dec 31, 2010 4:21 pm
by phil fitzpatrick
Happy now my main weopon is not drooping any more and as John
recommended I have split the operation of my Steve Winstone Mg's
I have fitted a relay and split my Mg's up,using switch G and the third
switched channel on the Auxiliary module
Click on the picture to see the vidio of the 2 guns
Posted: Fri Dec 31, 2010 7:08 pm
by robert michael hilton
Phil, you are frightening the life out of me with all those electronics....I am fast approaching the moment of truth when I just have to take the bull by the horns and delve deep into the Comets hull.
Haven't even opened the 'Option' boxes yet.
Phil, I don't want to side track you while you are on a roll....however while in Shrewsbury today, a round trip of fifty miles, I might add....I purchased a small pencil torch from B&Q , hopefully to use as the searchlight.
The torch has a moulded end.....how were you able to strip the lens/reflector/bulb out.
I can remove two parts, lens/reflector, by cutting through the casing....and similarly the bulb. Is this how you did it?
My Sealey bike lift arrived today.....so tomorrow 'she' will be up in the air, legs dangling, while I fit the tracks. With regard to 'paint spraying' I am still held back by the cold weather.....Happy New Year....Mick
Spot light etc
Posted: Fri Dec 31, 2010 8:03 pm
by phil fitzpatrick
Hi Mick
Its worth getting the option manuals out just for a bit of a read when you
have a moment.
They really are well detailed and terminals and connections marked up and
if you have to remove any mark the module with the number or letter.
The torch I got from B&Q I was lucky and dropped on the perfect fit.
It was called "Mini Maglite" and it was good quality and aluminium which
had a screw off head and bottom.
The reflector was actualy plastic and was some sort of plating for the
shiny reflection side.
It had one central Led but it was too long for the Armorpax spot light.
In my Helecoptor modeling I had used befor a set of aircraft lights
which had a little printed circuit arrangement at 4v to 6v with 8 leds.
2 white 1 green 1 red 2 red flashing slow and 2 white flashing fast.
This I bought from
www.pegasusmodels.co.uk
part number 995412 r/c led lighting system £14.49 incl postage.
I bought this for convenience the leds were the right size to fit in the
reflector and then into the spot light and the glass from the torch front
just glued straight onto the front of the spot light.
It turned out an expensive component but I didnt have to do any messing
about and any soldering,the Leds all have there own little plug on to plug
into the bourd.
I can use 4 of the other leds in the Turret because there seems to be a light
in each corner.
I am assuming these were white lights because I know they could be dimmed.
Do you know if there were any coloured lights ie red used in late war 2 in
Armoured vehicles.
Or can you remember from your REME days when red came into fassion
for night vision.
Going back to your torch,just cut the bits out that will fit,mine was about
20mm and had little webs on the back that I had to just touch up with a file
to fit.
Glad you have got your Sealey lift.
Happy new year to you and your wife
Cheers
Phil
Posted: Sat Jan 01, 2011 12:00 pm
by robert michael hilton
Thanks for you reply Phil....I am sure you are correct, and once I begin the options all will be revealed. I have plenty of time so a good 'read' of the instructions will be next on my list.
The basic tank build is all but complete, in as far as I want to go. I guess that so many Comet builds will show lots of additional parts made and being fitted....
I have to say, I seem to spend alot of time just looking at the Comet...a neighbour visited yesterday and could not believe the sheer size of the tank....I think the term is gobsmacked
Sorry, have no idea about the lighting systems used, Phil, most of my Army service in Germany involved road testing and repairing ten ton RASC Sudwerk transport vehicles used to move large quantities of general supplies....that period of my life is all just a little bit hazy now .
I think I may have chosen the wrong type of torch...mine is an all metal casing, but not aluminium....having had a second look the possible destruction I my cause when I attempt to dismantle it..... well this needs another coat of looking over. I like your idea for this searchlight part, so I will persevere.
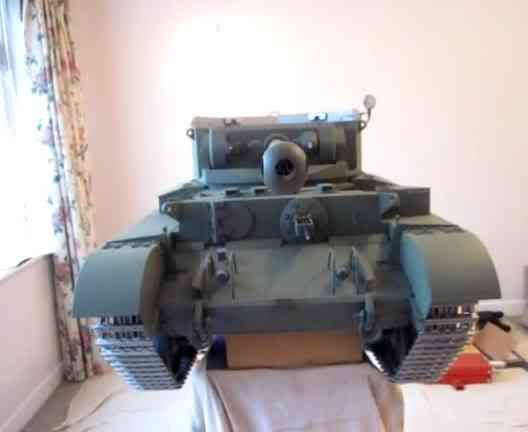
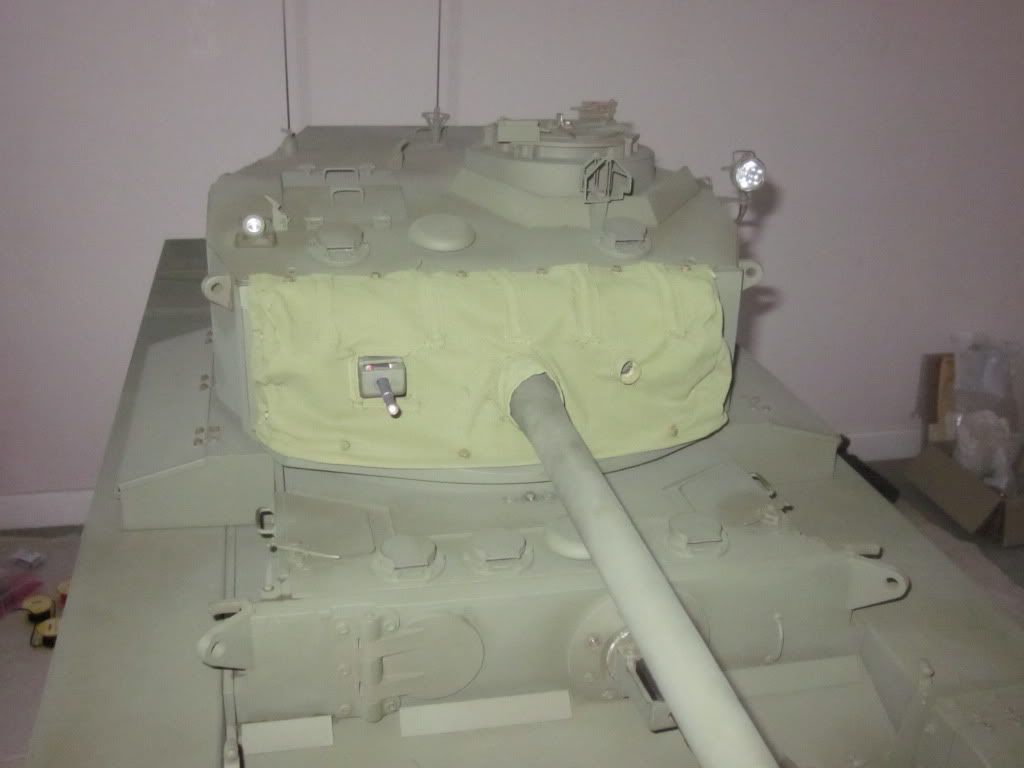
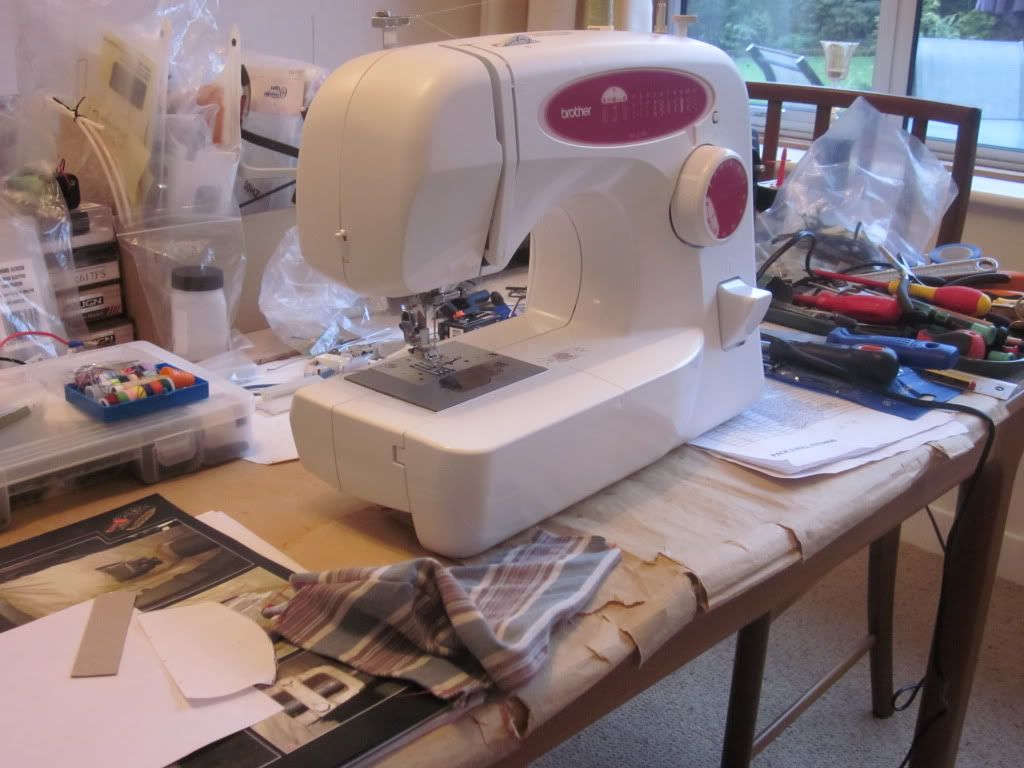
Mantlet Cover
Posted: Mon Jan 03, 2011 3:52 pm
by phil fitzpatrick
My Comet Mantlet Cover,with wire in the pockets and front.
I had almost the colour material that I wanted,then gave it one coat of
Acrylic UA006 Green Verde which is the equivalent of Humbrol 150
which Mike Starmer and Mike Cooper gave in their document on colours.
It stiffened the material up a bit aswell,which was just right.


Bought myself a little Brother sewing machine,thought I would have a go
at the Mantlet Cover.
Made some paper templates and practiced on an old T shirt
Posted: Mon Jan 03, 2011 4:02 pm
by robert michael hilton
Lovely job Phil.....now, can you produce 50 of these mantlet covers?......
....mick