Page 14 of 29
Posted: Mon Dec 13, 2010 9:23 am
by Derek Attree
hi Phil
Thanks I saw it after I posted the question

Thanks
Derek
Posted: Wed Dec 15, 2010 9:33 pm
by robert michael hilton
Phil, I am making up the Armorpax fittings....I cannot work out how the Cupola hatch fasteners work....the parts that sit on top of the Cupola.
You seem to have an extra fitting which holds the two Armorpax fasteners in a higher position.
The Cupola hatch is in two halves....as I understand it the fastener arm is moved inwards, towards the two hinged hatch parts, thereby holding the two hatch halves in the open position. Mine are set too low down to be affective....so nothing happens. I have searched the photo galleries, but I am unable to find a close-up photo.
Posted: Thu Dec 16, 2010 11:23 am
by Dennis Jones
Hi Mick,
If you look at Phil's hatches you will see extensions on opposite corners as in the real one. Most of the photos I have seen these catches have been taken off anyway. I think the Amorpax ones are more or less for show rather than being operational.
Dennis.
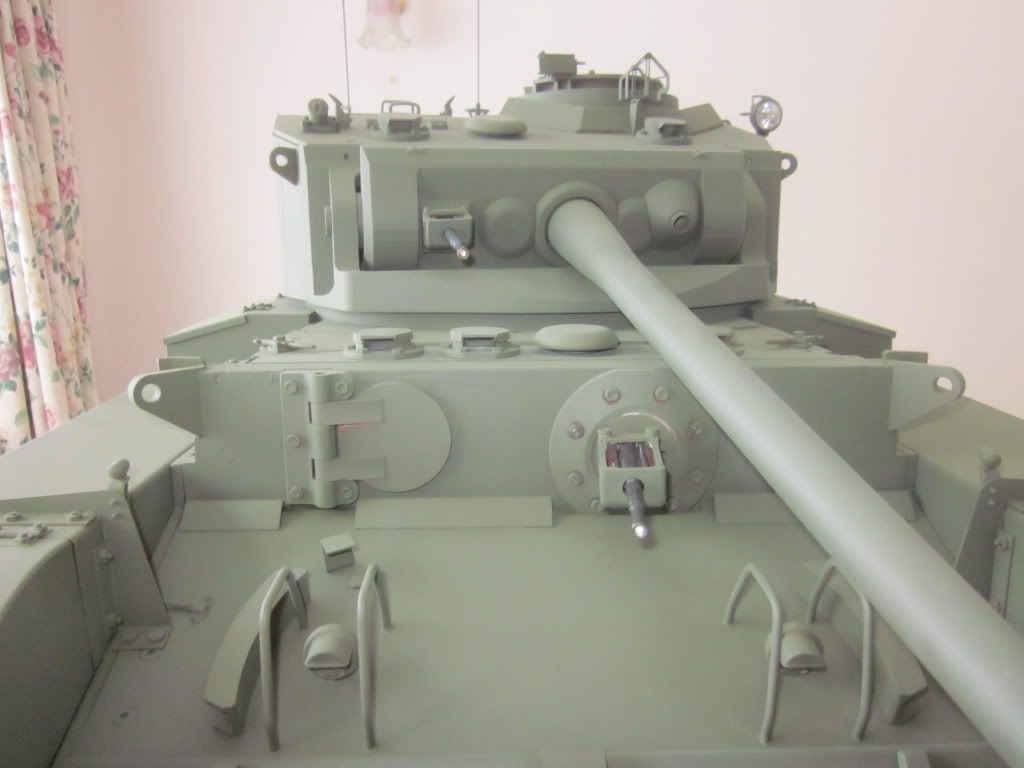
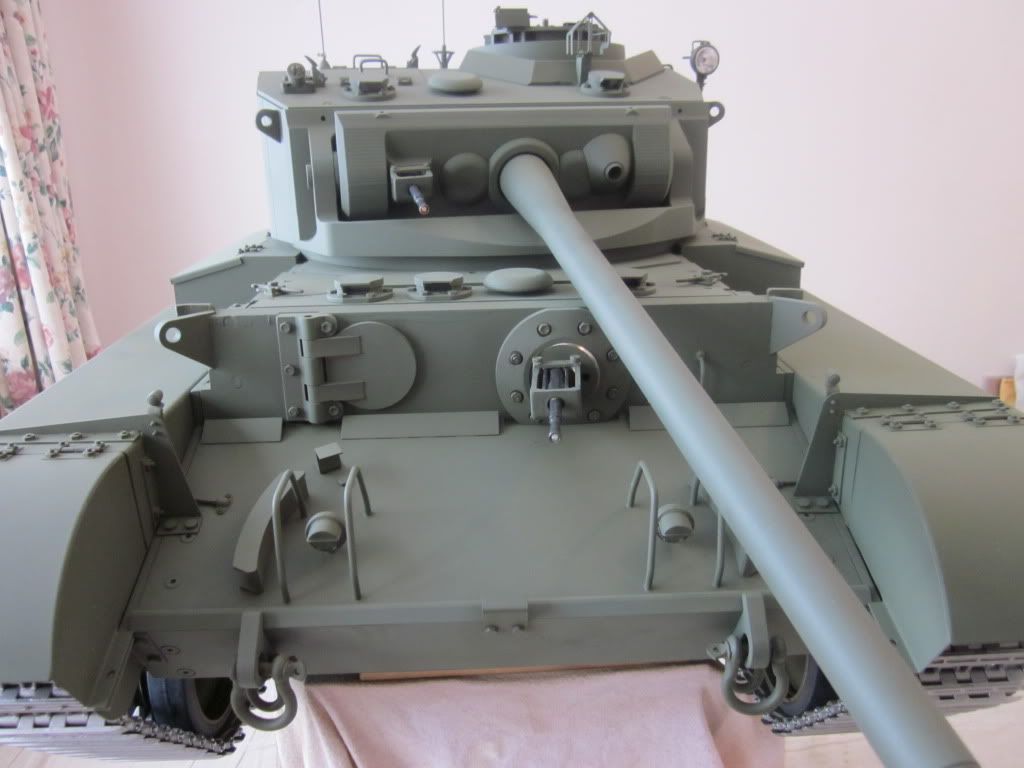
Armorpax cupola fittings
Posted: Thu Dec 16, 2010 2:16 pm
by phil fitzpatrick
Hi Mick
Like Dennis said I had to do a bit of work to get mine to work,which included cladding the cupola doors with some 1.5mm sheet to alter
the shape to resemble the iregular shape as in the book.
It was the best way I could do it using the parts available
I had to cut slots out for the cupola hinges cast into the doors.
The steel was just held on with the 2 angle fittings that I had already made
on earlyier photo's.
This then lowered the edge of the door towards the fitting and there was
just enough to hold the doors upright as intended,after the fitting was
raised with a bit of angle which still resembled the U channel and bolted
into the exsisting holes.
But the other intention of the fitting was also to hold the door flat because they were spring assisted.
I had to do a little filing to the hinge and most of all the screws for the
hinge had to be changed and well countersunk so the doors would open flat.
Then the little flat bit sticking down on the latch just goes over the door to hold it down.
Hope this helps a bit
Cheers
Phil
Posted: Thu Dec 16, 2010 5:06 pm
by robert michael hilton
Thanks for your reply Phil, and yours Dennis. I will have a look at raising the fastener a little....although I will be satisfied if the Cupola looks the part...I'm not in to extreme engineering

....mick.
Side Mesh
Posted: Sun Dec 19, 2010 11:26 am
by phil fitzpatrick
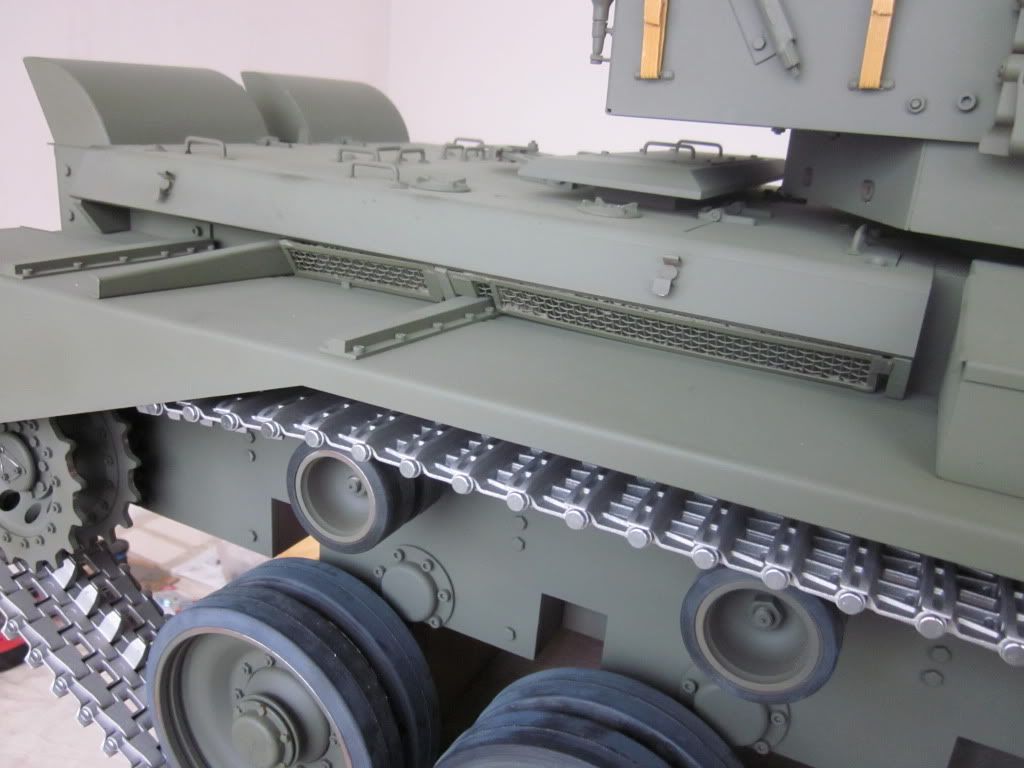
Side mesh fitted
Still got the springs to fit
Steve Winstones MG's & Led's
Posted: Sun Dec 19, 2010 11:30 am
by phil fitzpatrick
Fitted my 2 Steve Winstone MG's with Led's
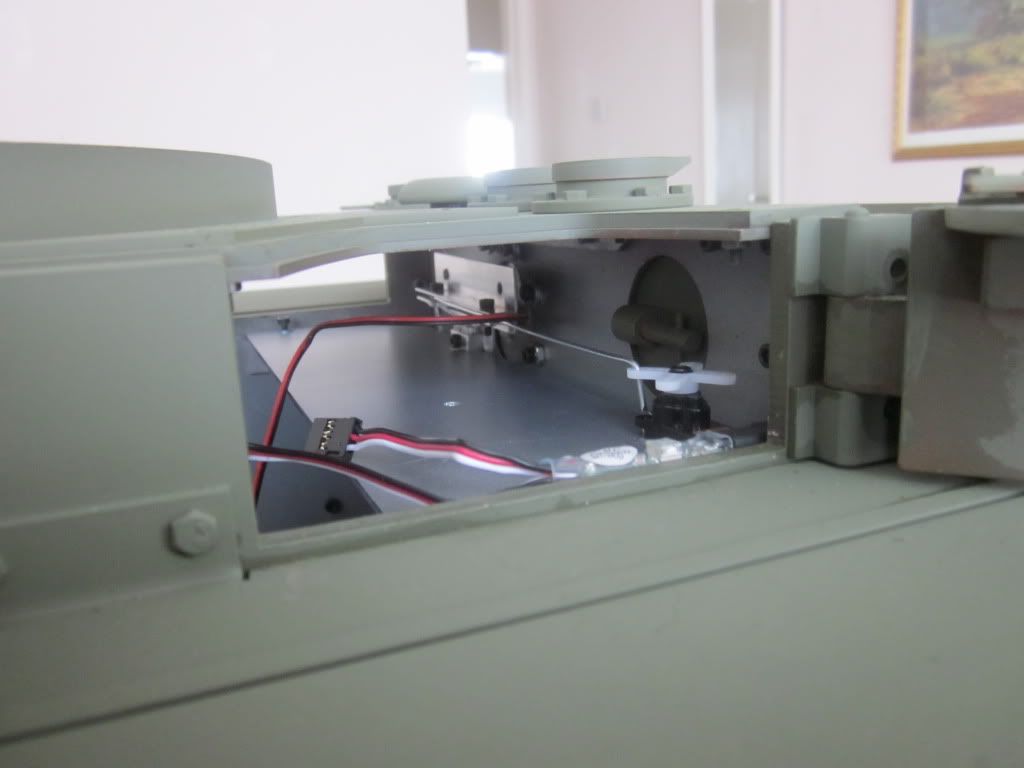
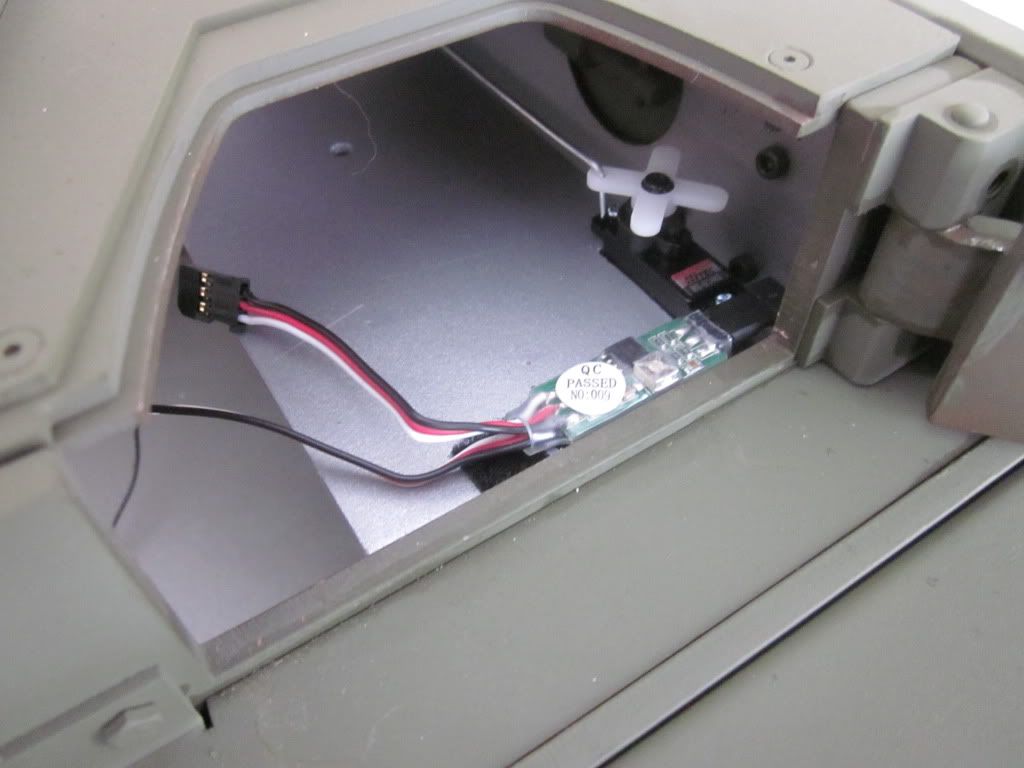
MG movement
Posted: Sun Dec 19, 2010 11:42 am
by phil fitzpatrick
Another Armortek dining table
Posted: Sun Dec 19, 2010 1:19 pm
by phil fitzpatrick
After seeing Micks nice Christmas Dining room and decorations,I thought
I had better show mine
Another True Armortek Dining Table set for Christmas.
Just done my Bench Tests or should I say dining room table tests on my
electrics.
All works great only one channel to reverse,the sounds are very impressive
and even the crew voices are very clear.
Shame you cant select the accent for the crew voices,instead of the
good old British Posh plum in the gob voice
No its all excellent quallity as normal,the only other voice I had to compare
was the Panzer 111L,the German voice sounded as though he was having his G string tightened by his mate
Doesnt seem long ago that I was assembling parts outside on my patio
table now its got a foot of snow on it
Posted: Sun Dec 19, 2010 3:45 pm
by robert michael hilton
Hello Phil, Happy Christmas to you and your family.
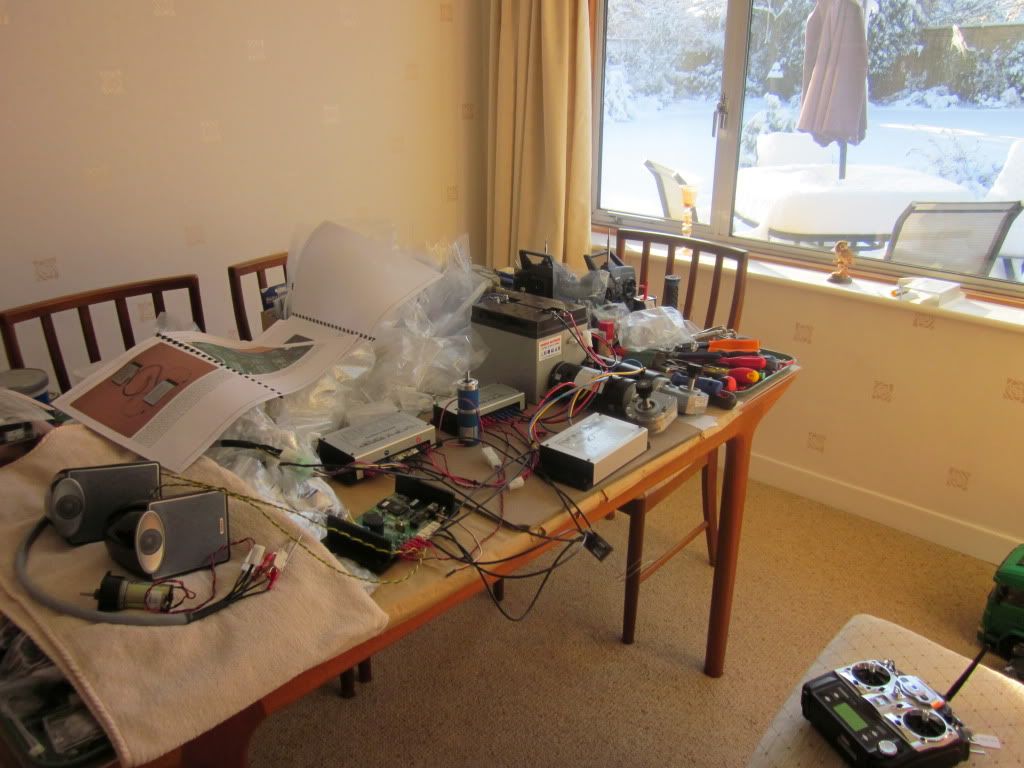
I have to say my bedroom workbench looks alot like yours. I am approaching the time when I will begin to fit the 'Options Pack'. I am apprehensive to say the least....however, I am sure the Forum will guide me through. If possible, a photograph overlooking the Comet, plan view, showing how the options fit internally would be a big help
I also purchased the M/G upgrades from Steve Winstone, I had not considered a system to move the gun....when the time arrives perhaps you will describe how it all works.
I would guess that when the Comet is complete and all these parts/items come together....motion/sound/....lights action camera....the finished project is a sight to behold....can't wait.
I keep promising myself I will leave the build alone for a few days over Christmas.....ok, I may add a few parts.....Mick
dining room table test
Posted: Sun Dec 19, 2010 3:55 pm
by Nick Farrugia
Hi phil
like the machine gun mods looks very good and so does the mesh on the engine deck.There,s not mutch room for the turkey on that table,looks good though, best wishes
have a good christmas
and a happy new year
nick
Posted: Sun Dec 19, 2010 4:42 pm
by Dennis Jones
Hi Phil, Have you checked out the led function on the sound board yet. Tried mine the other day and the leds flash in programming mode with the correct main and m/c gun sounds but in normal operation mode they don't work. I am in discussion with Mark and Thomas at the moment. I am going to use the system I developed for moving the m/c gun as I did on the Panzer using channel 5 in the on/off mode. There are details on the Panzer 3 forum. I see by your layout that there is room between the psu and the m/c gun for moving linkage.
Dennis.
Table Top
Posted: Sun Dec 19, 2010 5:12 pm
by phil fitzpatrick
Hi Nick and Mick.
Happy Christmas to you and your fammily Nick,I chose a simple system
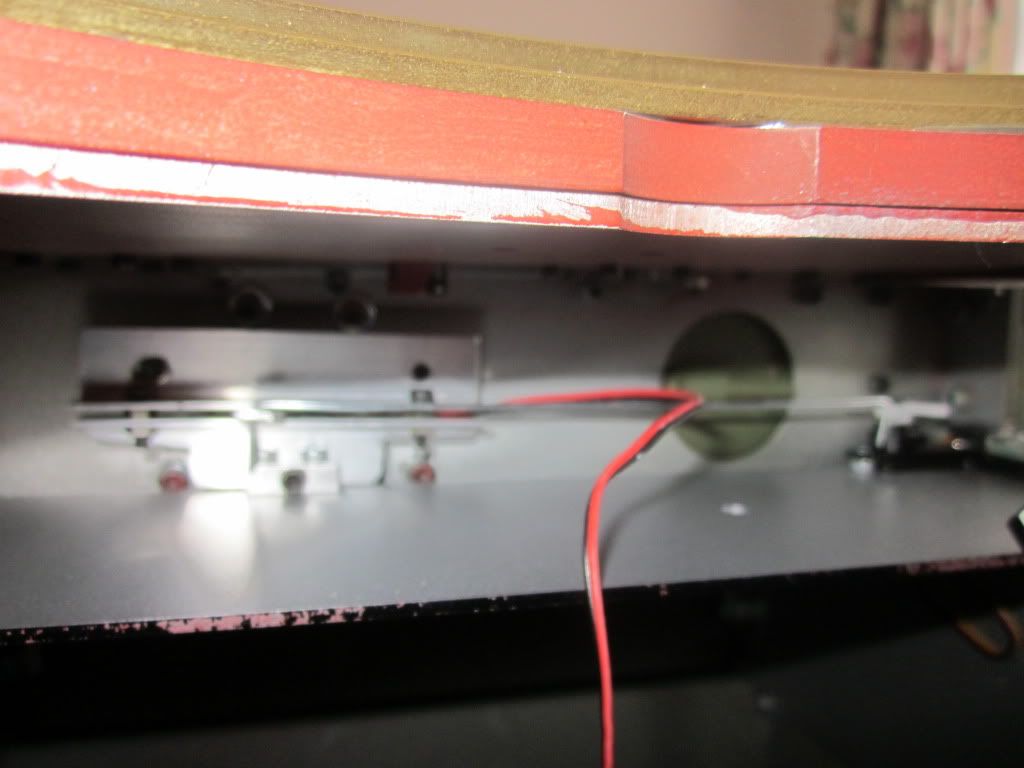
for the MG movement,a bracket on the back of the gun sliding between 2 peices of angle,a strong servo with metal gears and a servo speed reducer
for aircraft retracts.
Assigned switch B on the Futaba 7c and the end points adjust the travel
and the switch operates it from end to end and the speed reducer adjusts
right down to a crawl,all fitted to the edge of the power supply shelf.
With this method it stops at one end of the travel or the other,but I am adding a switch to stop it in the centre.
There was just enough room tu set my power supply further back and
still get the turret turn motor on.
Nick when you did your flashing guns did the cable just connect straight to the flasher output and work,or did you have to do any thing else?
Its Turkey at one of the kids houses for me Christmas then back to the Tank
Mick it was a bit of a pain getting in to do the work with the top deck on,
but I wasnt going to take all that off,and I had filled the screws on the
front plate so didnt want to move that.
In the end I got every thing to fit on the edge of the power supply shelf,
and I cut down to the 4 mm hole to make a slot so the shelf would just
drop onto the screws,it was still a fiddle though.
Mick I am putting photo's on as I do each bit,but I am following as
much as possible the diagrams for the layout in the Motion Pack assembly
instructions because the cable lengths will have been planned for this and
it looks the best anyway.
I am trying to leave as much space as I can pinch under the turret so I can
do some inside turn table detail with seats etc like I did with my Panzer.
Allow a lot of time and follow the manuals exactly with a bench test of
every thing.
You will notice that everything goes together except the Amplifier Module,
test it all then attatch the Amplier and you will notice a couple of cables then get shifted about.
But there is method in the madness.
Mark your cables some how if you need to for when you disconnect it
all to fit in the Tank.
You know that saying"measure twice cut once".
Well with your bench test read twice study the parts twice read another
twice and connect once,the right way.
Cheers guys
Phil
connecting mg flasher
Posted: Sun Dec 19, 2010 7:37 pm
by Nick Farrugia
Hi phil
when i did the mg flasher on the pz111 it didnt work fist time ,i connected it the rong way round if i remember right it only used two of the wires on the servo type cable ,i just swiched it round and then it worked fine ,hope this helps ,or jogs your memory.
best wishes
nick
MG
Posted: Sun Dec 19, 2010 8:17 pm
by phil fitzpatrick
Thanks Nick
You are right it only uses the two power wires so I will do what you did when the time comes.
Cheers
Phil