I don't know of a supplier but Google "dolls house piano hinge" and you should find something suitable.
Adrian.
My Stug conversion
-
Adrian Harris

- Posts: 5114
- Joined: Thu Jul 12, 2007 10:46 pm
- Location: Berkshire (UK)
- Has liked: 1473 times
- Been liked: 1667 times
-
colin fairweather
- Posts: 253
- Joined: Fri Aug 17, 2007 4:34 pm
- Location: athlone rep of ireland
- Been liked: 9 times
-
Derek Attree
- Posts: 1305
- Joined: Thu Jul 12, 2007 12:44 pm
- Location: london
- Has liked: 219 times
- Been liked: 199 times
Hi Guys
After a long break from building the STUG I have been making some
new parts.
The loaders hatch is now finished with working locking bar handle.
I will post some photos over the weekend.
I have also made a sub deck to go under the front deck to support the
the front split hatches that I have started.
I also pocketed the backs of the sprocket hub caps as they did not sit properly as the lock bushes are proud on my build.
Photos to follow
Derek
we must stop making stupid predictions
-
Derek Attree
- Posts: 1305
- Joined: Thu Jul 12, 2007 12:44 pm
- Location: london
- Has liked: 219 times
- Been liked: 199 times
Hi Guys
Some photos as promised of first the loaders hatches and MG shield.
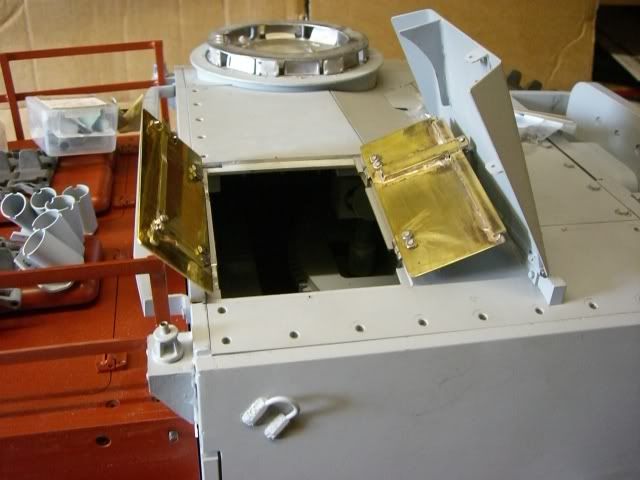
The front loaders hatch supporting the MG shield
The rear loaders hatch showing the working bar lock.
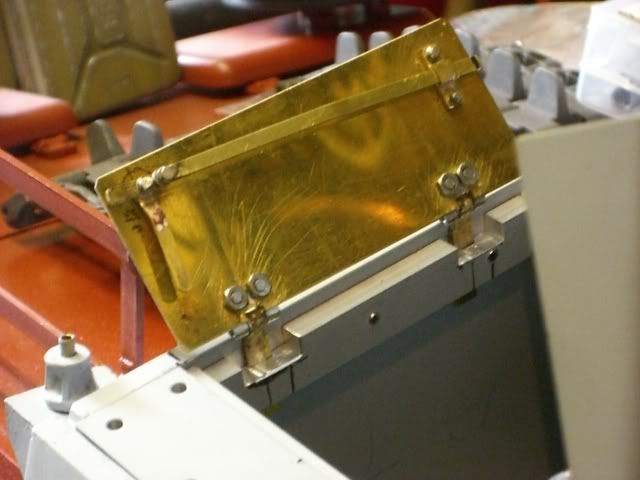
The hinges are Armorpax and for the rear hatch part scratch built and part Armorpax.
More photos of other parts to follow.
Regards
Derek
Some photos as promised of first the loaders hatches and MG shield.
The front loaders hatch supporting the MG shield
The rear loaders hatch showing the working bar lock.
The hinges are Armorpax and for the rear hatch part scratch built and part Armorpax.
More photos of other parts to follow.
Regards
Derek
we must stop making stupid predictions
-
Derek Attree
- Posts: 1305
- Joined: Thu Jul 12, 2007 12:44 pm
- Location: london
- Has liked: 219 times
- Been liked: 199 times
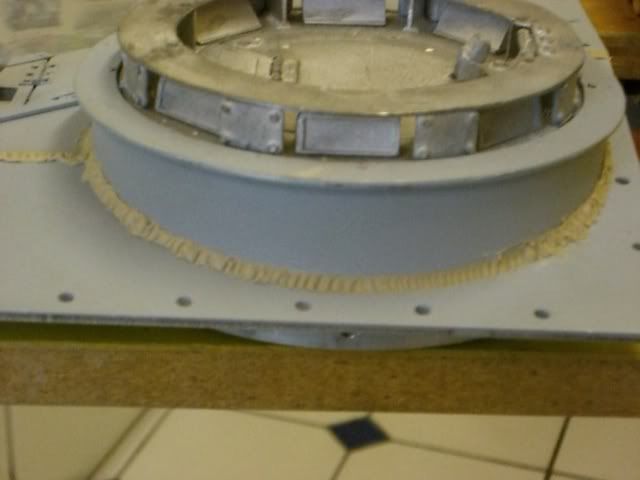
Hi Guys
I found that the hub caps for the sprockets did not seat home very well
on my build as the taper lock bush was a bit proud.
so I popped them in the lathe a pocketed out the backs as in the following picture.
Just 2 mm deep on both.
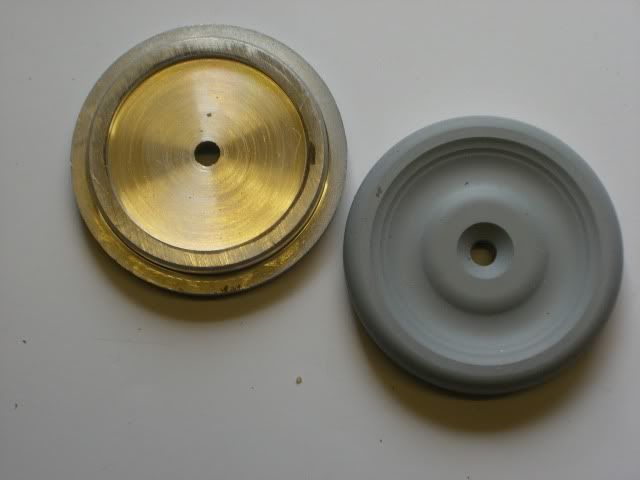
Now they go all the way home nicely.
Regards
Derek
I found that the hub caps for the sprockets did not seat home very well
on my build as the taper lock bush was a bit proud.
so I popped them in the lathe a pocketed out the backs as in the following picture.
Just 2 mm deep on both.
Now they go all the way home nicely.
Regards
Derek
we must stop making stupid predictions
-
Derek Attree
- Posts: 1305
- Joined: Thu Jul 12, 2007 12:44 pm
- Location: london
- Has liked: 219 times
- Been liked: 199 times
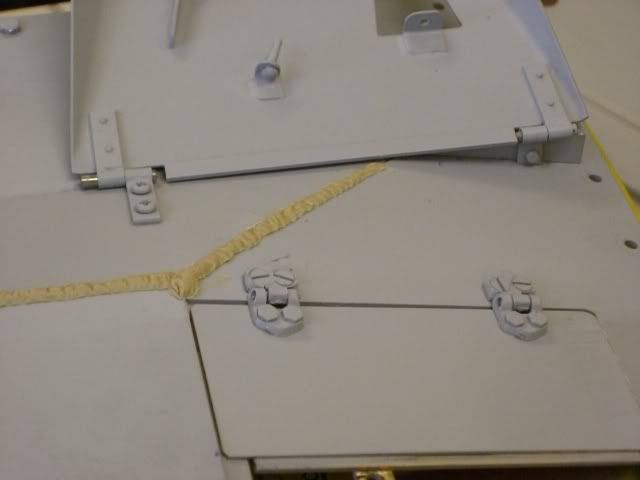
Hi Guys
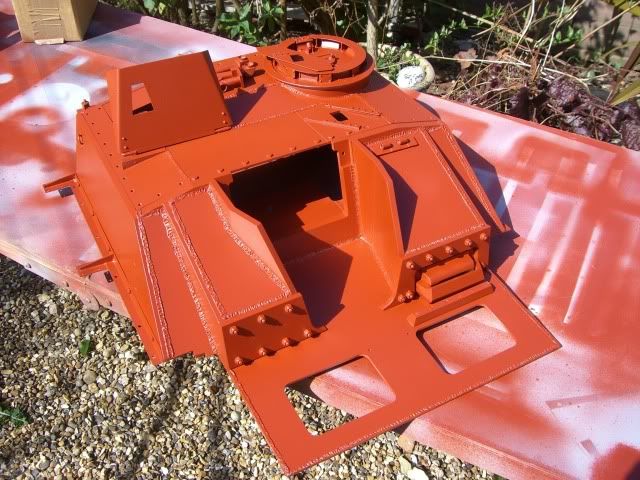
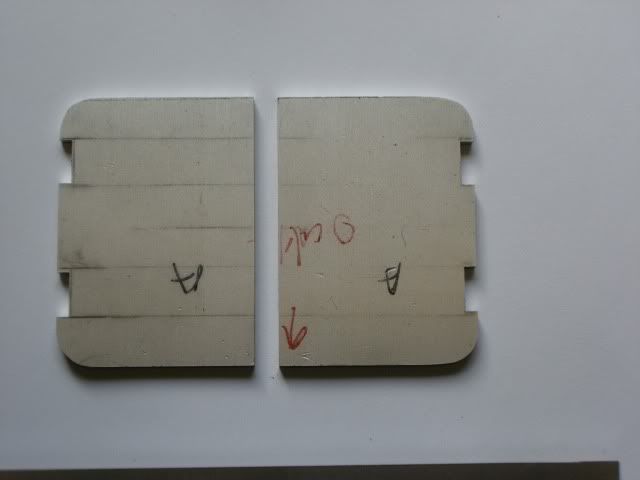
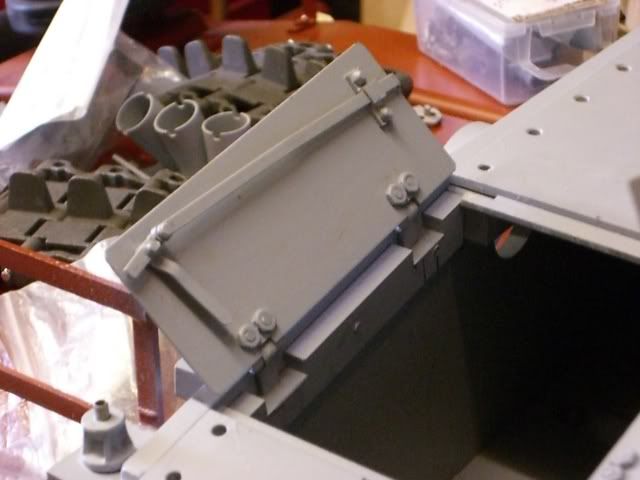
One of the things that is different on the Stug are the front hatches,
I have made a new front deck some time ago as part of the fighting
compartment.
So I have been able to use the old Steel PzIII one as a jig for the new hatches and the sub deck that gives the lip for the hatches to sit on.
The first picture shows one of the pairs of hatches.
This picture shows the sub deck.
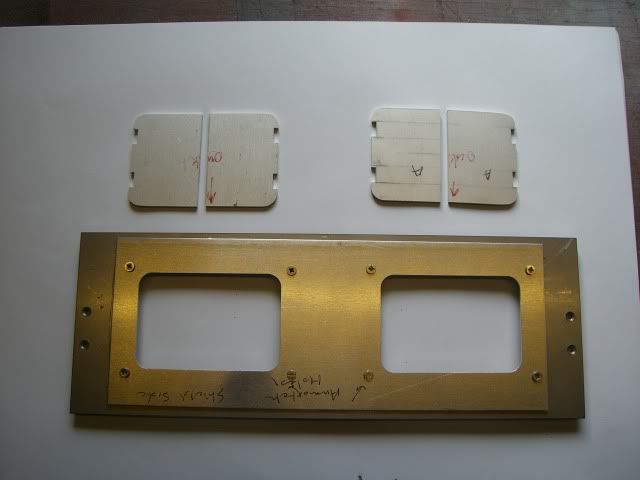
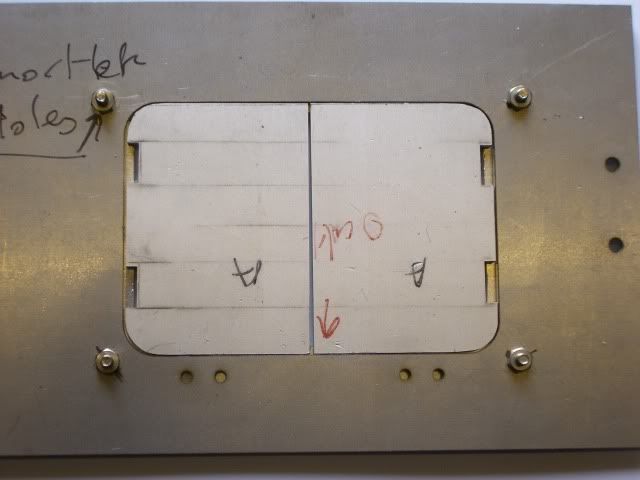
These next two pictures show the lips for the hatches.
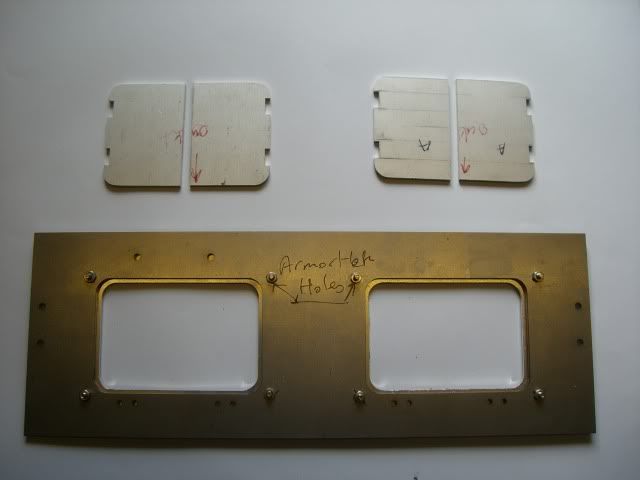
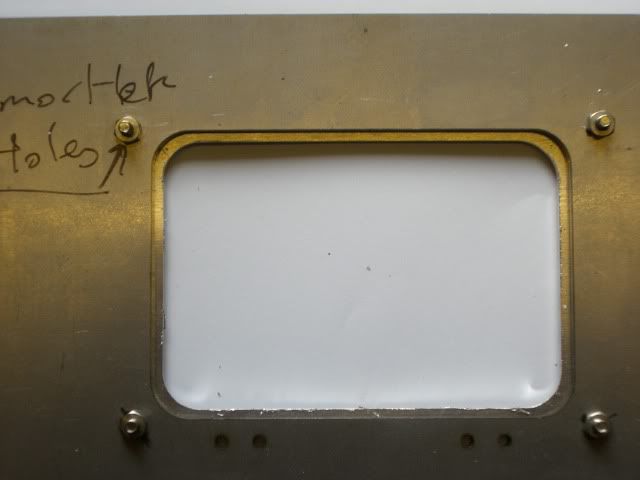
The next picture shows a hatch in place.
The hinges for these hatches are going to be difficult to make as they come up from the underside of the deck.
Tim Bowman has been kind enough to send me some photos so I will have a go in the next few days.
I am wondering weather to fabricate out of sections a pair and try to cast
4 pairs I need, or to machine a long section of the right profile and machine the 4 pairs I need from that.
You can see one picture of a stug hinge that Tim posted in Sarah's post on plate thickness.
One other problem is that because the hinges are either side if the hatches
the drive motors look like they will foul the hinge plates under the deck.
Thanks
Derek
One of the things that is different on the Stug are the front hatches,
I have made a new front deck some time ago as part of the fighting
compartment.
So I have been able to use the old Steel PzIII one as a jig for the new hatches and the sub deck that gives the lip for the hatches to sit on.
The first picture shows one of the pairs of hatches.
This picture shows the sub deck.
These next two pictures show the lips for the hatches.
The next picture shows a hatch in place.
The hinges for these hatches are going to be difficult to make as they come up from the underside of the deck.
Tim Bowman has been kind enough to send me some photos so I will have a go in the next few days.
I am wondering weather to fabricate out of sections a pair and try to cast
4 pairs I need, or to machine a long section of the right profile and machine the 4 pairs I need from that.
You can see one picture of a stug hinge that Tim posted in Sarah's post on plate thickness.
One other problem is that because the hinges are either side if the hatches
the drive motors look like they will foul the hinge plates under the deck.
Thanks
Derek
we must stop making stupid predictions
-
Derek Attree
- Posts: 1305
- Joined: Thu Jul 12, 2007 12:44 pm
- Location: london
- Has liked: 219 times
- Been liked: 199 times
Hi Guys
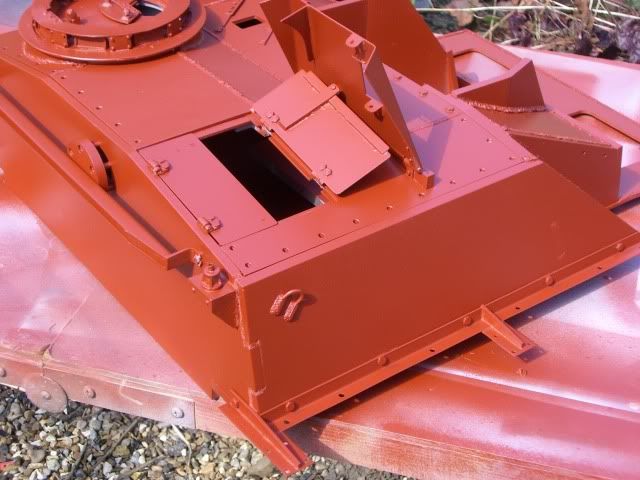
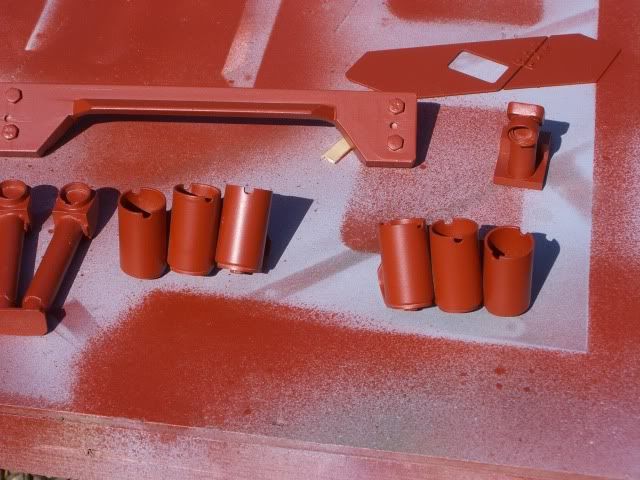
Started to make the Jack block and got some primer in the loaders hatch so a couple of pictures.

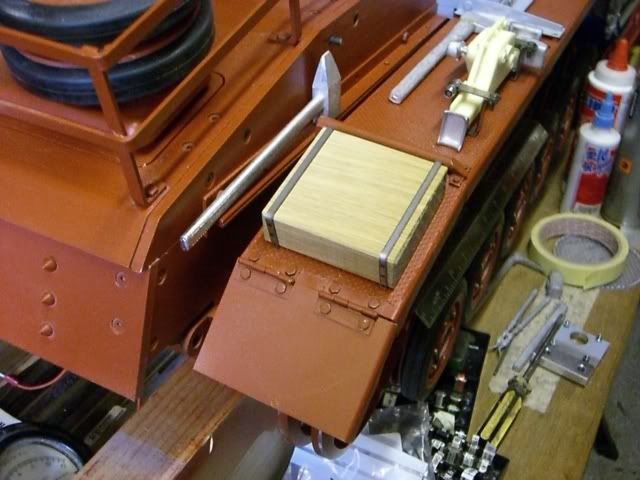
The block is made from a bit of Ash which will look just right after a bit of distressing.
I used this wood on my Panther jack block.
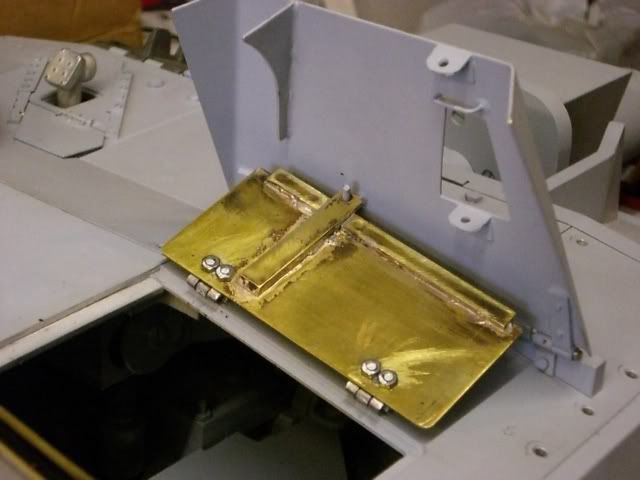
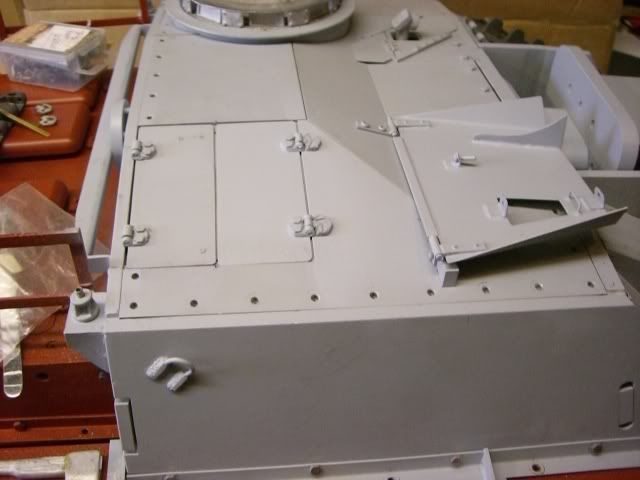
Now the loaders hatches you can see things better now the primmer is on.
the next 2 picture show the bar lock works.

The last picture shows the hatches fully closed and the shield down this shows the hinges that Armorpax supplied.The rear one modified by me to
suit this use.
I am planning to do the welds on the roof and front and rear of the fighting compartment over the weekend.
Happy Easter to all
Derek
Started to make the Jack block and got some primer in the loaders hatch so a couple of pictures.
The block is made from a bit of Ash which will look just right after a bit of distressing.
I used this wood on my Panther jack block.
Now the loaders hatches you can see things better now the primmer is on.
the next 2 picture show the bar lock works.
The last picture shows the hatches fully closed and the shield down this shows the hinges that Armorpax supplied.The rear one modified by me to
suit this use.
I am planning to do the welds on the roof and front and rear of the fighting compartment over the weekend.
Happy Easter to all
Derek
we must stop making stupid predictions
-
Derek Attree
- Posts: 1305
- Joined: Thu Jul 12, 2007 12:44 pm
- Location: london
- Has liked: 219 times
- Been liked: 199 times
Guys
I have really started to push things on with this build.
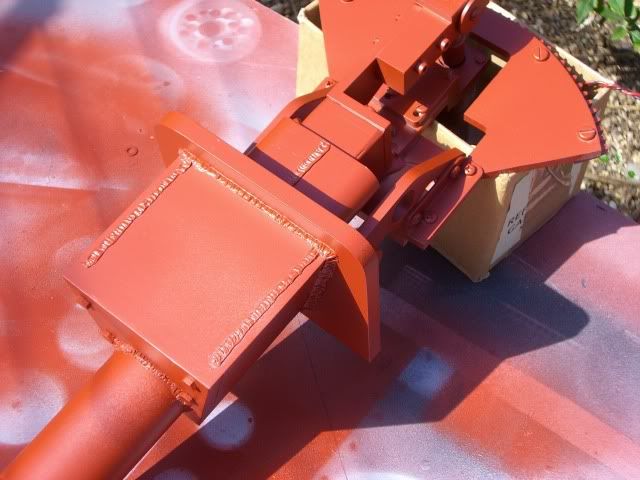
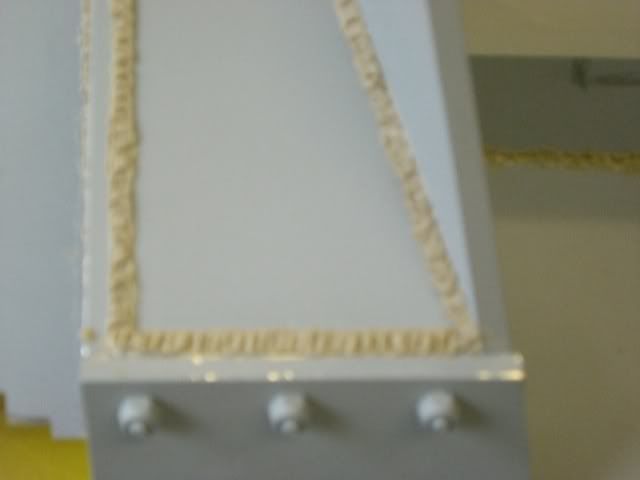
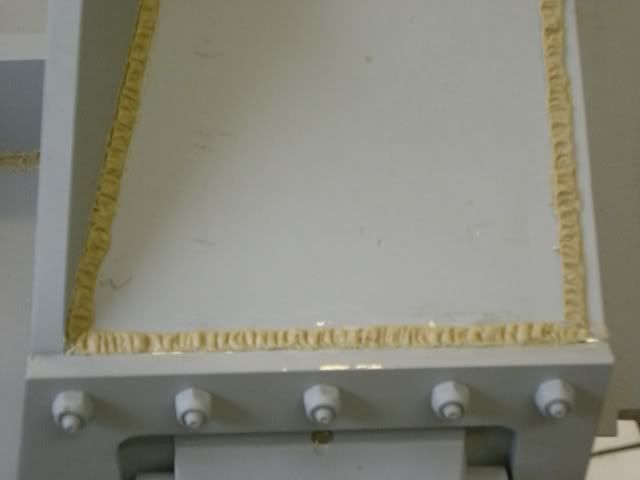
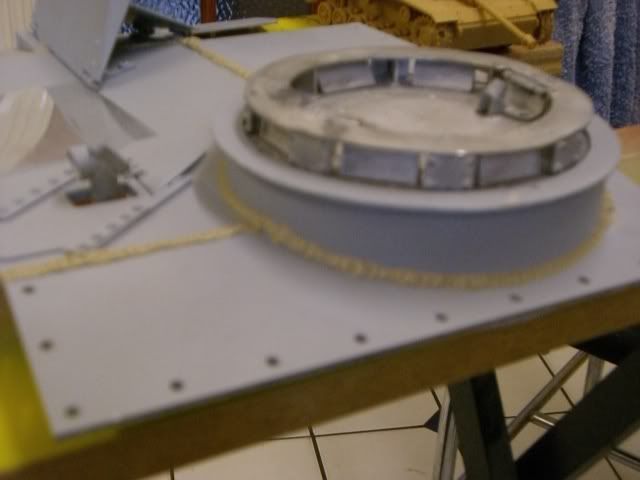
I have been doing the welds and making some other parts.
these are the photos of some of the welds.
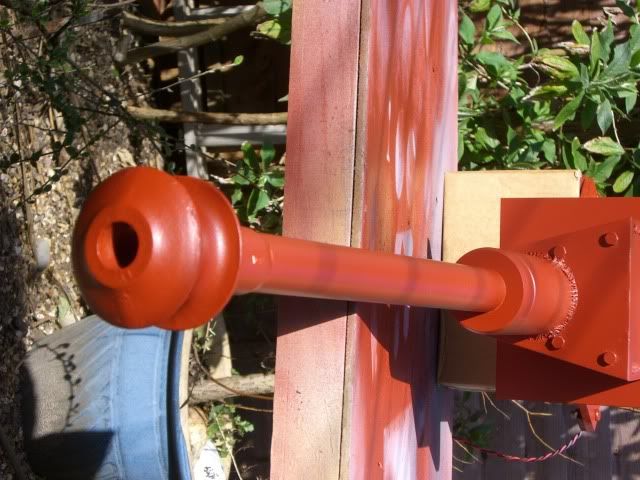
First on the gun
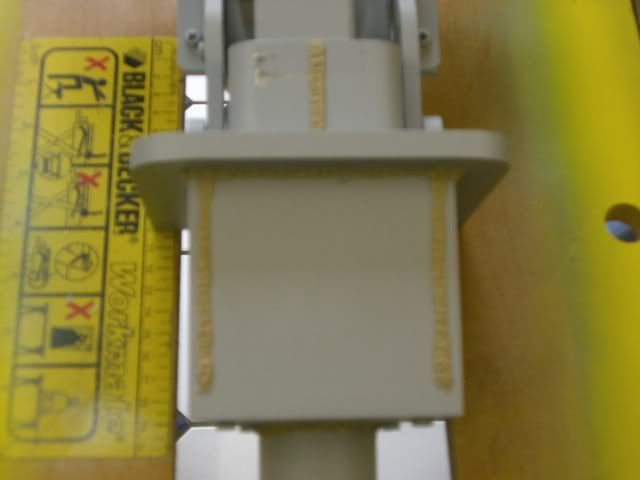
More round the mantlet
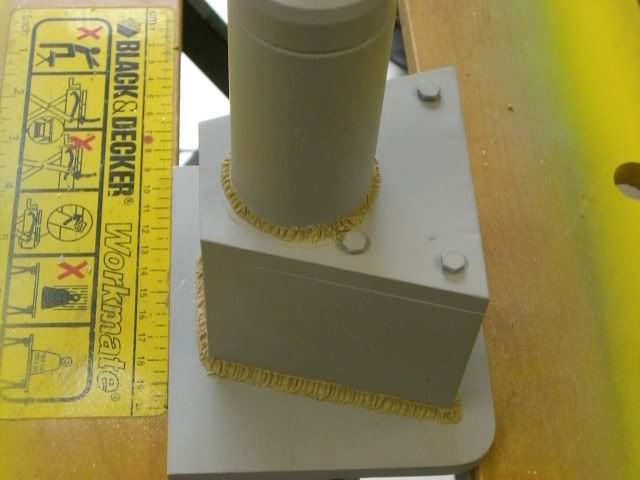
round the recoil tube base.
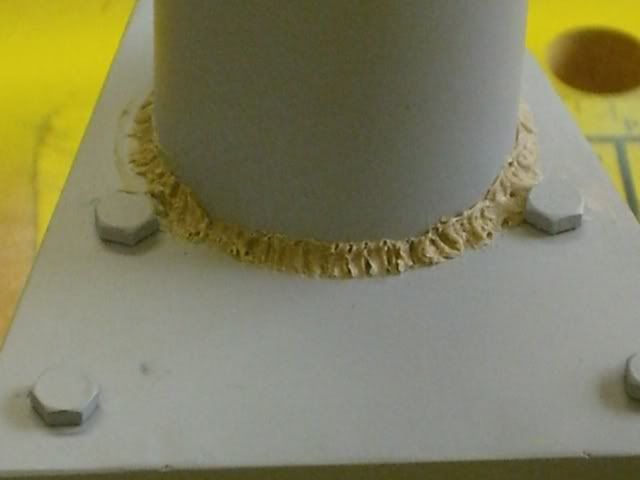
Then the fighting compartment.
More to follow
Derek
I have really started to push things on with this build.
I have been doing the welds and making some other parts.
these are the photos of some of the welds.
First on the gun
More round the mantlet
round the recoil tube base.
Then the fighting compartment.
More to follow
Derek
we must stop making stupid predictions
-
Derek Attree
- Posts: 1305
- Joined: Thu Jul 12, 2007 12:44 pm
- Location: london
- Has liked: 219 times
- Been liked: 199 times
-
Derek Attree
- Posts: 1305
- Joined: Thu Jul 12, 2007 12:44 pm
- Location: london
- Has liked: 219 times
- Been liked: 199 times
-
Paul Morris
- Posts: 1559
- Joined: Thu Jul 12, 2007 4:44 pm
- Location: North Lancs
- Been liked: 68 times
Hi Derek.
Always plenty of interest in your progress on this model mate it will be a stunner when complete, you are pulling out all the stops and I am picking up some tips for my Jagdtiger.
Regards Paul
Always plenty of interest in your progress on this model mate it will be a stunner when complete, you are pulling out all the stops and I am picking up some tips for my Jagdtiger.
Regards Paul
Paul's Tank Workshop. Complete Tank builds and re builds zimmerit and paint to museum quality standard. pjtigerman@aol.com
01524 720977
https://www.facebook.com/PaulsTankWorkshop
01524 720977
https://www.facebook.com/PaulsTankWorkshop
-
Derek Attree
- Posts: 1305
- Joined: Thu Jul 12, 2007 12:44 pm
- Location: london
- Has liked: 219 times
- Been liked: 199 times
Hi Guys
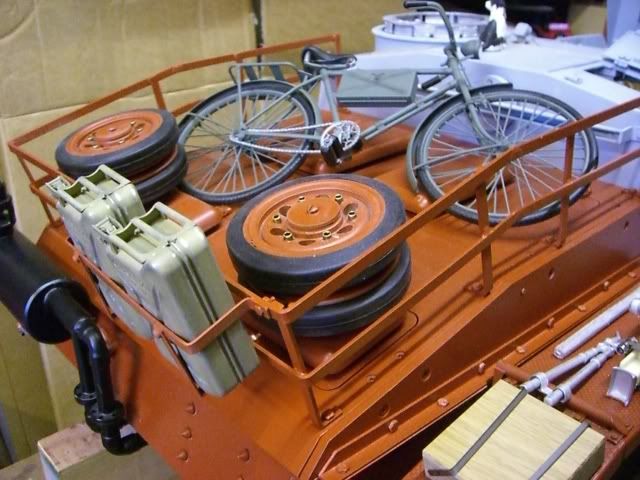
Some more photos as promised first I made a jerry can rack from strip steel
silver soldered to fit on the back of the stowage rails.
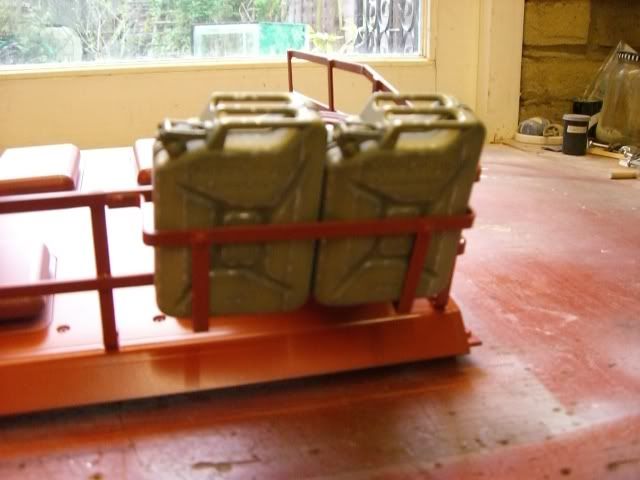
Then a rear view showing the exhaust and jerry can holder.
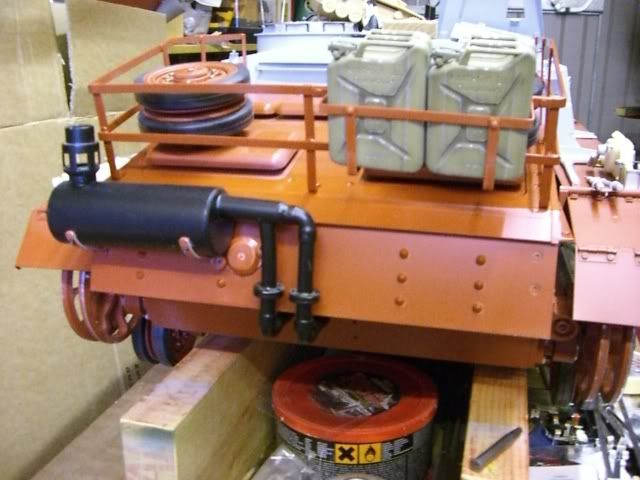
I want the stowage to be packed when it finished so I put some thing on the back to get the idea.
Thanks for looking
Derek
Some more photos as promised first I made a jerry can rack from strip steel
silver soldered to fit on the back of the stowage rails.
Then a rear view showing the exhaust and jerry can holder.
I want the stowage to be packed when it finished so I put some thing on the back to get the idea.
Thanks for looking
Derek
we must stop making stupid predictions
-
Derek Attree
- Posts: 1305
- Joined: Thu Jul 12, 2007 12:44 pm
- Location: london
- Has liked: 219 times
- Been liked: 199 times
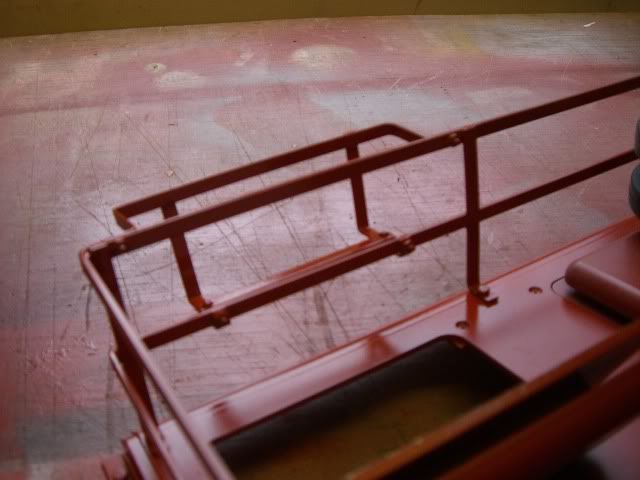
Hi Guys
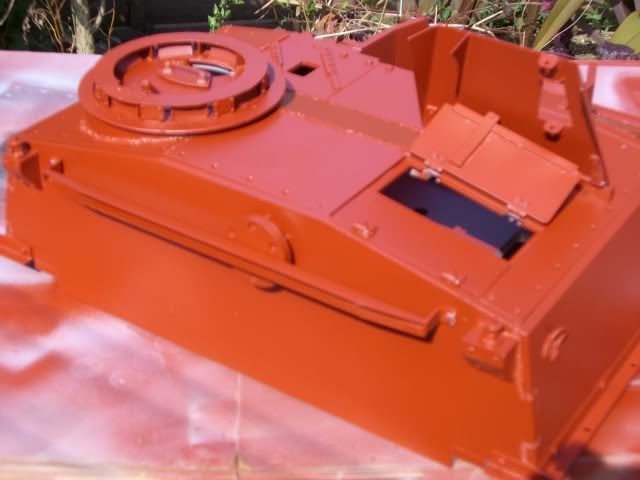
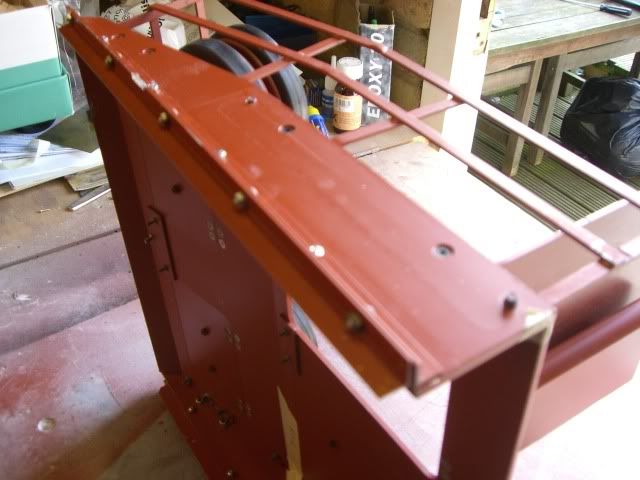
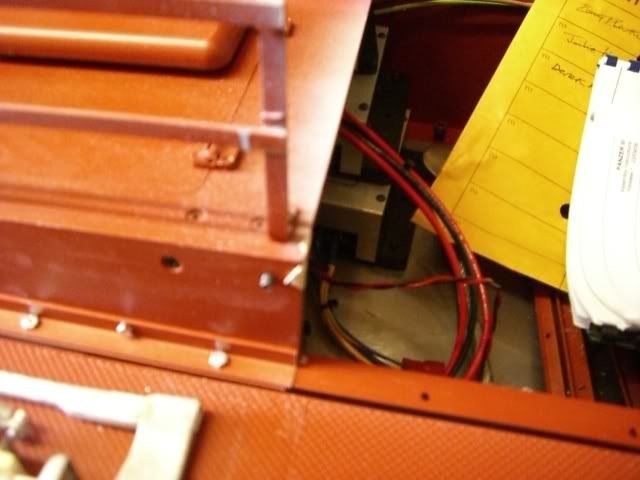
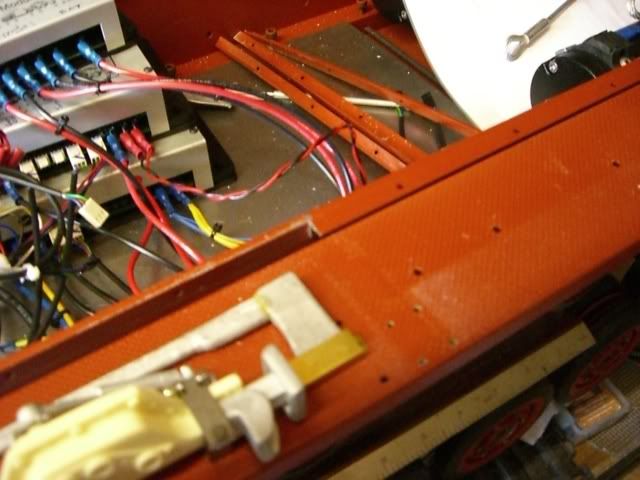
I have modified the angle rails that join the top to the hull.
The rear rails are now coming to the back as they should and I have
joined the top and bottom rails together so the rear can be lifted off as a unit.
This is needed as the fighting compartment is fixed in place by loads of nuts and bolts. It is a pain to remove this.
I think the pictures show what I mean.
Derek
we must stop making stupid predictions
-
Tim Bowman
- Posts: 1762
- Joined: Fri Jul 13, 2007 4:53 am
- Location: Northern California
- Been liked: 177 times
- Contact:
-
Derek Attree
- Posts: 1305
- Joined: Thu Jul 12, 2007 12:44 pm
- Location: london
- Has liked: 219 times
- Been liked: 199 times