Page 2 of 10
Re: Schwerer Panzerkraftwagen
Posted: Wed Feb 16, 2022 7:01 pm
by Oliver Brüninghaus
.
February 2016
Preparing the Assembly of the Frames
After the trim subassembly of the rear door, slightly larger components needed to be fitted,
deviant to the manual, I assembled the frames in a later stage of the build
after priming and painting every plate to avoid any unprotected surfaces.
Best regards
Oliver
.
 Viewed 5455 times")
- It seems that the little evil doesn‘t want to go home any more.
He just shouldn‘t keep eating rivets and bolts.
Re: Schwerer Panzerkraftwagen
Posted: Fri Feb 25, 2022 5:02 pm
by Oliver Brüninghaus
.
March 2016
A few additional bolts
During this build stage, I was struck by the idea to enrich the outer plates with some additional bolts.
This extra tour was taken using the prefaces of Haynes Workshop Manual for the MK IV as a reference.
I have identified four sizes for nuts and bolts, so about 60 pieces need to be made for each side.
Using the nuts from Knupfer, the new bolts look authentic.
.
It was a bit fiddly to apply some of the bolts, but with helping tools and very flexible fingers, it worked in the end.
These parts gave the model a few extra details, which revitalizes the view of the side plates.
Best wishes
Oliver
.
.
Re: Schwerer Panzerkraftwagen
Posted: Fri Feb 25, 2022 8:42 pm
by Phil Woollard
Very nice attention to detail
Re: Schwerer Panzerkraftwagen
Posted: Tue Mar 01, 2022 10:48 am
by Oliver Brüninghaus
Thank you Phil,
It's just fascinating to discover what else you might add.
Re: Schwerer Panzerkraftwagen
Posted: Fri Mar 04, 2022 12:37 pm
by Oliver Brüninghaus
.
April 2016
Take the advice seriously!
It was often announced in several build logs, so the front bushes got extra attention that the most rear position was accessible.
I removed some material to get a proper fit.
Looking at the old pictures, I was aware that the frames for the front bushes were bolted.
For that, some studdings were screwed in and secured with some strong glue.
The nuts from „Knupfer“ now fix the frames in a way shown on the old pictures.
Best wishes
Oliver
.
Re: Schwerer Panzerkraftwagen
Posted: Thu Mar 10, 2022 7:18 pm
by Oliver Brüninghaus
.
May 2016
And Now for Something Completely Different ...
After several subassemblies like the frames, the rear section, the bottom plate, and the driver‘s cabin were fitted, and the test assembly worked well, it was time to get an idea for the camo pattern.
It wasn‘t easy to extract the color blotches from the old black and white pictures. Searching the web, books, and statements from experts like Mr. Hundleby and Mr. Strassheim, I got an approximate idea of which colors and patterns wouldn‘t be wrong. Another expert I had a constructive and qualified conversation about this topic was Chis Hall, whose deep knowledge of these thanks gave me some more aspects to keep in mind.
Based on this informations, I asked myself which model I would like to see / build and searched the model pages online for beautiful builds of the small Tamiya and Takom kits.
Also inspired by old Märklin tin toys from 1932, I researched which colors would be suitable for this large model.
Wary that airbrush artworks would resist the rough duty of a hefty, radio-controlled one to six models, I choose regular car paint in rattle cans. Another rookie decision as to the many exceptional paintings and weatherings with acrylics and airbrush here in the forum proves.
Putting all information together, I did some sketches to find a balance between the form of the pattern and the size of the tank.
Regards
Oliver
.
 Viewed 4957 times")
- similar to the tank that was named ‘Kathi’
.
 Viewed 4957 times")
- inspired by the tank shown in ‘Tankograd Beute-Tanks Vol. 2’ on page 166
.
 Viewed 4957 times")
- similar to the tank shown in ‘Tankograd Beute-Tanks Vol. 1’ on Page 81
.
 Viewed 4957 times")
- inspired by the tank named ‘Mariechen’
.
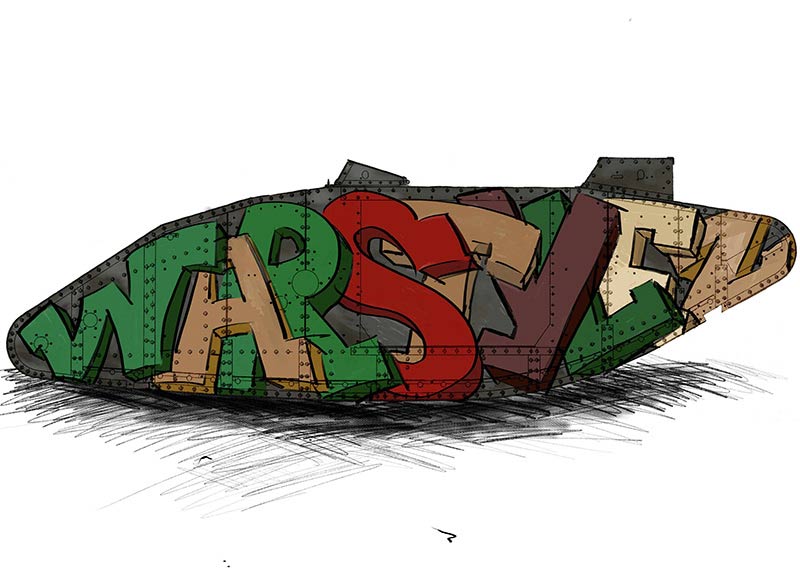
- sorry I couldn't resist doing the ‘suburban style’
- s.jpg (61.29 KiB) Viewed 4957 times
.
 Viewed 4957 times")
- the chosen pattern on the left
.
 Viewed 4957 times")
- and the view of the righthand side
.
Re: Schwerer Panzerkraftwagen
Posted: Thu Mar 10, 2022 9:20 pm
by Phil Woollard
I like it!....wafer thin.
Re: Schwerer Panzerkraftwagen
Posted: Fri Mar 11, 2022 8:33 am
by Oliver Brüninghaus
Thank you Phil

Re: Schwerer Panzerkraftwagen
Posted: Sat Mar 12, 2022 8:56 am
by Chris Hall
Oliver -
While flattered, I completely reject the title of ‘expert’

. I’m just passionate about the Beutepanzers, like you, but I lack the technical skills you’re showing. An amazing job !
I feel your pain in trying to convert 100 year old grainy photos into a recognisable paint pattern, though ….

Best wishes, and keep up the great work,
Chris
Re: Schwerer Panzerkraftwagen
Posted: Sun Mar 13, 2022 11:20 am
by Oliver Brüninghaus
Hello Chris,
you hit the nail on the head, unfortunately the reproductions of the old photographs are mostly very poor and the printing of the publications makes even more details disappear. With a little experience, time and will, one could obtain much more detailed information from the original photographs with today's digitalisation technology. But as is so often the case, costs and effort are not in proportion and are at best something for enthusiasts of the subject or for technical archaeology.
We are united by our interest for the MKIV Beute-Tanks, but I can't get rid of the feeling that my knowledge is on a very basic level.

sunny greetings
Oliver
Re: Schwerer Panzerkraftwagen
Posted: Sun Mar 13, 2022 7:28 pm
by Chris Hall
[quote="Oliver Brüninghaus]I can't get rid of the feeling that my knowledge is on a very basic level.
[/quote]
Oliver -
Look at it this way. Prior to Hundelby, Strasheim and a few people like us, any interest in WW1 Beutepanzers had been dormant for around 90 years. And now interest has been awakened, new information is being uncovered / rediscovered, and people are asking questions again. So, while we don't know everything, we're flag-flying visionaries !

It's a passion - just go with it. And there's very few people out there to say you're wrong.
Best wishes, and stay well,
Chris
Re: Schwerer Panzerkraftwagen
Posted: Mon Mar 14, 2022 7:28 pm
by Oliver Brüninghaus
Hello Chris,
what a fitting picture you' re drawing.
So let's wave the flags of discovery and understanding and look forward to reliving the findings in our models again.
Best regards and stay healthy
Oliver
Re: Schwerer Panzerkraftwagen
Posted: Sun Mar 20, 2022 12:39 pm
by Oliver Brüninghaus
.
June 2016
Start of Painting
I made a few tests to check the chosen colors and the compatibility of the paints.
Each colour was enriched with two further hues and painted wet in wet with rattle cans. Some salt weathering effects were tested but showed some difficulties if I applied too much paint. Encouraged by the results, I opened the paint shop.
.
.
Re: Schwerer Panzerkraftwagen
Posted: Sun Mar 20, 2022 12:48 pm
by Phil Woollard
Are you using the salt as a scrub Oliver?
Re: Schwerer Panzerkraftwagen
Posted: Sun Mar 20, 2022 2:36 pm
by simon_manning
The Model always comes to life when the paint goes on, i love the colour scheme, wacky, interesting, regards simon.