Bob,
Looks great. Man I wish I could do some work to mine. Look forward to meeting you and taking a look at your tanks possibly on the next trip home.
Jim
CHALLENGER 2 PRE-ORDERS
NOW OPEN
EMAIL US AT SALES@ARMORTEK.CO.UK TO PRE-ORDER
CLICK HERE FOR MORE DETAILS
NOW OPEN
EMAIL US AT SALES@ARMORTEK.CO.UK TO PRE-ORDER
CLICK HERE FOR MORE DETAILS
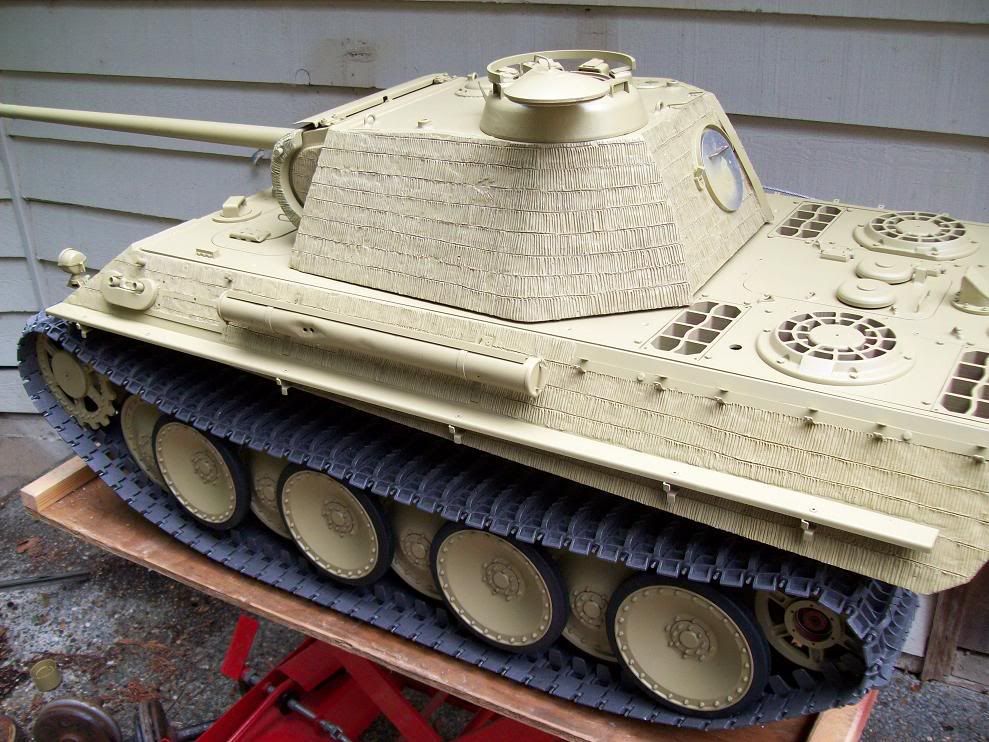
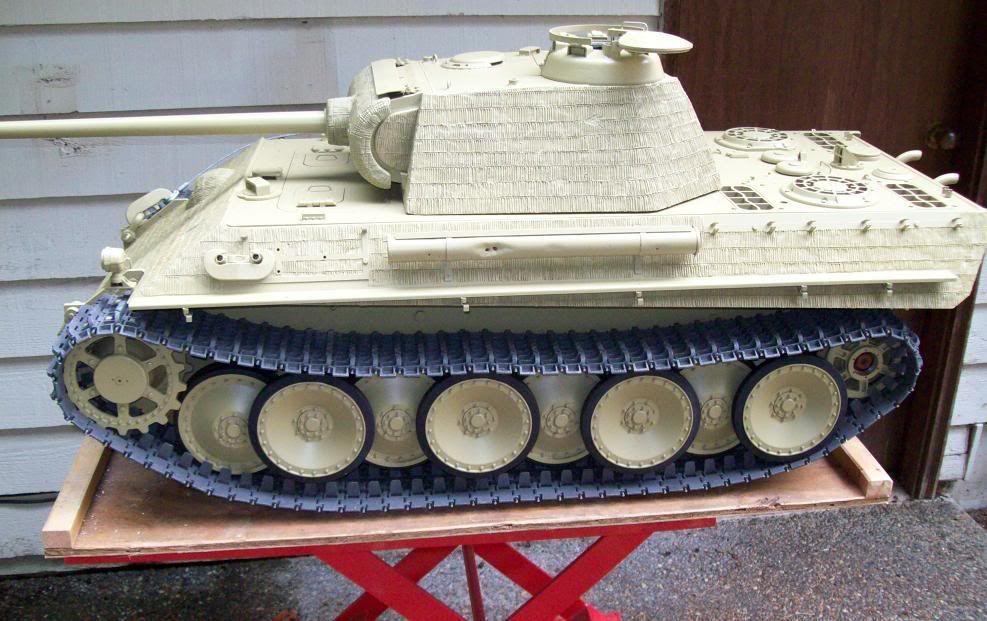
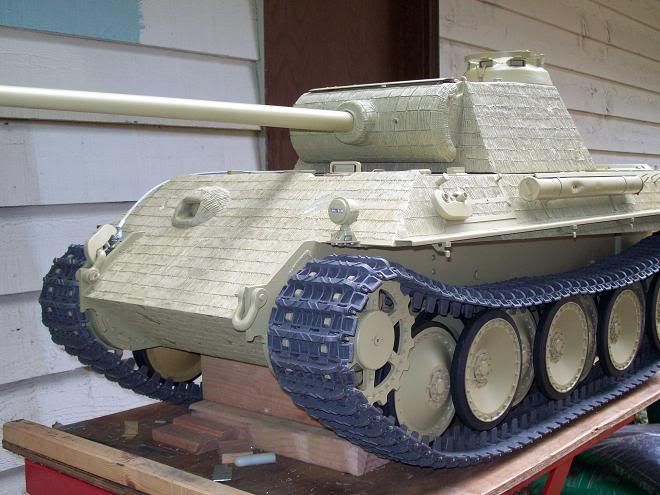
Panther Progress!
-
Jim Slothower
- Posts: 138
- Joined: Wed Apr 02, 2008 7:39 pm
- Location: (Afghanistan)-Camas, Wa. USA
-
willie leonard
- Posts: 52
- Joined: Sat Apr 05, 2008 11:32 pm
- Location: metro-chicago, IL U.S.A
- Been liked: 11 times
Hey Bob After seeing the outstanding Zimmerit job that you and Tim (and others)have done on your Panthers I was REALLY,REALLY,REALLY bummed to learn that the Germans stopped applying zimmerit to there tanks in Sept 1944 two months before the late Jadgpanthers (of which the Armortek JP is based) were produced.I guess I'll just have to get me a Panther some day.
-
Tim Bowman
- Posts: 1762
- Joined: Fri Jul 13, 2007 4:53 am
- Location: Northern California
- Been liked: 177 times
- Contact:
Hi Willie
With some very minor part changes, you can easily do your Jadgpanther as an earlier production model. Then you can zimmerit to your hearts content!
I know just the guy to talk to for the exhaust guards and pipes.
regards
Tim
With some very minor part changes, you can easily do your Jadgpanther as an earlier production model.
I know just the guy to talk to for the exhaust guards and pipes.
regards
Tim
"So long as one isn't carrying one's head under one's arm, things aren't too bad." – Erwin Rommel
-
Kent Wiik
-
Robert E Morey

- Posts: 2312
- Joined: Wed Jul 18, 2007 12:59 am
- Location: Seattle, WA USA
- Has liked: 134 times
- Been liked: 784 times
-
Robert E Morey
- Posts: 2312
- Joined: Wed Jul 18, 2007 12:59 am
- Location: Seattle, WA USA
- Has liked: 134 times
- Been liked: 784 times
-
Tim Bowman
- Posts: 1762
- Joined: Fri Jul 13, 2007 4:53 am
- Location: Northern California
- Been liked: 177 times
- Contact:
Hi Bob
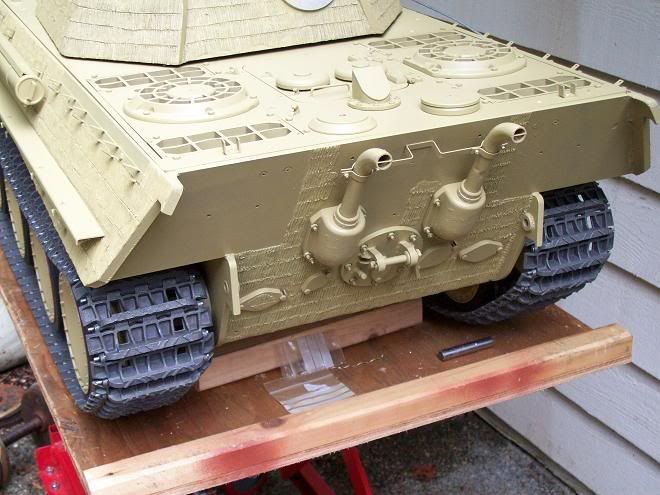
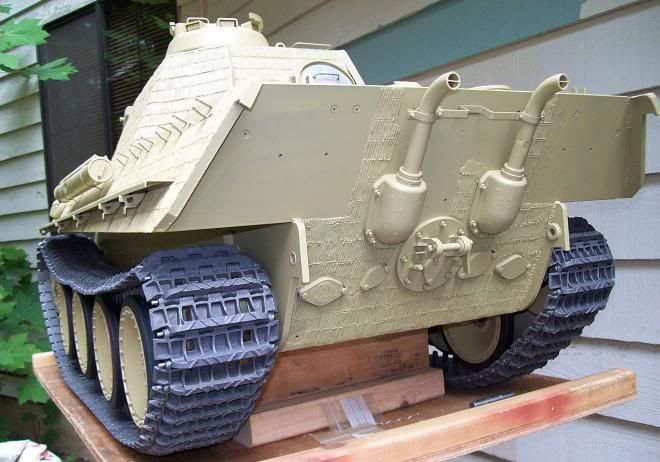
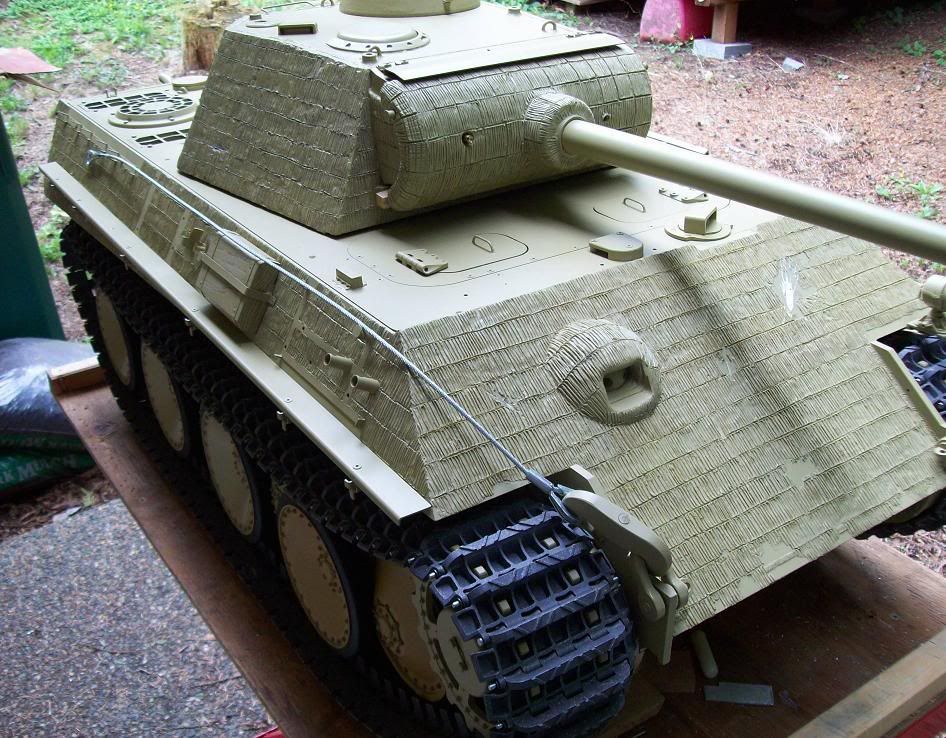
I'm starting to sound like a broken record but......SUPER Work! I can't get over how real that second photo looks! The zimmerit, exhaust guards/pipes and access hatch detailing. Kinda makes me wish I did the cast guards. Nice to see those drilled fender brackets too.
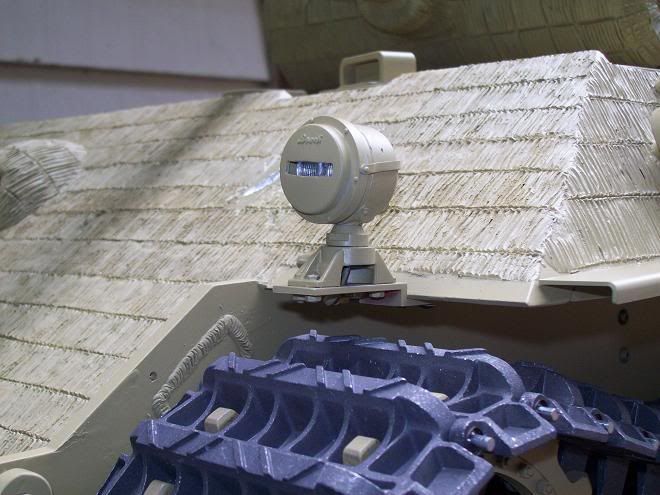
Nice work on the driver's scope too.
Hope to see it in real life soon.
I also love the pristine tracks...it makes me very jealous. I think you just might camo before me.
Tim
I'm starting to sound like a broken record but......SUPER Work!
Nice work on the driver's scope too.
Hope to see it in real life soon.
I also love the pristine tracks...it makes me very jealous. I think you just might camo before me.
Tim
"So long as one isn't carrying one's head under one's arm, things aren't too bad." – Erwin Rommel
-
Kent Wiik
Oh what a beauty!
Fantastic work Bob, she looks stunning.
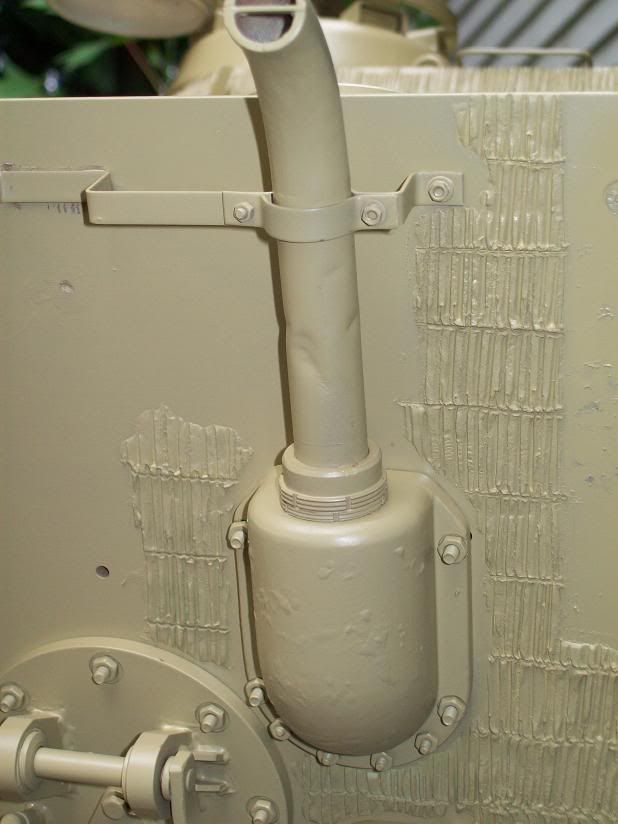
Very, very realistic zimmerit and hit-marks. And those exhausts!
And the driver’s scope, and the hinges, and....simply amazing.
Good source for inspiration as I have a lot to do before I can show photos like that. Glad everything on my "must-do-list" for our house is done and I can concentrate on something more important
Love your photos so keep them coming.
Cheers
Kent
Fantastic work Bob, she looks stunning.
Very, very realistic zimmerit and hit-marks. And those exhausts!
And the driver’s scope, and the hinges, and....simply amazing.
Good source for inspiration as I have a lot to do before I can show photos like that. Glad everything on my "must-do-list" for our house is done and I can concentrate on something more important
Love your photos so keep them coming.
Cheers
Kent
-
simon_manning
- Posts: 2040
- Joined: Fri Nov 02, 2007 8:51 pm
- Location: new forest,hampshire,u.k.
- Been liked: 1678 times
-
Allan Richards
- Posts: 743
- Joined: Thu Jul 12, 2007 10:34 am
- Location: Kent
- Been liked: 10 times
-
Robert E Morey
- Posts: 2312
- Joined: Wed Jul 18, 2007 12:59 am
- Location: Seattle, WA USA
- Has liked: 134 times
- Been liked: 784 times
All,
Thanks for the kudo's and kind remarks on my build. Glad you enjoy the photos and the progress I've made. I feel like the model is really starting to come together. Those beginning one of these kits - keep plugging away!
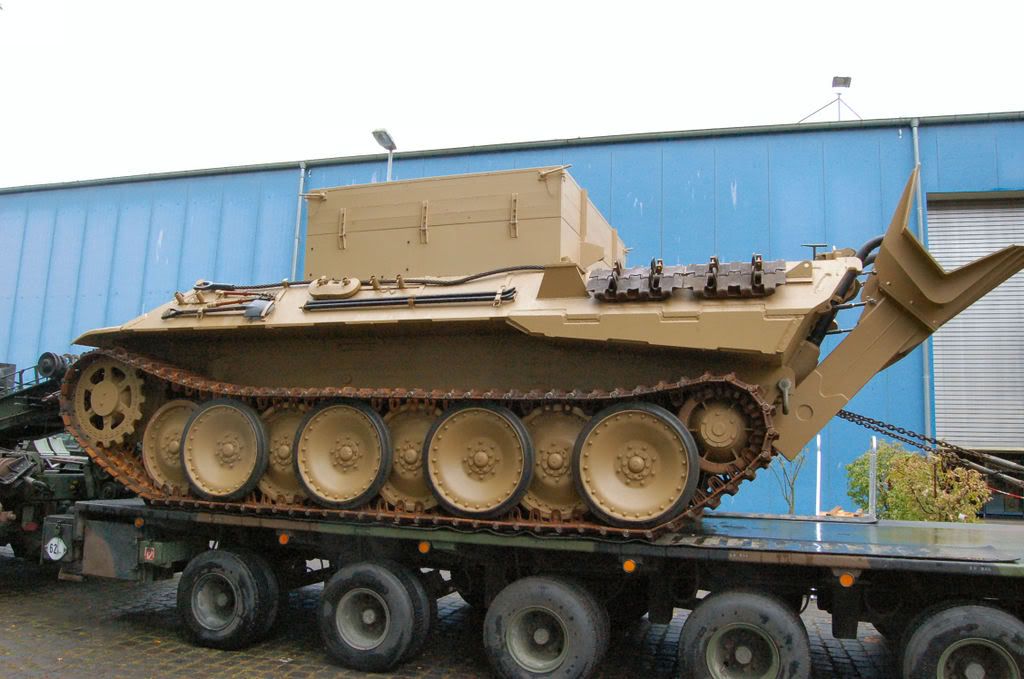
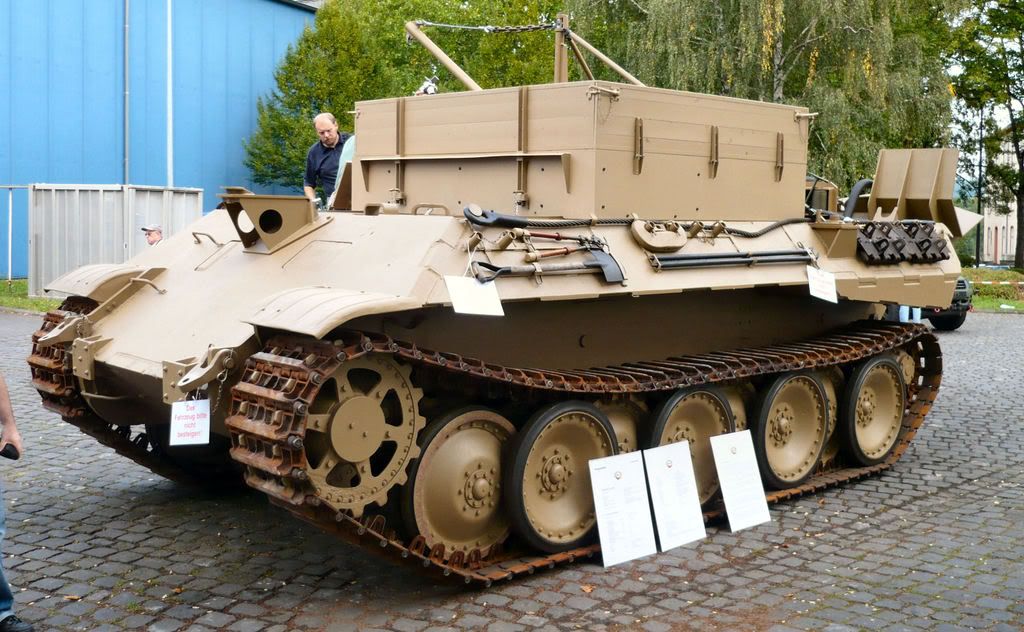
Simon a factory dio would be great. I have a panther engine that would look great in a diorama. Can someone *please* donate a Panther kit that I can convert to a BergePanther???? One could always wish.
More fun stuff to follow. You guys keep posting pix! Those of you that haven't posted pictures of your model yet please do!
Bob
Thanks for the kudo's and kind remarks on my build. Glad you enjoy the photos and the progress I've made. I feel like the model is really starting to come together. Those beginning one of these kits - keep plugging away!
Simon a factory dio would be great. I have a panther engine that would look great in a diorama. Can someone *please* donate a Panther kit that I can convert to a BergePanther????
More fun stuff to follow. You guys keep posting pix! Those of you that haven't posted pictures of your model yet please do!
Bob
-
simon_manning
- Posts: 2040
- Joined: Fri Nov 02, 2007 8:51 pm
- Location: new forest,hampshire,u.k.
- Been liked: 1678 times
-
Robert E Morey
- Posts: 2312
- Joined: Wed Jul 18, 2007 12:59 am
- Location: Seattle, WA USA
- Has liked: 134 times
- Been liked: 784 times
Hi Simon,
No appologies needed for the question.
The zimmerit is all milliput, grey (medium). My tools are amazingly crude and simple. A small semi sharpened piece of flat alum for making the dimple - like a sharpened flat screw driver blade, about 12-14mm wide, 1-1.5mm thick. Another piece of .016" (.4mm) thick alum sheet to make straight cut lines, a small piece of styrene rod (12mm dia) to roll the m-put flat, and a sponge to keep it moist. And my fingers to kneed and smush the stuff on.
Probably the best tool one can have is patience! Applying m-put with this technique is EXTREMELY time consuming. Months in fact! But I only do a small patch at a time (er my fingers can only handle pressing small amounts on in one sitting).
In general the steps I used are:
1) Prime the metal first. This way chips will show primer underneith!
2) kneed a small milliput ball together
3) press it on the tank, push it down flat till its about 1mm thick all around
4) roll it flatter with the styrene rod (just knock down the high spots)
5) press the vertical zimmerit marks in one at a time with the tool
6) make the horizontal cut lines with thin sheet or knife
7) flake a little off here and there for chips etc
 repeat for several weeks or months
9) Paint when a large amount is complete
Hope that helps! Practice a bit on some scrap wood, plastic, or metal. If it doesn't look right, scrape it off (before it hardens) and try again. Its like concrete after it sets up.
Bob
No appologies needed for the question.
The zimmerit is all milliput, grey (medium). My tools are amazingly crude and simple. A small semi sharpened piece of flat alum for making the dimple - like a sharpened flat screw driver blade, about 12-14mm wide, 1-1.5mm thick. Another piece of .016" (.4mm) thick alum sheet to make straight cut lines, a small piece of styrene rod (12mm dia) to roll the m-put flat, and a sponge to keep it moist. And my fingers to kneed and smush the stuff on.
Probably the best tool one can have is patience! Applying m-put with this technique is EXTREMELY time consuming. Months in fact! But I only do a small patch at a time (er my fingers can only handle pressing small amounts on in one sitting).
In general the steps I used are:
1) Prime the metal first. This way chips will show primer underneith!
2) kneed a small milliput ball together
3) press it on the tank, push it down flat till its about 1mm thick all around
4) roll it flatter with the styrene rod (just knock down the high spots)
5) press the vertical zimmerit marks in one at a time with the tool
6) make the horizontal cut lines with thin sheet or knife
7) flake a little off here and there for chips etc
9) Paint when a large amount is complete
Hope that helps! Practice a bit on some scrap wood, plastic, or metal. If it doesn't look right, scrape it off (before it hardens) and try again. Its like concrete after it sets up.
Bob
-
Robert E Morey
- Posts: 2312
- Joined: Wed Jul 18, 2007 12:59 am
- Location: Seattle, WA USA
- Has liked: 134 times
- Been liked: 784 times
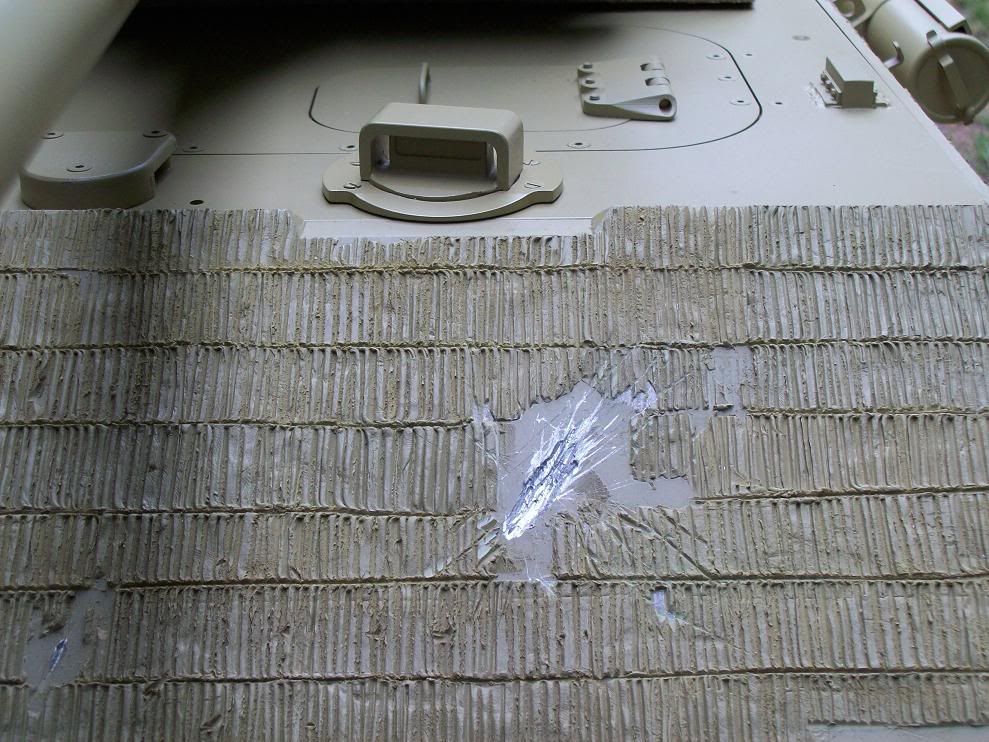
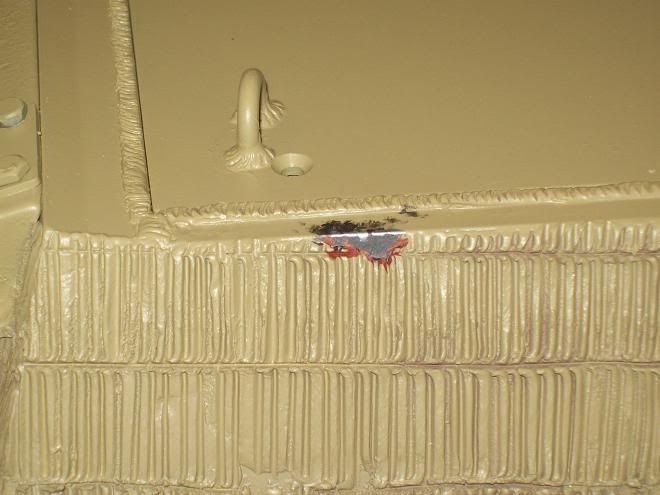
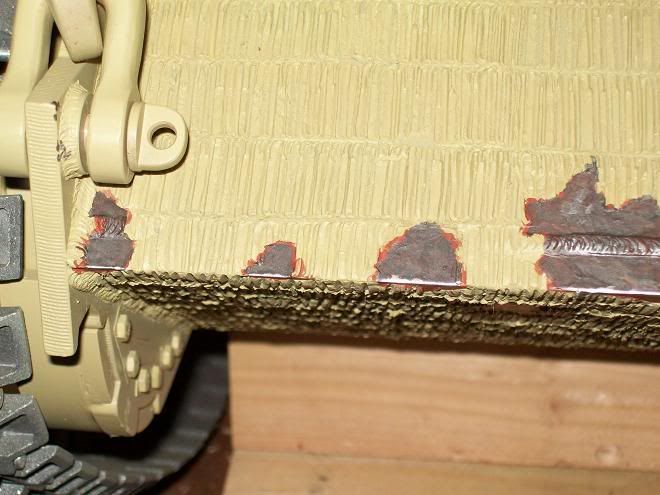
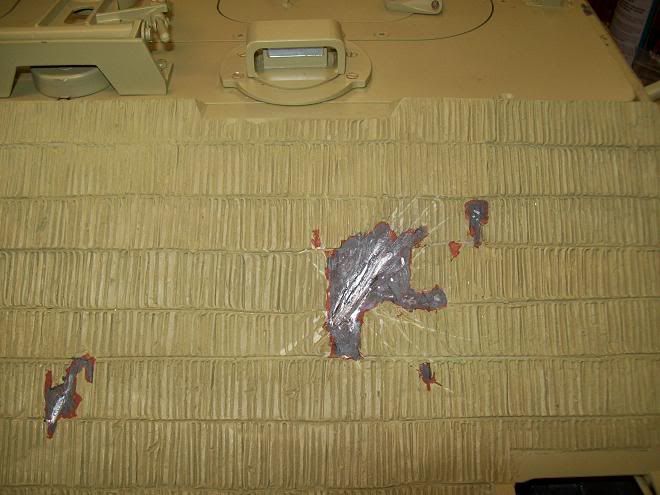
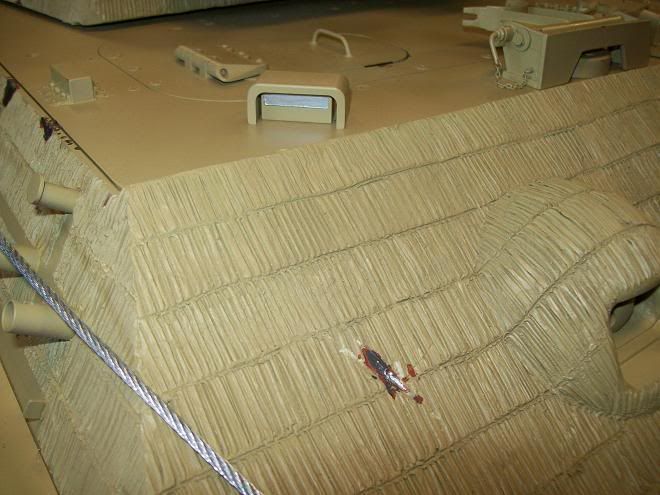
Some more photos of recent progress. I kinda jumped the gun a bit and started painting details. I couldn't wait till after the camo.  I was fiddling with some rust red primer, Testors gunmetal, and silver and came up with a cool effect. Its also very easy to do. I decided to paint a few of the "chips" in my zimmerit to see how it would look. Next thing you know I'm painting them all. The further away you are the better they look. The gun metal color really looks like steel, and a little silver to highlight the high spots really top it off.

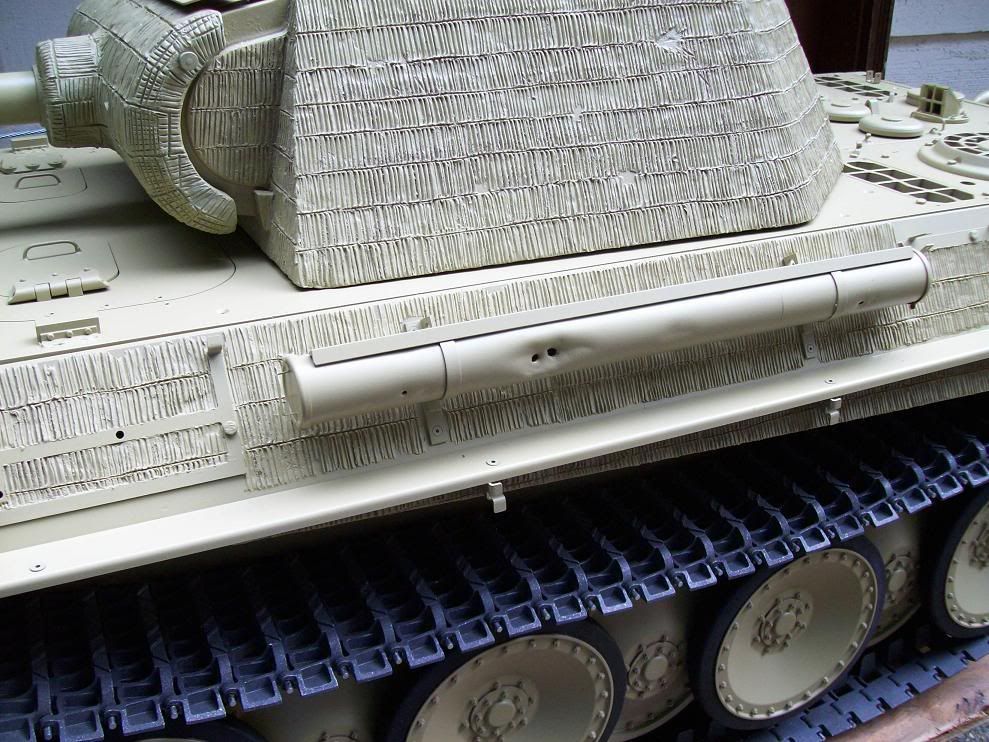
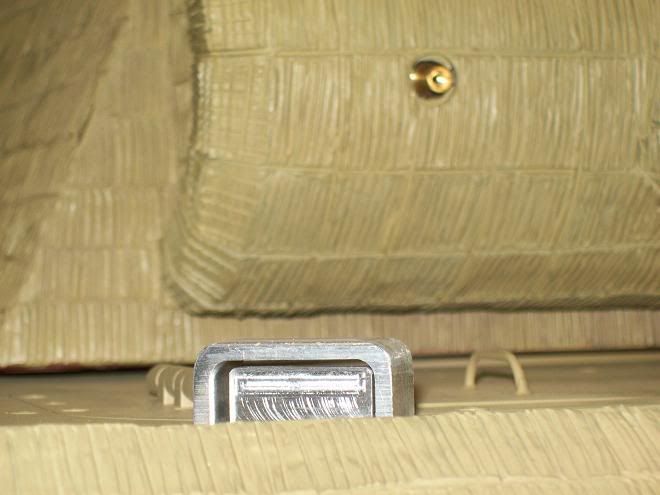
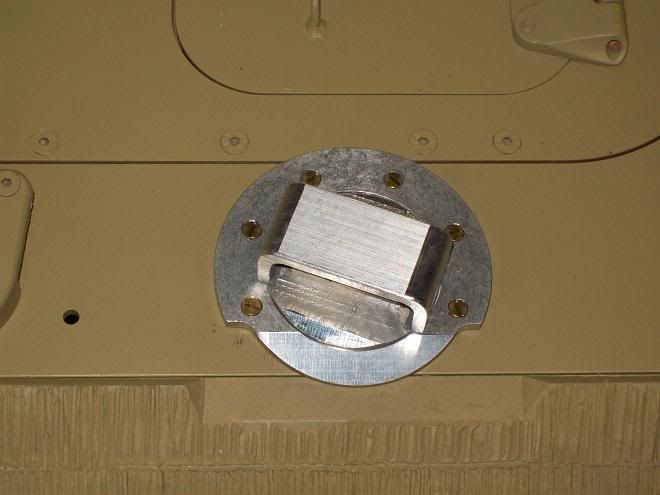
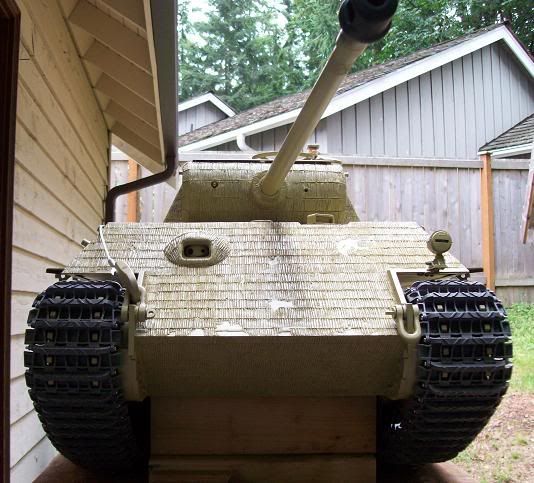
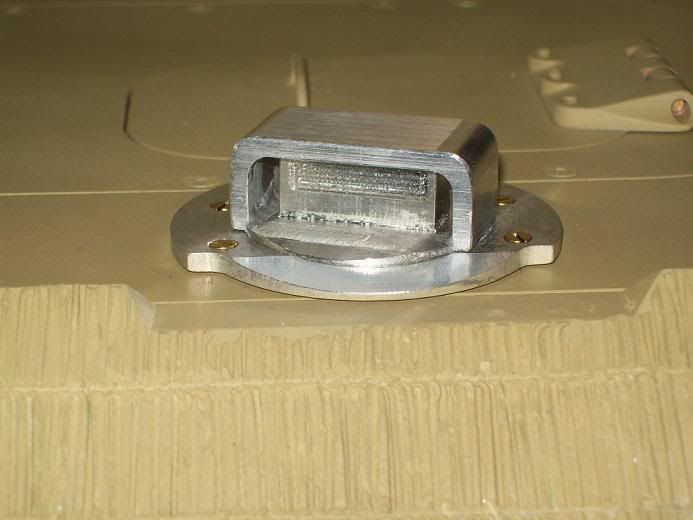
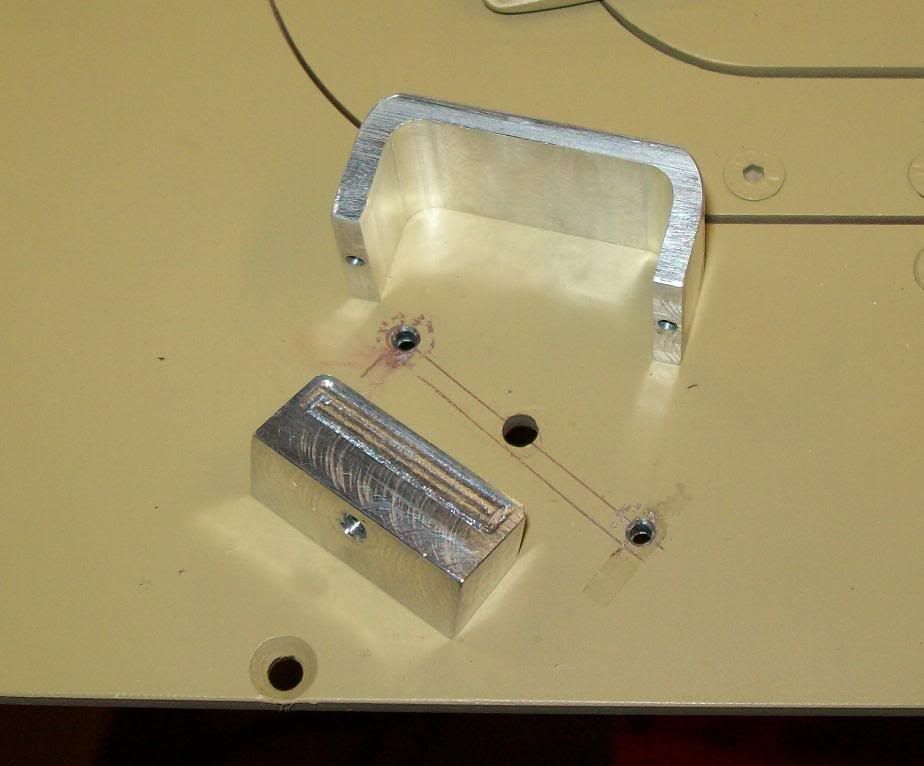
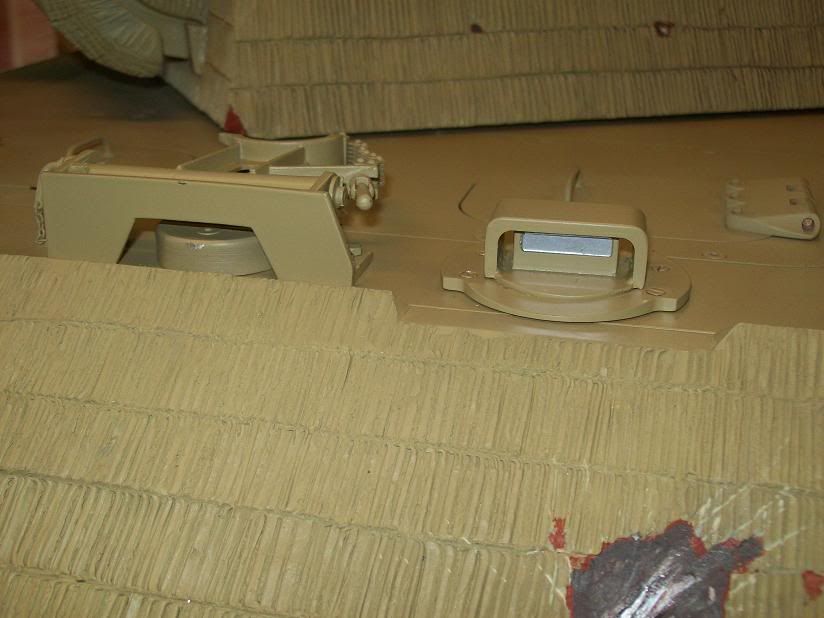
Some detailing of the front fenders. Took all day to do one! Slow progress but coming along well. Brass ribs and Tin edge piece. The "rivets" are screws with the slots filled with epoxy.
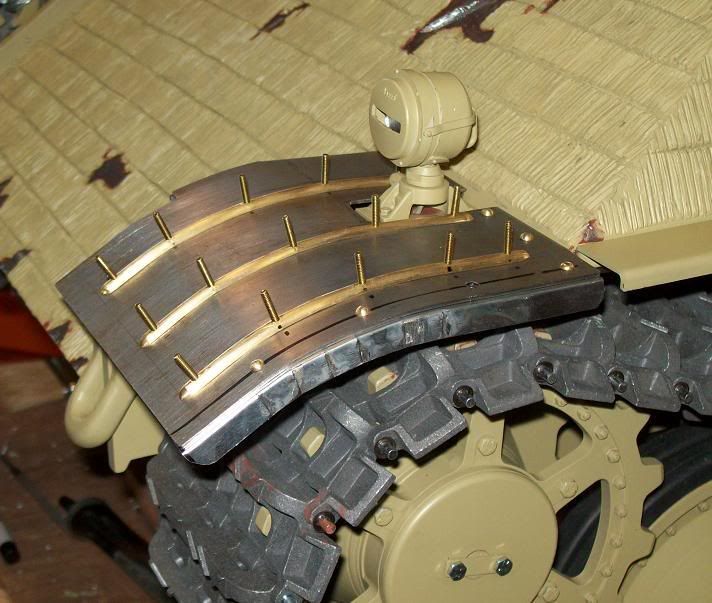
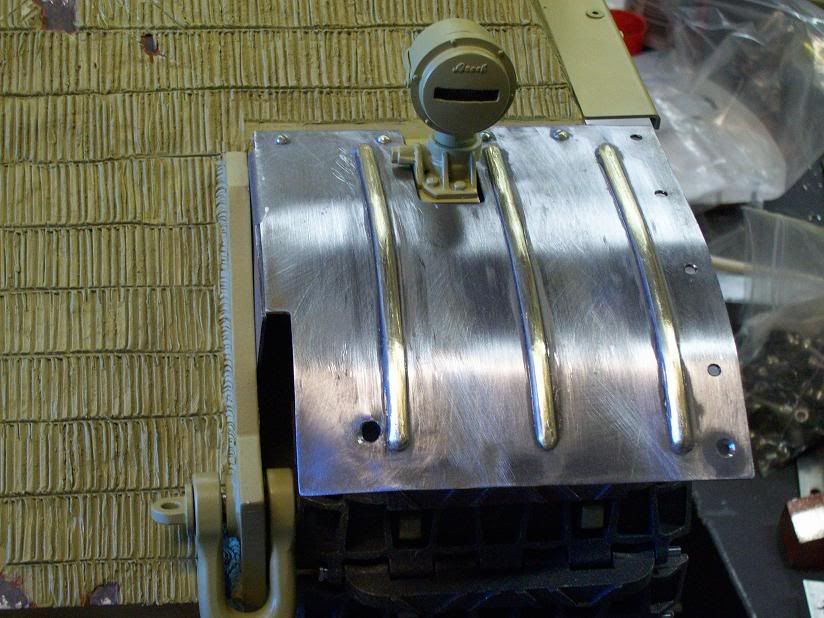
Finally added Steve Winstone's travel lock - which fits the barrel perfectly! Painted the periscope "glass" with Testors silver.

till next post,
Bob
Some detailing of the front fenders. Took all day to do one! Slow progress but coming along well. Brass ribs and Tin edge piece. The "rivets" are screws with the slots filled with epoxy.
Finally added Steve Winstone's travel lock - which fits the barrel perfectly! Painted the periscope "glass" with Testors silver.
till next post,
Bob
-
Kent Wiik
Stunning work Bob!
Love that damaged zimmerit areas and thanks for the tip of paint to be used there.
It looks very realistic and the now seen welds on the front plate give this zimmerited Panther an even more realistic look.
Some minor spots of beginning rust might even top this.
Wish I had come as far as you with my own build...
Cheers
Kent