Page 2 of 9
Re: Mark IV 007 Build
Posted: Thu Nov 06, 2014 11:36 pm
by Steve Stuart
The Hull sides are now plated up and side angles attached all round.
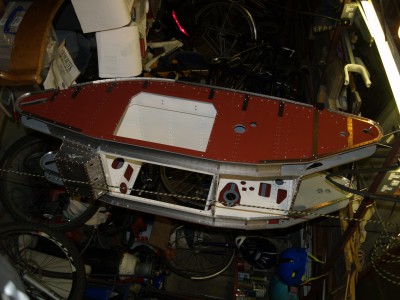
- Hull Bolt Up
Now this is done, the Garage is going to be subjected to a tidy up. Hull will be partially disassembled and the sides of the hull are going to be riveted as much as possible. But I will have to borrow a spare vice from work to rig up on the build trolley to allow for riveting.
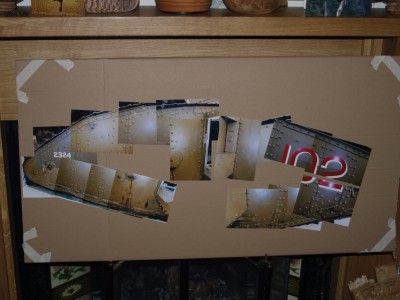
- Rivet Pattern Collage
To help with the pattern of rivets and bolts I have made up a collage of photos, dead trendy art or what?
Hammering in rivets is going to take some time.

I have realised that I need to a better sight of the roof to work out what is going on as most photos don't show much detail. So I will need to see if I can visit Bovington with some steps to get up higher.
It is good to see other builds taking shape as it helps a lot.
All the best
Steve
Re: Mark IV 007 Build
Posted: Tue Nov 11, 2014 11:01 pm
by Steve Stuart
Good Evening Ray, and all other Mark IV Builders!
I have spent the last few days riveting the first Hull Side, I recommend red oxide priming as it doesn't show the blood

, fingers get caught no matter what.
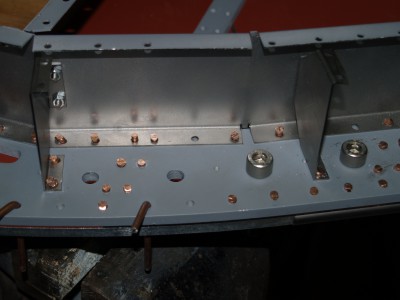
- Pegging Plates
The 8mm bolts with shanks are used to peg the plates along with 'L' pegs that I have made out of 1/8" rod. This means that the rivets when inserted go cleanly through the layers of metal without catching as everything is correctly aligned.
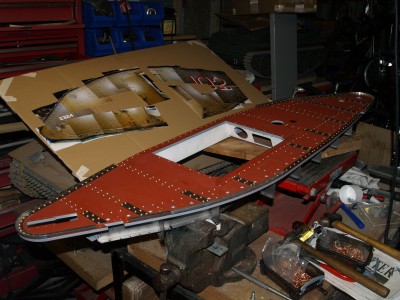
- Finished Plate
One side after completing, although a couple of the rivets will need to be redone as they are not clean. There were three holes that needed drilling through along the top. That is where my collage helped to check the riveting pattern.
The next side to go....
Steve
Re: Mark IV 007 Build
Posted: Thu Nov 20, 2014 11:14 pm
by Steve Stuart
At last, back together

I have been at work bolting the sides to the main body, first one side;
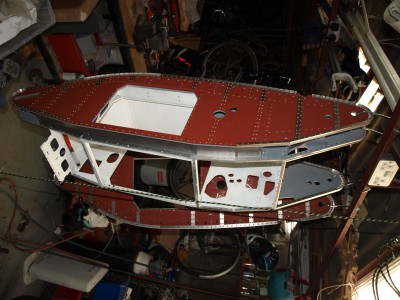
- Reattachment, first one side
Then the other;
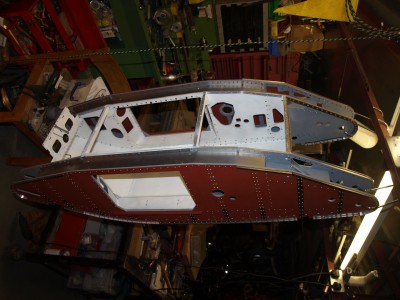
- Reattachment, the second side
Some of the bolts have been extremely fiddly to get the nuts onto the bolts as they are in difficult to get to. One bolt had fourteen nuts fall away, but persistence pays off. I have used double-sided sticky tape on my finger tip to keep the nut in the right position to catch the tread of the bolt

That is my best idea, apart from having the hull in a vertical position!
It is getting cold in the Garage now, which has the benefit that there is no sweat to cause the unpainted steel to rust. I feel that a suitable stage has been reached to celebrate with a glass of whisky!
Regards
Steve
Re: Mark IV 007 Build
Posted: Sat Nov 22, 2014 11:18 pm
by Steve Stuart
A trip to Bovington today for the S.A.G meeting meant an opportunity for some more detail photos which I have uploaded to Photobucket.
http://s607.photobucket.com/user/Steve_ ... kIV%20Tank
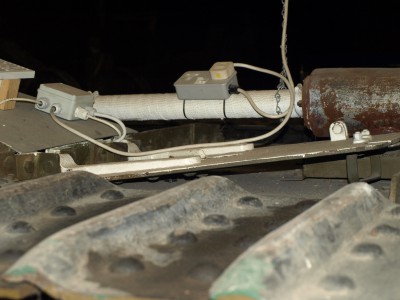
- Don't Replicate
Some of the photos are perhaps not so useful

As before I can burn these to CD and post, even to Australia!
Good evening to all.
Steve
Re: Mark IV 007 Build
Posted: Sun Nov 23, 2014 12:06 pm
by IAN HINKS
Does any one know where we can get 1/6th scale electrical extension leads and sockets?

Great log of your build. I took a large number of photos of the tank in the Lincoln museum of life a couple of years ago, A female, FLIRT II. Would you like me to send a CD to you? I don't do photo bucket or things like that. Maybe you can put them with your collection for other builders to use. For anyone else reading this post I can also post out copies to other Mk IV builders. PM me with contact details.
Gunner.
Re: Mark IV 007 Build
Posted: Sun Nov 23, 2014 6:30 pm
by Steve Stuart
Hi Ian
Please do send me your Lincoln Mark IV photos. I will be happy to put them onto Photobucket in an Album. The more information that is available the better, particularly as there are relatively few Tanks to be looking at. My brother lives in Rye, so may be at Christmas a trip to Ashford would provide something to compliment yours of FLIRT II as is also a female tank.
On another note, I have sussed getting nuts onto hidden/hard to get at bolts. Use a suitably bent bicycle spoke, push it through the hole, then thread the nut onto it, then slowly withdraw it leaving the bolt held in place against the hole with your finger tip. Next, simply screw the now aligned nut and bolt together. Voila!
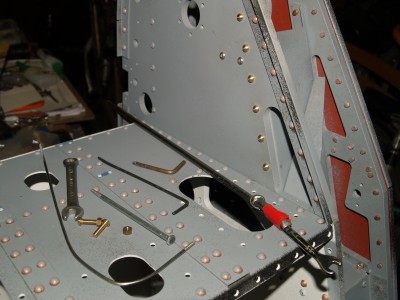
- Round Headed, no slot 5BA Brass Bolts
Also in the photo is my steel 'podger' which is proving a Godsend in getting plates and fittings to line up so bolts go through.
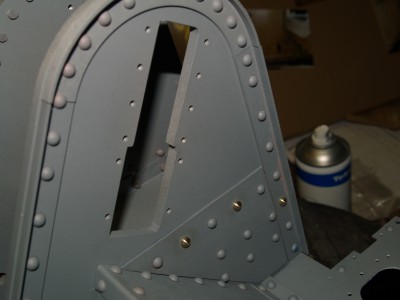
- Indistinguishable? very little difference?
Derek Atree put me onto the brass bolts- from EKP Supplies - and although they stand only slightly taller, they disappear into the back ground and are going to allow 'rivets' to be installed in places where a glued rivet would be no good as it will have no strength and will avoid using an Allen Headed Bolt. Plus where the hammered in rivet reveals that it has not gone in correctly and needs replacing the will substitute.
A Cool Day to Ray (006) and a good evening to all.
Steve
Re: Mark IV 007 Build
Posted: Thu Nov 27, 2014 11:43 pm
by Steve Stuart
Ian Hinks has kindly sent me a CD of his photos of Lincoln Museum's Mark IV Female Tank Flirt II.
Apart from the fact that they are going to be really useful, as they complement Bovington's Mark IV Male in the detail that they show. I am pleased in particular to see the ditching beams rails.
I have a chance if I can organise it to go to Ashford in Kent over Christmas. If not the Warm Teas Show in July is just round the corner

Steve
Re: Mark IV 007 Build
Posted: Sun Nov 30, 2014 11:18 pm
by Steve Stuart
I have added some extra detail to the Rear House to replicate the angle around the bottom of it.
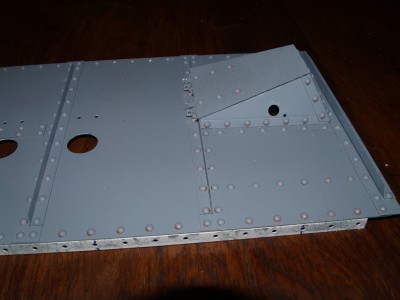
- Rear House
Also to the hatch, the hinges are riveted into place.
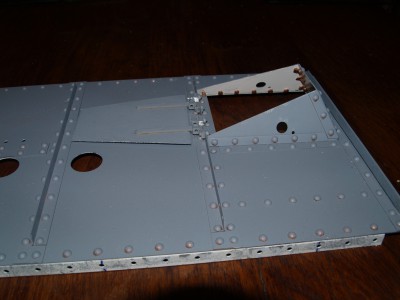
- Hatch
The photos I have taken give a sort of guide as to what needs to be there, but the detail is not enough to take it much further as there is little on what goes on top being available.
Now it is on with the Rollers and their fixings, 2mm nuts are going to be fiddly!
Regards
Steve
Re: Mark IV 007 Build
Posted: Tue Dec 02, 2014 10:49 pm
by Steve Stuart
Hallelujah!
The Rollers are in and the Angles, U Bolts and Nuts installed! This in its way has been harder than the riveting as the 2mm Nuts have a propensity to come unscrewed at the slightest provocation before the U Bolts can be successfully hooked onto the ends of the Roller Axles.
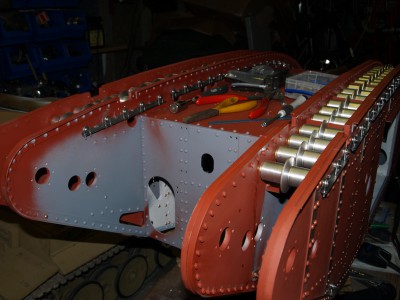
- Rollers and Angles
Having got to the last of the angles I felt that I was getting into the rhythm. My strategy was to load the U Bolts on to the Angle with the Nuts caught on, having previously used the bare Angle to make sure that the slots in the Roller Axles were correctly positioned to accept the Angle. Then to carefully hook the U Bolts over the end of Axles, whilst simultaneously rolling the Angle up into the slots. This was the point that the Nuts unscrewed, meaning having to start again as it is not easy fitting the Nut on to an installed U Bolt.

Once the Angle was located the 3mm Bolts were fitted keeping everything in place to allow the U Bolt Nuts to be tightened.

The Angles with eight U Bolts gave me the most grief, but thankfully Radio 6 keeps the brain from overload!
Steve
Re: Mark IV 007 Build
Posted: Wed Dec 03, 2014 7:29 am
by Derek Attree
Hi Steve
Looking a very nice clean build you have there.
The riveting looks great.
Derek
Re: Mark IV 007 Build
Posted: Wed Dec 03, 2014 7:35 pm
by Steve Stuart
Derek, thank you for the kind comment! The reason I have not painted the additional fittings with primer is that the steel and brass really offsets the red oxide primer and looks dead cool for now

I would hope that Solomon Joseph Solomon would approve, unfortunately his paint scheme only applies to the Mark I, and my Tank is going to be B Battalion and Brown

So unless it gets too damp leave it as it is. I will keep on with the current appearance until the sponsons are fitted, when it will go under red oxide primer.
Thanks Steve
Re: Mark IV 007 Build
Posted: Sun Dec 07, 2014 11:50 pm
by Steve Stuart
The covers illustrate the question of which way round the bolts go, in or out? Comparing different tanks and photos leads one to think that you have to find your own way. I have bolted most of the nuts on the outside as it is easier that way to fish the bolts into their holes from the inside.
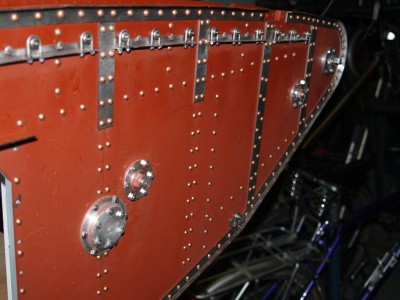
- Covers Installed
The tank is now upside down for the fitting of the Rollers, it is now due to be right sided for building the Sponsons and then fitting them so they are demountable as in the real thing.
There are in estimation plenty of extra bolts that might be fitted to the Hull, but I counted the rivets, but have decided not to be a complete 'Nutter'

Steve
Re: Mark IV 007 Build
Posted: Tue Dec 09, 2014 5:17 pm
by IAN HINKS
Hi Steve,
Great to meet up today and see your Mk IV, it looked even better in the flesh than it does in the photos. I didn't realise you were working in such cramped conditions. Look forward to further updates and meeting up again in the near future.
Gunner.
Re: Mark IV 007 Build
Posted: Tue Dec 09, 2014 9:44 pm
by Steve Stuart
It was good to meet you Ian, especially as the traffic on the Botley Road can be tough. I hope that the rest of your trip goes well and that the weather does not be unkind. Chalk Downs with snow on are as bleak as any northern hill!
I think that my cramped work conditions are mostly self (and Sons) inflicted, although extra work bench space would be useful. Others will be in a worse position than myself.
As a general invite, we are just under a mile from the A34 in Oxford and if you are passing, please do drop by, it is always good to see the faces behind the postings on the forum.
Regards
Steve
Re: Mark IV 007 Build
Posted: Mon Jan 26, 2015 10:41 pm
by Steve Stuart
What with Christmas, the New Year and now Marmalade I have had time to think about how to easily demount the Sponsons.
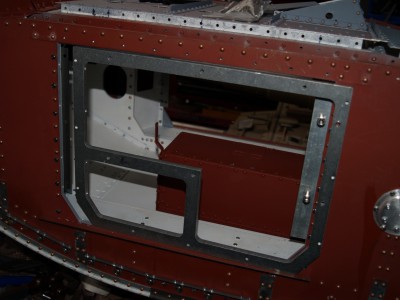
- Sponson Frame Overview
My solution is to have four '4mm Dog Grub Screws' on the forward edge of the Sponson Frame engaging into four holes on the edge of the Hull Plate To secure the rear of the Frame a new wider, thicker Fish Plate is fitted and Frame and the Fish plate is drilled and taped to take two 5mm Socket Headed Bolts.
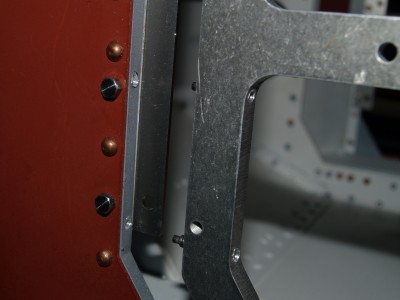
- Dog Grubs and Location Holes
These bolts are positioned so that a long Allen Key can reach in through the Rear Door of the Sponson so as to be able to simply detach the Sponson. The Dog Grubs can be adjusted with an Allen Key to solidly secure the Sponson. I certainly hope that this will be strong enough!
So now I can get on with the Riveting of the Sponsons

Steve
 I have realised that I need to a better sight of the roof to work out what is going on as most photos don't show much detail. So I will need to see if I can visit Bovington with some steps to get up higher.