Hi again,
the spray I have used is a normal spray bottle "SPRITZ-SPACHTEL" , Acrylic Spray Putty. It is very thick to spray and it gets dry in a short time.
You can also spray it in a bin and after a short time you can apply it to the surface with a putty knife or a brush. Also possible is to mix it with grit.
Bodo
Brown's T34 85 #008
-
Bodo Langbehn
- Posts: 109
- Joined: Wed Jan 06, 2010 11:07 am
- Location: Germany Black Forest
- Been liked: 25 times
Re: Brown's T34 85 #008
- Attachments
-
- 13.02.2009kl Kuppel und Vorgelege 010.jpg (123.53 KiB) Viewed 9151 times
-
- 13.02.2009kl Kuppel und Vorgelege 009.jpg (103.7 KiB) Viewed 9151 times
-
Brown Hawkins
- Posts: 204
- Joined: Sat Aug 01, 2009 12:34 am
- Location: Denver, Colorado
- Been liked: 33 times
Re: Brown's T34 85 #008
Forget the filler stuff. I'm marvelling at the example pictures! What tank is that? Where did you get the half I-beam on the cupola ring and is it metal? Great work Bodo! Oh, and thanks for the filler info too.
Brown
Brown
-
Fabrice Le Roux
- Posts: 394
- Joined: Thu Jul 12, 2007 8:57 pm
- Location: London UK
- Been liked: 14 times
Re: Brown's T34 85 #008
Bodo,
Many thanks. I googled it and Hycote and Simonitz both market spray putty in the UK. Will give it a go.
Brown,
One of the great things about this Forum is that, even having been on it for years, I can learn something unexpected and new. It adds huge value and pleasure to building the models. Sorry for the "off topic" nature of the previous post. Will follow your model with interest.
Cheers, Fabrice
-
Brown Hawkins
- Posts: 204
- Joined: Sat Aug 01, 2009 12:34 am
- Location: Denver, Colorado
- Been liked: 33 times
Re: Brown's T34 85 #008
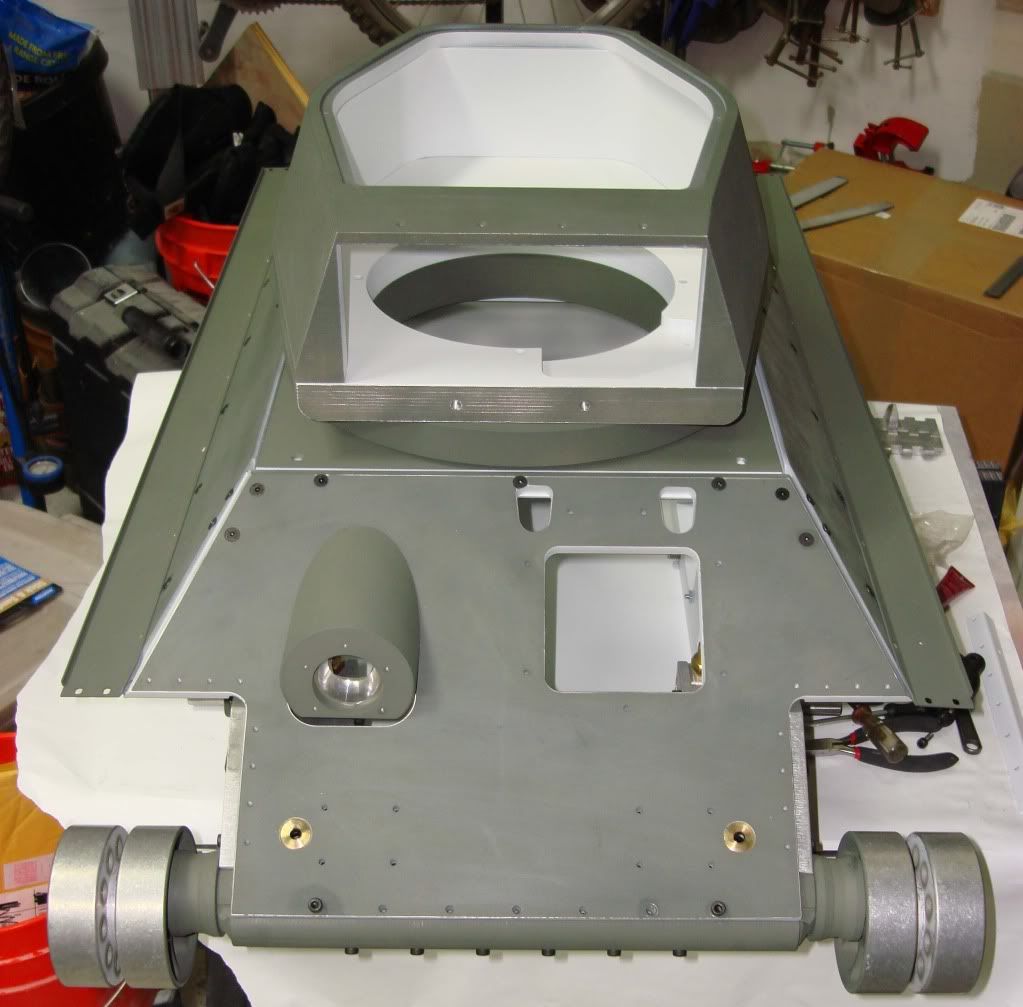
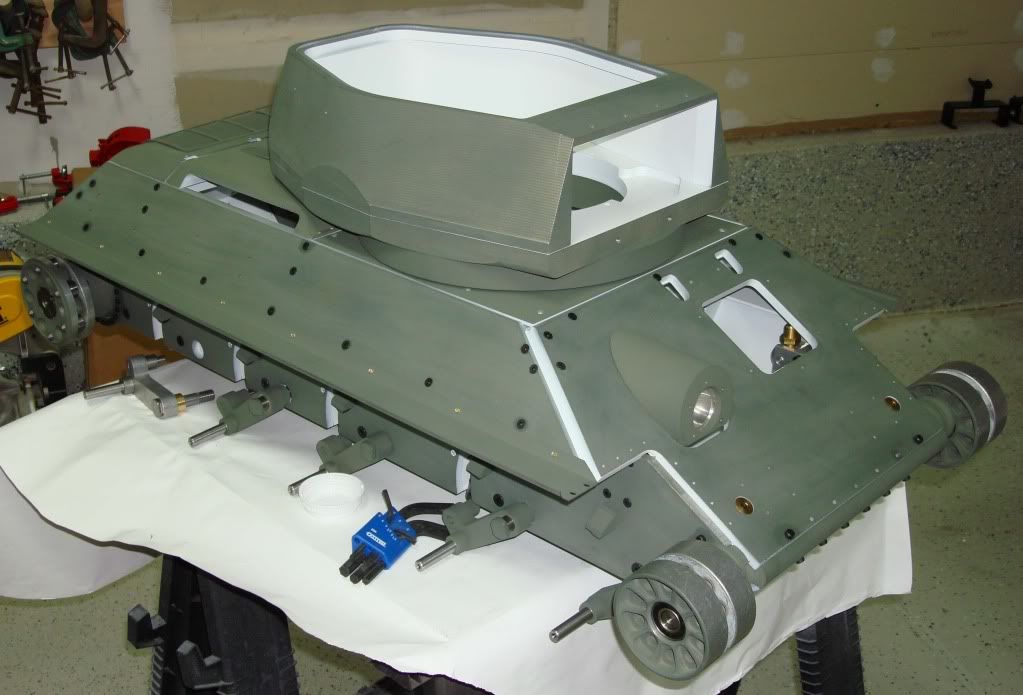
Just wanted to see how it looked. Still need to make some handles and the bracket:
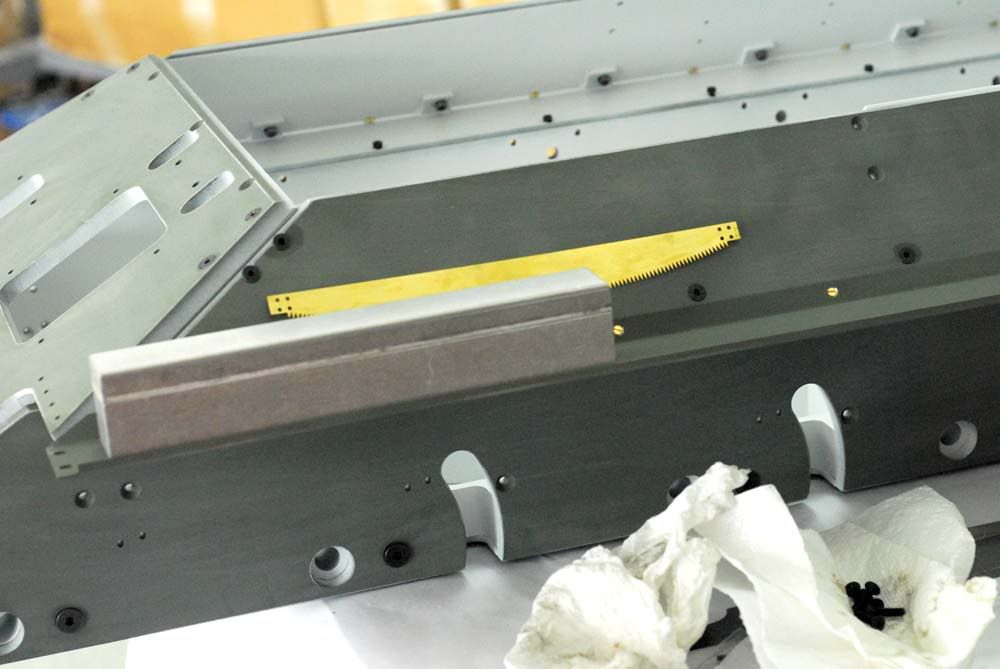

Attached the side mudguards with the countersunk (inside and out) brass flathead bolts. Some folks are going to take some measurements of the equipment box on the mudguard for me for a go at etching a working one. Is this box where the cleaning rod was kept or was it stored in the tank?
Brown
Attached the side mudguards with the countersunk (inside and out) brass flathead bolts. Some folks are going to take some measurements of the equipment box on the mudguard for me for a go at etching a working one. Is this box where the cleaning rod was kept or was it stored in the tank?
Brown
-
phil fitzpatrick
- Posts: 2020
- Joined: Sat Dec 12, 2009 3:38 pm
- Location: Sambourne uk
- Been liked: 223 times
Tool Box
Hi Brown
In the Osprey book T34/85 1944 to 1994,they show a cutaway drawing of a T34/85 model 1945
and the tool box on the left looks to have the cleaning rods in it.
They called it a "ZIP ( tool ) box"
Cheers Phil
Your parts are looking good.
Cheers
Phil
In the Osprey book T34/85 1944 to 1994,they show a cutaway drawing of a T34/85 model 1945
and the tool box on the left looks to have the cleaning rods in it.
They called it a "ZIP ( tool ) box"
Cheers Phil
Your parts are looking good.
Cheers
Phil
-
Bodo Langbehn
- Posts: 109
- Joined: Wed Jan 06, 2010 11:07 am
- Location: Germany Black Forest
- Been liked: 25 times
Re: Brown's T34 85 #008
Hi Brown,
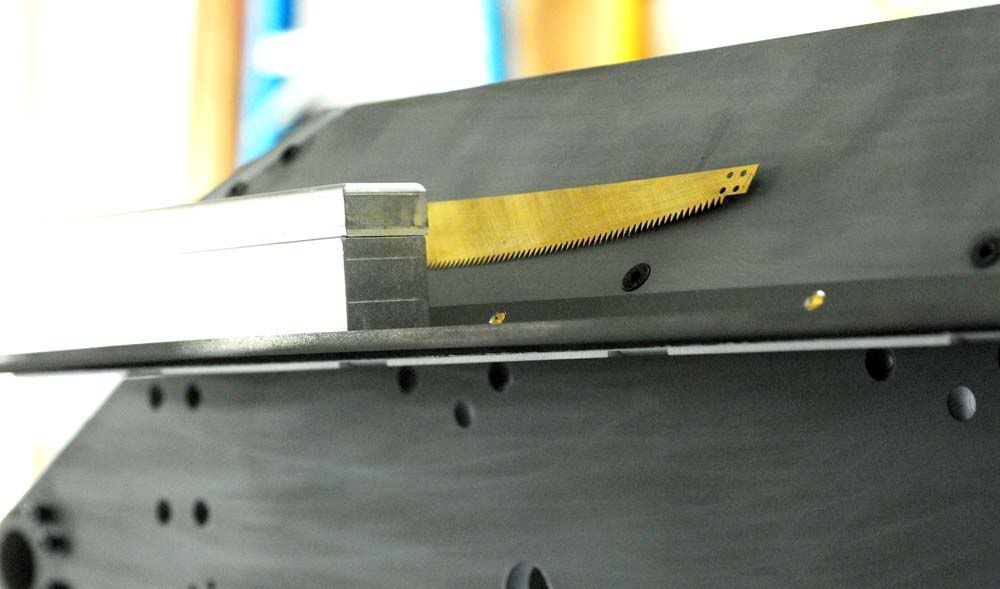
the half l beam on the front of the cupola is mad out of an aluminium profile. The cupola is from my Panther A, which I have scratchbuild.
Bodo
the half l beam on the front of the cupola is mad out of an aluminium profile. The cupola is from my Panther A, which I have scratchbuild.
Bodo
- Attachments
-
- Panther 31.05.09 010.jpgkl.jpg (114.01 KiB) Viewed 9098 times
-
- PICT0007.jpgkl.jpg (95.36 KiB) Viewed 9098 times
-
Brown Hawkins
- Posts: 204
- Joined: Sat Aug 01, 2009 12:34 am
- Location: Denver, Colorado
- Been liked: 33 times
Re: Brown's T34 85 #008
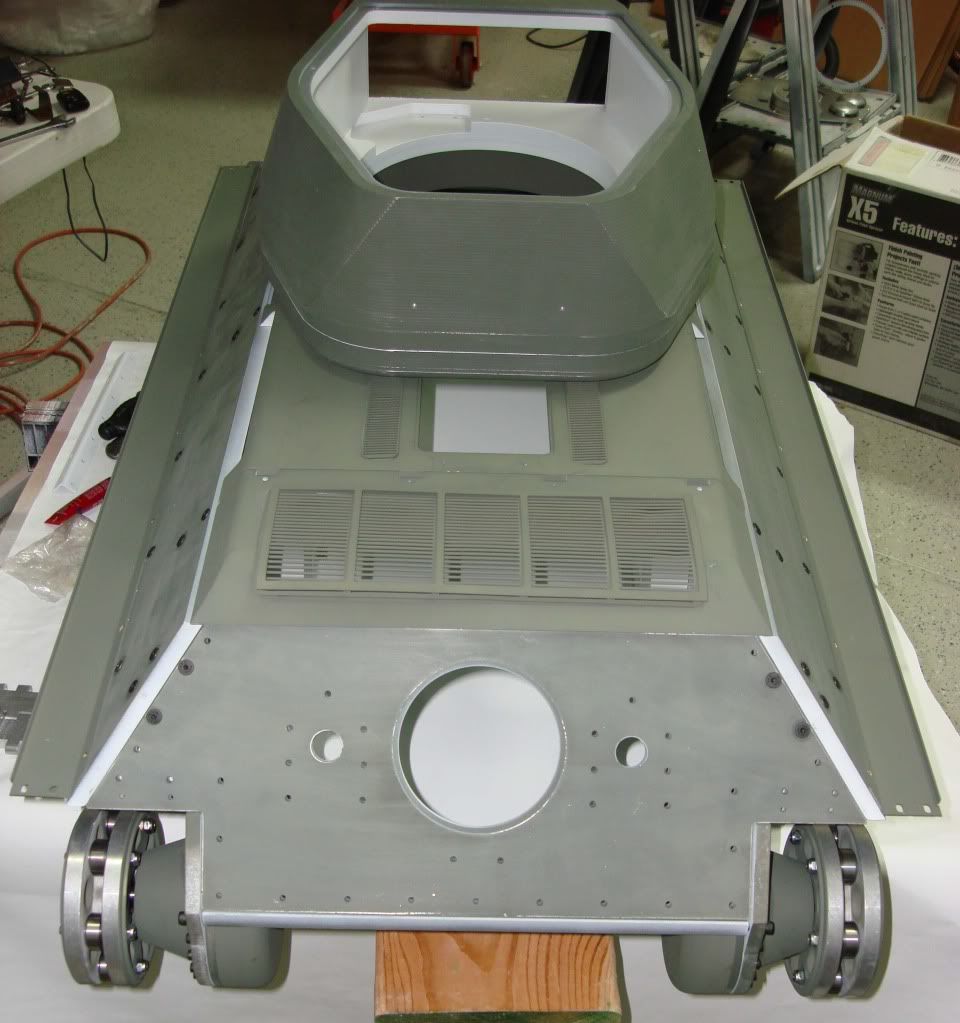
Received a packet of BA nuts, bolts, and taps this week and started working on the rear engine hatch. Milled the hinge down:
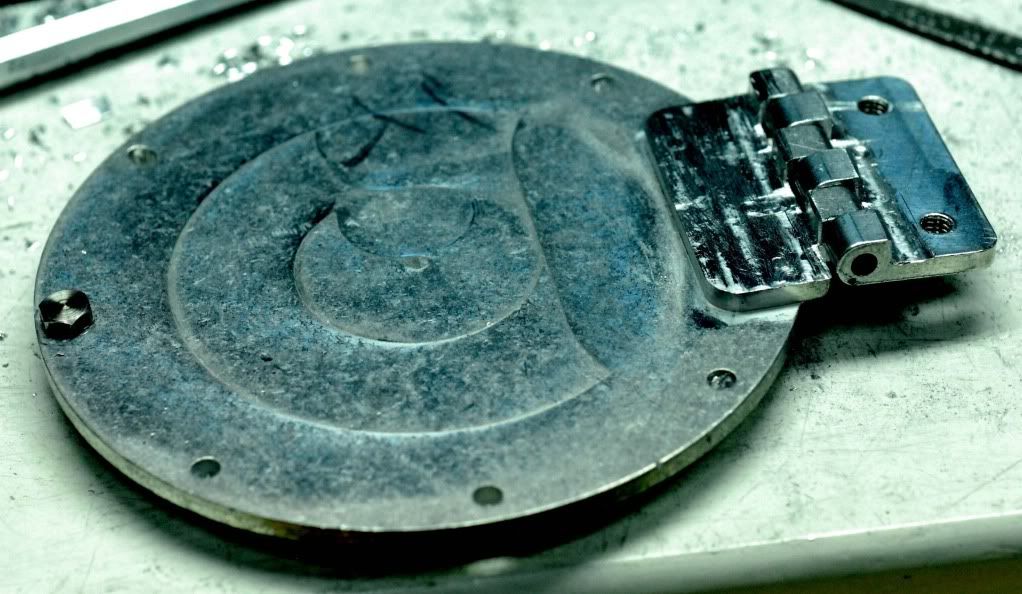
Need to round the hinges. Drilled and tapped all the holes in the hatch for the 5BA bolts.
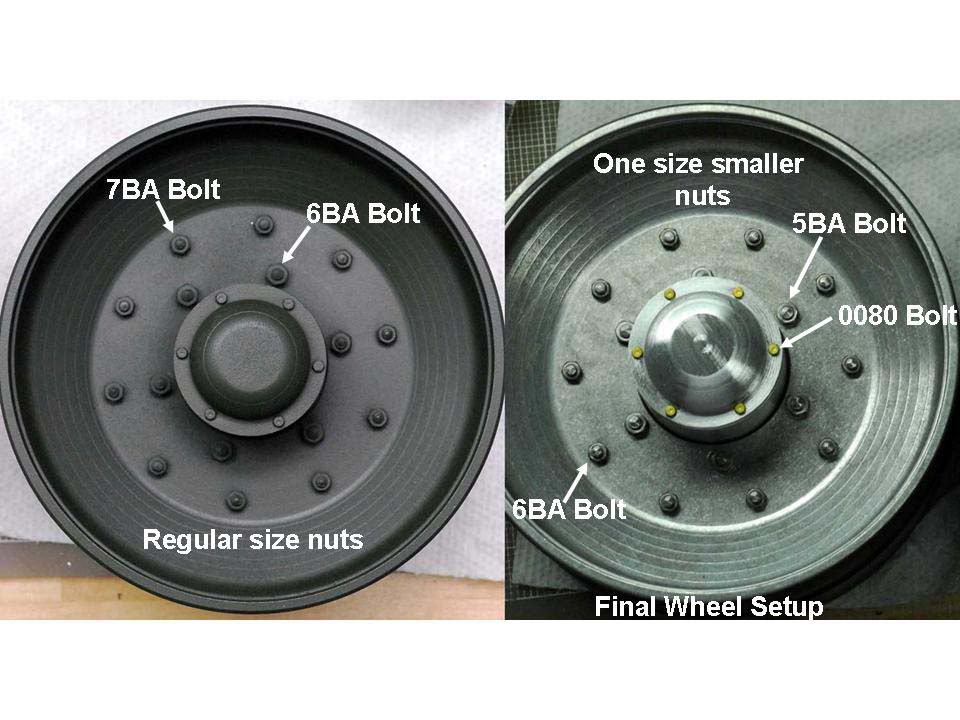
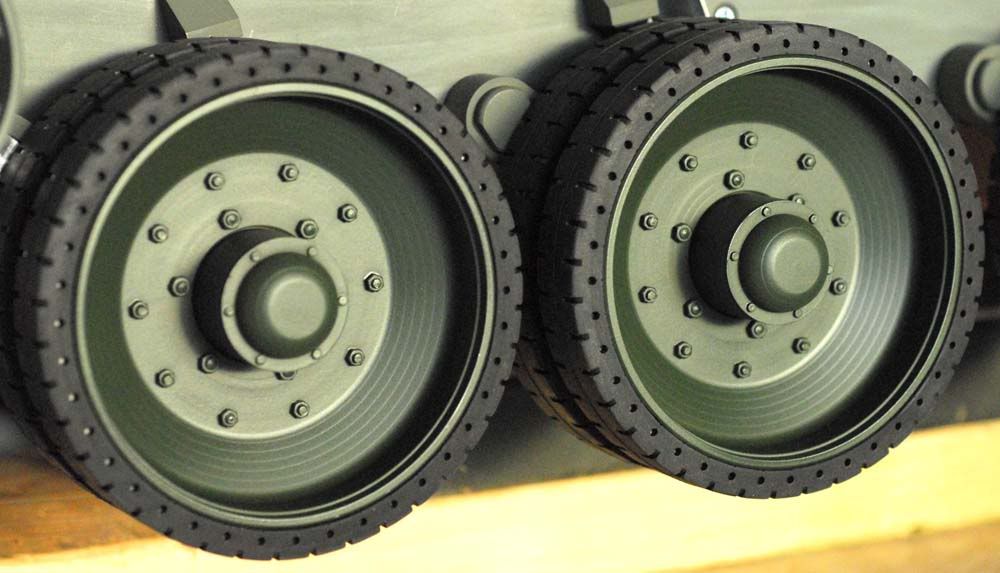
The final wheel bolt pattern is 5 and 6 BA bolts with one-size-smaller nuts for a more scale look:
Waiting for the next shipment of nuts and bolts so I can finish all of the wheels.
Here are some general shots:
More soon,
Brown
Need to round the hinges. Drilled and tapped all the holes in the hatch for the 5BA bolts.
The final wheel bolt pattern is 5 and 6 BA bolts with one-size-smaller nuts for a more scale look:
Waiting for the next shipment of nuts and bolts so I can finish all of the wheels.
Here are some general shots:
More soon,
Brown
-
phil fitzpatrick
- Posts: 2020
- Joined: Sat Dec 12, 2009 3:38 pm
- Location: Sambourne uk
- Been liked: 223 times
-
William Lewis
- Posts: 26
- Joined: Thu Mar 31, 2011 1:07 am
- Location: Lake Worth, Florida, USA
Re: Brown's T34 85 #008
Hi Brown
Ok, I'm ready to take my first venture into building an Armortek model which happens to be a T-34/85 # 39. My only tank model experience has been a 1/16 King Tiger and boy is this a totally different animal, uh well not animal, you know what I mean. I believe I should first preassemble pack 1 to make sure parts fit well, then disassemble parts and sand lightly with emery cloth or steel wool, then clean with solvent (Acetone), then spray both sides of each part with acid etch primer (Duplicolor rattle can is available in US). Next step spray interior parts white, then start reassembly of pack 1. Is this the right approach? Sorry for such a long post and rookie questions. Any recommendation on products available on this side of the pond. Any update on tow hooks? Oh and I almost forgot will the welds Bondo/milliput adhere to etch primer?
Thanks Again for your help,
William Lewis
-
Brown Hawkins
- Posts: 204
- Joined: Sat Aug 01, 2009 12:34 am
- Location: Denver, Colorado
- Been liked: 33 times
Re: Brown's T34 85 #008
Hey William,
I have to admit I kind of loosely follow the instructions in the manual. The first thing I bolted together was the turret. I mainly check on fasteners I need for a specific part or parts. There is a lot of fitting, assembling, disassembling, fitting again, etc, until you are ready to call it good and put the Locktite on the bolt or bearing.
I'm also a bolt checker as you can tell by my fascination with the wheel bolts. I have Simon Manning and Steve Winstone to thank for that. Adding scale nuts and bolts is one of the easiest ways to really take these models to the next level and they don't cost too much.
The only place I have found the self-etching primer is at AutoZone here in Colorado. As far as prep before priming I wash everything, big and small, before assembly. I use dish soap and water on the big, flat hull pieces and use an abrasive hand cleaner on all steel pieces (plate and machined) to make sure I cut and remove the grease/oil on these parts. I was going to clean all of the bolts thoroughly to get the oil off them but only wipe them down with a paper towel as I go (not ideal but better than I did on the KT).
Check Phil's T34 thread for a good idea of the order of assembly and detailed assembly pictures. I had the laptop on my workbench with his suspension pictures up. Get the basic hull together, suspension, wheels, and tracks. Then the fun will begin. I paint individual parts as I go making sure not to paint surfaces that will be rotating and have an already tight fit (axles, bushings, holes bushings will fit into). You can always sand/file when needed, and it will be needed here and there. Do heed the warning to loose fit everything until fitted together and THEN tighten up. This really came into play with the front armor. The front glacis plate should probably be left removeable for most of the build. I just bought a couple of packs of JB Weld to fill in periscope holes above the driver's hatch used for the '76. The JB Weld will also be used to build up and sharpen the joint between the glacis plate and the lower front armor.
You can always roughen up the primer for better adhesion of later paint and Milliput.
I'm only planning tonight, getting ready for lots of building and etching over the next 3 days once my wife leaves for the weekend!
Ask whatever of the forum. Someone has the answer!
Brown
-
Brown Hawkins
- Posts: 204
- Joined: Sat Aug 01, 2009 12:34 am
- Location: Denver, Colorado
- Been liked: 33 times
Re: Brown's T34 85 #008
Anyone have a handle on the proper mantlet bolts for attachment to the brackets? I know they are M8 and approximately 30 and 40 mm in length. Not sure which head type will work with the limited clearance.
Brown
Brown
-
William Lewis
- Posts: 26
- Joined: Thu Mar 31, 2011 1:07 am
- Location: Lake Worth, Florida, USA
Re: Brown's T34 85 #008
Hi Brown
Thanks for the info, now I feel like I'm ready to get started and I will be using yours and Phil's pictures to help me.
I already learned about the Glacis Plate / Suspension issue from Phil's posts which has been a big help with planning this build.
More questions to follow.
Thanks Again
William
Thanks for the info, now I feel like I'm ready to get started and I will be using yours and Phil's pictures to help me.
I already learned about the Glacis Plate / Suspension issue from Phil's posts which has been a big help with planning this build.
More questions to follow.
Thanks Again
William
-
Armortek

- Site Admin
- Posts: 2936
- Joined: Tue Jul 10, 2007 10:30 am
- Location: Winchester, England
- Been liked: 3704 times
Re: Brown's T34 85 #008
Hi Brown
We have made special pivot bolts for the mantlet. These will be sent out to you. Apologies for the omission.
Mark
We have made special pivot bolts for the mantlet. These will be sent out to you. Apologies for the omission.
Mark
Armortek
-
Brown Hawkins
- Posts: 204
- Joined: Sat Aug 01, 2009 12:34 am
- Location: Denver, Colorado
- Been liked: 33 times
Re: Brown's T34 85 #008
Finished the wheels:

Worked on the rear armor and hatch:
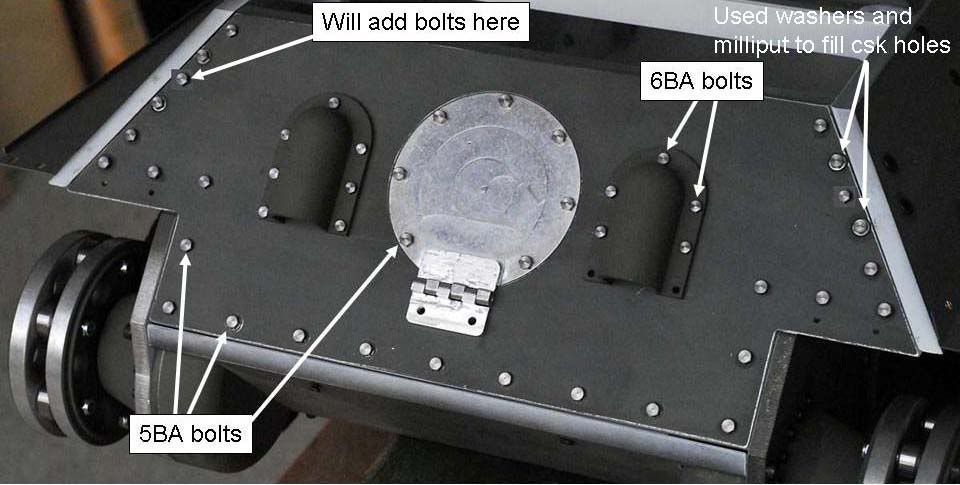
I replaced the csk bolts with 1" long 5BA bolts and nuts and filled in the csk holes with milliput and washers. need one additional bolt on each upper side of the rear plate.
Still have a few more details to finish.
Brown
Worked on the rear armor and hatch:
I replaced the csk bolts with 1" long 5BA bolts and nuts and filled in the csk holes with milliput and washers. need one additional bolt on each upper side of the rear plate.
Still have a few more details to finish.
Brown
-
leesellars
- Posts: 934
- Joined: Thu Jul 12, 2007 11:19 am
- Location: Nottingham
- Has liked: 2 times
- Been liked: 15 times
Re: Brown's T34 85 #008
Hello Brown
Looking Good. Are you going to do the Hammer head tow hooks For Others to have?
Lee
Looking Good. Are you going to do the Hammer head tow hooks For Others to have?
Lee
http://www.Facebook.com/newthorpemodels
Dont hit me so early in the morning with those negative waves.
Listen carefully i shall say this only once.
If its not broke dont fix it.
Ich Hatt Einen Kameraden
Dont hit me so early in the morning with those negative waves.
Listen carefully i shall say this only once.
If its not broke dont fix it.
Ich Hatt Einen Kameraden