Page 2 of 9
Posted: Fri Jan 21, 2011 5:42 pm
by Tim Bowman
Hi Steve
Your Panther's rear plate looks fantastic!
I remember having the same question regarding the convoy light's wire though hole armor guard on the rear plate. I believe that on the real Panther, the storage bin is actually spaced off the rear plate towards the bottom and is mounted with brackets that attach under the pannier. This provides a small space between the rear plate and bin. The wires armor cover sits partially behind the bin.
I know this an ausf A and the photo doesn't show the part you need but it explains the gap I am talking about.
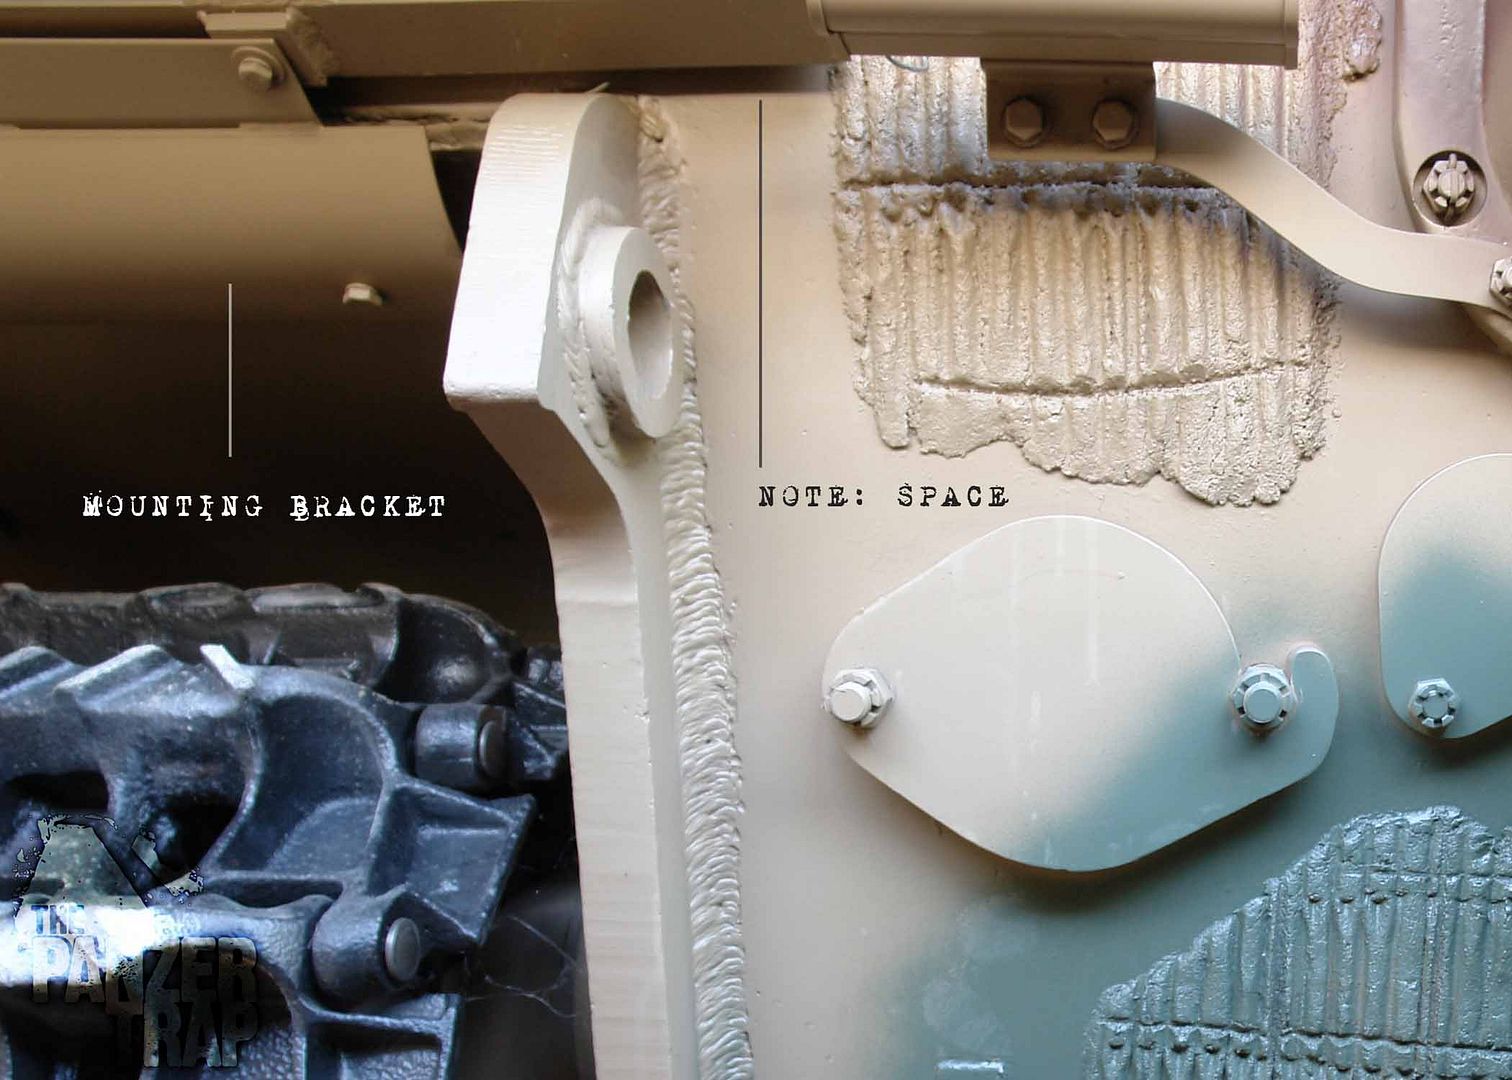
On my Panther, I ran the wire through the hull just next to bin about 5mm up from the bottom of the bin.
Hope that helps in some way.
best regards
Tim
Posted: Fri Jan 21, 2011 5:56 pm
by Steve Norris
Thanks Tim,
Thats a good photo even if it is a Ausf A.
I hope to fit the armoured cover for the light power cable and the gap behind the stowage bin would explain why the photos and drawings i have seen only show half of the armoured cover.
Hopefully someone will come up with a good shot of the Ausf G set up.
Regards
Steve
Posted: Fri Jan 21, 2011 6:13 pm
by Tim Bowman
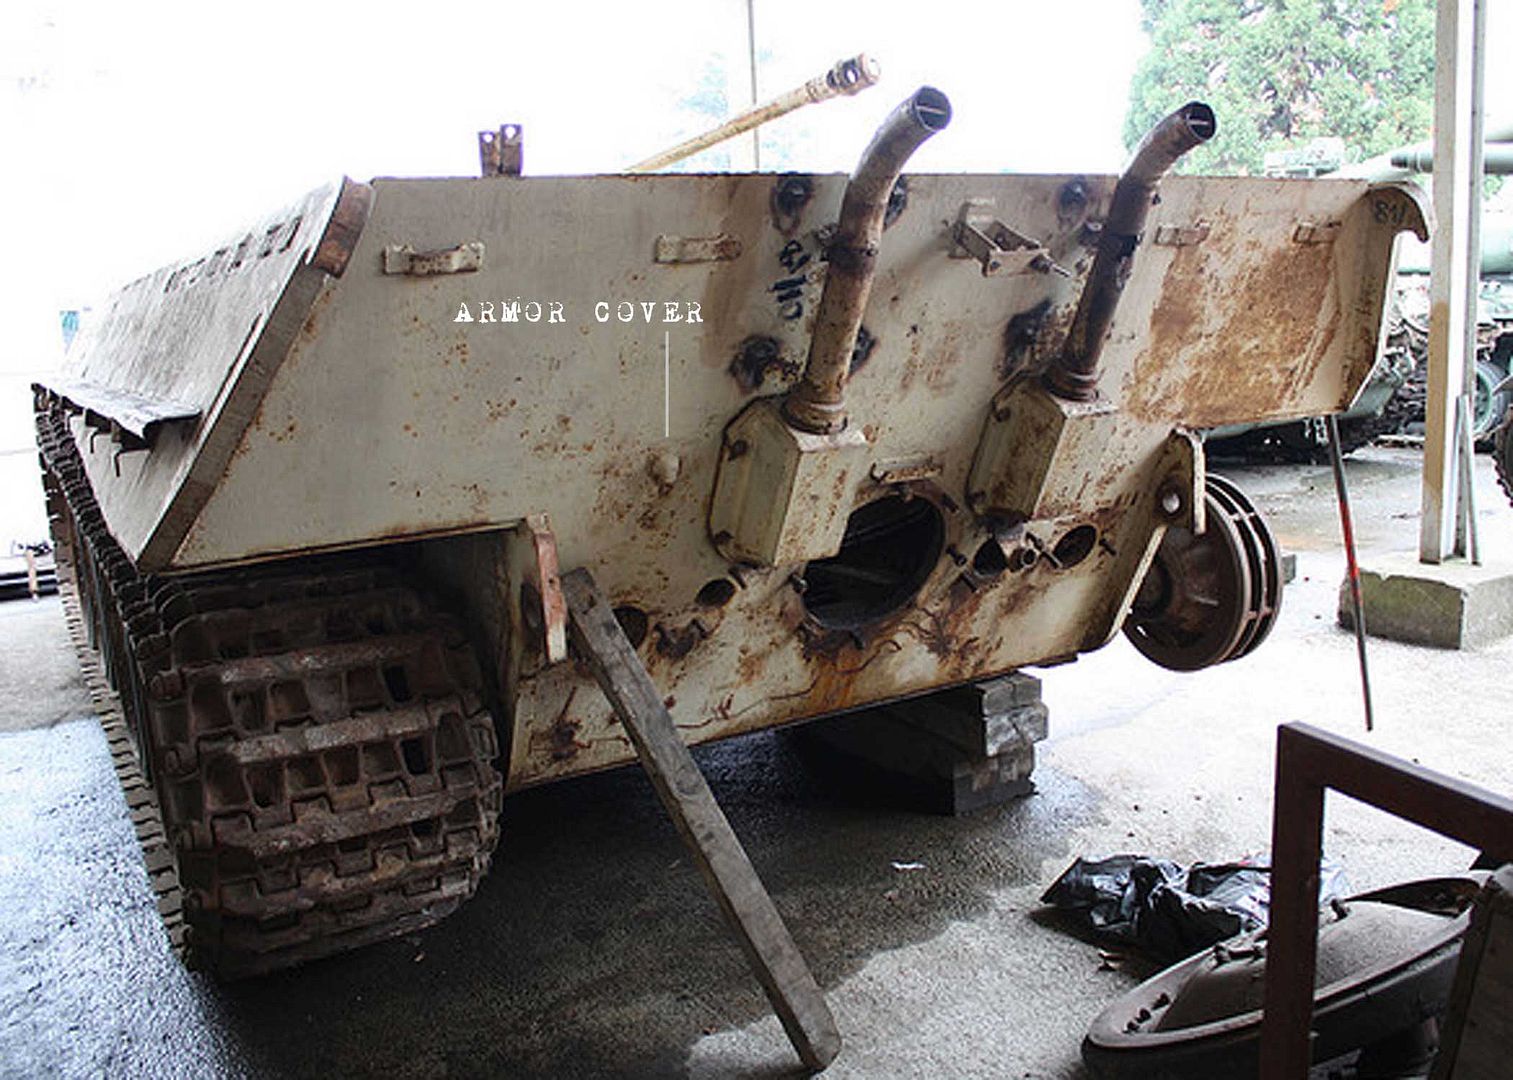
Here you go Steve.
A clear photo without a bin. MAybe you can plot the location scaling from this photo.
Tim
Posted: Fri Jan 21, 2011 6:46 pm
by Steve Norris
Thanks Tim.
That gives me something to work from.
Regards
Steve
Posted: Fri Jan 21, 2011 7:51 pm
by simon_manning
thanks tim for the posting, i did'nt know where the wires went, or how they connected to the hull, good photos, thanks steve, regards simon.
Posted: Fri Jan 21, 2011 8:28 pm
by Kent Wiik
Hi Steve,
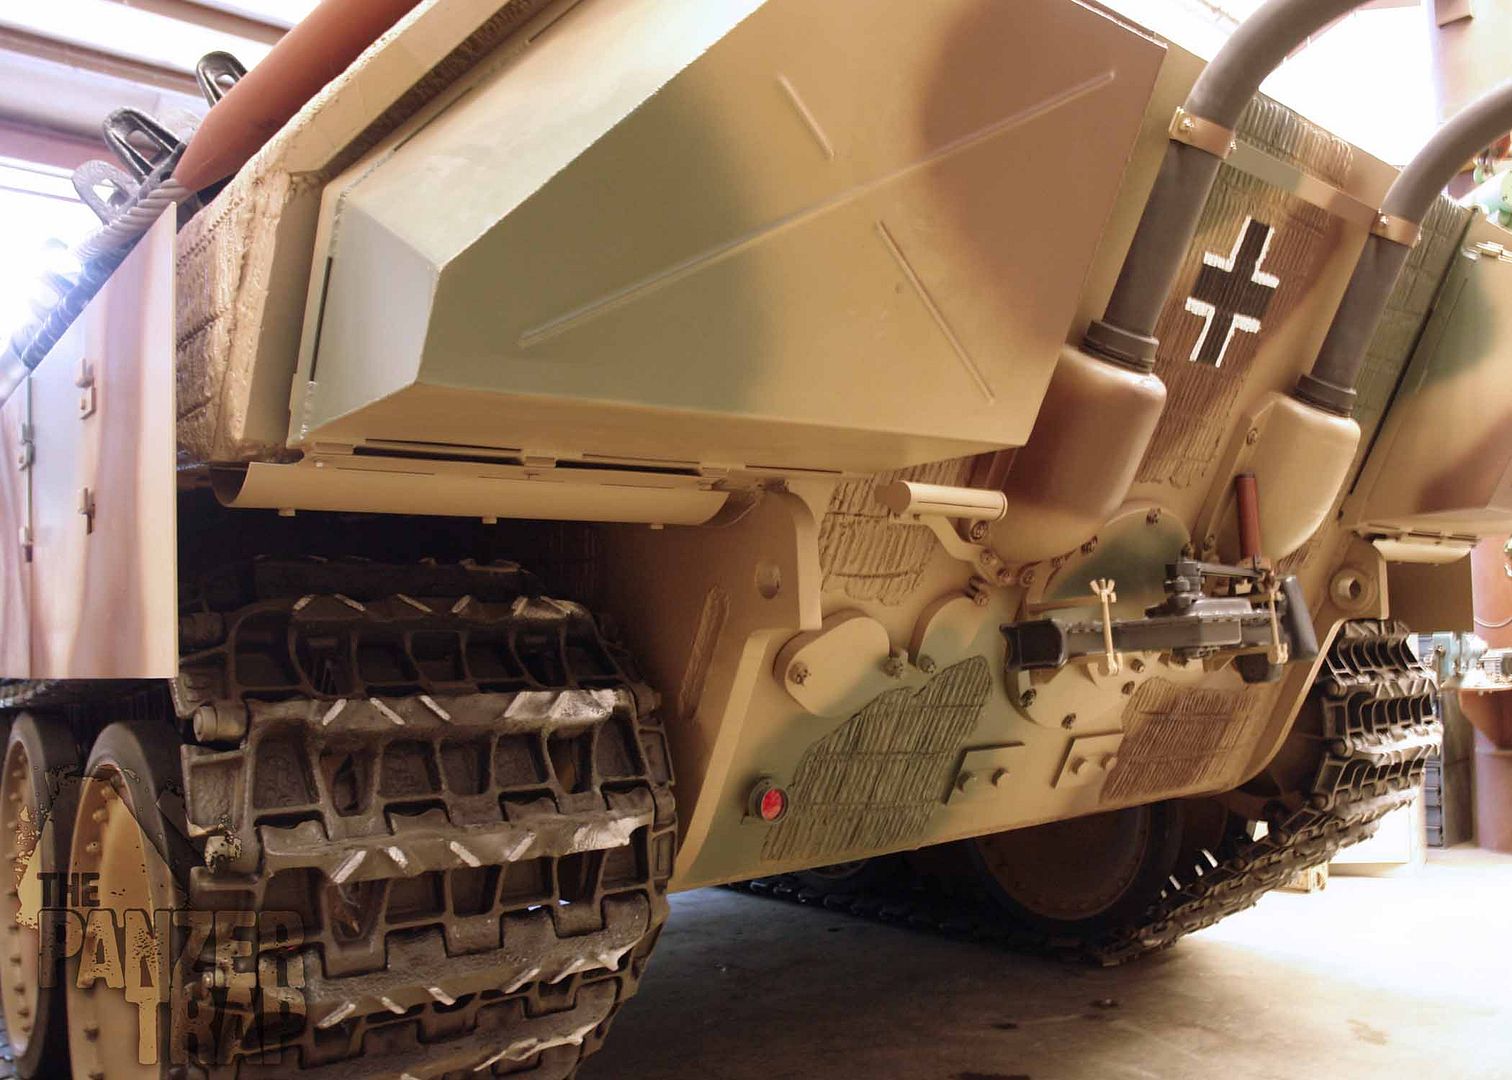
Here is a close up from the Houffalize Ausf G

Hope of use
Kind regards
Kent
Posted: Fri Jan 21, 2011 9:14 pm
by Steve Norris
Thanks Kent.
Do you happen to have a shot of how the stowage bin fits over the armoured cover ?
Regards
Steve
Posted: Sat Jan 22, 2011 1:15 am
by Brian Leach
Steve,
Your topic has become a "must see".
Thanks for the good work and sharing!
Brian
Posted: Sat Jan 22, 2011 12:05 pm
by Kent Wiik
This is a good question as drawings in books show different layouts.
Trojca show the cover completely hidden behind the box while Doyle shows them only ½-hidden.
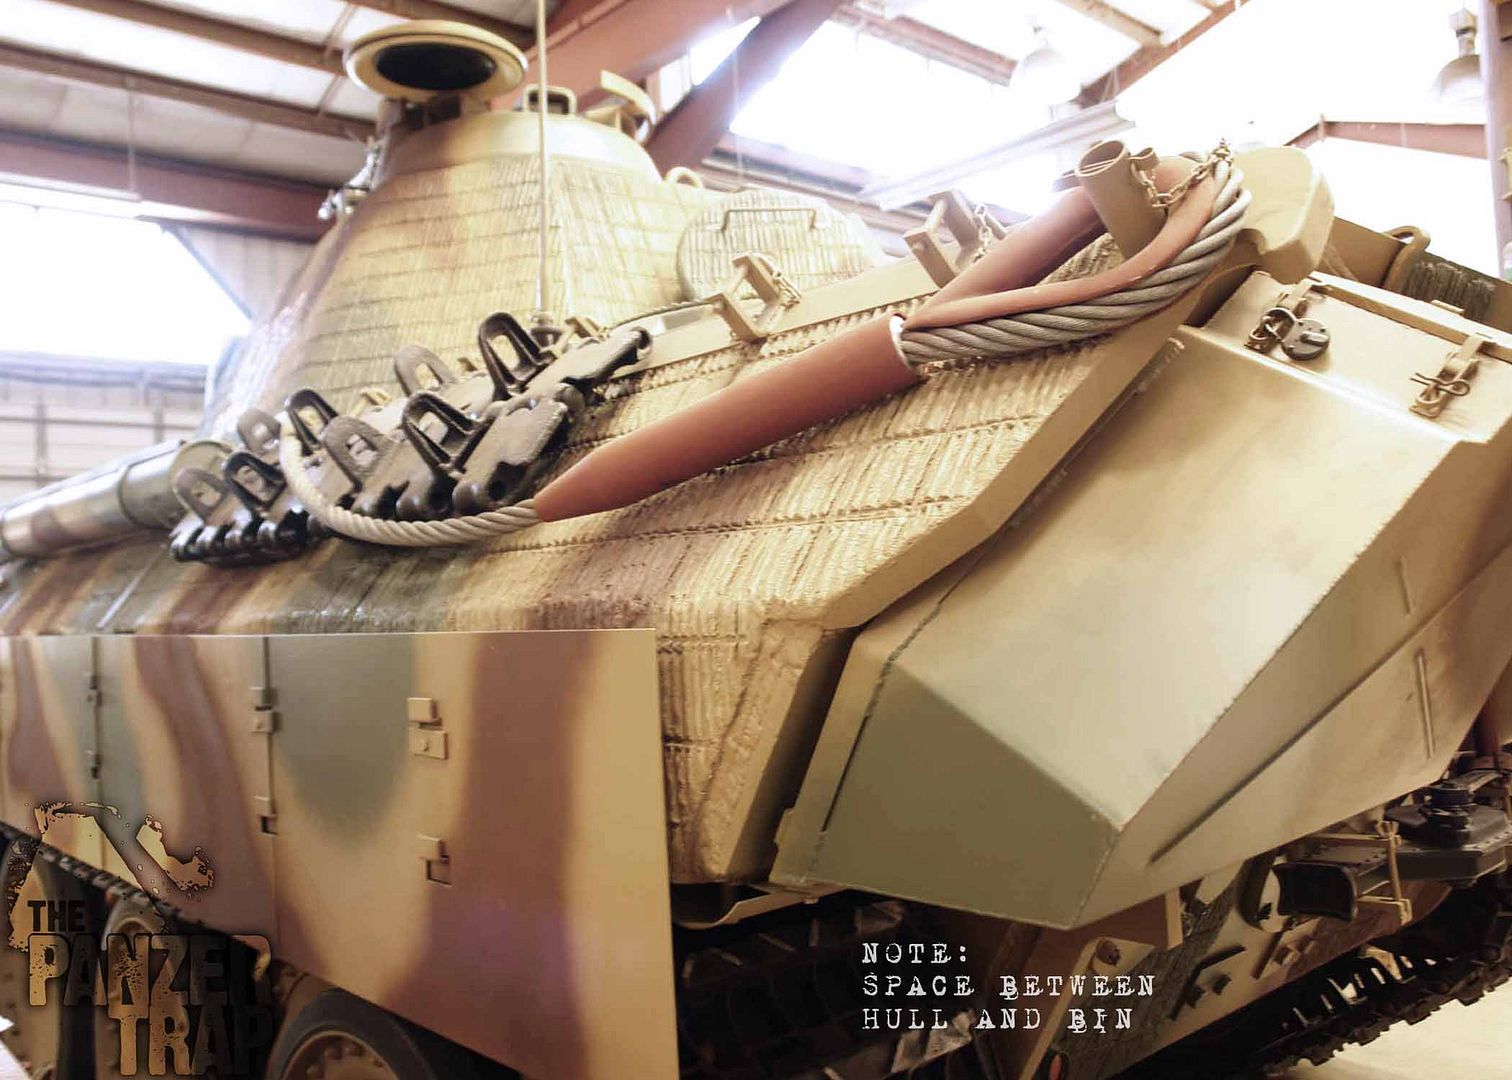
To confuse us even more museum "restored" Ausf G has different layouts, for example the Overloon G has its cover completely exposed

The correct way was like seen in Doyle drawings (Panzer Tracts 5-3) the cover was ½ hidden behind the box as seen in this photo.

With a space between the box and the rear plate as seen in Tim’s photos is how it was done.
Please note this space was only on the LHS box (also seen in Tim’s photo)
Kind regards
Kent
Posted: Sat Jan 22, 2011 4:02 pm
by Steve Norris
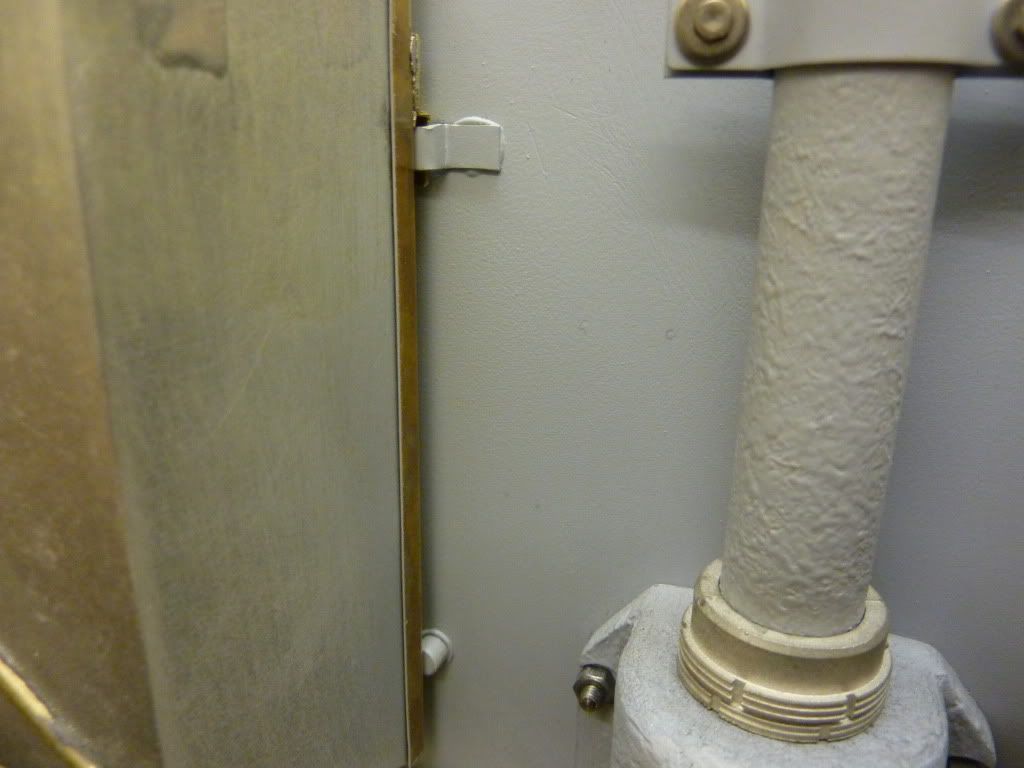
Its amaizing how a simple question about a small detail can throw up a wealth of detail information.
I have been thinking about how to fit the stowage bins for a few days now and with this extra information i have formed a plan:-
The bins supplied in this kit are machined out of solid aluminium block and are very well done, the ony down side is that they are open backed as seen below
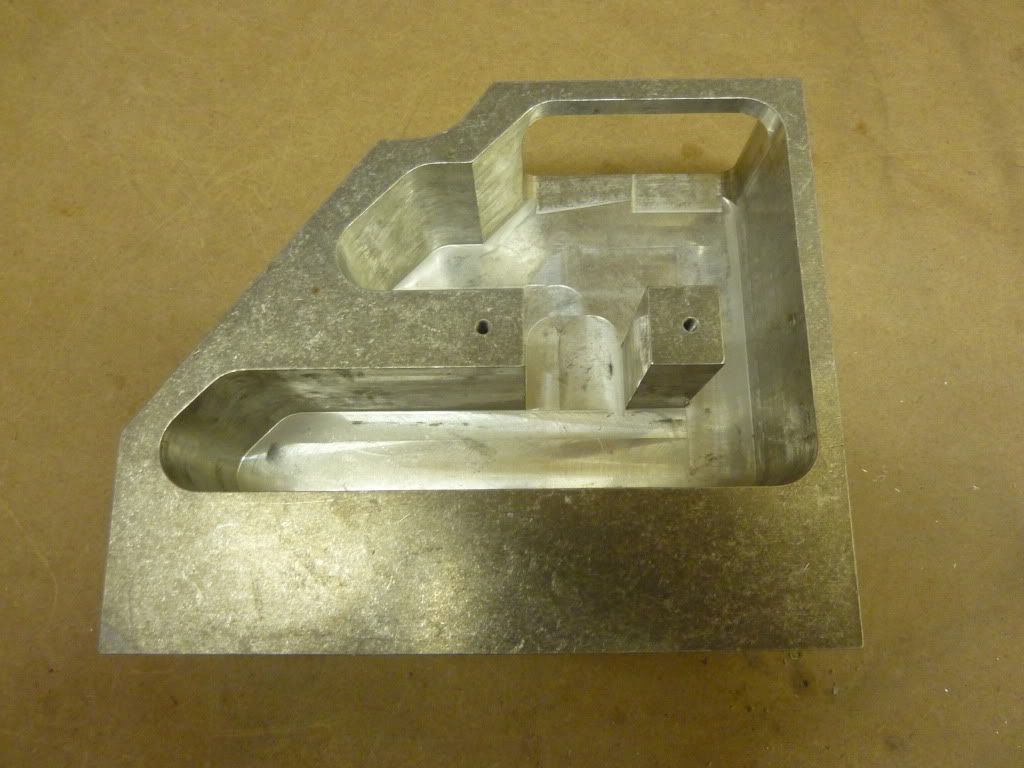
Being open backed is not a problem if you were to mount them directly to the rear plate but as we all now know there was a gap and a solution is required.
My plan is to bond a brass sheet to the back with L profile brass sections soldered to it along both sides, this should simulate the strips shown welded to the bins in Tims photos. I will use spacers between the original mounting holes and the bin to attach it to the rear plate, the reason for this is that the bins are quite heavy and if attached using scale attachments i dont think the would stay attached for long.
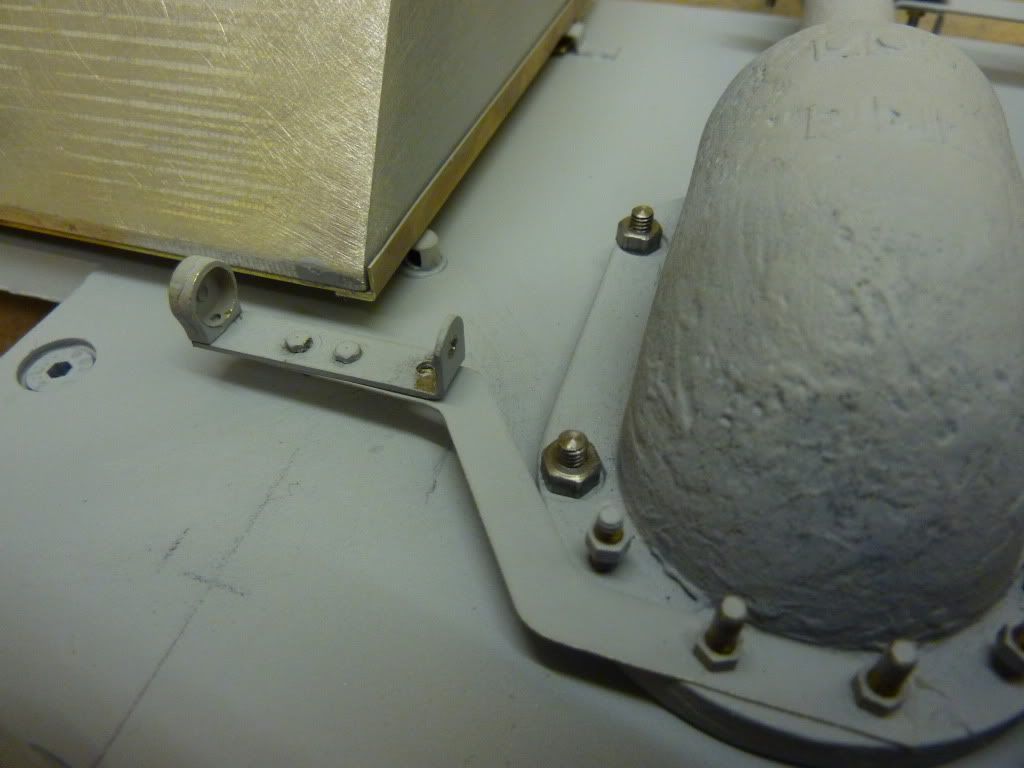
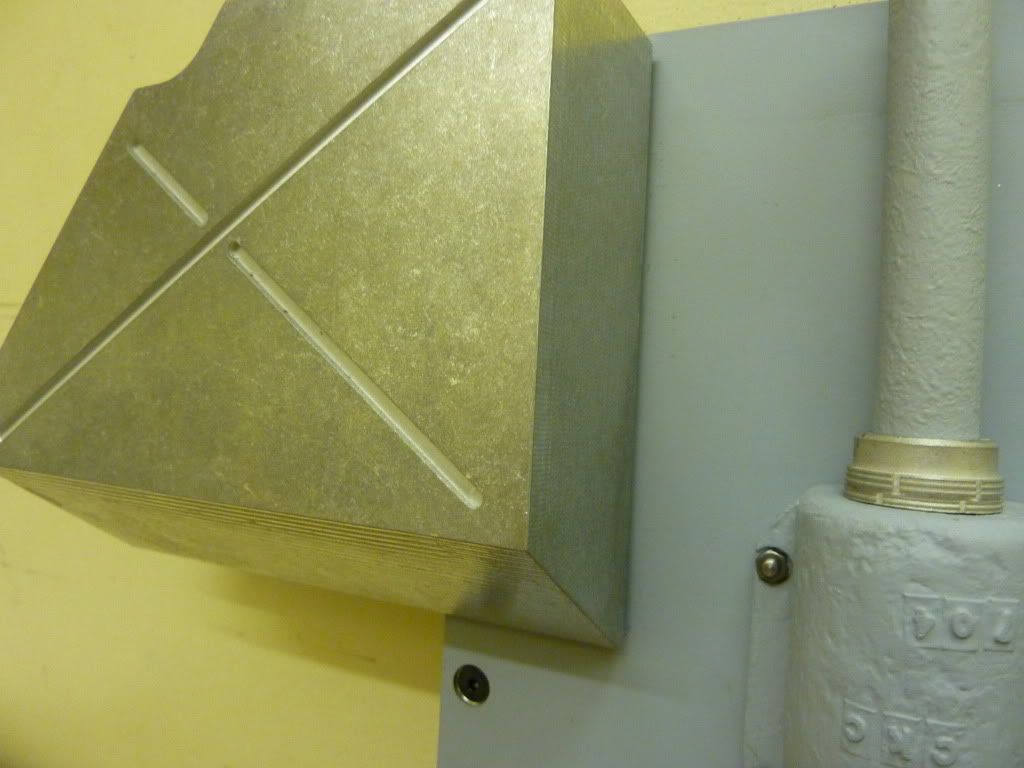
Below is a shot of the bin mounted with some spacers behind it, This is just a trial fit and the spacer thickness has yet to be determined.
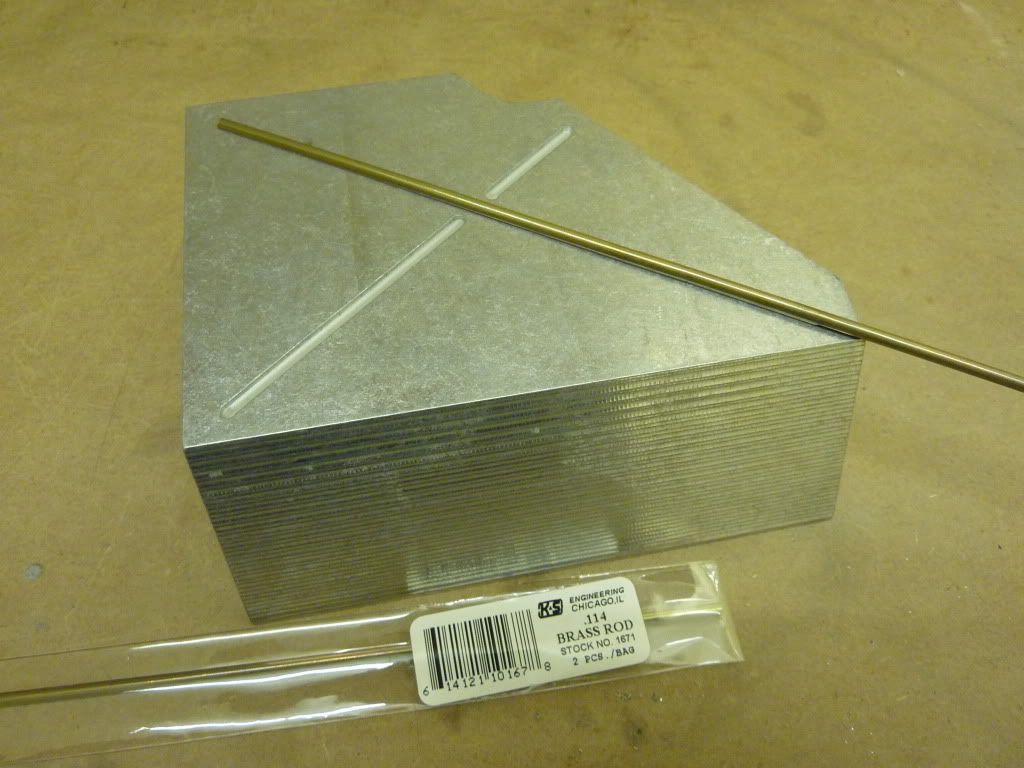
The next shot shows the front (rear) face of the bin, The only problem i can see with it is that the reinforcing ribs are machined into it rather than standing proud of it. This can be easily fixed with some brass rod as shown, It needs cutting to length the ends rounding and bonding in position with plenty of araldite. Dont forget that this will ultimatly be covered by Zimmerit so a perfect job is not neccesary.
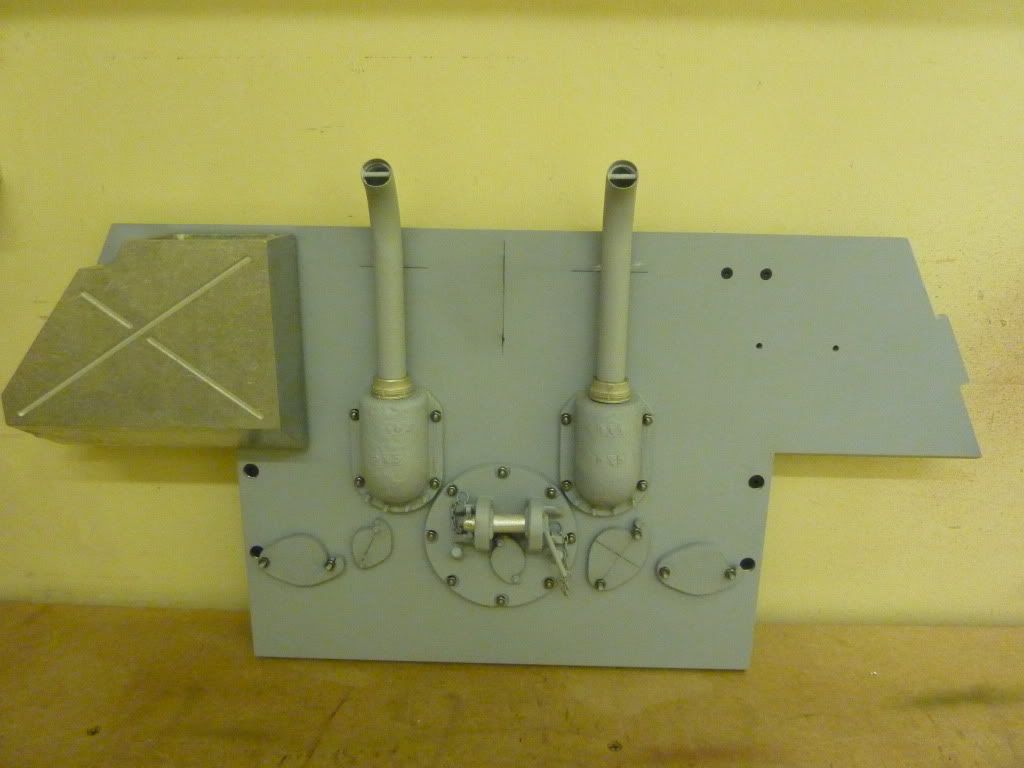
The final shot is an overall view of the rear plate with the bin slaved in place and the completed exhausts, Brackets are still required for the exhaust system but i cannot make these untill i have the jack and its mounting hardware.
I will post some further photos when i have the bins completed.
Regards
Steve
Posted: Sat Feb 05, 2011 10:30 pm
by Steve Norris
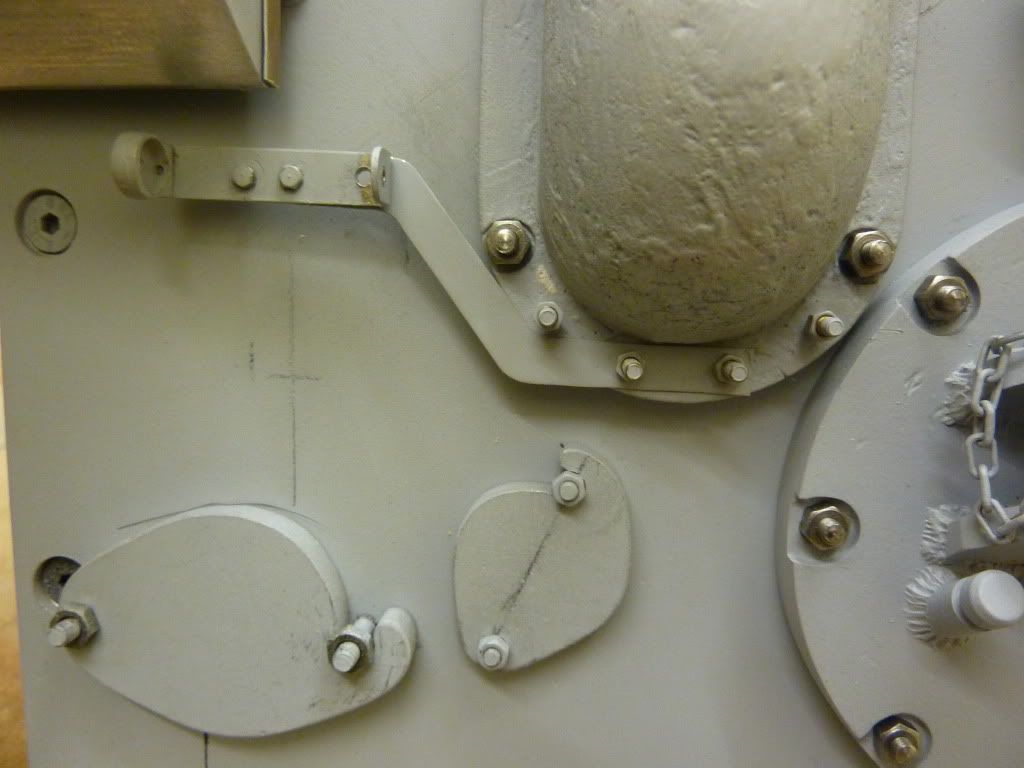
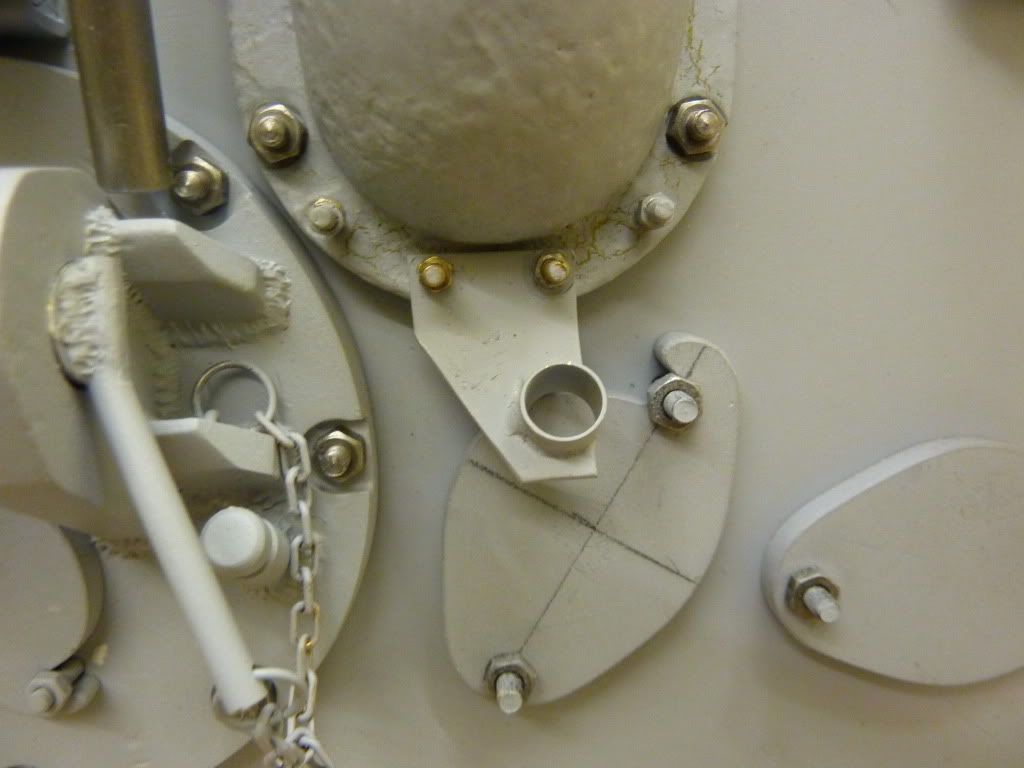
Time for another update, so if you can stand it heres some shots of my back end
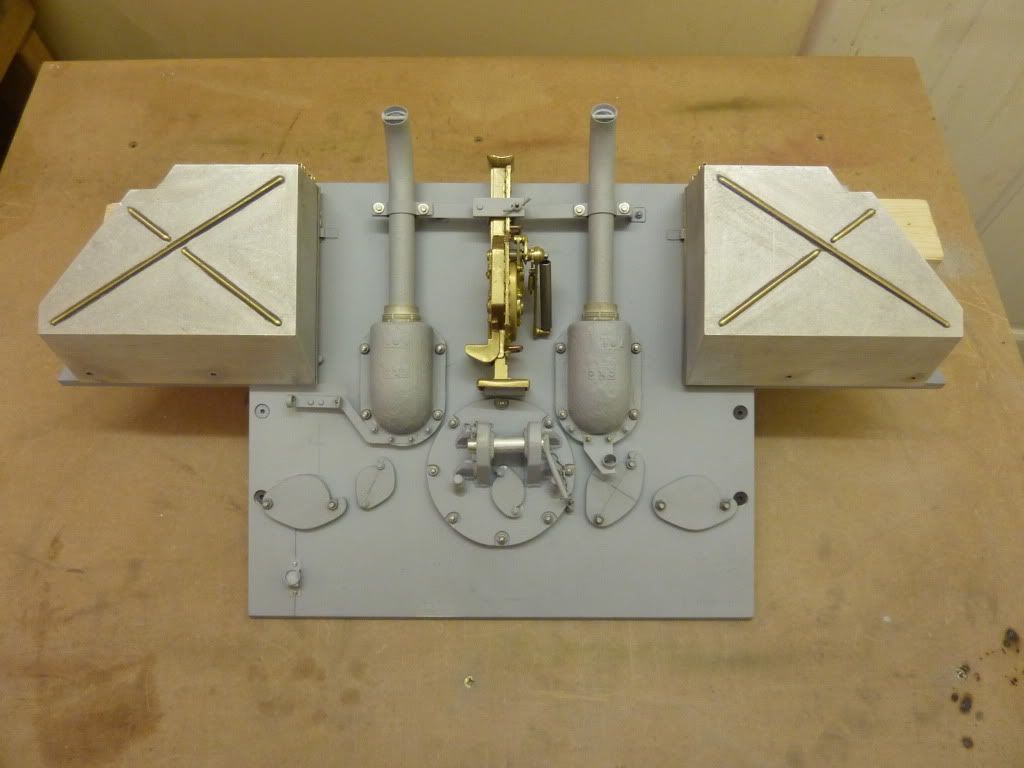
An overall view of the almost complete rear plate.
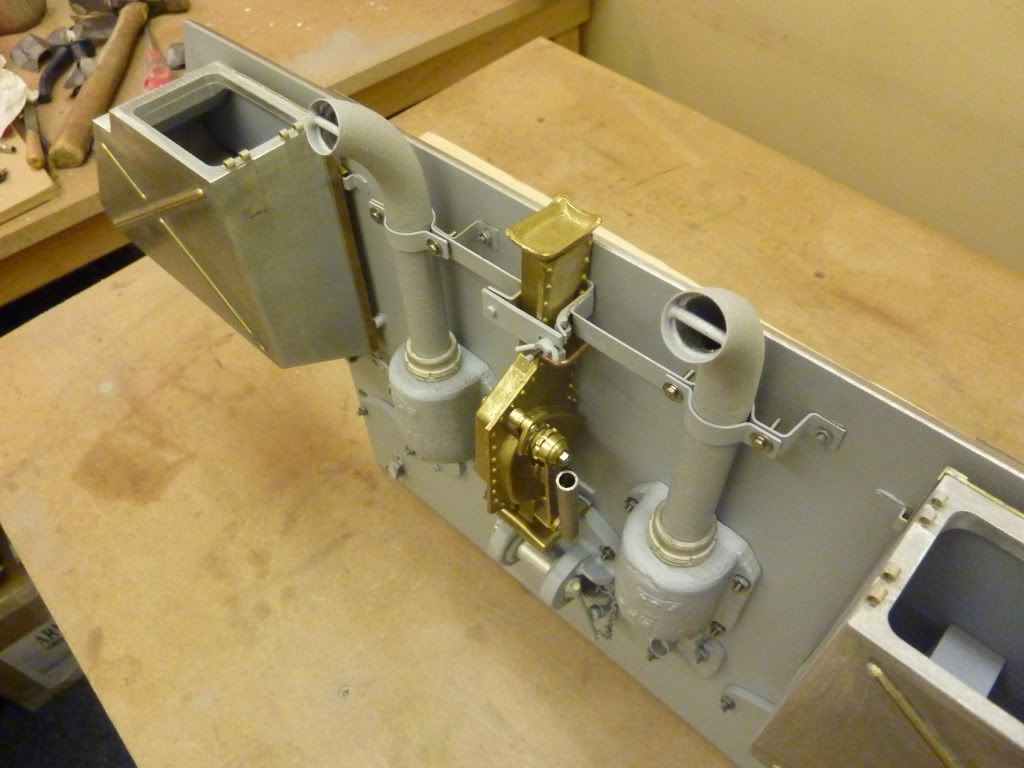
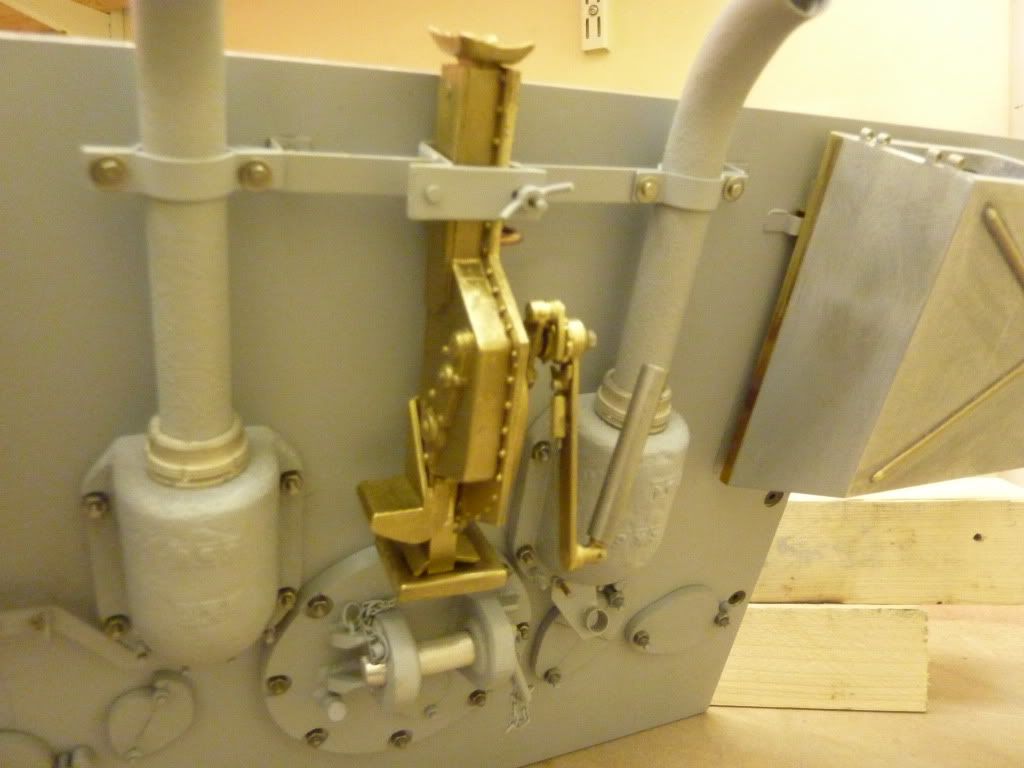
A couple of closer shots showing some of my added details, some fine tuning to do yet like weld detail on the bins and bin lids and latches.
More to follow
Steve
Posted: Sun Feb 06, 2011 12:10 am
by Steve Norris
Posted: Sun Feb 06, 2011 2:00 am
by Tim Bowman
Go man go!!

Excellent Steve!(no surprise)
best regards
Tim
Posted: Sun Feb 06, 2011 6:02 am
by Luca Fossa
Posted: Sun Feb 06, 2011 12:59 pm
by simon_manning
i always enjoy your builds steve, they are quality, lots of consideration on every step, no you've got us all interested keep em coming. simon manning.