Does anyone have the forum link that translates german paint colors into Tamiya colors? I have Dunkelgelb = Tamiya TS-3.
Thanks,
Brown
Brown's King Tiger
-
Brown Hawkins
- Posts: 204
- Joined: Sat Aug 01, 2009 12:34 am
- Location: Denver, Colorado
- Been liked: 33 times
-
Brown Hawkins
- Posts: 204
- Joined: Sat Aug 01, 2009 12:34 am
- Location: Denver, Colorado
- Been liked: 33 times
See what you guys think... I am wondering how much thread to show for the 7BA wheel bolts, more or less. I'm using small washers to adjust the amount of bolt to show above each nut. The bolts around the hub are 10 BA.

The special bolts for the wheel middle will be here in a week or 2.


I used 7BA small head bolts on the central part of the rear deck as seen on the forum, but wonder if some folks used regular 7BA bolts instead? Some of the 7BA special are kinda' swallowed up here and there. Still need to finish the supports for the sides of the rear deck per Simmon Manning's design. Any advice appreciated.
The special bolts for the wheel middle will be here in a week or 2.
I used 7BA small head bolts on the central part of the rear deck as seen on the forum, but wonder if some folks used regular 7BA bolts instead? Some of the 7BA special are kinda' swallowed up here and there. Still need to finish the supports for the sides of the rear deck per Simmon Manning's design. Any advice appreciated.
-
Dale jordan
- Posts: 1429
- Joined: Fri Jul 13, 2007 1:10 am
- Location: Port Macquarie Australia
- Been liked: 429 times
- Contact:
Hi Brown . One thing i would do . before you start to bolt your wheels together , make sure you wash and scrub all that white power off your wheels ... It's left over machine fluid , otherwise your primmer will not stick ... I used hot soapy water and a tooth brush to get in the grooves then wet and dry sand paper to clean them up . I do this with all the hull plates as well as other parts ...Dale
-
Brown Hawkins
- Posts: 204
- Joined: Sat Aug 01, 2009 12:34 am
- Location: Denver, Colorado
- Been liked: 33 times
I scaled a bunch of parts from the DVD I ordered from Sven with Canvas. It's kind of cool because you can set it up to convert the actual dimensions to the scale size. I also scaled some of the actual photos to get the angles and curves correct. I was surprised how different the actual rear decks hooks are from those in the kit. After looking at all of the hi res photos it seems every nut on the KT has a lock tab under it. This weekend I'll see how many parts I get completed.
These drawings are rather simple 2D but to scale on the printed sheets. The good thing is that I can measure directly off the drawings for thicknesses and shapes on the workbench or in a hobby store.

Most of my small scale bolts, nuts, and rivets got here this week. Waiting on a big lot of parts from Mr. Winstone; icing for the cake, I mean tank!
These drawings are rather simple 2D but to scale on the printed sheets. The good thing is that I can measure directly off the drawings for thicknesses and shapes on the workbench or in a hobby store.
Most of my small scale bolts, nuts, and rivets got here this week. Waiting on a big lot of parts from Mr. Winstone; icing for the cake, I mean tank!
Last edited by Brown Hawkins on Wed May 05, 2010 2:40 pm, edited 1 time in total.
-
simon_manning
- Posts: 2036
- Joined: Fri Nov 02, 2007 8:51 pm
- Location: new forest,hampshire,u.k.
- Been liked: 1661 times
some interesting changes to make brown,and some usefull info from sven,the extra effort put in at the early stages makes the most of these kits,its hard to go back once completed,i lke detail but some of mine is incorrect and needs changing,i should have waited a bit longer for more info. regards simon manning,
-
Brown Hawkins
- Posts: 204
- Joined: Sat Aug 01, 2009 12:34 am
- Location: Denver, Colorado
- Been liked: 33 times
Drew out the KT air filters from a drawing I found on:
http://www.panzerbasics.com/index_files ... awings.htm
I'll work out details from some of the books I have, but I think this is a good start:

I found a place online that has the exact dimension aluminum tubing I need to make the big round part of the air filter. I'll make the "boxes" out of sheet aluminum and the small side tubes from brass tubing. Still have to think about all of the other details.

http://www.panzerbasics.com/index_files ... awings.htm
I'll work out details from some of the books I have, but I think this is a good start:
I found a place online that has the exact dimension aluminum tubing I need to make the big round part of the air filter. I'll make the "boxes" out of sheet aluminum and the small side tubes from brass tubing. Still have to think about all of the other details.
-
Brown Hawkins
- Posts: 204
- Joined: Sat Aug 01, 2009 12:34 am
- Location: Denver, Colorado
- Been liked: 33 times
MAYBACH HL 230 P45 Air Filters
Does anyone know if the KT MAYBACH HL 230 engine has a different intake manifold from the Tiger 1 version of the same engine? The centers of the new air filters I am making are a little off center from the current air filters. If there is a different manifold on the latest Maybach 230 engines I'm good. However, my scaling could be off so I'll double check my drawings with a different engine plan I found last night.
I'll post the new and improved scaled down plans shortly.
Brown
I'll post the new and improved scaled down plans shortly.
Brown
-
Sven Strobbe
- Posts: 301
- Joined: Mon Jan 12, 2009 11:08 am
- Location: Belgium,Gent
- Been liked: 11 times
- Contact:
Brown
I see you got the DVD...
But you have to keep in mind that some parts on the King Tiger are done after the war.
So when you copy exactly everything as you see it you want have the original...
For instance the left hatch (drivers hatch) is a copy, the right hatch is the original with the original bolts.
The centre of the wheels, the cover should have grease nipples, those on the tank are copies made after the war for the restauration...
The mudguards are also done after the war...
So to be sure make a reference to pictures from then and now...
Regards
Sven
It's a beautiful day to go out in my King Tiger
-
Brown Hawkins
- Posts: 204
- Joined: Sat Aug 01, 2009 12:34 am
- Location: Denver, Colorado
- Been liked: 33 times
Now for the proverbeal "wheel marathon!" My package from Steve W. arrived yesterday with a sorts of goodies including the special wheel bolts and the bolt hole drilling template. It's going to take most of the week I think to get the wheels together and painted. Heres what I have for now:
Steel wooled and then used 400 grit wet/dry paper on all of the wheels

Got one set of lock tabs on. Only 17 to go! I was trying for a random tab arrangement. I may go for a more regular look after checking the books and Sven's DVD again. Flat head mini pliers work great for the final tab bending.


This all should look VERY familiar.
Brown
Steel wooled and then used 400 grit wet/dry paper on all of the wheels
Got one set of lock tabs on. Only 17 to go! I was trying for a random tab arrangement. I may go for a more regular look after checking the books and Sven's DVD again. Flat head mini pliers work great for the final tab bending.
This all should look VERY familiar.
Brown
-
simon_manning
- Posts: 2036
- Joined: Fri Nov 02, 2007 8:51 pm
- Location: new forest,hampshire,u.k.
- Been liked: 1661 times
-
Brian Leach
- Posts: 363
- Joined: Tue Nov 18, 2008 4:15 pm
- Location: Auburn, Wa USA
- Been liked: 3 times
Brown,
Hi, this is a 1/16 KT site, but the gentleman building it should be doing 1/6th. The details are incredable and, I think, possibly helpful here.
This link is to the 1/16 HL230 P45 engine he built for his project
http://public.fotki.com/Liejon/scale-mo ... trumpeter/
Cheers,
Brian
Hi, this is a 1/16 KT site, but the gentleman building it should be doing 1/6th. The details are incredable and, I think, possibly helpful here.
This link is to the 1/16 HL230 P45 engine he built for his project
http://public.fotki.com/Liejon/scale-mo ... trumpeter/
Cheers,
Brian
-
Brown Hawkins
- Posts: 204
- Joined: Sat Aug 01, 2009 12:34 am
- Location: Denver, Colorado
- Been liked: 33 times
Thanks Brian for the website. Here is the other engine plan that has more detail of the air filters:


There were at least 2 versions of the KT air filters. The top plates are different. I'll post my new filter version when I get one put together. The special tubing for the main body is on order now.
Still have to drill the new holes in the wheel hubs.
Brown
There were at least 2 versions of the KT air filters. The top plates are different. I'll post my new filter version when I get one put together. The special tubing for the main body is on order now.
Still have to drill the new holes in the wheel hubs.
Brown
-
Brian Leach
- Posts: 363
- Joined: Tue Nov 18, 2008 4:15 pm
- Location: Auburn, Wa USA
- Been liked: 3 times
-
Brown Hawkins
- Posts: 204
- Joined: Sat Aug 01, 2009 12:34 am
- Location: Denver, Colorado
- Been liked: 33 times
Brian,
The second set of engine drawings are from the book:
Pz.Kpfw.VI Tiger Ausf. B Konigstiger Technical and Operational History
It has a lot of good stuff in it. Much is a rehash of just about every other King Tiger reference. What stands out are the many, many line drawings of KTs from all angles. The color computer drawings are ok but not as good as the paintings in the "Tigers in Combat" books IMO.
Later,
Brown
-
Brown Hawkins
- Posts: 204
- Joined: Sat Aug 01, 2009 12:34 am
- Location: Denver, Colorado
- Been liked: 33 times
I must have taken the hull apart 5 times since my last post. It's too embarassing to list out all of the mistakes I have made over the last month. I know how to it correctly and it is all red loc-tited! The wheels took a lot longer than planned. Some of the suspension arms were tight and needed much sanding to loosen them up. Some of the wheels have a slight wobble to them. We will see if this is a problem during running.
A special thanks again to Steve Winstone, Mike Stannard and Dale Jordan for bolts and parts used in the build.
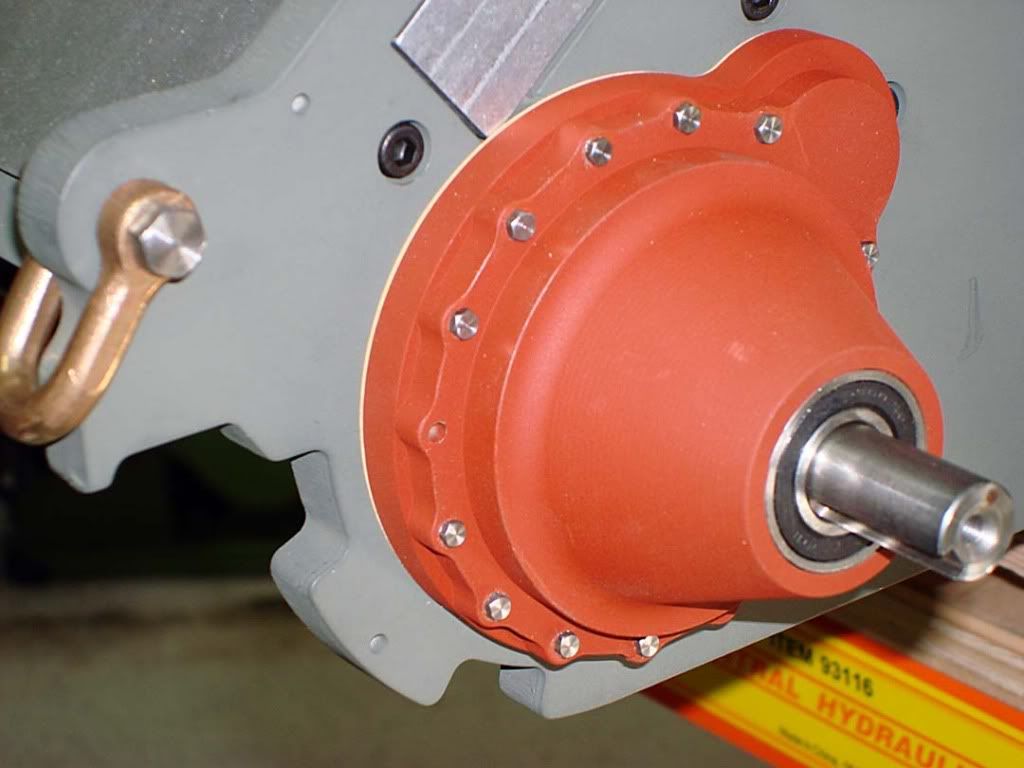
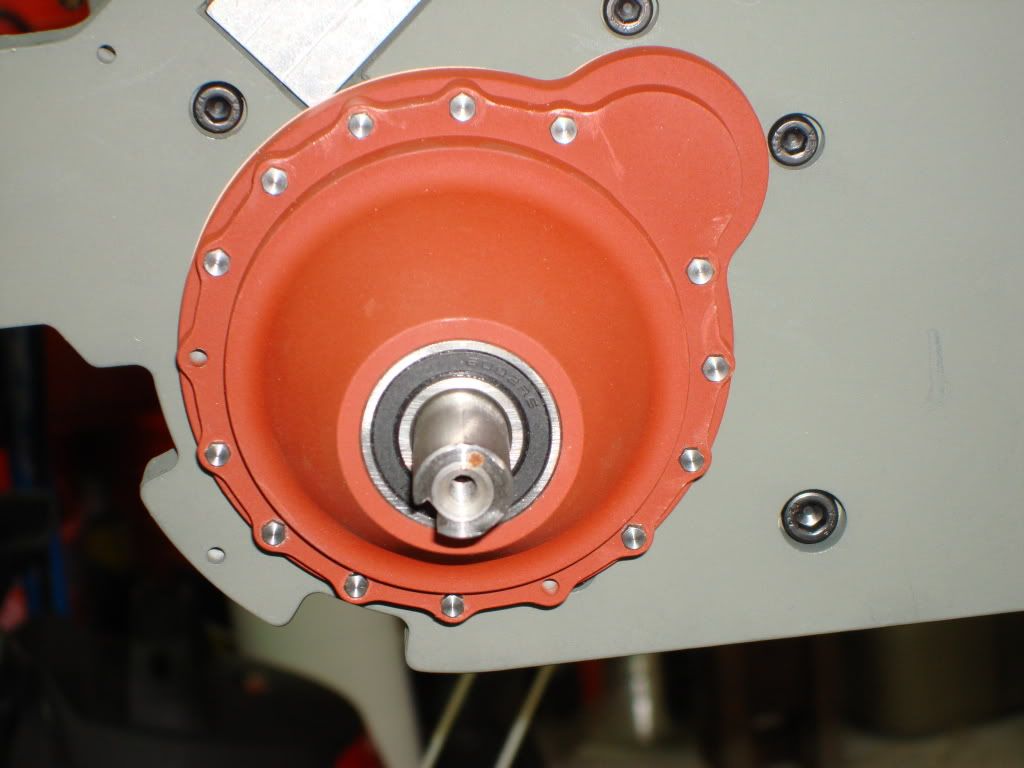
I did not plan this out, but it seems to work. I used leftover special wheel bolts and 6BA small-head bolts to attach the drive housings to the hull. The wheel bolts go through the lower hull plate while the 6BAs thread into the hull plates. I also recessed the bolts that show in the front below the glacis plate. There are actually only 3 recessed bolts on the real tanks; I may work this in later...we will see. Is it just mine or do all KT drive housings have 2 holes that don't take a bolt? The 2 empty holes in the pics below line up on a caphead bolt in the hull. Do you just leave them empty or fill with a dummy bolt?
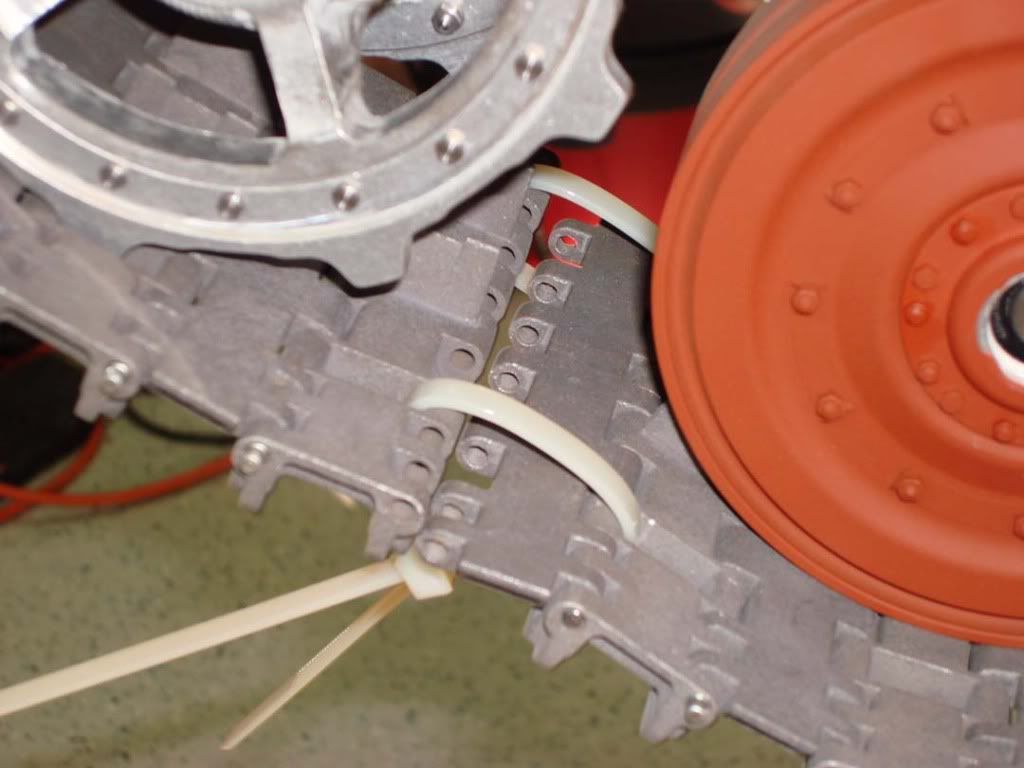
Here is the a photo sequence of the final track pinning for those who have not gotten there yet. I used big zip ties to join the tracks as mentioned in earlier posts.
Starting out...
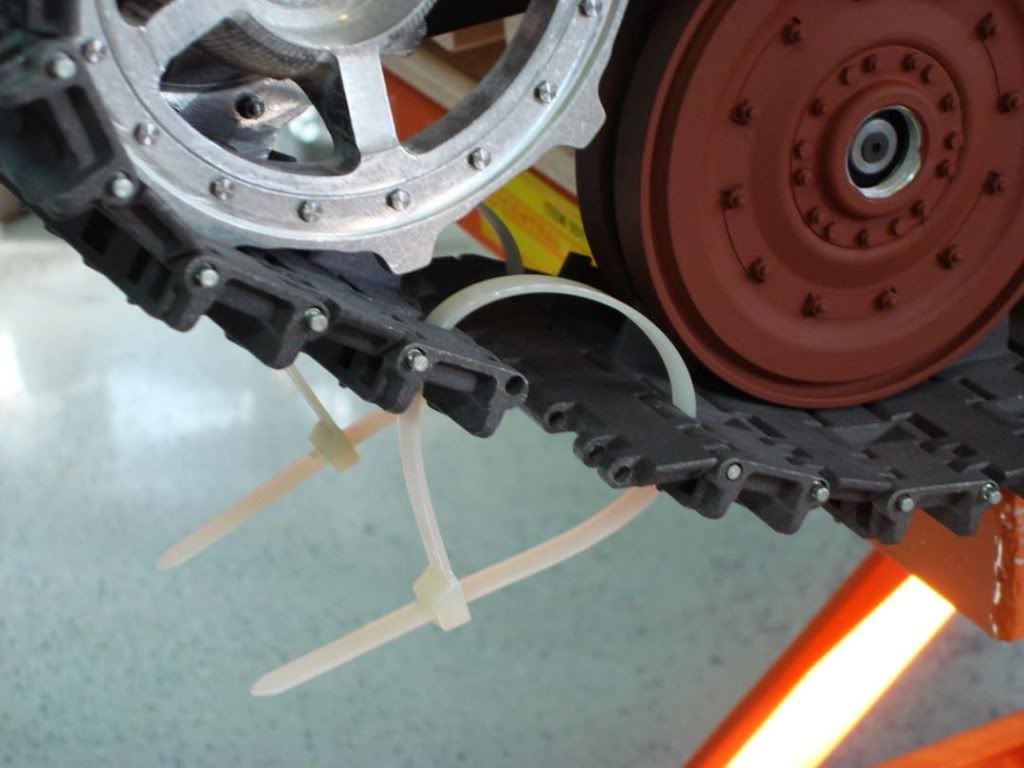
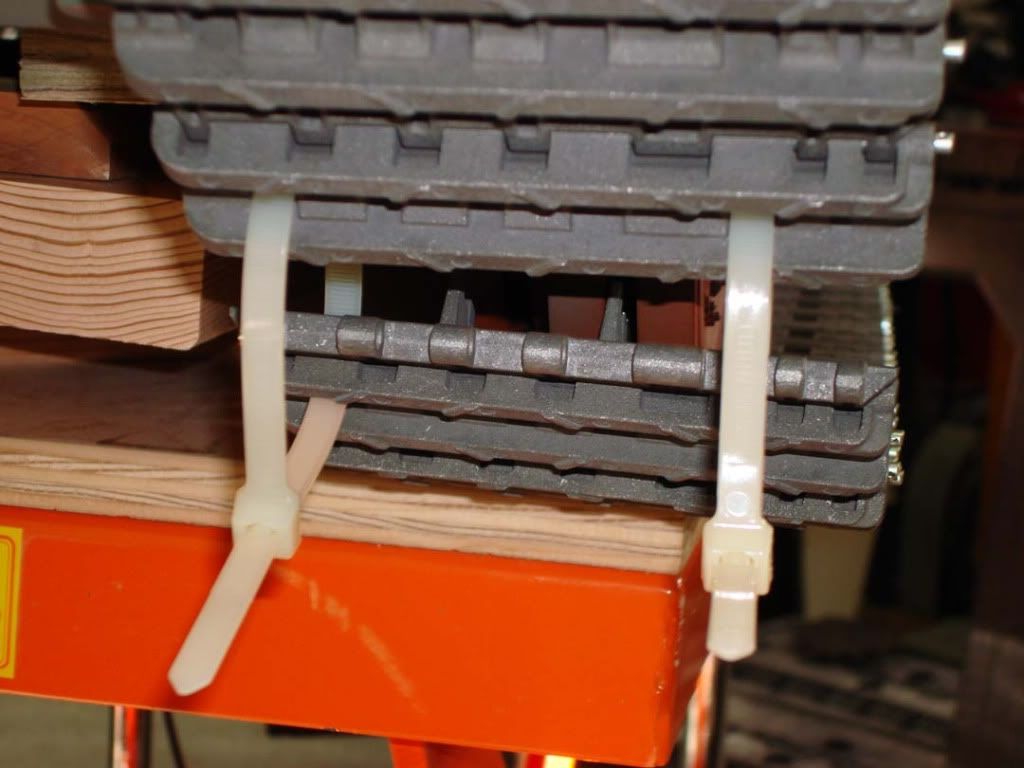
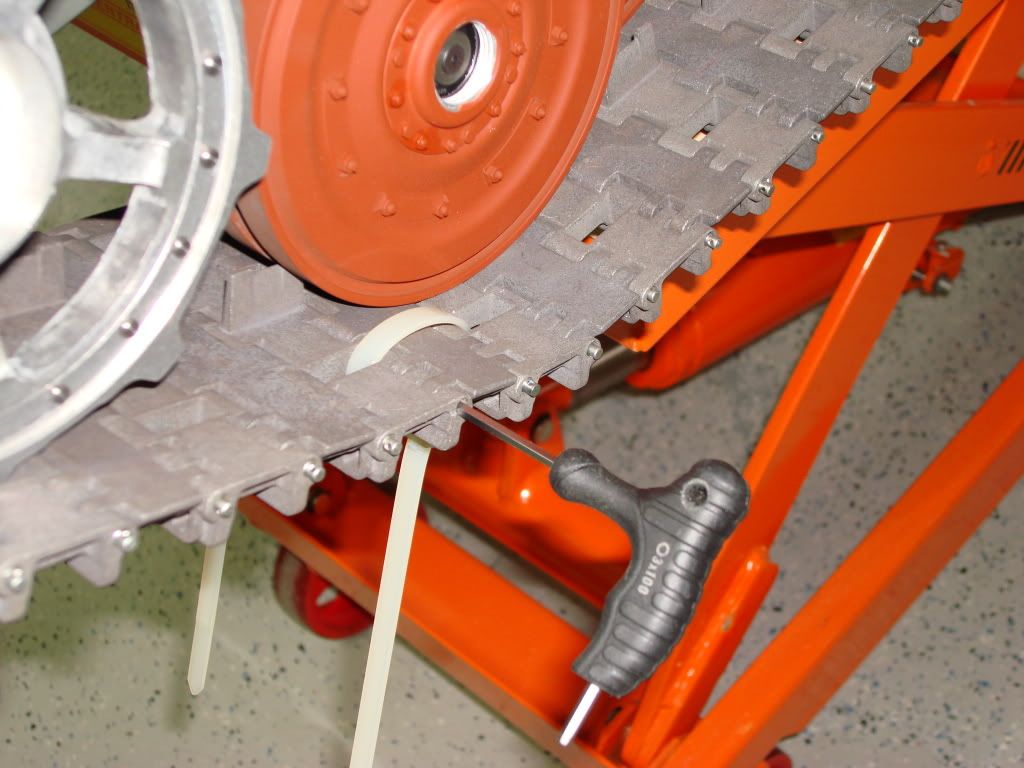
Almost there...
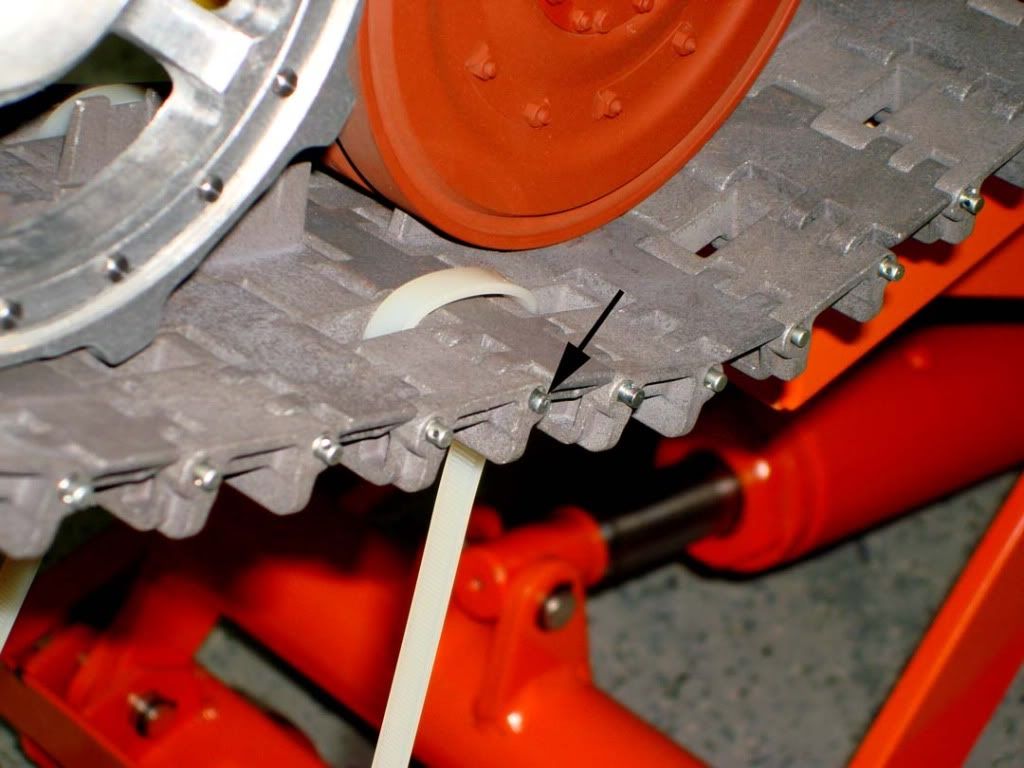
I used an allen wrench at the last to get the holes lined up so I could inseret the pin from the backside.
Finished...
Here is what I have so far:
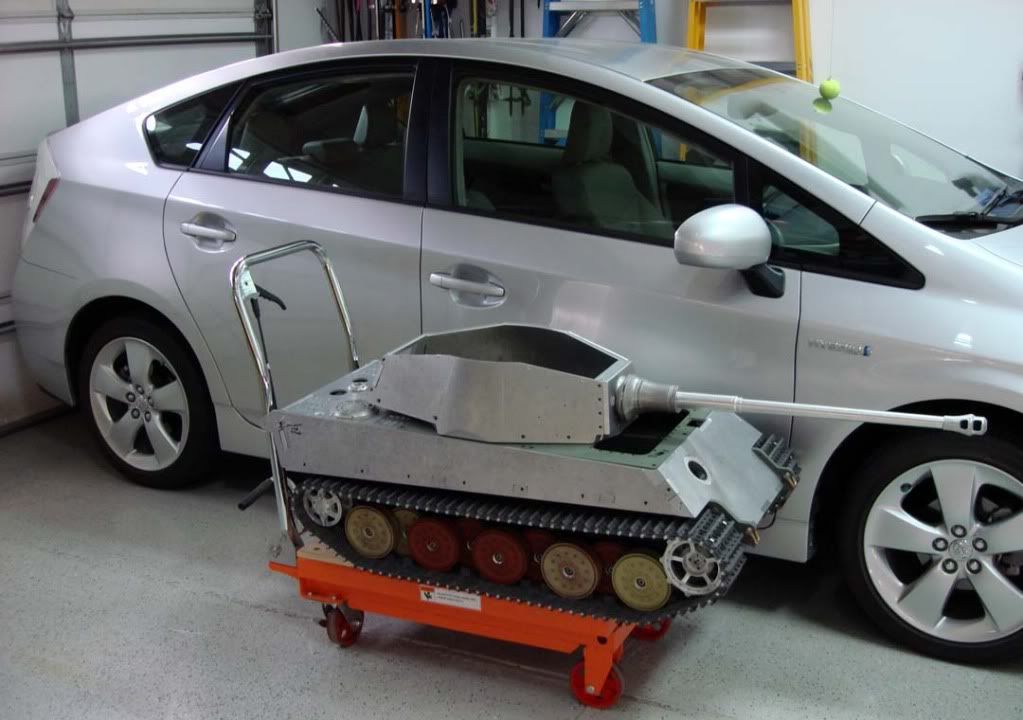

I'll push and pull the tank around tomorrow to loosen up the tracks and see if I can get them to fit better. Also need to finish the wheel hubs now that I have Mr. Winstone's small lock tabs for them. Those little 10BA bolts are a pain! Wiggytronics' smokers are on their way here and maybe I'll get the motors in early July. Next I need to weld up the hull, zimmerit, and finish the turret.
Does anyone have or know of a source of small cone-head bolts? I need 6 ch bolts that are smaller than the ones that came with the kit for the rear hull details. I may have to make my own.
Cheers,
Brown
A special thanks again to Steve Winstone, Mike Stannard and Dale Jordan for bolts and parts used in the build.
I did not plan this out, but it seems to work. I used leftover special wheel bolts and 6BA small-head bolts to attach the drive housings to the hull. The wheel bolts go through the lower hull plate while the 6BAs thread into the hull plates. I also recessed the bolts that show in the front below the glacis plate. There are actually only 3 recessed bolts on the real tanks; I may work this in later...we will see. Is it just mine or do all KT drive housings have 2 holes that don't take a bolt? The 2 empty holes in the pics below line up on a caphead bolt in the hull. Do you just leave them empty or fill with a dummy bolt?
Here is the a photo sequence of the final track pinning for those who have not gotten there yet. I used big zip ties to join the tracks as mentioned in earlier posts.
Starting out...
Almost there...
I used an allen wrench at the last to get the holes lined up so I could inseret the pin from the backside.
Finished...
Here is what I have so far:
I'll push and pull the tank around tomorrow to loosen up the tracks and see if I can get them to fit better. Also need to finish the wheel hubs now that I have Mr. Winstone's small lock tabs for them. Those little 10BA bolts are a pain! Wiggytronics' smokers are on their way here and maybe I'll get the motors in early July. Next I need to weld up the hull, zimmerit, and finish the turret.
Does anyone have or know of a source of small cone-head bolts? I need 6 ch bolts that are smaller than the ones that came with the kit for the rear hull details. I may have to make my own.
Cheers,
Brown