Page 2 of 3
Posted: Wed Feb 10, 2010 8:22 am
by Adrian Harris
That's some outstanding bits of machining on there if you've only just taken delivery of a mill.

I have yet to invest in one but it's looking more and more likely when there are pictures such as these to show what is possible with them.
Adrian.
Posted: Wed Feb 10, 2010 10:08 am
by simon_manning
kingtiger masterpeice in the making,the recess for the rear hatch is a nice extra,i over looked that,keep the posts coming,simon manning.
Posted: Thu Feb 11, 2010 2:52 am
by Mark Bennett
Hi Adrian,
I'm just a novice learning how to use this milling machine -- but I'm having fun in the process
I've used the mill much more than I had expected and also use it instead of my drill press and belt sander. If you do decide to invest in one, I think you will be very happy with it.
Regards,
Mark
Posted: Sat Feb 13, 2010 4:25 am
by Robert E Morey
Mark,
Super job on your modifications and fitting of the turret parts. Very professional job! Looking forward to seeing more of your progress.
Bob
Posted: Sun Feb 14, 2010 2:32 pm
by Sven Strobbe
Mark
Great job...
You have an eye for details...
You can use the pictures...
That's why they're on the internet...
Regards
sven
Posted: Mon Feb 22, 2010 3:52 am
by Mark Bennett
Hello All,
I decided it was time to get back to work on the hull, so here are a few photos of my weekend progress.
Counter-bored the final drive bolt holes so they fit flush with the hull side per the actual vehicle.

Milled the final drive armor guards to that they are recessed from the hull side. Next, applied the welds using milliput. Hopefully, I’ll get better at doing the welds since it seems to take me a long time to finish them.

All of the bottom hull screw holes were counter-sinked and the cap screws replaced with new countersink screws.

Drilled and tapped holes to add stainless steel grease zerks for the torsion bars.

Regards,
Mark
Posted: Mon Feb 22, 2010 12:37 pm
by simon_manning
nice attention to detail mark,you can tell your looking closely,worth the extra effort ,regards simon manning.
Posted: Mon Feb 22, 2010 3:24 pm
by Adrian Harris
> Hopefully, I’ll get better at doing the welds since it seems to take me a long time to finish them.
Mark, I wouldn't worry about the time it takes you, they're the best looking welds I think I've ever seen on the forum

Have you made a concave tool to create the ridges

Adrian.
Posted: Mon Feb 22, 2010 5:15 pm
by Roland Mann
I have to agree with Adrian, this is the best welding I have ever seen - including my own !
In German : Absolut phantastisch. Looking foreward to see more of your work.
Roland
Posted: Mon Feb 22, 2010 5:23 pm
by Richie Wignall
Hi Mark
Love your welds, very nice indeed

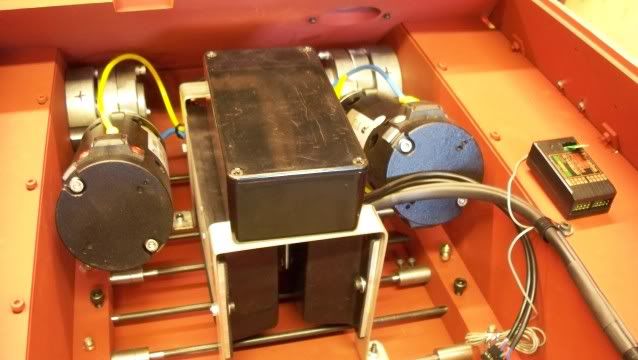
, I have noticed that you have fitted grease nipples. I did this also on my KT build at the very start. You will need to alter some of these, especially under the motors to 90 degrees nipples, as you can't get in with the grease gun when the motors are fitted.
The picture below shows 90 degree nipples fitted under the motors. Hope this helps.
Richie
Posted: Tue Feb 23, 2010 2:03 am
by Mark Bennett
Hi all,
Thanks for all the kind words.

Adrian, I did make a simple tool. I cut a brass tube lengthwise as described in the following article:
http://www.armorama.com/modules.php?op= ... 220&page=2
Making 90-degree fillet welds on the inside of the armor guard was a snap; however, the front welds were a challenge since the direction kept changing.
Again, thanks for the encouragement.
Regards,
Mark
Posted: Tue Feb 23, 2010 2:11 am
by Mark Bennett
Hi Richie,
Thanks for the info about the 90-degree nipples -- it looks like it will be a tight fit. I'll definitely have to order some 90-degree zerks.
I can't resist the urge to customize my tank, but I'm sure when I get the motion packs I'll find that I'll have to rework some of my planned "mods".
Regards,
Mark
Posted: Tue Nov 30, 2010 1:54 am
by Mark Bennett
I've been wanting to update the build for quite some time, but never seemed to get around to it. Unfortunately, I can't find the photos that I took earlier, so I'll have to just show the wheel pics that that I've been working on this week.
I got one of Steve Winstone's wheel hub templates to correct the bolt pattern as several others have posted earlier. Three of the holes are offsets of existing holes, so it has been a challenge to drill the offsets. I started by milling the new holes slightly oversized on the wheels and hubs.

[/img]
Next, I used alot of JB weld to fill in the old and new holes and then drilled the new holes to the correct pattern.


Here's the wheel hub covers with the new bolt pattern -- note the JB weld in grey.

Posted: Thu Jan 20, 2011 4:14 am
by Mark Bennett
I decided it was time to post a couple of more pics, so here's an update on my build.
I milled the extra bolt length off of all the wheels. They do look much better after being cut down.

The next photo is the modified wheel hubs with the correct 5-bolt pattern and the slots cut to represent the three parts on the actual vehicle. The idler and sprocket hubs have had putty applied to simulate the casting effect.

I used the mill to cut the slots in the axles to ensure that the cuts were perfectly flat. I also made a jig to set the angle to 36 degrees for all the axles.

The completed axles are shown in the lower hull. I also made a modification to the two rear armor plates so that I can weld them in place instead of being attached to the upper rear hull plating.

I made a new rear plate so that I can quickly remove the entire rear hull deck without using any screws. Here I'm doing the initial cutting to size.

Here is my new removable rear hull deck plate after cutting all the holes for bolts and vents. One of the two new armor plates is visible in the lower right. They are secured with two #0 countersunk screws.

Posted: Thu Jan 20, 2011 12:55 pm
by Steve Norris
Hi Mark.
Love the work you,ve done on the Tiger.
Its going to be superb when done.
Regards
Steve