A34 COMET
-
robert michael hilton
- Posts: 377
- Joined: Sat Apr 03, 2010 3:23 pm
- Location: Welshpool, Powys
-
phil fitzpatrick
- Posts: 2020
- Joined: Sat Dec 12, 2009 3:38 pm
- Location: Sambourne uk
- Been liked: 223 times
Idler parts
Hi Mick
I used the Locktight 480 to make sure and left it all night to be sure nothing
was going to creep into the bore of the bush.
My bushes were slightly longer than the hole in the hull,so I did a dry fit of the idler to see how the centre of the idler wheel would line up with the
gaps in the road and return rollers.
I then decided on having mine flush on the outside of the hull.
By then I had already discovered in my kit I only had plane 12 mm nuts
not the nyloc ones.
So I bought two of the thinner size because the ones we used at work
were the thicker ones and the nylon wouldnt have been on the thread.
I also discovered that the 12mm washer had an outside diameter just less
than the outside diameter of the bush,so would have done nothing if the
retainer of the bush had failed,it would have slid inside the hull bore.
I didnt like that so I bought two of what they call Penny washers because
they have an O/D of about a penny size.
I had to cut a flat on the one edge of the washer to stop it fouling on the
front armour.
When I fitted them I just did the nut up so that the outer tension plate
just touched the hull and moved by hand.
I didnt paint the inner or outer plates after removing all burrs and makeing sure the teeth engaged properly.
You can see from my pictues that they received a bit of green after fitting
when I did a bit of spraying.
I had to do a bit of fiddling with a file on my ratchet hanger so that the
ratchet had enough movement and I had to shim up the ratchet and ratchet hanger to line up with the teeth of the tension plates,just with some thin washers and it all worked fine.
Hope this helps a bit for you if yours doesnt go right first time.
Cheers
Phil
-
robert michael hilton
- Posts: 377
- Joined: Sat Apr 03, 2010 3:23 pm
- Location: Welshpool, Powys
-
phil fitzpatrick
- Posts: 2020
- Joined: Sat Dec 12, 2009 3:38 pm
- Location: Sambourne uk
- Been liked: 223 times
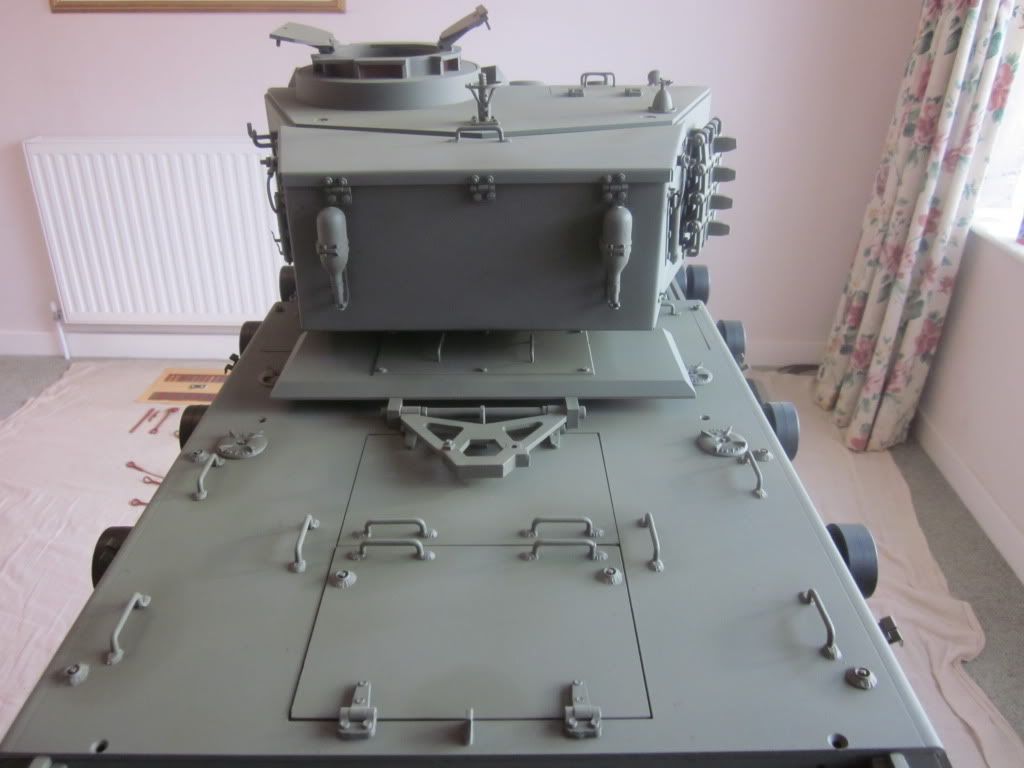
A lot more parts and detail
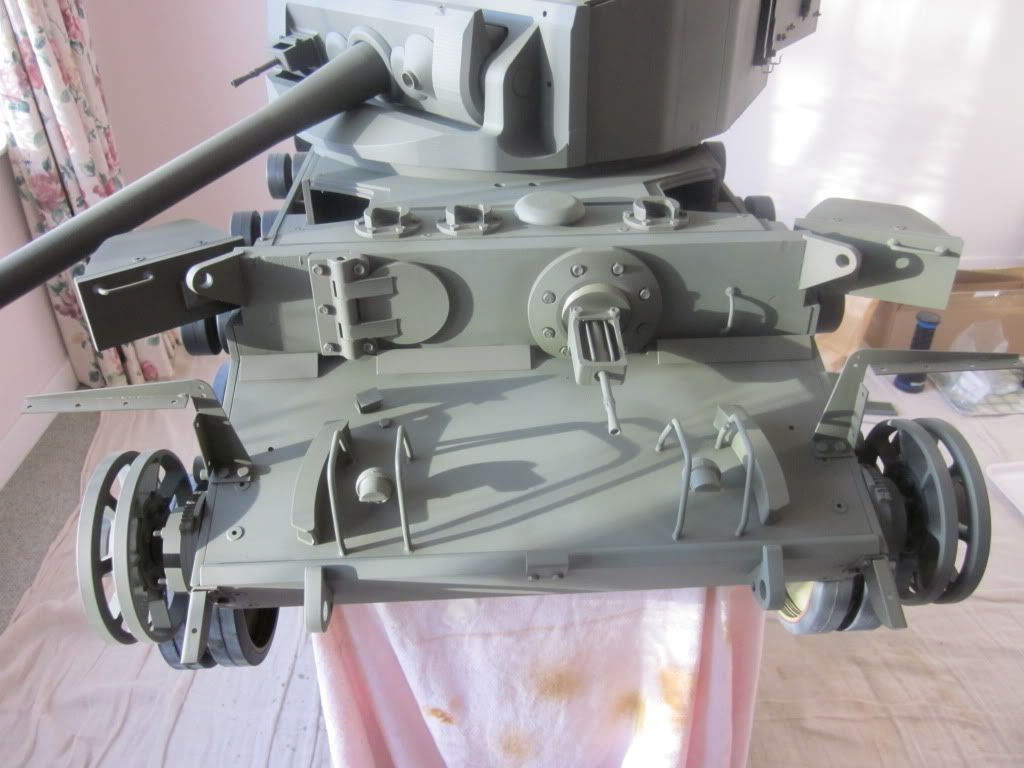
Rear tow hook and oil filters
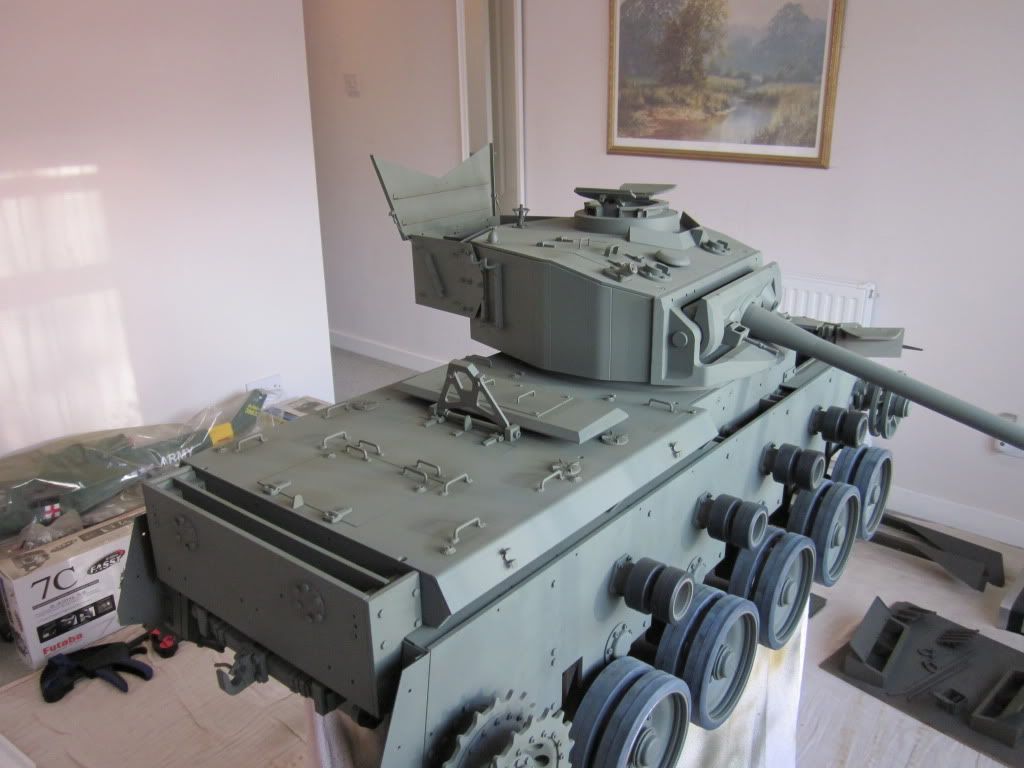
Made some little spare track support brackets,there was just enough
threaded hole left in the track support bar fixings to turret,to screw them on
Spare track Links hanging on them

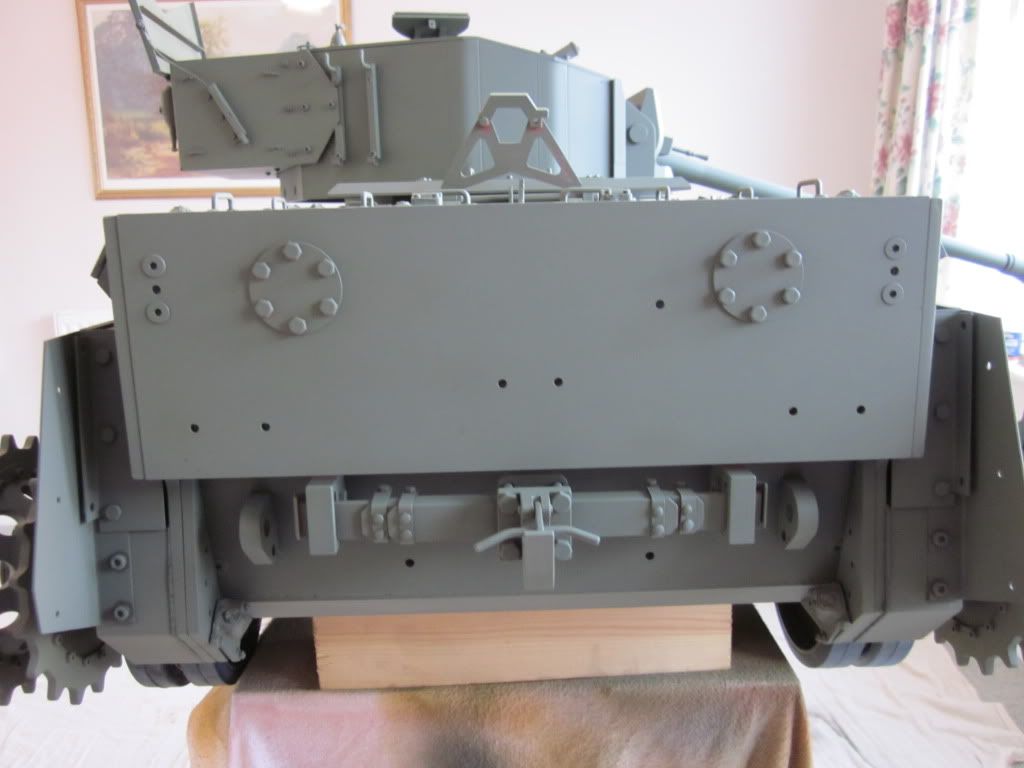
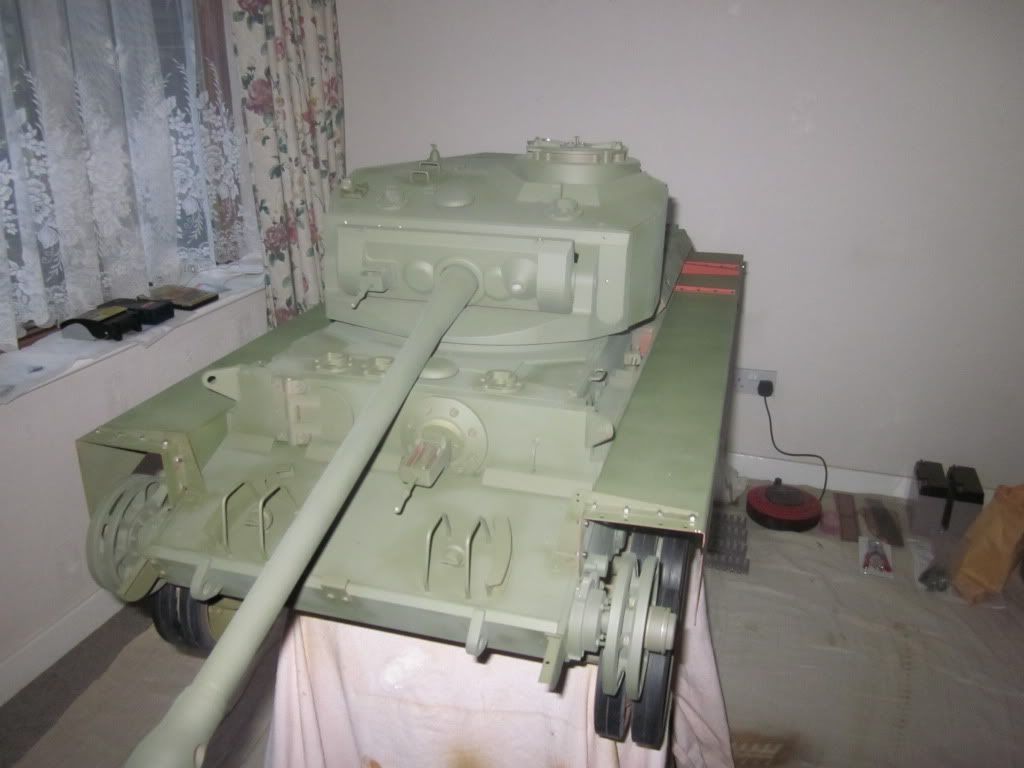
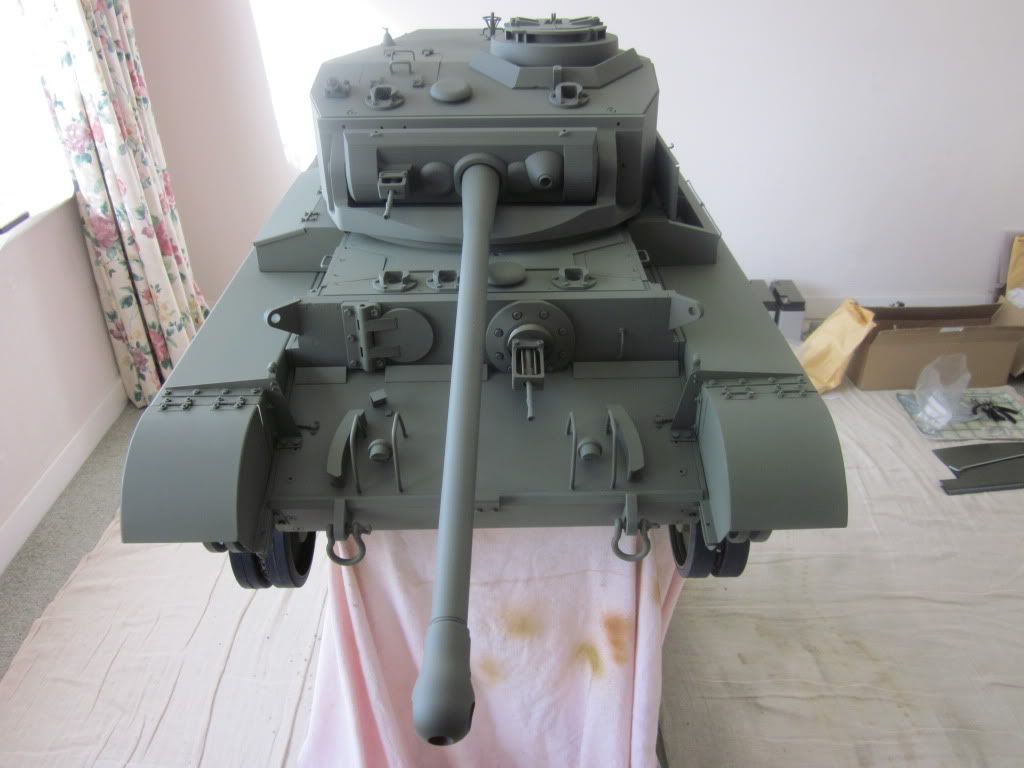
More front details put on
Went round with the paint covering up the primed detail parts
Front and side
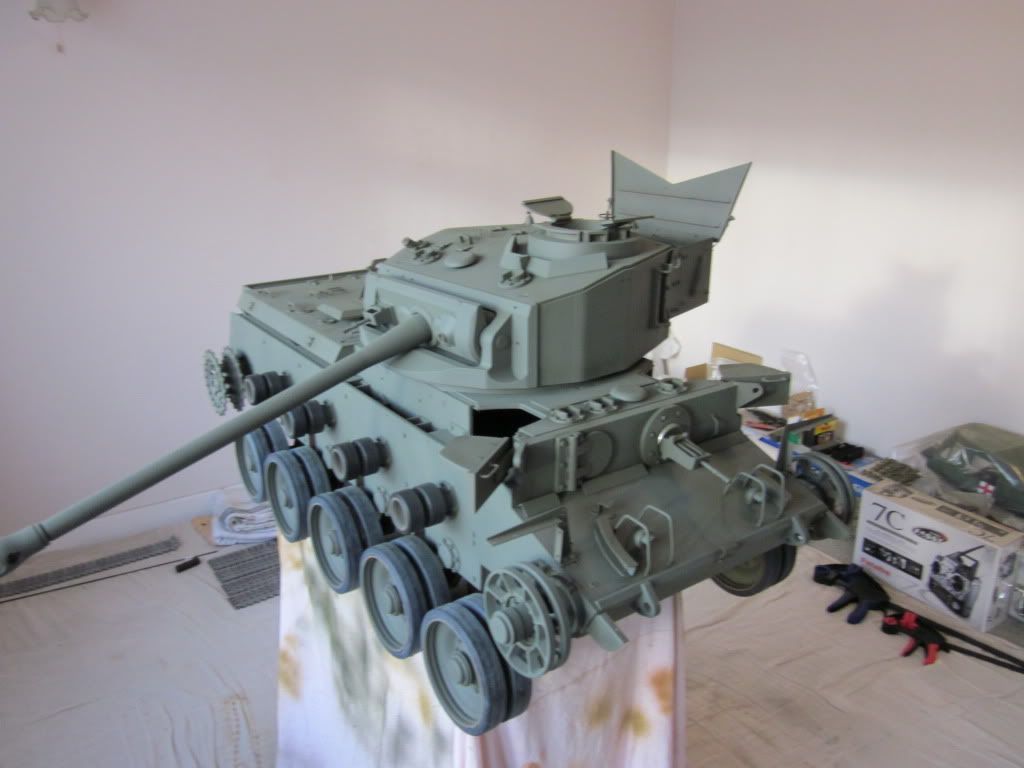
Rear and side
Made some little spare track support brackets,there was just enough
threaded hole left in the track support bar fixings to turret,to screw them on
Spare track Links hanging on them
More front details put on
Went round with the paint covering up the primed detail parts
Front and side
Rear and side
-
phil fitzpatrick
- Posts: 2020
- Joined: Sat Dec 12, 2009 3:38 pm
- Location: Sambourne uk
- Been liked: 223 times
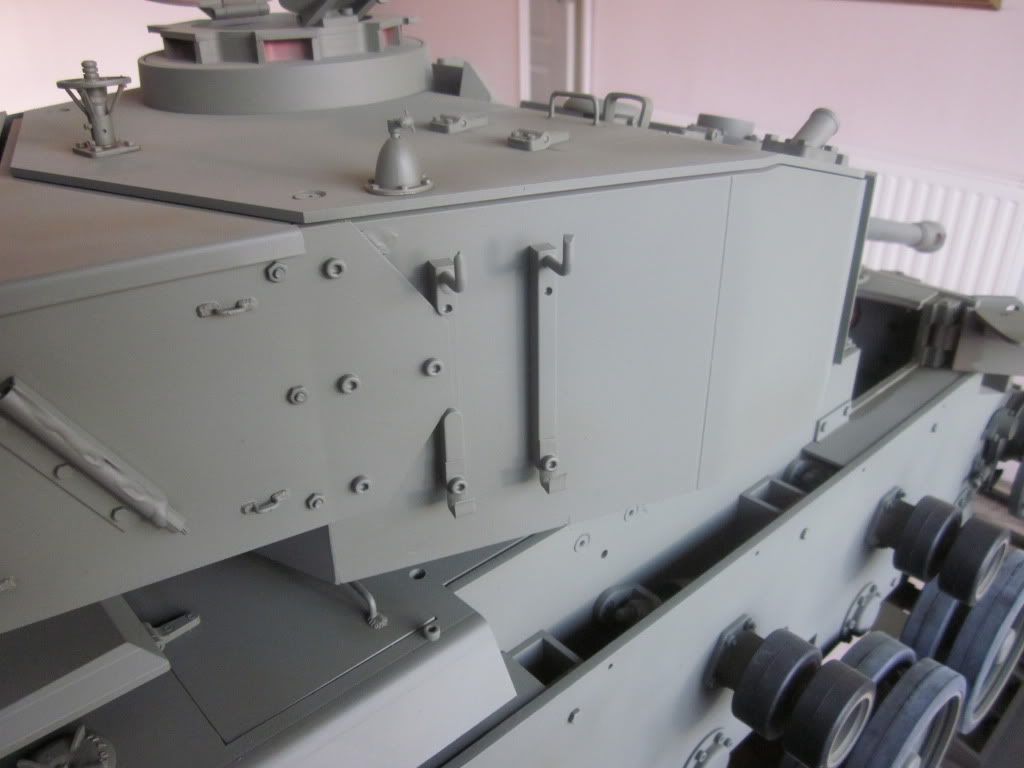
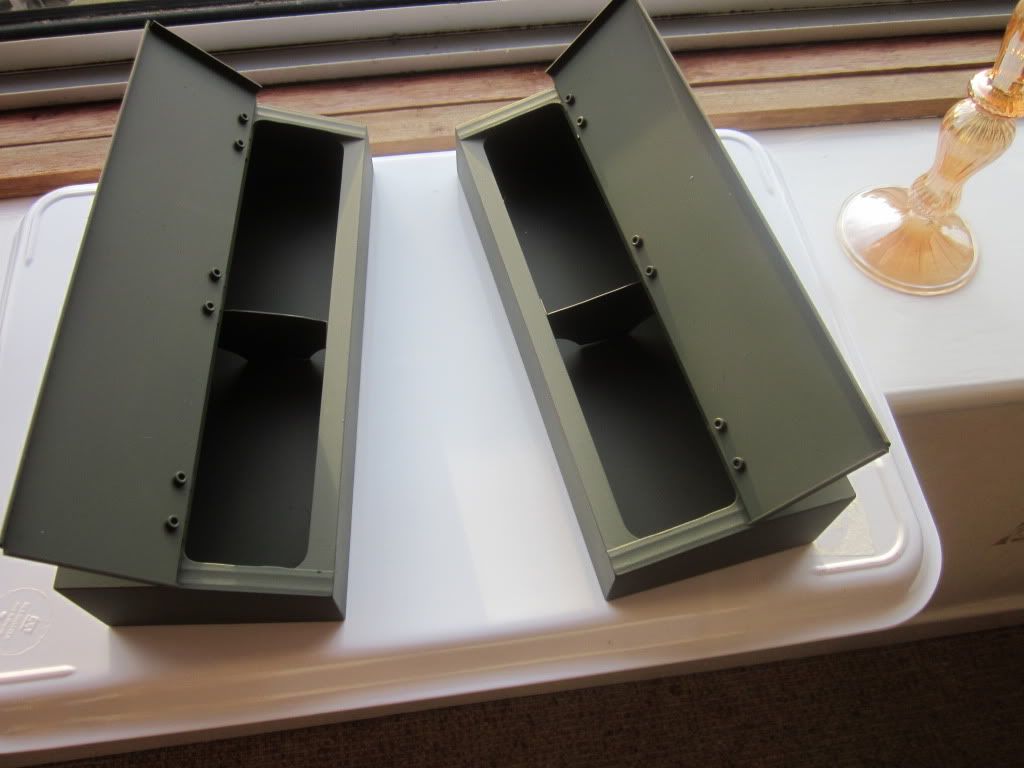
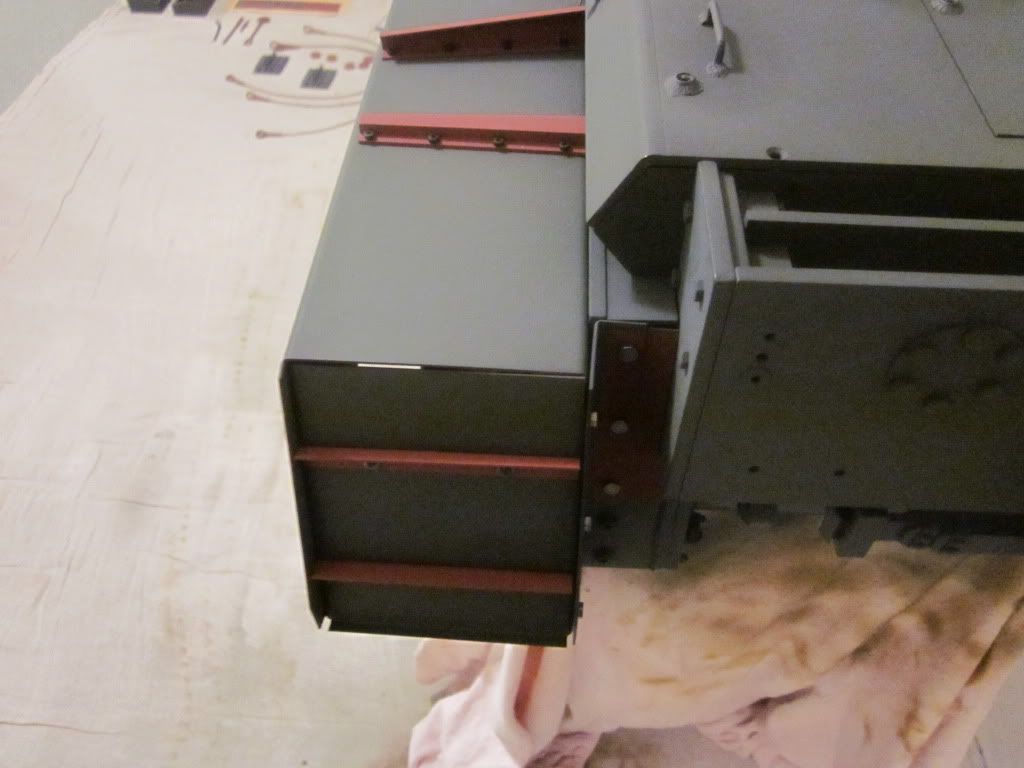
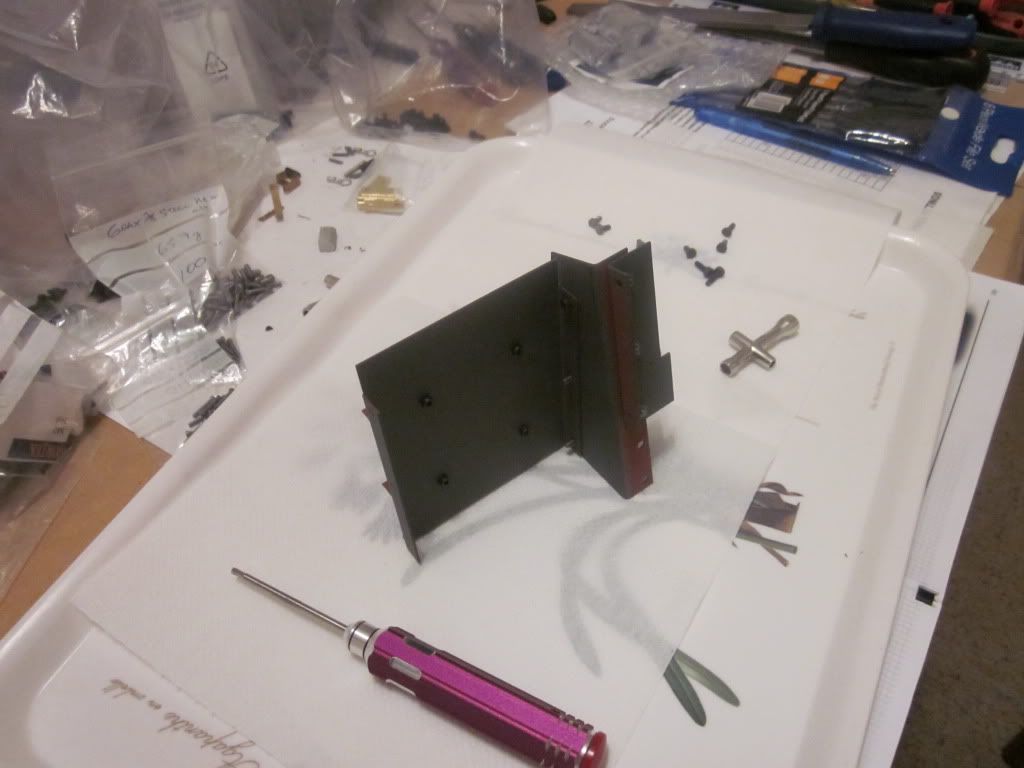
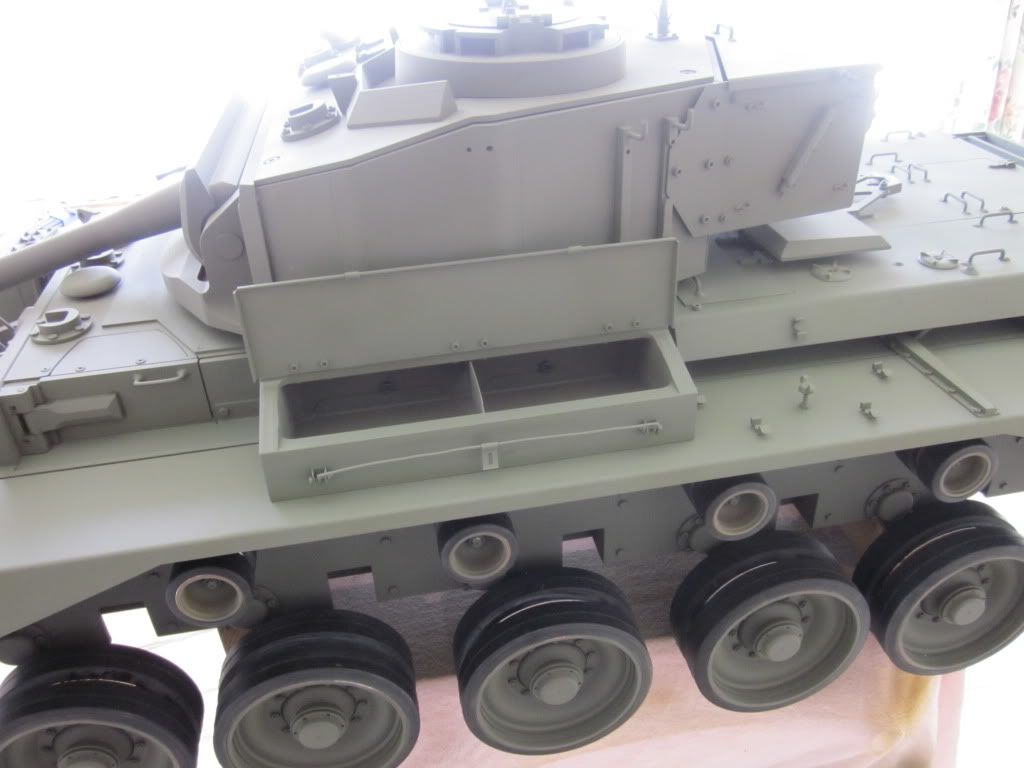
Tool Box's
Fitted bottoms to my tool box's and added the partition/support inside,now
I can fill it full of tools.
I can fill it full of tools.
-
leesellars
- Posts: 934
- Joined: Thu Jul 12, 2007 11:19 am
- Location: Nottingham
- Has liked: 2 times
- Been liked: 15 times
Hello Chaps
Loctite 480 is a super glue for rubber ie putting tyres on.
638 High Strenth
242 meduim Stenth.
Alsoi also read earlier that there was a question on painting. You cannot put enamels on acrilics as you will get a paint reaction. You have to put a barrier ie varnish to seperate them.
Lee
Loctite 480 is a super glue for rubber ie putting tyres on.
638 High Strenth
242 meduim Stenth.
Alsoi also read earlier that there was a question on painting. You cannot put enamels on acrilics as you will get a paint reaction. You have to put a barrier ie varnish to seperate them.
Lee
http://www.Facebook.com/newthorpemodels
Dont hit me so early in the morning with those negative waves.
Listen carefully i shall say this only once.
If its not broke dont fix it.
Ich Hatt Einen Kameraden
Dont hit me so early in the morning with those negative waves.
Listen carefully i shall say this only once.
If its not broke dont fix it.
Ich Hatt Einen Kameraden
-
phil fitzpatrick
- Posts: 2020
- Joined: Sat Dec 12, 2009 3:38 pm
- Location: Sambourne uk
- Been liked: 223 times
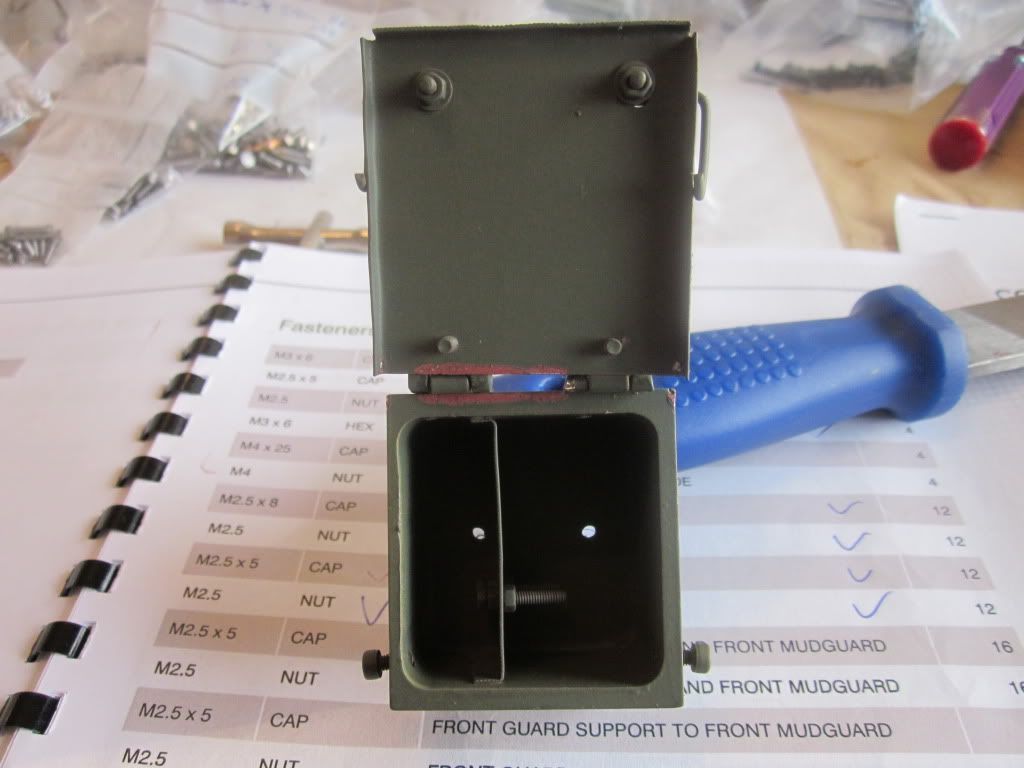
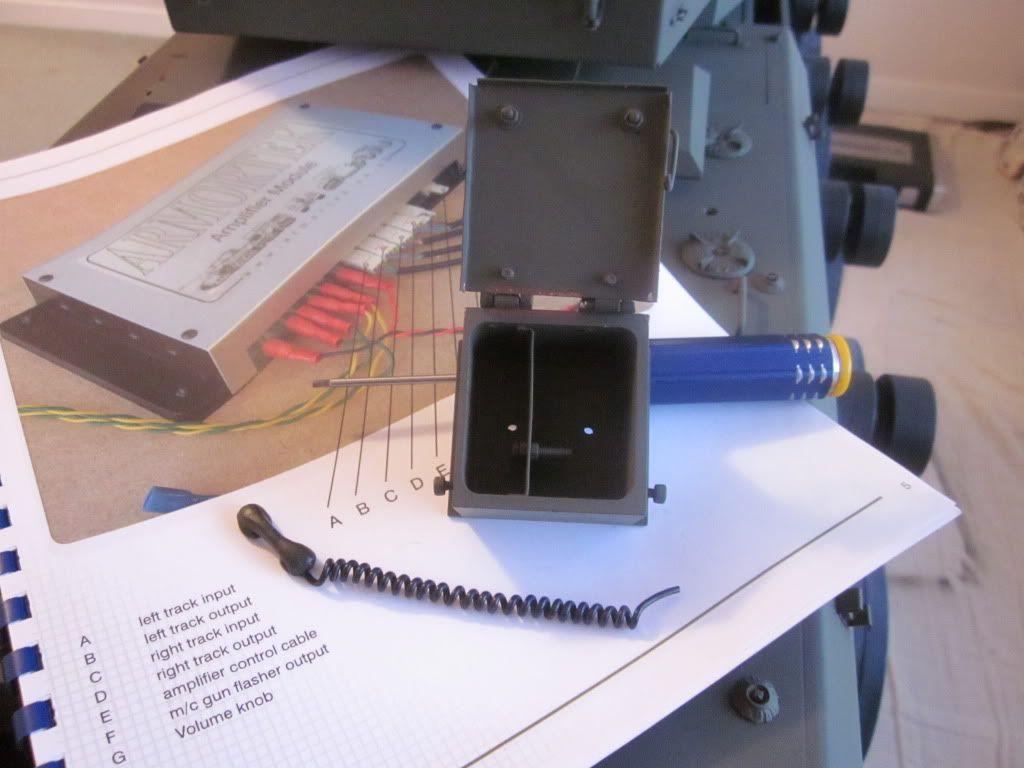
Infantry Telephone Box MK2
Interior and exterior details added to my Infantry Phone box.
Just need to figure out how to wire it up to my Amplifier Module.
The First aid Kit they kept in there might be a challenge aswell.
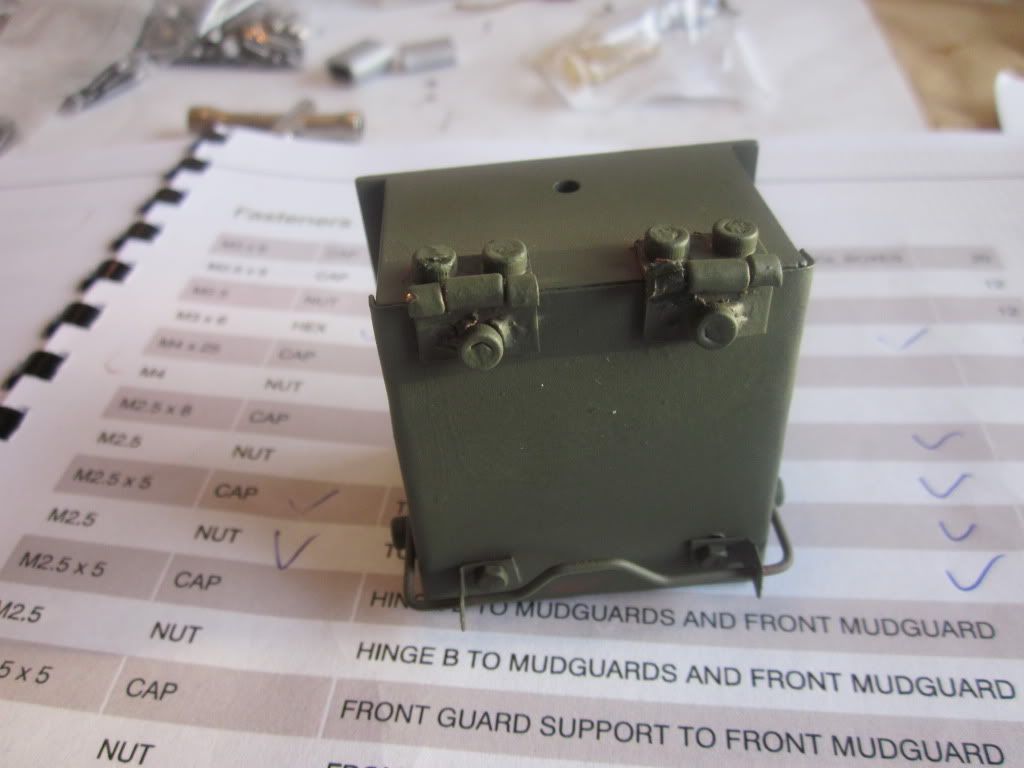
Might have to see if I can get some 2mm hex head to swap the cap heads
in the hinges.

Just need to figure out how to wire it up to my Amplifier Module.
The First aid Kit they kept in there might be a challenge aswell.
Might have to see if I can get some 2mm hex head to swap the cap heads
in the hinges.
-
leesellars
- Posts: 934
- Joined: Thu Jul 12, 2007 11:19 am
- Location: Nottingham
- Has liked: 2 times
- Been liked: 15 times
Hello Phil
You can get a 1/6th scale first aid kit.
Lee
You can get a 1/6th scale first aid kit.
Lee
http://www.Facebook.com/newthorpemodels
Dont hit me so early in the morning with those negative waves.
Listen carefully i shall say this only once.
If its not broke dont fix it.
Ich Hatt Einen Kameraden
Dont hit me so early in the morning with those negative waves.
Listen carefully i shall say this only once.
If its not broke dont fix it.
Ich Hatt Einen Kameraden
-
phil fitzpatrick
- Posts: 2020
- Joined: Sat Dec 12, 2009 3:38 pm
- Location: Sambourne uk
- Been liked: 223 times
First aid kit
Hi Lee
I hadnt got round to do any searching yet,where can you get one from.
RE the Enamel.
I think it was me that might have mentioned enamel.
But all I have done is bought a sample of Enamel Mat SCC 15 Olive Drab
and painted some samples with it to check against my own mixing
of Lifecolor Acrylics,which I am using on the Comet.
Cheers
Phil
-
leesellars
- Posts: 934
- Joined: Thu Jul 12, 2007 11:19 am
- Location: Nottingham
- Has liked: 2 times
- Been liked: 15 times
Hello Phil
I havent got any instock but i will check it out for you.
Lee
I havent got any instock but i will check it out for you.
Lee
http://www.Facebook.com/newthorpemodels
Dont hit me so early in the morning with those negative waves.
Listen carefully i shall say this only once.
If its not broke dont fix it.
Ich Hatt Einen Kameraden
Dont hit me so early in the morning with those negative waves.
Listen carefully i shall say this only once.
If its not broke dont fix it.
Ich Hatt Einen Kameraden
-
phil fitzpatrick
- Posts: 2020
- Joined: Sat Dec 12, 2009 3:38 pm
- Location: Sambourne uk
- Been liked: 223 times
-
phil fitzpatrick
- Posts: 2020
- Joined: Sat Dec 12, 2009 3:38 pm
- Location: Sambourne uk
- Been liked: 223 times

-
phil fitzpatrick
- Posts: 2020
- Joined: Sat Dec 12, 2009 3:38 pm
- Location: Sambourne uk
- Been liked: 223 times
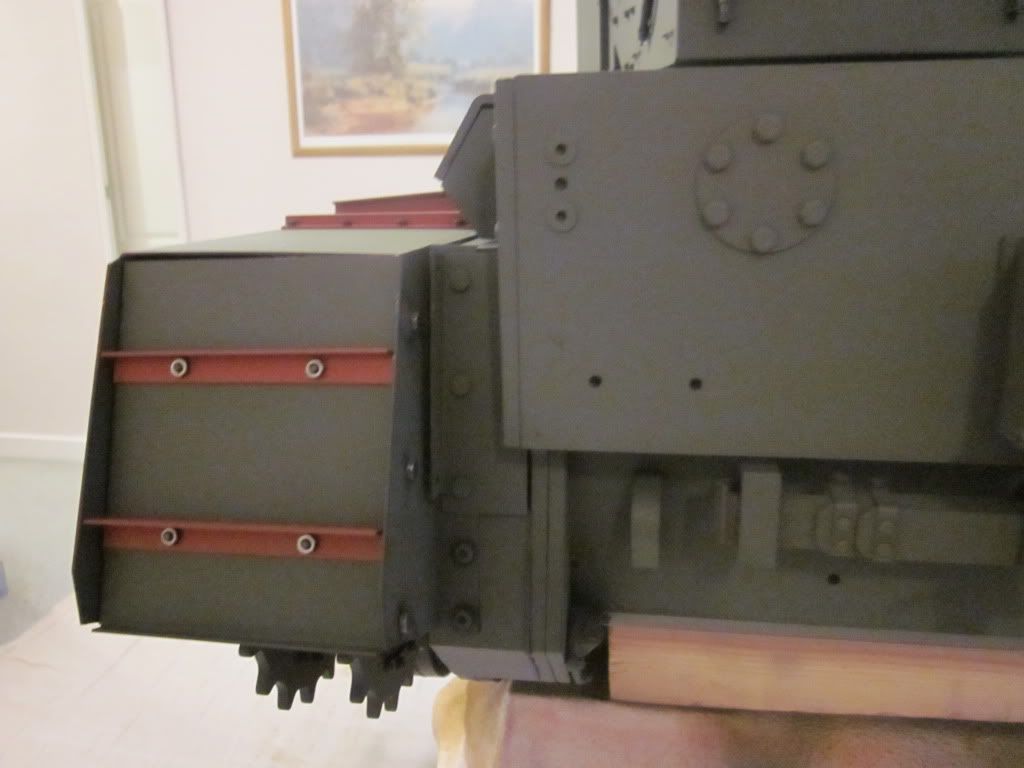
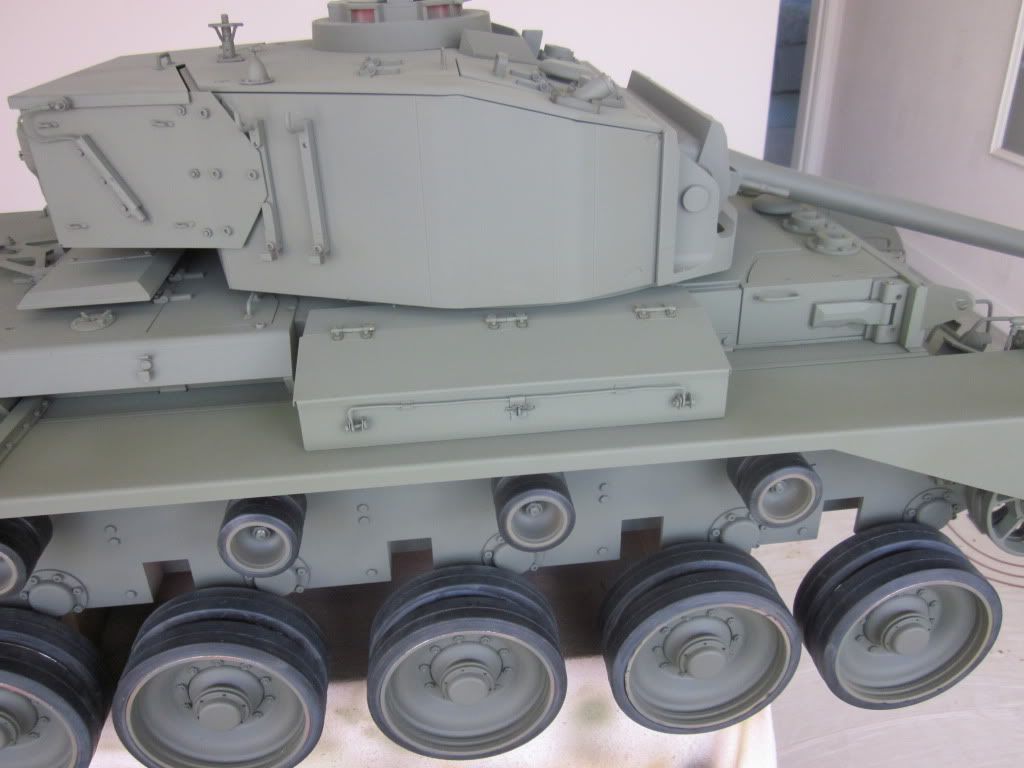
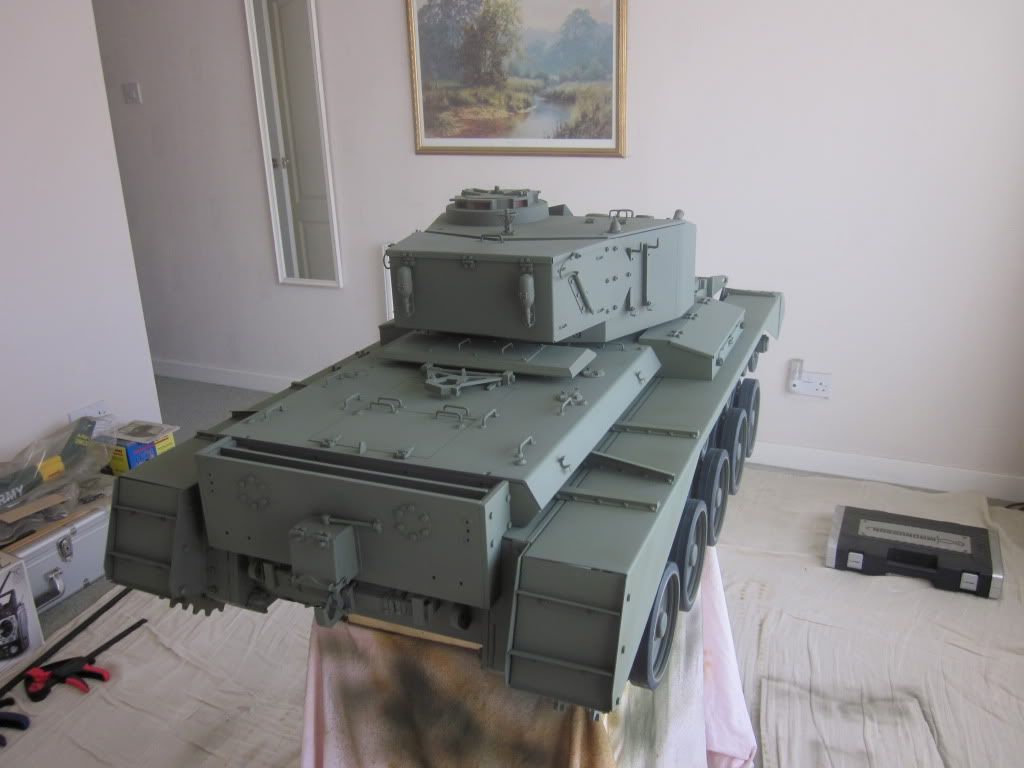
Tool Box's and Front Mudguards
Front Mudguards and Lights fitted
Tool Box's fitted
Made the long locking bar assembly's for the Tool Box's
Tool Box's fitted
Made the long locking bar assembly's for the Tool Box's
-
martin pitcairn
- Posts: 172
- Joined: Thu Jul 12, 2007 5:53 pm
- Has liked: 788 times
- Been liked: 8 times
-
robert michael hilton
- Posts: 377
- Joined: Sat Apr 03, 2010 3:23 pm
- Location: Welshpool, Powys