Hi Pete
Thanks for the info,It makes a lot of sense I think you are right and
some of the photo's in the Armor Photogallery show a lot of extra kit
stowed rear of the box's on the mud guards.
Cheers
Phil
A34 COMET
-
phil fitzpatrick
- Posts: 2020
- Joined: Sat Dec 12, 2009 3:38 pm
- Location: Sambourne uk
- Been liked: 223 times
-
phil fitzpatrick
- Posts: 2020
- Joined: Sat Dec 12, 2009 3:38 pm
- Location: Sambourne uk
- Been liked: 223 times
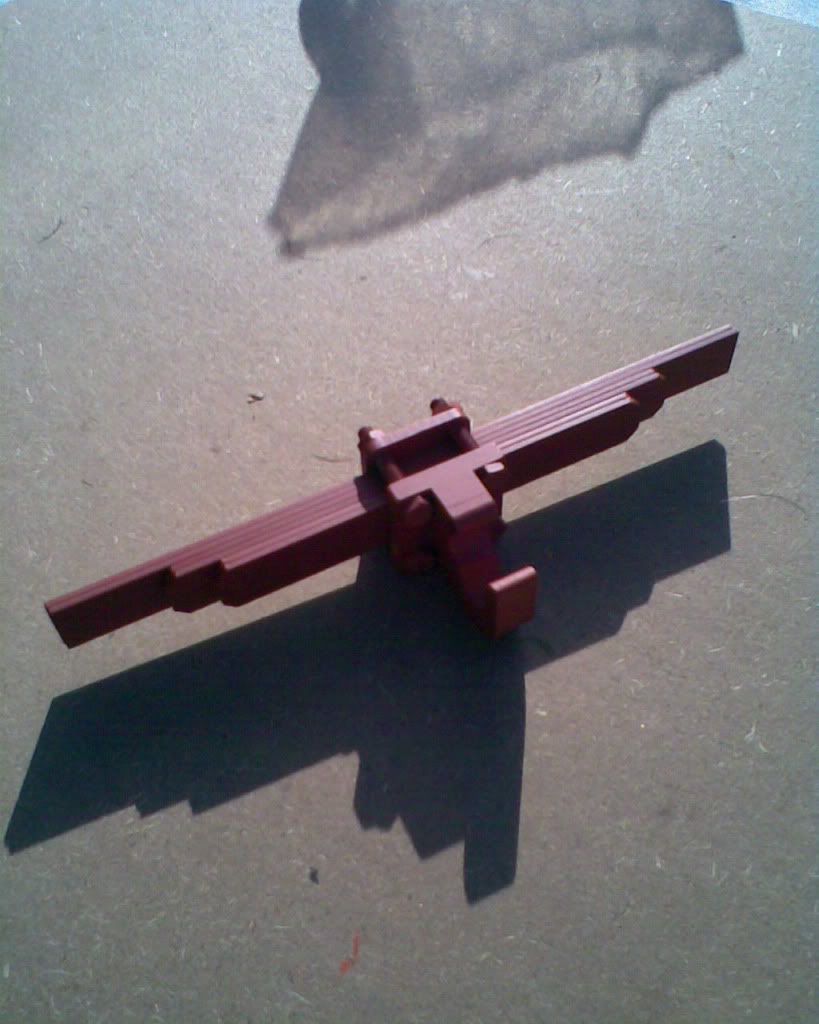
Spring pack and tow hook/mudguard parts
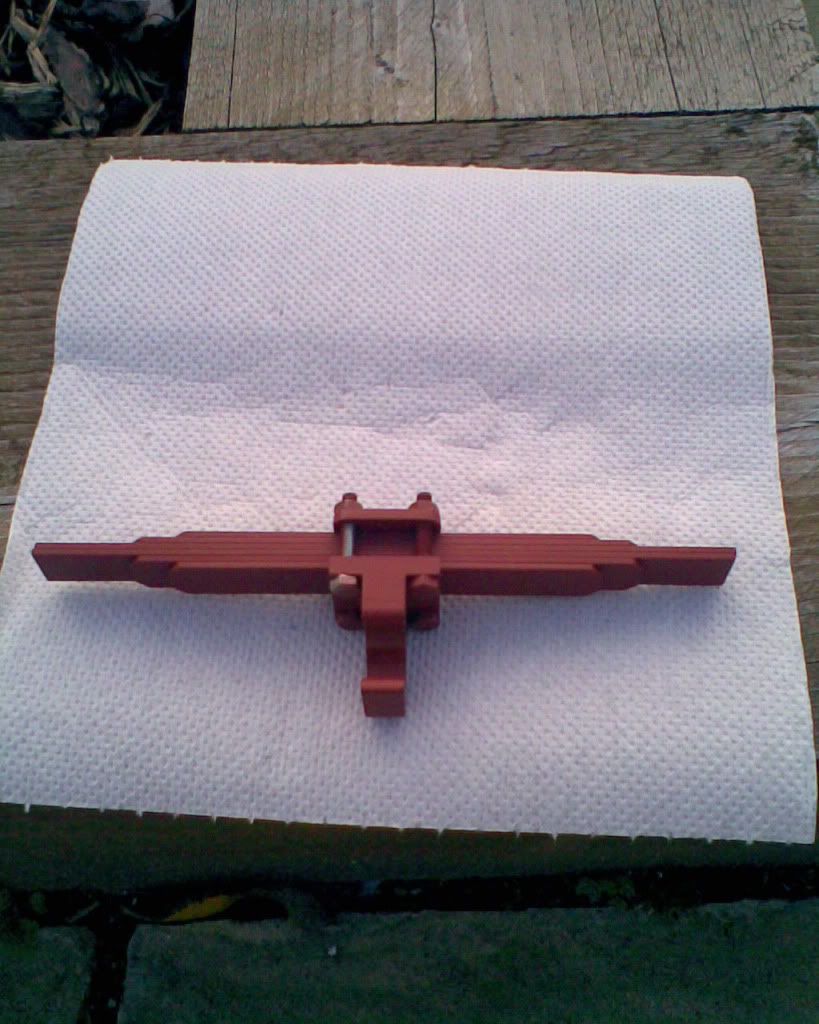
Mudguard parts ready for fitting

Spring Pack and Tow Hook assembled
Spring Pack and Tow Hook assembled
-
Paul Fairlamb
Comet Towing Arrangement
Hi Phil,
I wonder how you find the time to not only build the Comet but also keep us so well up to date on your progress.
Just a small point, I do not think the leaf springs on the tow hook are not fitted correctly. As you have them they would provide excellent buffering on the over-run but very little when towing as only the longest will take any load.
From pictures I have seen the leaves should be arrange smallest on the outside, next the mid size and longest in the middle.
Also with reference to comments a while back regarding the small springs on the track tensioning device; the Duxford inside Comet has these in place. They are surprisingly light and one wonders what effect they might have. However they are just as you have fitted.
Keep up the good work.
Paul
-
phil fitzpatrick
- Posts: 2020
- Joined: Sat Dec 12, 2009 3:38 pm
- Location: Sambourne uk
- Been liked: 223 times
Springs
Hi Paul
Thanks for the nice comments,I work in the week so only have the
evenings and weekends,last night I just painted a few parts and put
together the Leaf Springs<just do a bit when I can.
Anyway I cant retire now I've discovered Armortek,I'm loving these
Tanks and the challenges,I think I can feel another one coming on already
in the future.
I have to admit I could only think that the springs were for buffering and
I thought that must only have any effect if a solid towing bar was used.
But I assembled them as to the Armortek Manual.
But after you mentioned them I checked the Armor Photogallery Book
which mostly shows the Jaques Littlefield Comet,and the Leafs are
assembled that way round,as the Armortek manual,in picture no 65 it is
quite clear they show some clamps that hold the end of the leefs together.
I've just spotted pictures 90,95 and 102 confirm it.
I will have to have a look through Stevens Photo's of the Bovington Comet,
all 233 of them.
Be interesting to find out if some Comets had them the opposit way round.
I went to Duxford in October but I didnt pay any attention to the rear Springs.
I will have to have a good look,nice and easy to swap if I have to.
I noticed in the same book it showed the turret besa in some photo's
with just front section of the barrel sticking out,where as most others it sticks out much further.
Cheers
Phil
-
phil fitzpatrick
- Posts: 2020
- Joined: Sat Dec 12, 2009 3:38 pm
- Location: Sambourne uk
- Been liked: 223 times
Corrected Spring Leaf and Tow Hook assembly.
Hi Paul
You were smack on with your spring info.
The Photo's of Steven's taken at Bovington are a lot clearer so I have altered them round.
I might add some more detail to it that I've seen on the photo's.
Cheers Paul thanks for spotting it.
Phil
You were smack on with your spring info.
The Photo's of Steven's taken at Bovington are a lot clearer so I have altered them round.
I might add some more detail to it that I've seen on the photo's.
Cheers Paul thanks for spotting it.
Phil
-
Armortek

- Site Admin
- Posts: 2926
- Joined: Tue Jul 10, 2007 10:30 am
- Location: Winchester, England
- Been liked: 3663 times
Hi Phil
Our intention was always to have the spring pack with the shorter leaves placed either side of the central two full length ones. This is how our prototype is built. I have to admit, the info in the manual on this is poor, and the illustration we provide is not good either. We will try harder next time!
Regards
Mark
Armortek
-
phil fitzpatrick
- Posts: 2020
- Joined: Sat Dec 12, 2009 3:38 pm
- Location: Sambourne uk
- Been liked: 223 times
Spring Leafs
Hi Mark
I think the Manuals are excelent when you combine the stages with the
pictures and then refer to the drawings on the back,so you will be improving on that.
I put another picture on so nobody would copy me
Just made the 4 bands that clamp the leaves together,out of the scrap brass
from the Panzer 111L kit.
Cheers
Phil
-
Paul Fairlamb
Tow Hook
Hi Phil,
My pleasure and glad I saved you a problem later. I was looking at your photos a while back that I noticed I had the suspension bump stops on upside down, so thanks for that.
I've now had my Comet on a couple of successful test runs around the garden, apart from the tyres coming off.
As this is my first tank I decided to build to an operating level before painting, just to get an idea of the best approach to a painting procedure; hence not having the tyres fully secured.
And next a strip down and painting by stages!
I guess I will also sort out how to get images on the forum one day.
Enjoy your tank building.
Paul
-
Alfredo Campanini
- Posts: 104
- Joined: Thu Jul 12, 2007 10:36 am
- Location: PARMA Italy
-
phil fitzpatrick
- Posts: 2020
- Joined: Sat Dec 12, 2009 3:38 pm
- Location: Sambourne uk
- Been liked: 223 times
Pauls Comet
Hi Paul
Glad you have got on well with your Comet and had it running.
I look forward to seeing your Photo's.
Photobucket is Free and easy enough when you have done a couple,Mick
picked it up quick
If its any help I did a posting in the Armortek owners section,I think I
called it "Photobucket for the computor challenged like Moi",I think it
might be on about page 3 or 4 now.
It might be slightly out of date,because these Webb programs alter the
front screens,or home pages I think they are called,but the basics are there.
Upto yet my photo's have been taken with my mobile,uploaded and saved into a folder in my pictures.
Then I upload to a folder in Photobucket and its from there you get it onto the Forum.
I bought a new little Digital camera on saturday to take better pictures in the bad light,so I am just about to post some of my completed spring
Leaf assembly with some added detail.
Chers
Phil
-
phil fitzpatrick
- Posts: 2020
- Joined: Sat Dec 12, 2009 3:38 pm
- Location: Sambourne uk
- Been liked: 223 times
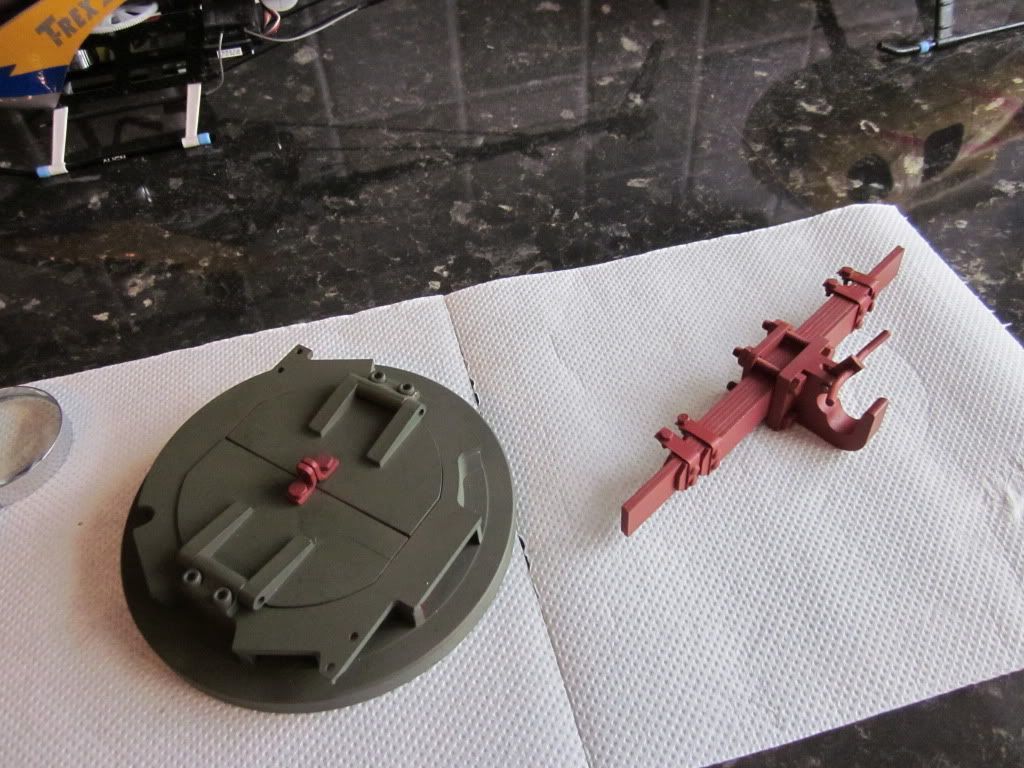
Completed Spring Leaf Assembly and Tow Hook Detail
From a little mistake with assembling my spring Leafs the wrong way
round,thanks to Paul discovering intime,to something I'm quite proud of.
Added the 4 bands clamping the ends of the Leafs complete with the bolts
and fixings,and then I added the sprung loaded part with hand bars to the
Tow Hook,which is hinged on a 3mm pin.
I still made two mistakes doing this
The first was the blind fixings to the front of the Spring Leaf Bands.
I made these out of Milliput and wandered why the didnt go hard,I had only mixed the one out of the two colours.
The Second was retaining the bent handle bar into the Cam with the two holes in.
I used the Locktight 480 but I got dissorientated and stuck it into the hole
for the 3mm pin.
Needless to say it took the Bar held in a vice and some carefull twisting
with an adjustable spanner for leverage to brake the hold.

These are my first pictures with my new camera,the mobile pictures
were about 250 kb,where as the Cannon pictures are 1.5 to 2.0 mb
round,thanks to Paul discovering intime,to something I'm quite proud of.
Added the 4 bands clamping the ends of the Leafs complete with the bolts
and fixings,and then I added the sprung loaded part with hand bars to the
Tow Hook,which is hinged on a 3mm pin.
I still made two mistakes doing this
The first was the blind fixings to the front of the Spring Leaf Bands.
I made these out of Milliput and wandered why the didnt go hard,I had only mixed the one out of the two colours.
The Second was retaining the bent handle bar into the Cam with the two holes in.
I used the Locktight 480 but I got dissorientated and stuck it into the hole
for the 3mm pin.
Needless to say it took the Bar held in a vice and some carefull twisting
with an adjustable spanner for leverage to brake the hold.
These are my first pictures with my new camera,the mobile pictures
were about 250 kb,where as the Cannon pictures are 1.5 to 2.0 mb
-
Dale jordan
- Posts: 1445
- Joined: Fri Jul 13, 2007 1:10 am
- Location: Port Macquarie Australia
- Been liked: 472 times
- Contact:
-
phil fitzpatrick
- Posts: 2020
- Joined: Sat Dec 12, 2009 3:38 pm
- Location: Sambourne uk
- Been liked: 223 times
Screw Holes
Hi Dale
Thanks for the comments,yes its a nice Tank to build and there is a whole load of detail you can add,even if you only have hand tools like me.
Yes I am deffinately going to fill the big cap head holes especially the turret sides and glassis plate.
I'm glad I have left it for a while because I had to remove the two left hand screws out of the Glassis plate when I was fitting the side hatches.
The one hinge was a bit too tight so I had to take out the hinge and pin parts to ease it a bit more.
I've got them just nice now,smooth in action put you get the feeling of
weight like they would be.
I have thought about using Milliput,but I dont know how easy it would be
to poke out,if ever I needed to.
What have you used in the past?
The way I am painting is ideal for me,Prime and under coat befor I fix,except for some of the smaller Armorpax parts,then build up some thin
coats as I go.
Cheers
Phil
-
Dale jordan
- Posts: 1445
- Joined: Fri Jul 13, 2007 1:10 am
- Location: Port Macquarie Australia
- Been liked: 472 times
- Contact:
Hi Phil . On all my models the holes are mask around with masking tape , then filled with car filler . Having he tape on , gives you overfill around the hole so you have material to sand down plus you don't get filler all over the place, the tape is then removed straight away then block sanded . I've hat to remove a couple of filled holes before the car filler can be chip out ... Dale
-
phil fitzpatrick
- Posts: 2020
- Joined: Sat Dec 12, 2009 3:38 pm
- Location: Sambourne uk
- Been liked: 223 times
Holes
Hi Dale
Thanks for the info,I will be getting to them quite soon now because I have
lots of detail bits in red primer building up on the Tank so I will catch them
all with a quick coat of paint.
Cheers
Phil
Thanks for the info,I will be getting to them quite soon now because I have
lots of detail bits in red primer building up on the Tank so I will catch them
all with a quick coat of paint.
Cheers
Phil