Thanks Pete I will give them wipes a go,it seems as though I am in and out of B&Q every day.
Mick sorry to hear about your asthma and the Locktight fumes.
In the manual it also refers to two pack epoxy but I think you would need to go for one with a slower cure time than the 5 minute stuff.
Araldite do a twin tube precision strong adhesive Ive got some of that and
it is repositionable for two hours and it bonds Metal and rubber.
Does the super glue fumes affect you if you were to do the wheels outside in the breeze?
Cheers Phil
A34 COMET
-
phil fitzpatrick
- Posts: 2020
- Joined: Sat Dec 12, 2009 3:38 pm
- Location: Sambourne uk
- Been liked: 223 times
-
phil fitzpatrick
- Posts: 2020
- Joined: Sat Dec 12, 2009 3:38 pm
- Location: Sambourne uk
- Been liked: 223 times
-
Jeff Hyder
- Posts: 88
- Joined: Wed Jun 18, 2008 9:47 am
- Location: Buckinghamshire
- Been liked: 3 times
Tyres
Hi Guys,
Just a follow up with the question of sticking tyres to the road wheels.My Tiger 1 was one of the first Armortek sold and when I came to fitting the tyres to the road wheels I hit upon using double sided Sellotape.It was 15mm wide just right for the job.I degreased the road wheel,put on the tape,cut to lenght,removed the non-stick paper and slipped on the tyre.As mentioned that my Tiger was one of first produced I had a lot of issues with road wheel clearance,thus I had to remove the wheels and tyres several times.To remove the tyre from the rim I had to use both thumbs and with considerable force break the seal and work the tyre off the rim.9 times out of 10 the tape stayed on the rim and it was still tacky enough to replace the tyre.If not I just cleaned up the rim with white spirit and replaced the tape.I don't know if the side forces on the tyre are same as the Comet, however using the tape you don't machine or damaging anything and if it does not work theres always the Epoxy route.
Cheers Jeff Hyder.
-
robert michael hilton
- Posts: 377
- Joined: Sat Apr 03, 2010 3:23 pm
- Location: Welshpool, Powys
Thank you for your replies, Phil and Jeff. I spent most of the afternoon searching the 'interweb' for industrial strength double sided tape, M3 have a high performance type, so I think now I will try this route....I guess the outcome will not be known for a few months.
In a previous life ( model aircraft ) I first discovered the effect of cyano fumes, inside and outdoors. A visit to my GP, resulted in a 'preventer' and 'reliever' inhaler being prescribed. No problems now just as long as I steer clear of cyanoacrylate, or any substance that relates to 'superglue'.
Comet building will now move on a pace.....my other half is amazed at the size of the beast....we are talking tanks here!!!!
mick
-
phil fitzpatrick
- Posts: 2020
- Joined: Sat Dec 12, 2009 3:38 pm
- Location: Sambourne uk
- Been liked: 223 times
Tape and Tyres
Hi Mick
It sounds like its worth a go with the tape route thanks to Jeff spotting
the postings and doing the road testing on his Tiger.
Give em a good clean like the book says.
Cheers
Phil
It sounds like its worth a go with the tape route thanks to Jeff spotting
the postings and doing the road testing on his Tiger.
Give em a good clean like the book says.
Cheers
Phil
-
Jeff Hyder
- Posts: 88
- Joined: Wed Jun 18, 2008 9:47 am
- Location: Buckinghamshire
- Been liked: 3 times
Tyres
Hi Robert,
Just to recap on double sided tape,I just used ordinary double sided Sellotape that you get in W H Smiths.Its 15mm wide which is great for Tiger tyres,however I think Comet tyres are wider so you have to put 2 widths side by side.Also as the tape is the same thickness of normal Sellotape you cannot see any material between the tyre and the rim giving the impression that the tyre is moulded to the wheel as prototype.
Cheers Jeff Hyder.
-
Pete Mallett
- Posts: 133
- Joined: Tue Jul 21, 2009 4:17 pm
- Location: Oxford
- Been liked: 11 times
- Contact:
-
phil fitzpatrick
- Posts: 2020
- Joined: Sat Dec 12, 2009 3:38 pm
- Location: Sambourne uk
- Been liked: 223 times
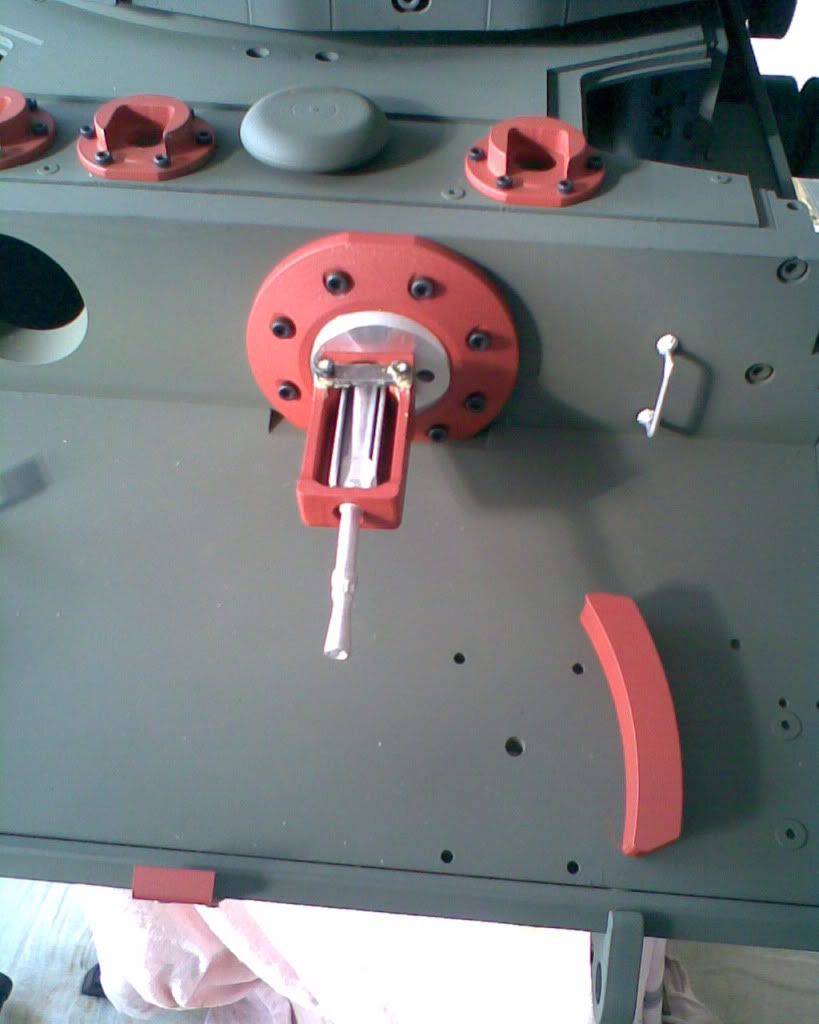
Handles,fuel caps,engine plate locks
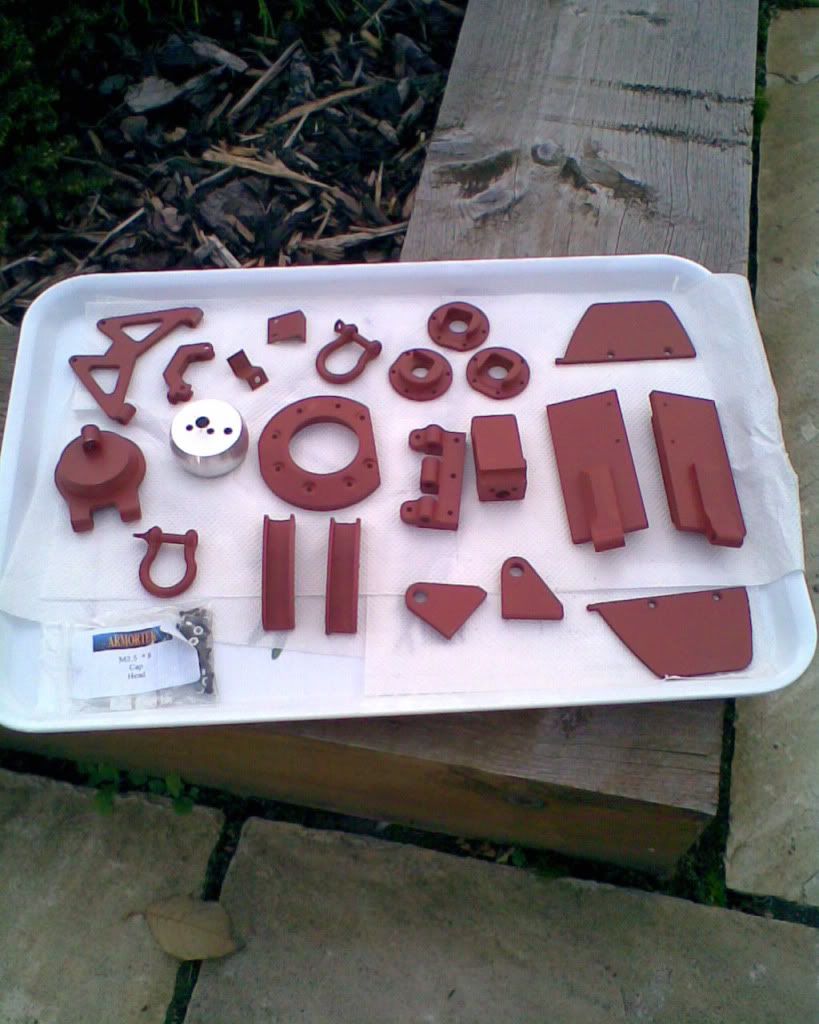
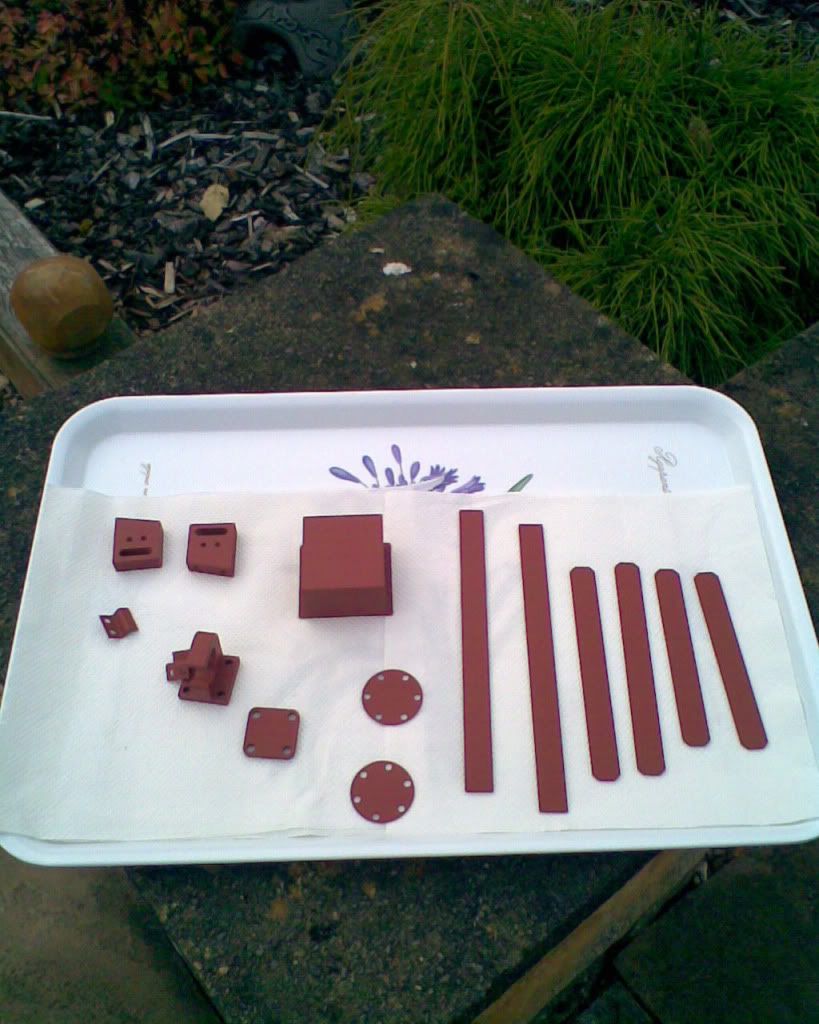
Fitted some of the Armorpax detail while waiting for paint to dry.
Made a few other bits for the armoured vent cover and flame cut rear hatch stops.
Made the handles for the loaders hatch
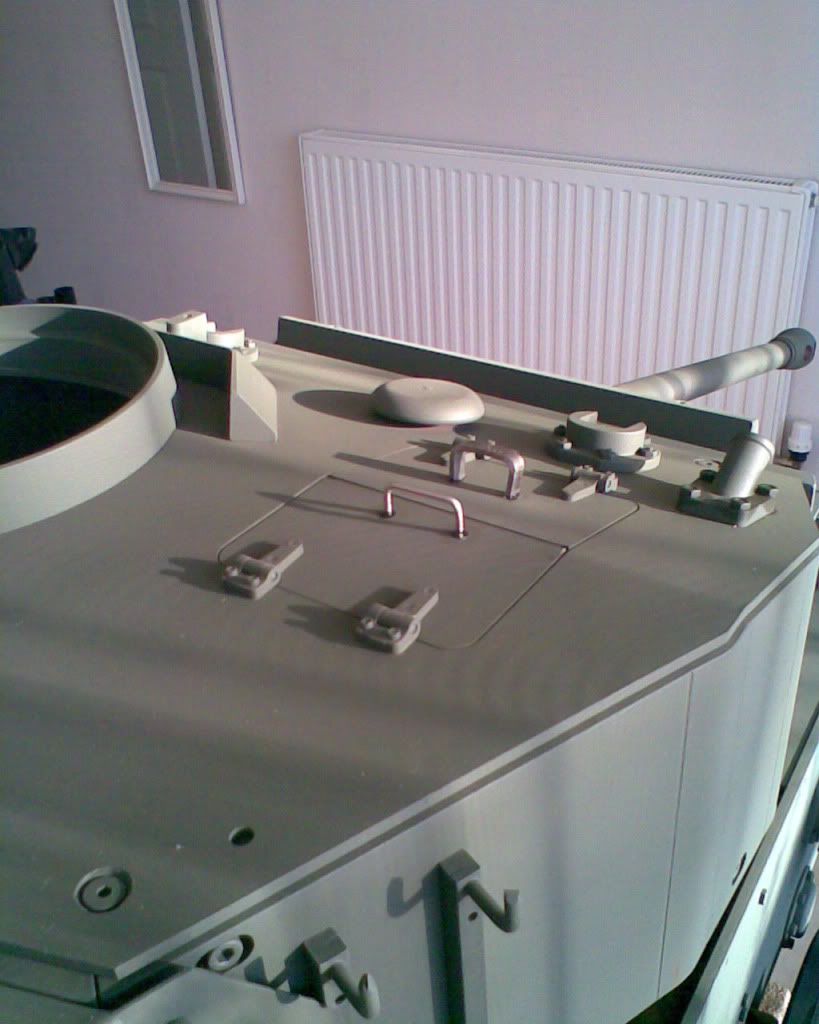
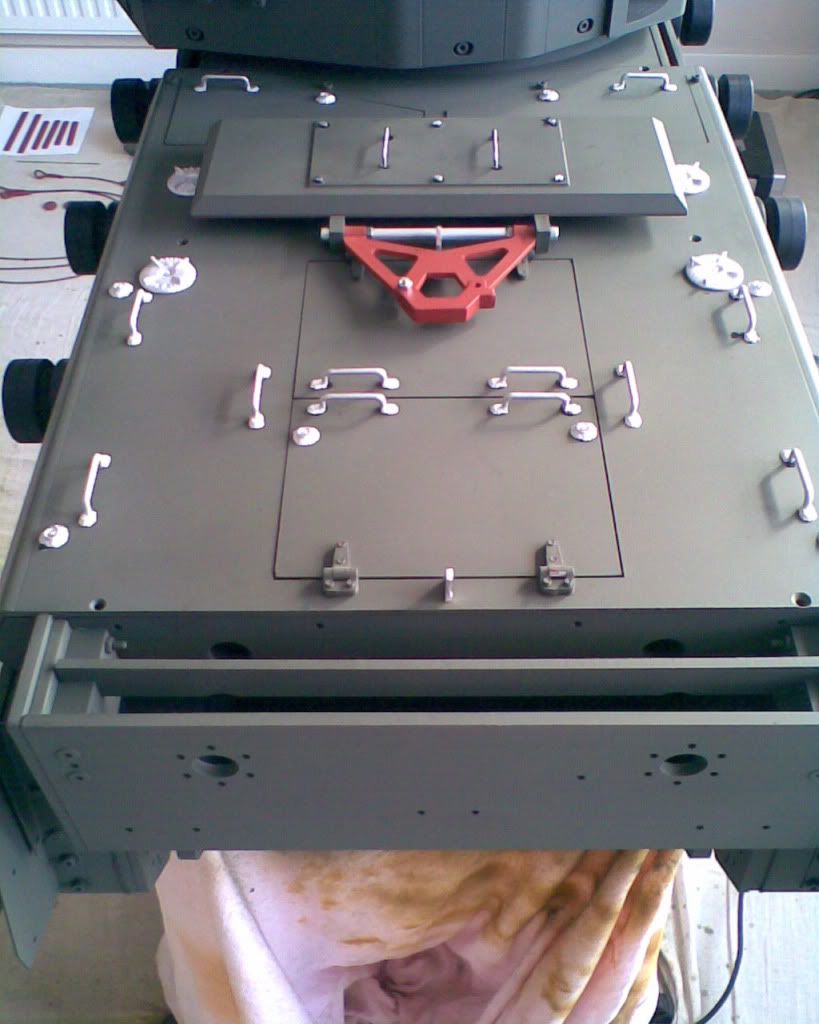
Loaders hatch handle detail
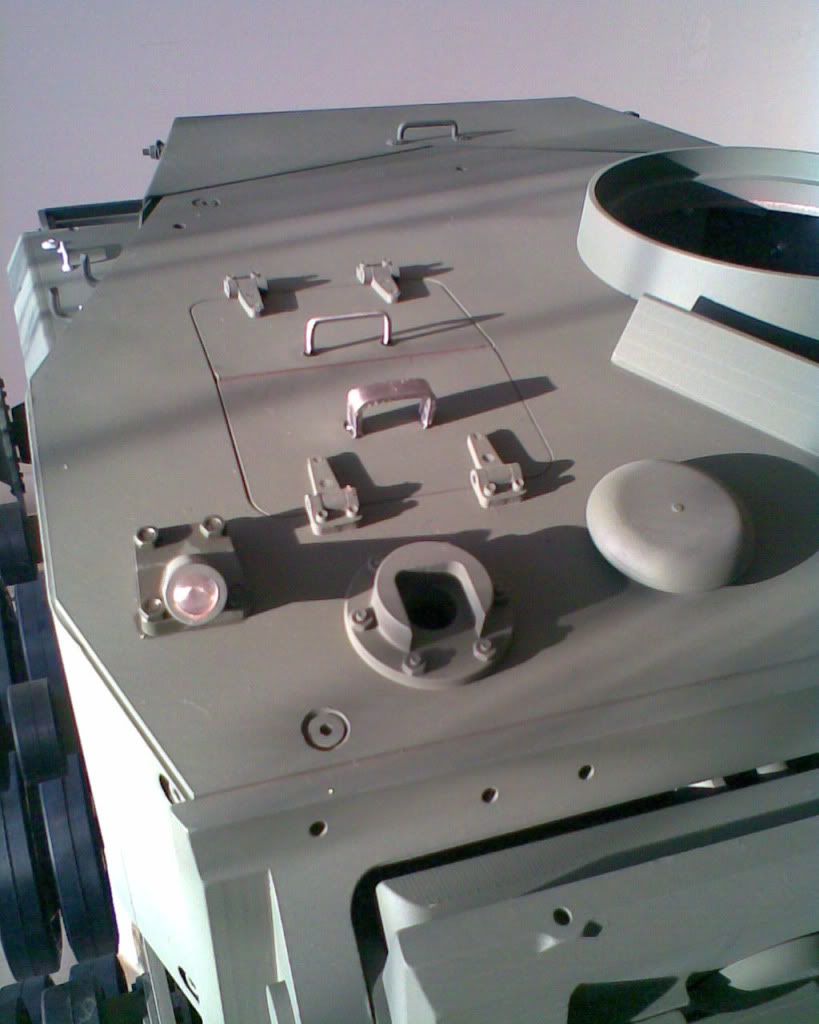
Made a few other bits for the armoured vent cover and flame cut rear hatch stops.
Made the handles for the loaders hatch
Loaders hatch handle detail
-
Pete Mallett
- Posts: 133
- Joined: Tue Jul 21, 2009 4:17 pm
- Location: Oxford
- Been liked: 11 times
- Contact:
-
phil fitzpatrick
- Posts: 2020
- Joined: Sat Dec 12, 2009 3:38 pm
- Location: Sambourne uk
- Been liked: 223 times
Nuts
Thanks Pete
Well spotted
No it wasnt a test fit it was a brain malfunction
I did the one on the turret first on another day and got that right.
Cheers
Phil
Well spotted
No it wasnt a test fit it was a brain malfunction
I did the one on the turret first on another day and got that right.
Cheers
Phil
-
phil fitzpatrick
- Posts: 2020
- Joined: Sat Dec 12, 2009 3:38 pm
- Location: Sambourne uk
- Been liked: 223 times
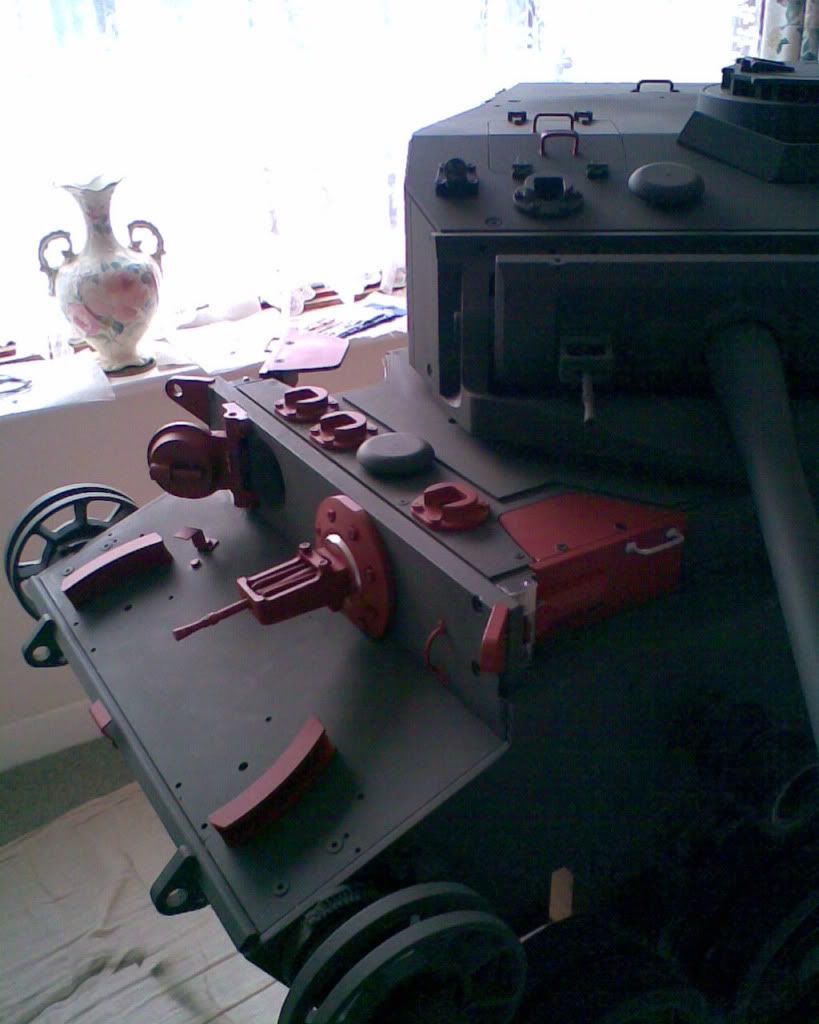
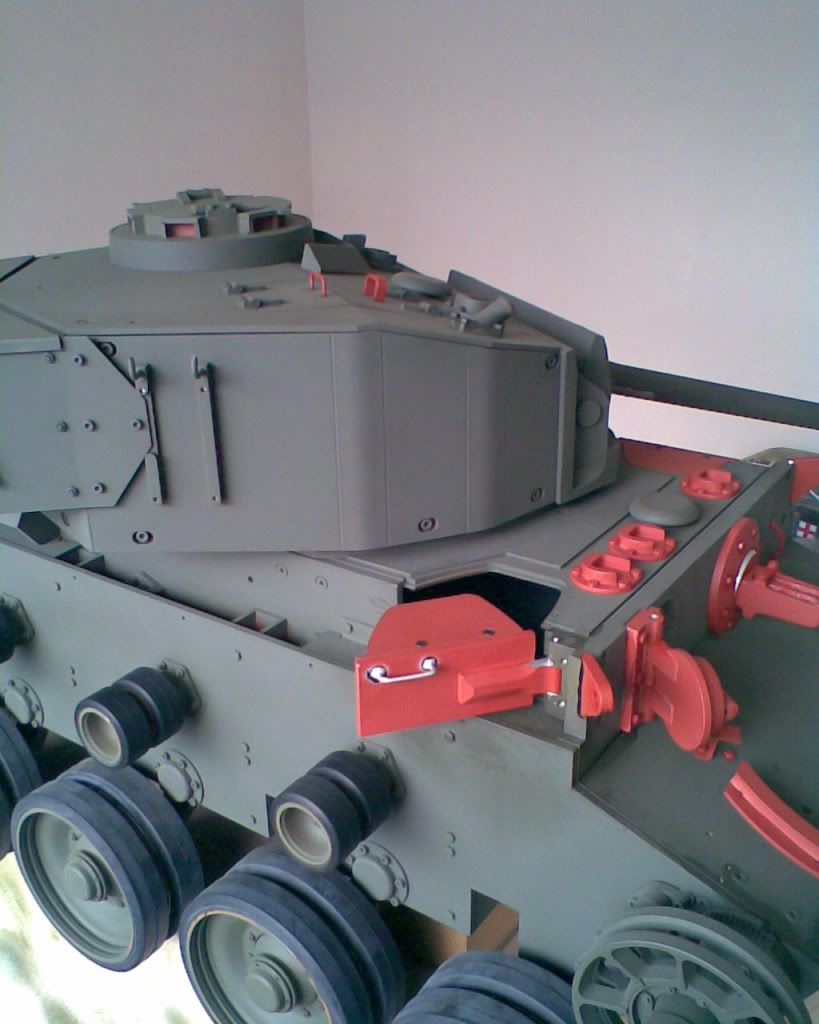
Front and Rear parts
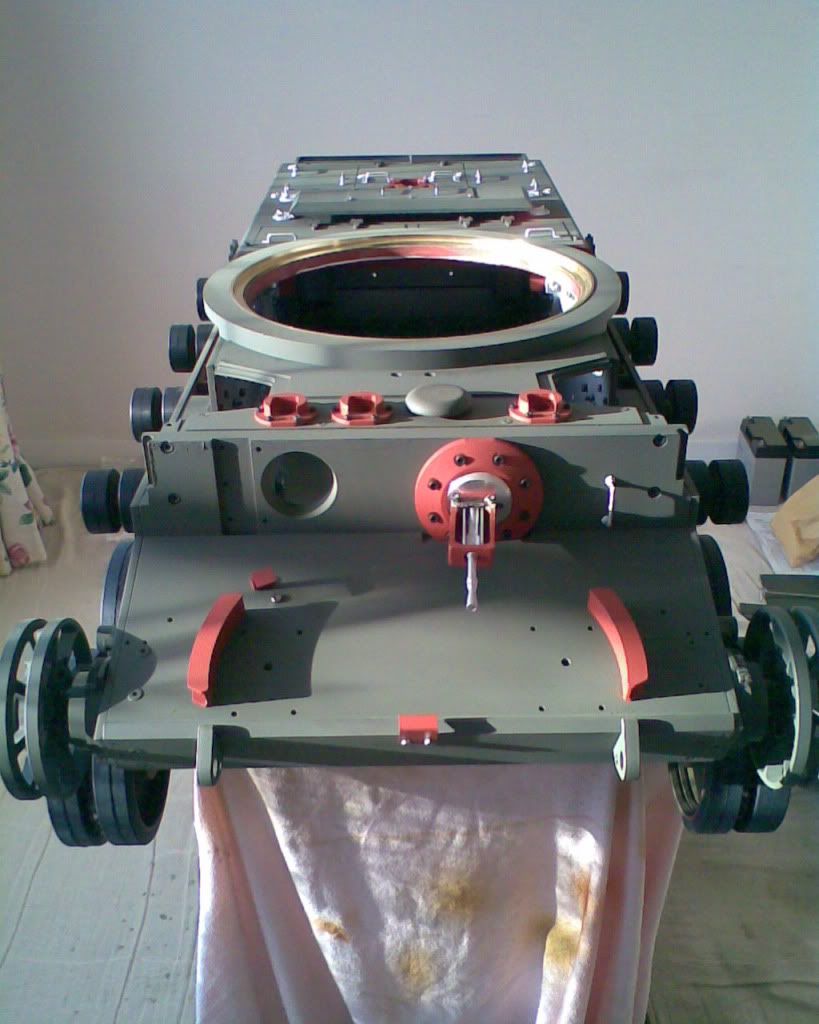
Front Hatch with the latch I made for the driver,and yes it locked the
front hatch first time(bit of luck)
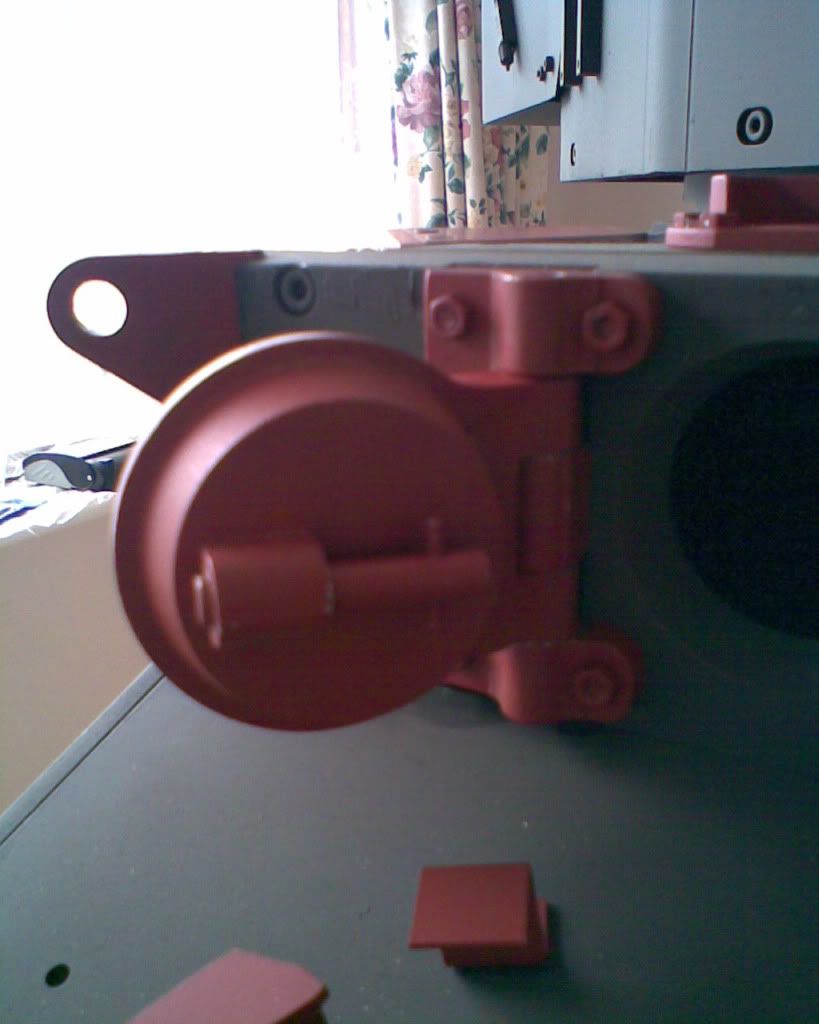
Rear plate parts primed and undercoated ready for fitting
Side Hatches fitted
front hatch first time(bit of luck)
Rear plate parts primed and undercoated ready for fitting
Side Hatches fitted
-
robert michael hilton
- Posts: 377
- Joined: Sat Apr 03, 2010 3:23 pm
- Location: Welshpool, Powys
-
phil fitzpatrick
- Posts: 2020
- Joined: Sat Dec 12, 2009 3:38 pm
- Location: Sambourne uk
- Been liked: 223 times
comet
Thanks Mick
I'm glad you have got your wheels sorted and getting them repainted
dont worry about the little boobs you make I've done a few myself
and as you have found on the forum there is always someone to help out.
I am getting close with my colour now,I bought a sample of SCC 15
Olive Drab from White Ensign Models it was Enamel,I have painted a
block which I can check against.
I am aiming for some where between a faded mat finish with slight sheen
in places.
Its time for me to get myself a new little digital camera instead of my mobile phone camera,its not very good on some of the inside photo's,I
noticed one of my photo's on the posting showed up quite blue.
When the Mat SCC 15 Drys it looks close to my later photo's and a bit greener than yours.
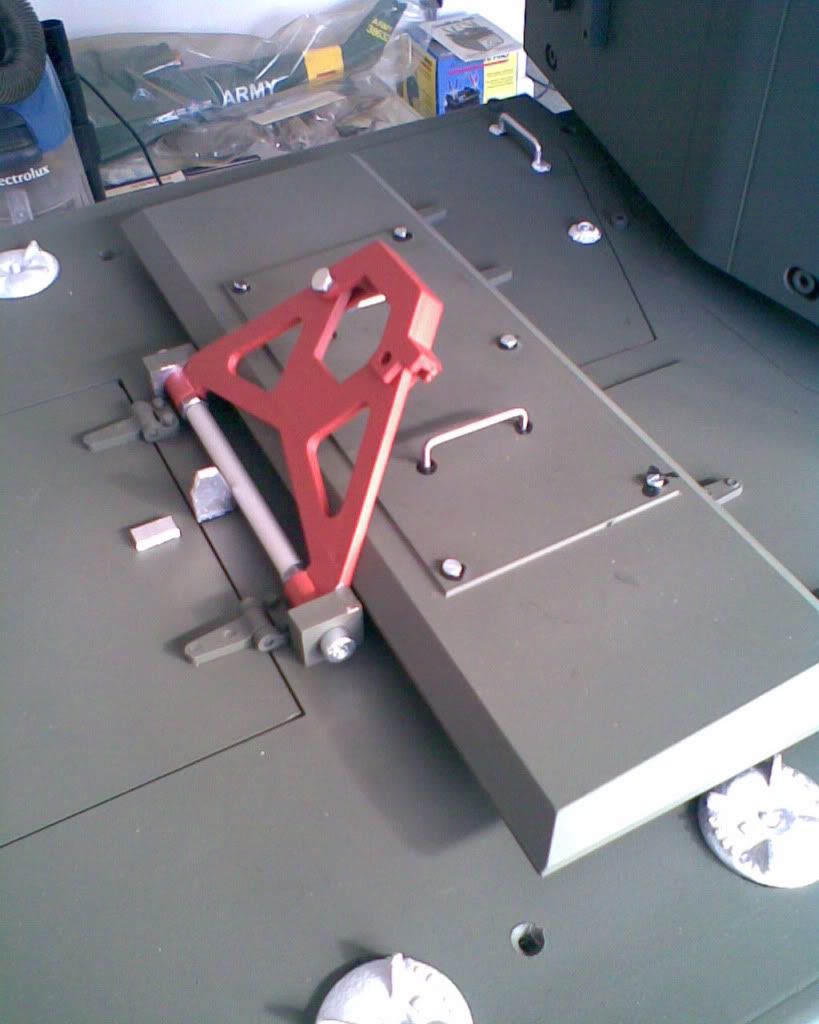
I am experimenting on the underside of my mud guards and tool box's
at the moment,and I done a few peices of sheet steel to experiment with a
bit of the gloss,I've used a red oxide base so they are the same as the Tank
RE EFO608 Guard Arm
It deffinately has a purpose,I have had a look in my Armor Photogallery
Book,and on page 14 photo 65 it shows it is fixed to something at the back end,and there is other detail there under the rear deck in that area.
Needs investigating.
Have you had a look at the 2 postings by Dennis and Steve?
Dennis's posting for "Comet A34 Walk arround" is very good for the detail bits.
Steve's posting "More Comets at Bovington"takes you to his Photobucket
photo's at least 230 of them,they are brilliant and a lot of help.
I will have a look through those myself for some clues.
Keep up the good work and enjoying your build
Cheers
Phil
I'm glad you have got your wheels sorted and getting them repainted
dont worry about the little boobs you make I've done a few myself
and as you have found on the forum there is always someone to help out.
I am getting close with my colour now,I bought a sample of SCC 15
Olive Drab from White Ensign Models it was Enamel,I have painted a
block which I can check against.
I am aiming for some where between a faded mat finish with slight sheen
in places.
Its time for me to get myself a new little digital camera instead of my mobile phone camera,its not very good on some of the inside photo's,I
noticed one of my photo's on the posting showed up quite blue.
When the Mat SCC 15 Drys it looks close to my later photo's and a bit greener than yours.
I am experimenting on the underside of my mud guards and tool box's
at the moment,and I done a few peices of sheet steel to experiment with a
bit of the gloss,I've used a red oxide base so they are the same as the Tank
RE EFO608 Guard Arm
It deffinately has a purpose,I have had a look in my Armor Photogallery
Book,and on page 14 photo 65 it shows it is fixed to something at the back end,and there is other detail there under the rear deck in that area.
Needs investigating.
Have you had a look at the 2 postings by Dennis and Steve?
Dennis's posting for "Comet A34 Walk arround" is very good for the detail bits.
Steve's posting "More Comets at Bovington"takes you to his Photobucket
photo's at least 230 of them,they are brilliant and a lot of help.
I will have a look through those myself for some clues.
Keep up the good work and enjoying your build
Cheers
Phil
-
phil fitzpatrick
- Posts: 2020
- Joined: Sat Dec 12, 2009 3:38 pm
- Location: Sambourne uk
- Been liked: 223 times
Guard arm
Hi Mick
I've been through those photo's from the postings that I recomended to
you and all I can come up with is it must be in some sort of supporting roll
for the mudguard plate.
there is some good clear photo's and most of the guard arms are short
of going under the rear deck.
Cheers
Phil
I've been through those photo's from the postings that I recomended to
you and all I can come up with is it must be in some sort of supporting roll
for the mudguard plate.
there is some good clear photo's and most of the guard arms are short
of going under the rear deck.
Cheers
Phil
-
Pete Mallett
- Posts: 133
- Joined: Tue Jul 21, 2009 4:17 pm
- Location: Oxford
- Been liked: 11 times
- Contact:
EF0608
if you look on the Cromwells you'll see that EF0607 is located at the front of the mudguard, under the Hull gunners side escape hatch, it supported the mudguard but also gave clearane to the door opening. At the rear of the mudguard EF0608 was always used, in conjunction with a right-angle bracket, but it was used on it's back with the opening pointing skywards. Again it was used just to support the mudguards. So overall, on the Cromwells, there were only threee mudguard support arms per mudguard.
I'm not 100% certain why so many mudguard supports have been used on the back of the Comet but if I had to guess I'd say that it has a lot to do with field experience gained during the 'great swan' up through France and into Belgium when they advanced with such speed that they found themselves carrying loads of infantry on the back. Footsloggers crawling all over the back probably resulted in much damage to the mudguards and therefore fouling of tracks etc. and it was likely deemed necessary to use extra support in this one area. It's a guess but I reckon if you check with Bovington that you'll find it's not too far off the mark.