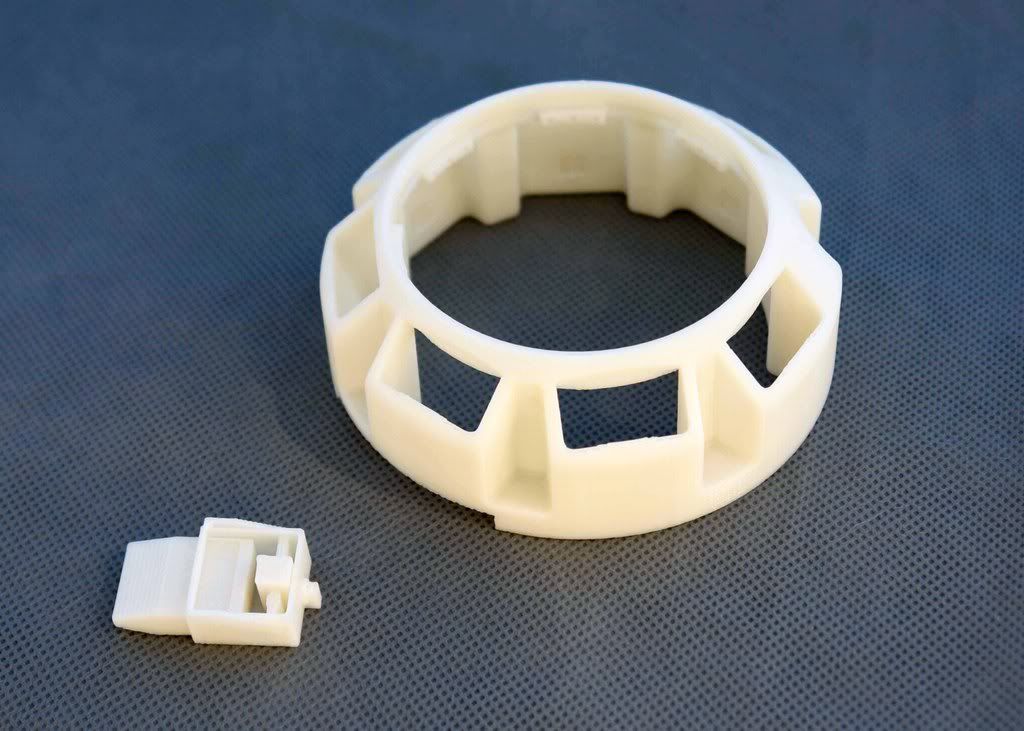
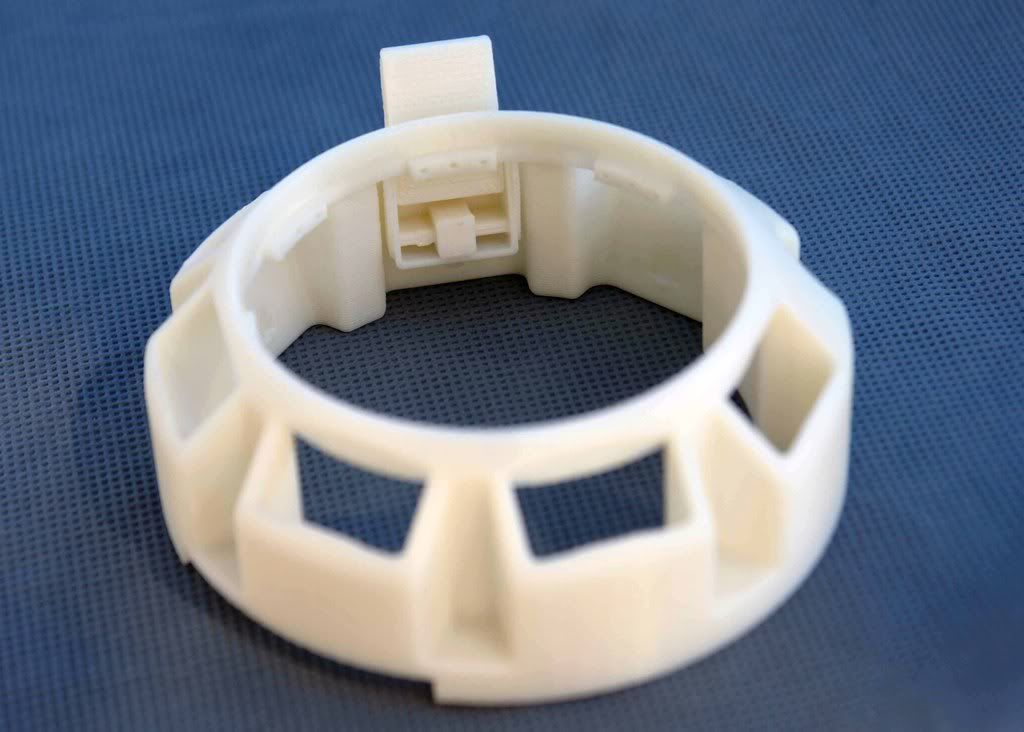
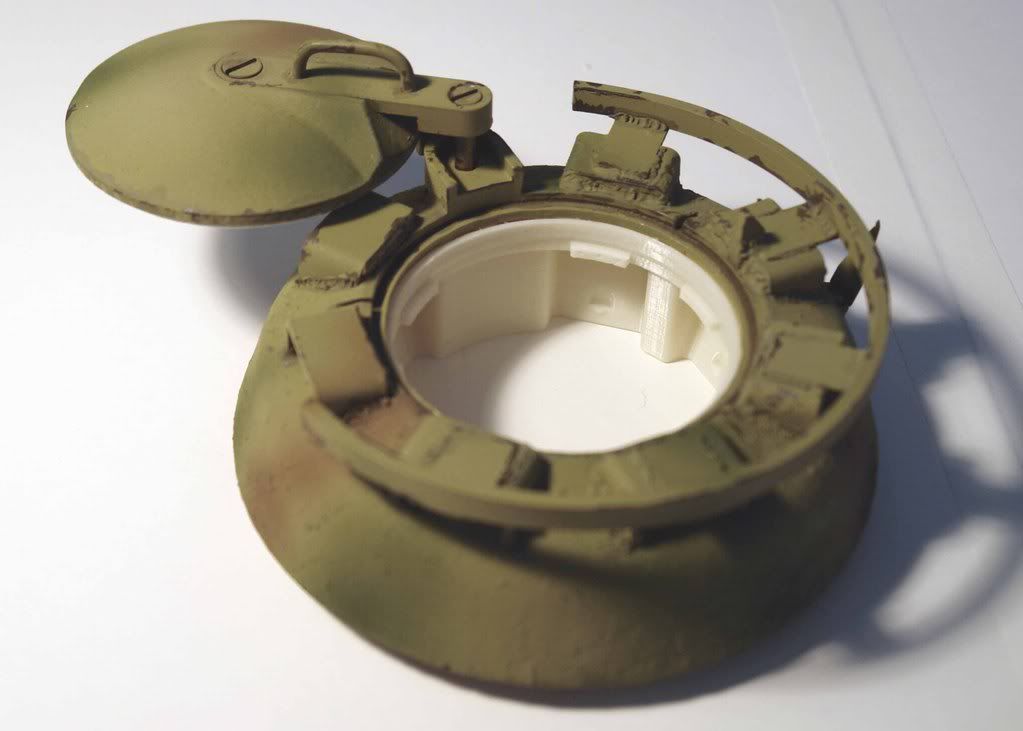
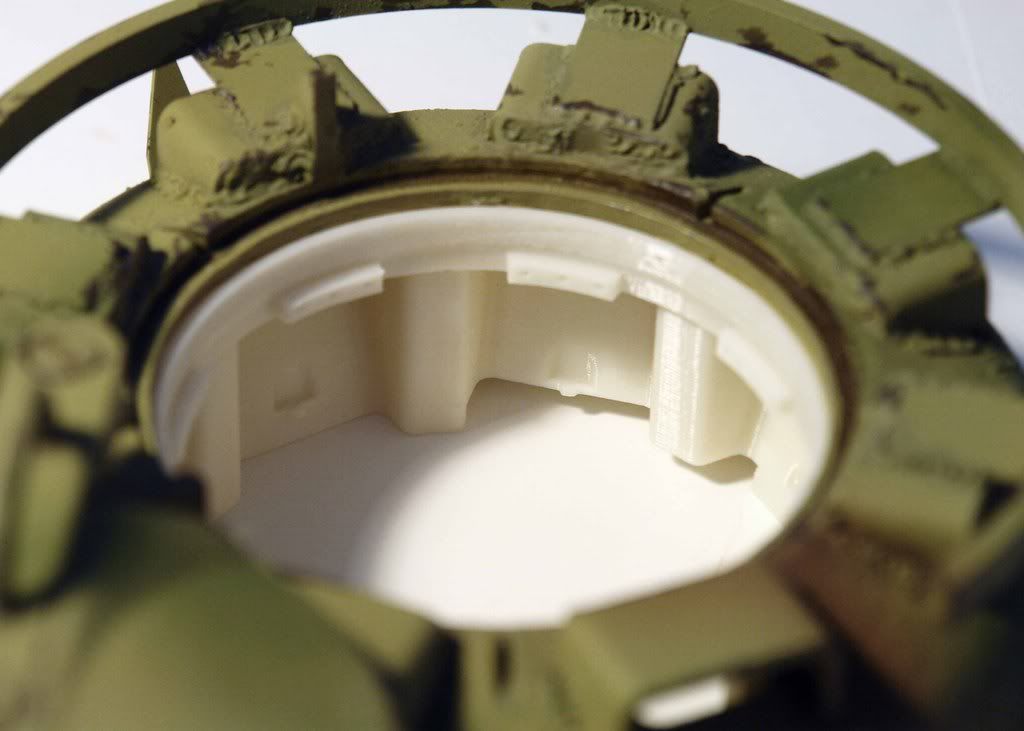
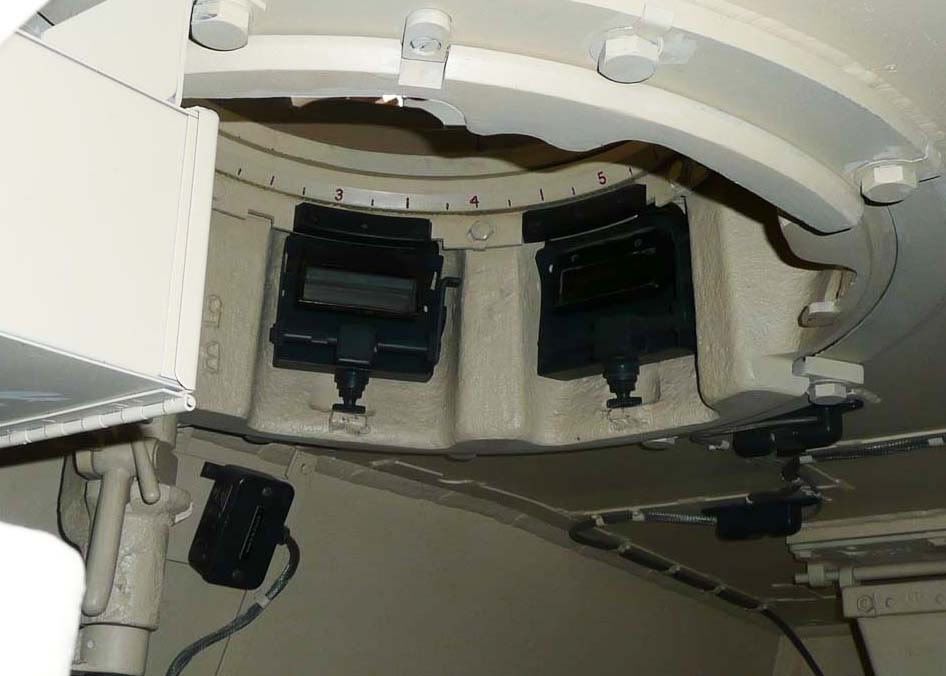
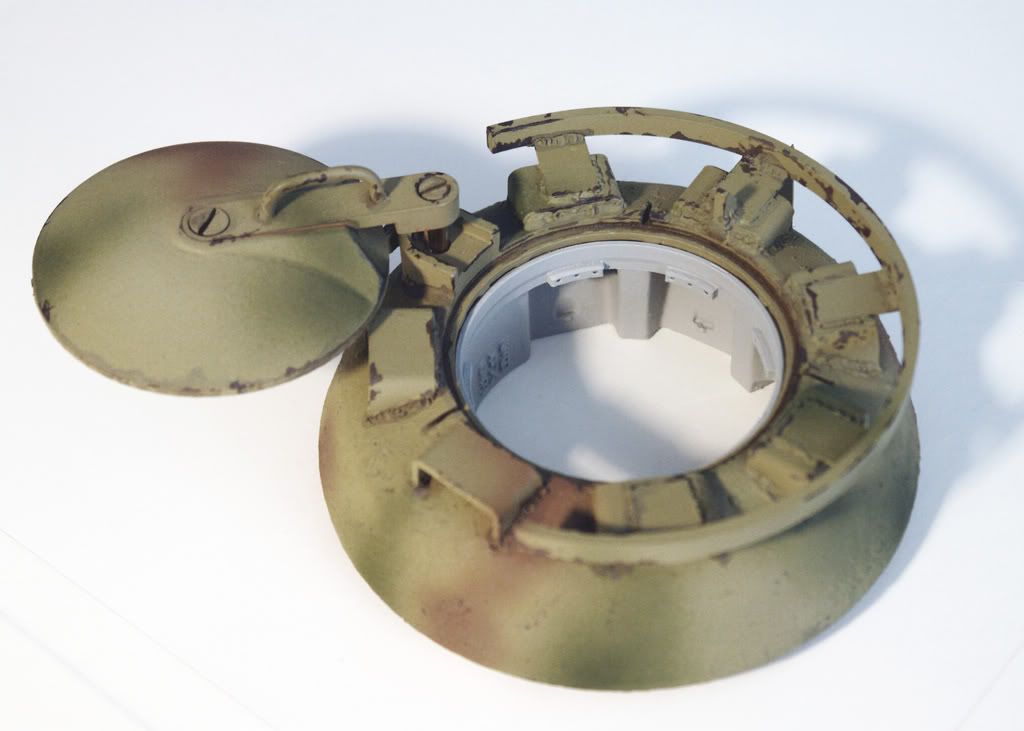
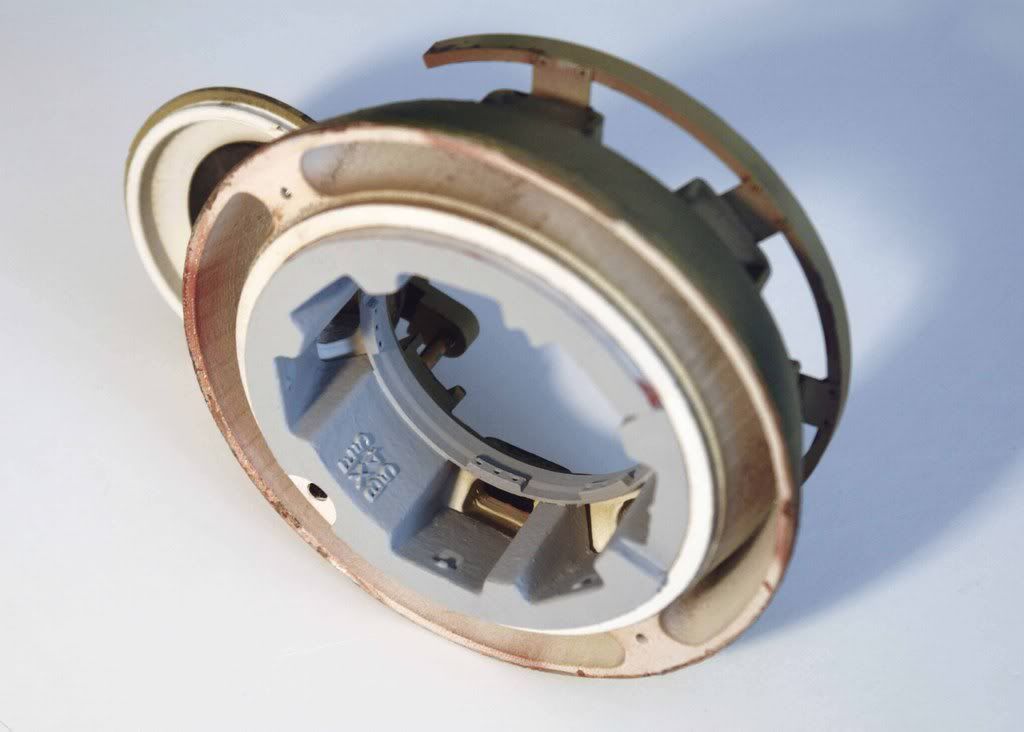
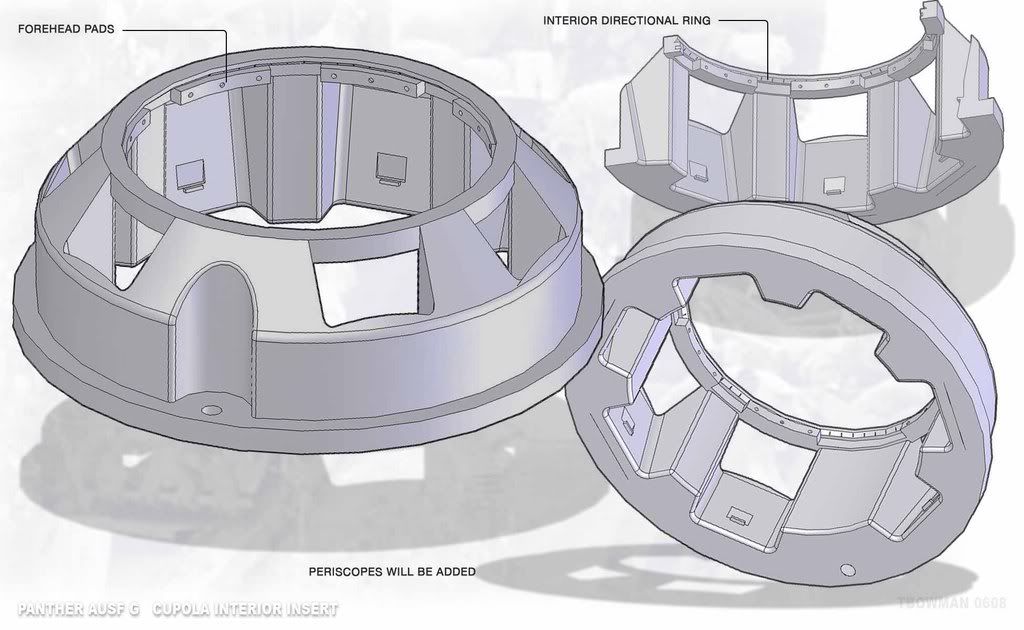
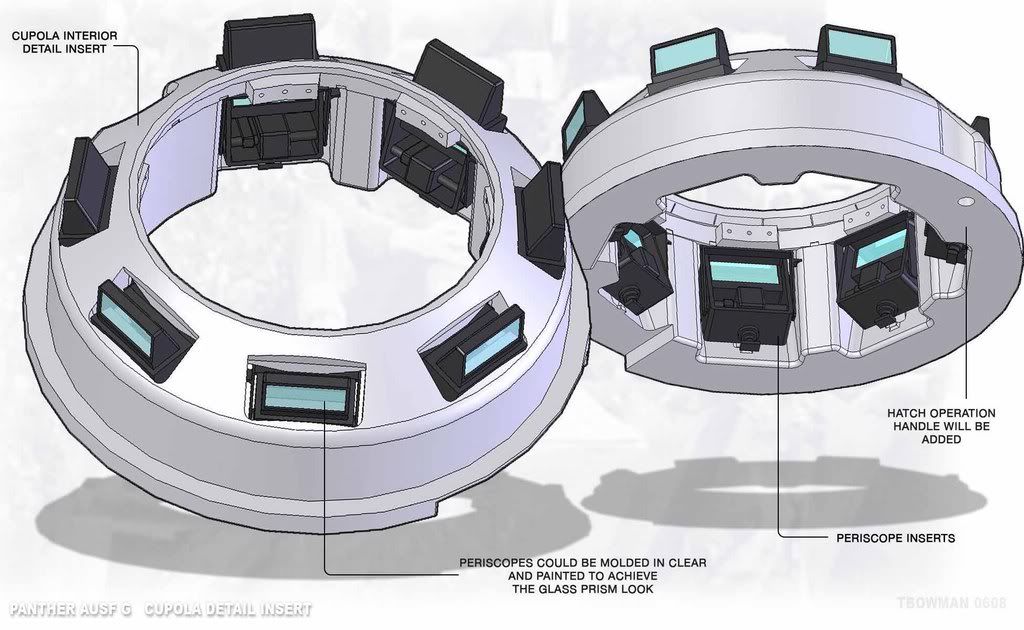
I have just a few things left to complete on the Panther. One of them is this project I started a long time ago but put on the back burner. Like my other parts, I will build a rapid proto, give it the cast-metal texturing and it is then simply inserted from inside Armortek's existing cupola. I will machine away the periscope openings on the existing cupola to accommodate the scale periscopes that are pushed through from the inside, along with the whole assembly.
The cupola periscopes will be done separately the same way, cast in clear and then painted. Although not as spectacular as Mike Stannard's awesome cupola and scopes, it should give a nice representation of the interior.
regards
Tim