Iacopo's Panzer III, a new and first adventure for me.
-
simon_manning
- Posts: 2050
- Joined: Fri Nov 02, 2007 8:51 pm
- Location: new forest,hampshire,u.k.
- Been liked: 1715 times
Re: Iacopo's Panzer III, a new and first adventure for me.
superb job, a big improvement. regards simon manning.
-
Stephen White
- Site Admin
- Posts: 3114
- Joined: Sat Oct 11, 2008 7:05 pm
- Location: Dorset
- Has liked: 1033 times
- Been liked: 2111 times
- Contact:
Re: Iacopo's Panzer III, a new and first adventure for me.
Iacopo, superb job. Ironic that having created real welds, you're presumably going to have to simulate scale ones on top?
You've certainly sorted out the subtle changes needed such as the angle of the back plate, the slope angle of the top front plate and the position of the cupola further back. Do you have the smaller cupola which I think came with the later batch?
A real pleasure to watch.
Best regards.
Stephen
You've certainly sorted out the subtle changes needed such as the angle of the back plate, the slope angle of the top front plate and the position of the cupola further back. Do you have the smaller cupola which I think came with the later batch?
A real pleasure to watch.
Best regards.
Stephen
-
Adrian Harris

- Posts: 5088
- Joined: Thu Jul 12, 2007 10:46 pm
- Location: Berkshire (UK)
- Has liked: 1449 times
- Been liked: 1620 times
Re: Iacopo's Panzer III, a new and first adventure for me.
Great to see what can be done with the Panzer III turret 
It's not often we see real welding on here.
Was it proper TIG welding, or one of the aluminium soldering sticks like Durafix
> smaller cupola which I think came with the later batch?
I believe only the latest batch of Panzer IVs came with the smaller cupola.
Adrian.
It's not often we see real welding on here.
Was it proper TIG welding, or one of the aluminium soldering sticks like Durafix
> smaller cupola which I think came with the later batch?
I believe only the latest batch of Panzer IVs came with the smaller cupola.
Adrian.
Contact me at sales@armortekaddict.uk for details of my smoker fan control module
-
Andrea Daviero
- Posts: 105
- Joined: Fri Dec 03, 2010 7:24 pm
- Been liked: 5 times
Re: Iacopo's Panzer III, a new and first adventure for me.
Stephen, Iacopo's cupola is bigger than what it must be, we have also armorpax cupola hatches but we found they are too small for the cupola. So Iacopo decided to rework armortek hatches and cupola to have a good compromise with the dimensions. I don't know if there is a smaller cupola version made by armortek, if so, it is too late, cupola is a "work in progress" and is near completition.
Adrian, the cupola was TIG welded by our friend Emiliano.
Emiliano is an italian guy who loves steel tanks. He did (it is almost completed) a 1:4 FULL STEEL M60 tank, gas powered with a 125cc engine and hydromecanical clutches. It is water cooled and so on... His weight is over 400 Kilos. Now, with a friend, they are doing a couple of Tiger I tank... Full steel, still 1:4th scale.
We asked him to help us with turret, as aluminium needs a good skills to be correctly welded.
Regards
Andrea Daviero (Andrew)
Andrea Daviero (Andrew)
-
Iacopo Di Giampietro
- Posts: 226
- Joined: Fri May 11, 2012 9:14 pm
- Been liked: 48 times
Re: Iacopo's Panzer III, a new and first adventure for me.
Hello everyone!
Resume work on the turret of the Panzer III.
I started working on the base of the cannon.
This is the original piece Armortek:
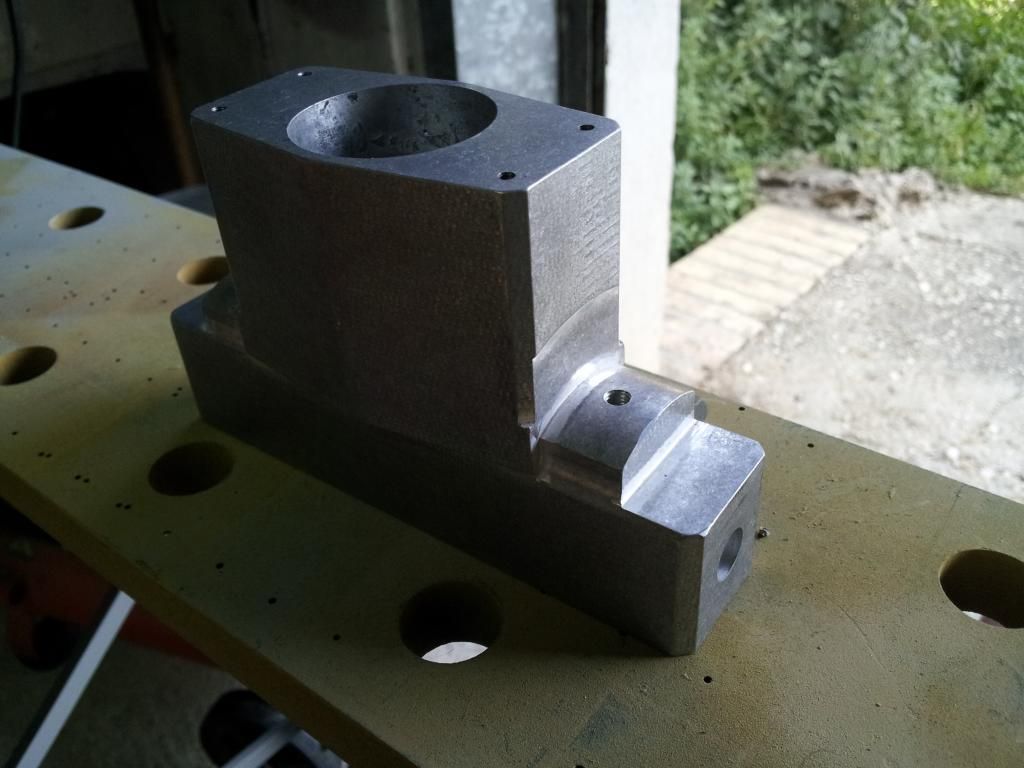
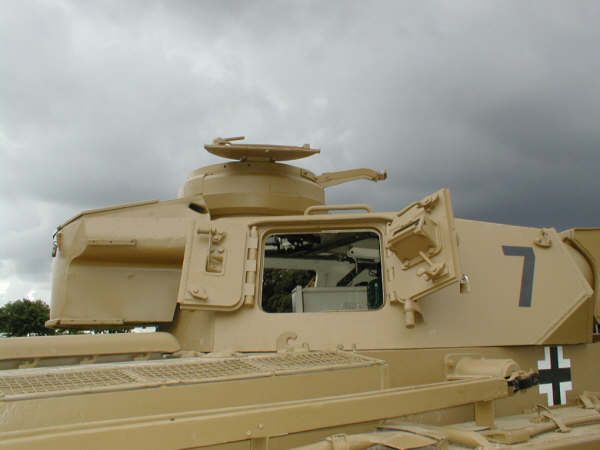
This is a picture of the real Panzer III (Bovington):
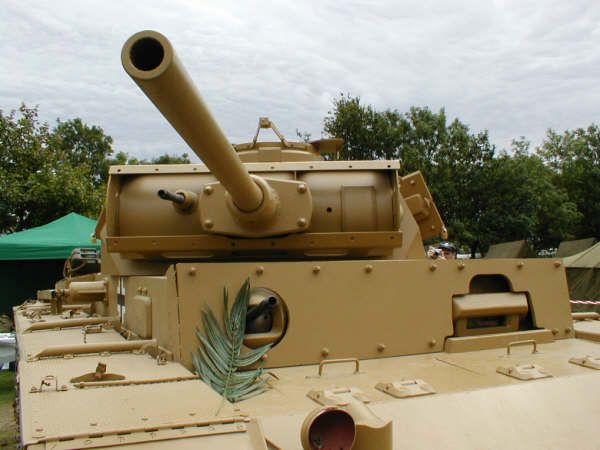
The sides of the base are rounded and not straight and the edges are "connected".
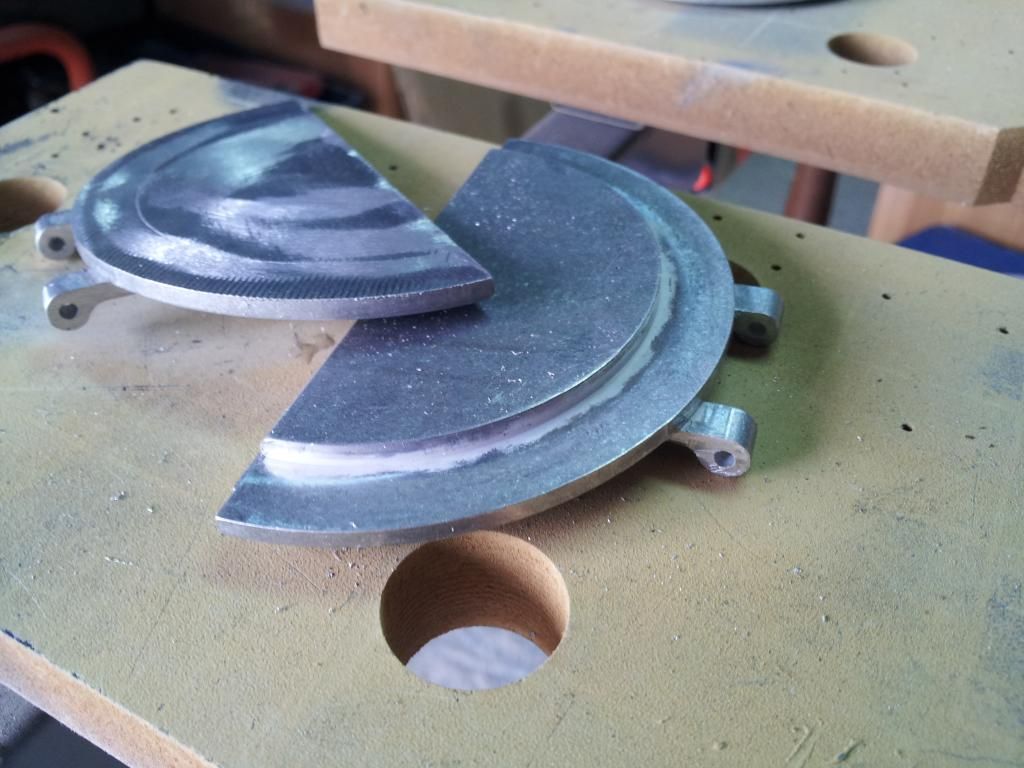
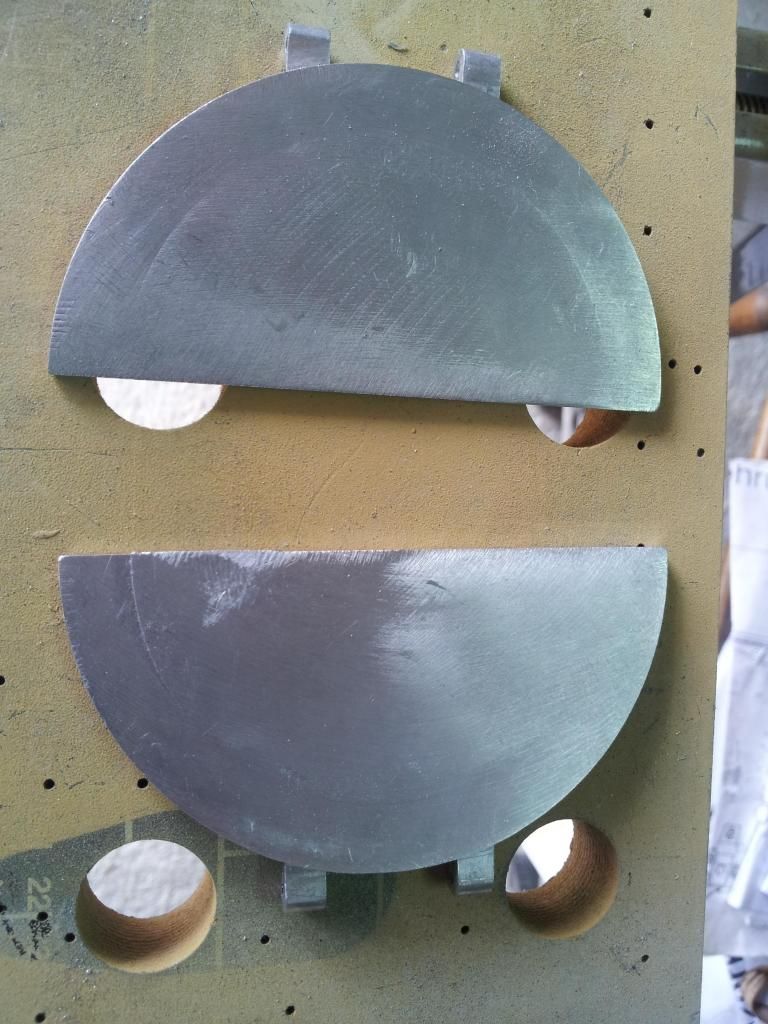
So, start by adding the material on the sides. Two strips of aluminum, screwed and glued with putty/ liquid steel:
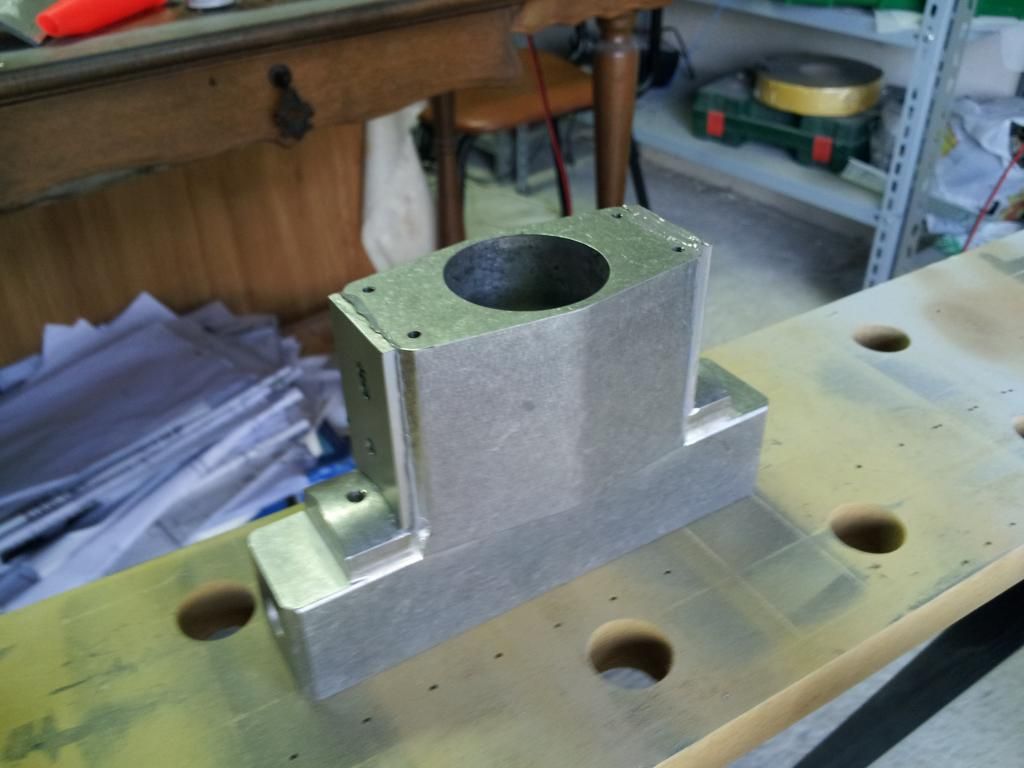
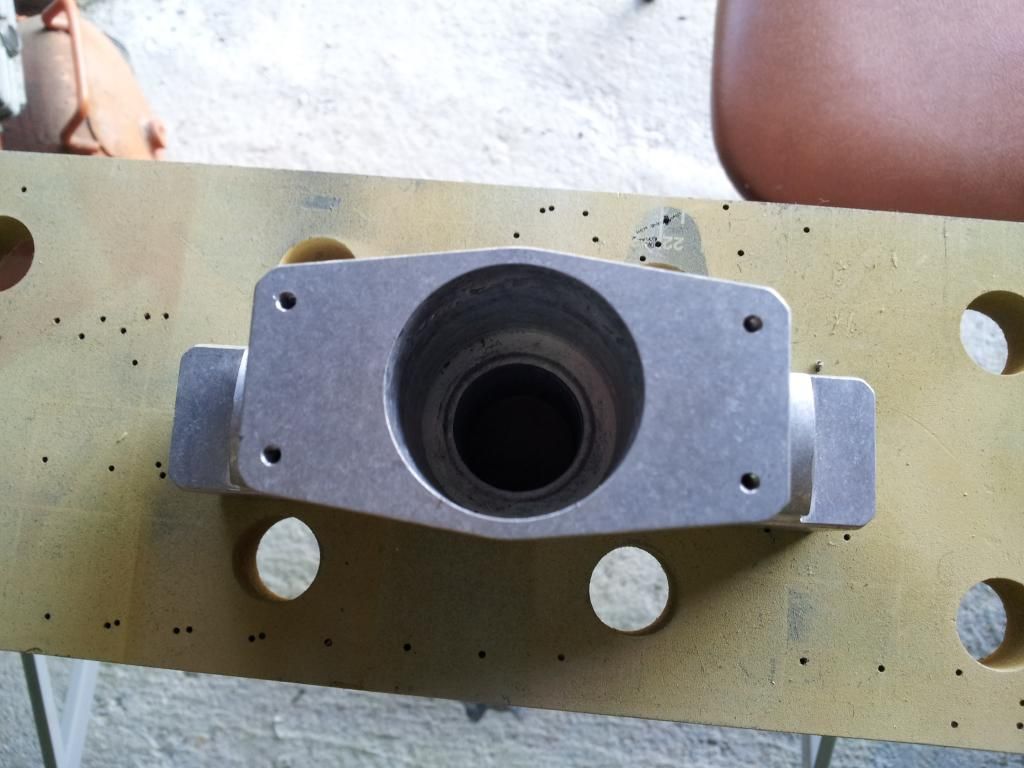
The excess liquid steel and aluminum strips are filed down until you get the desired shape:
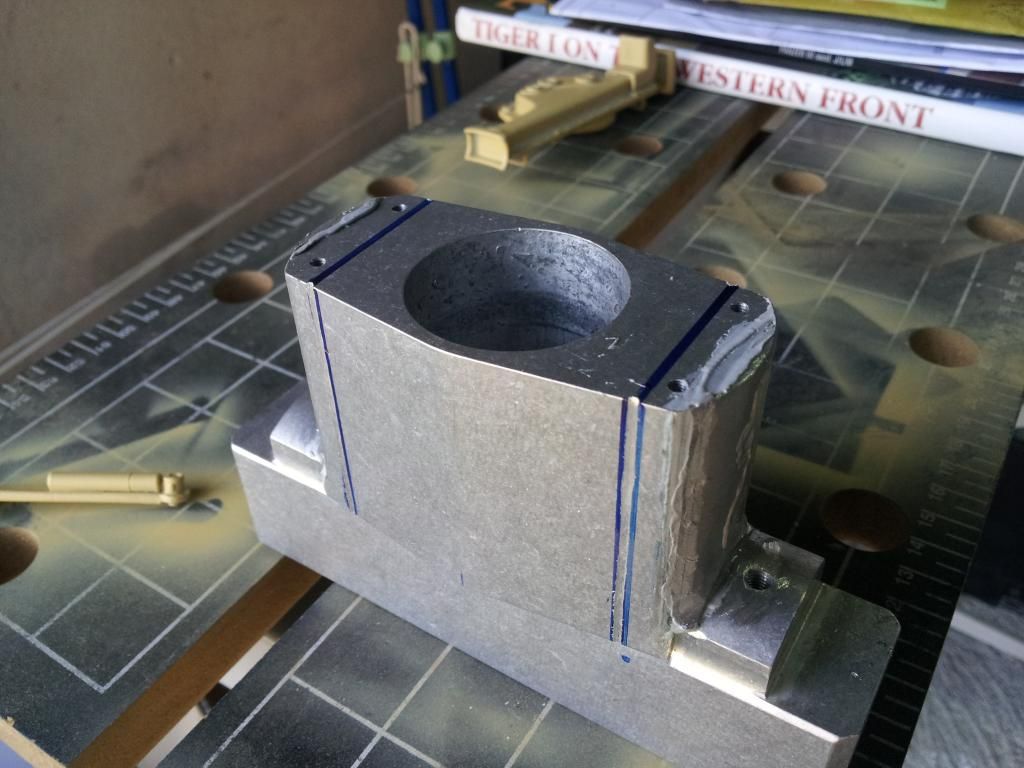
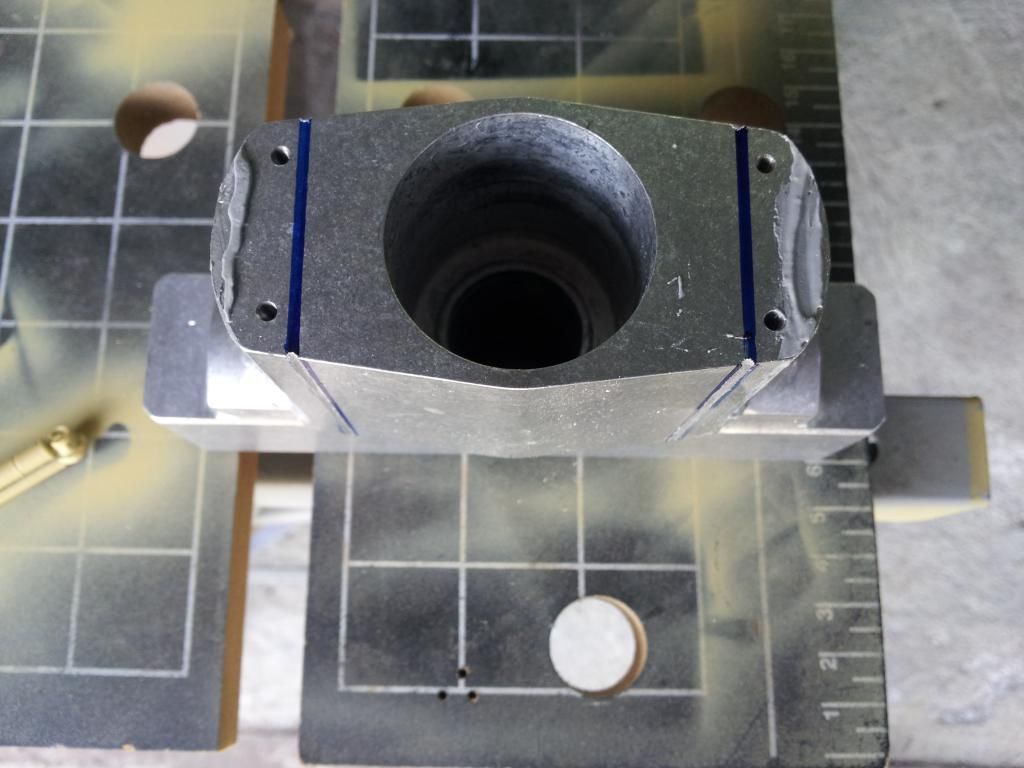
Meanwhile, four slots are milled, which will accommodate the fake welds.
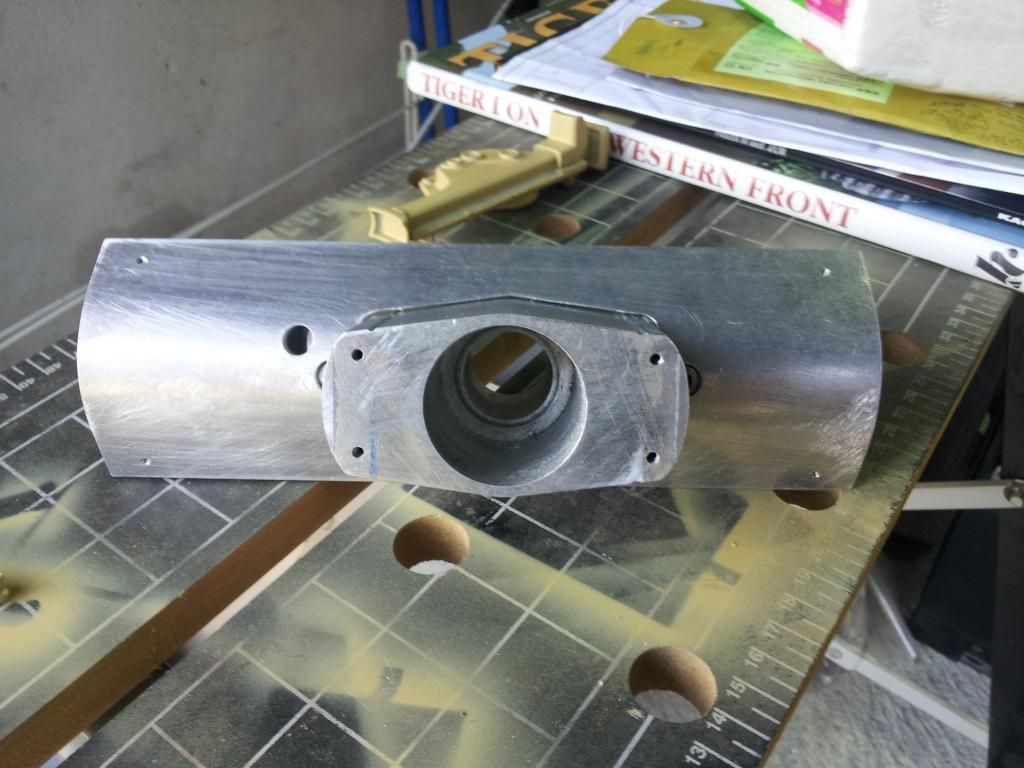
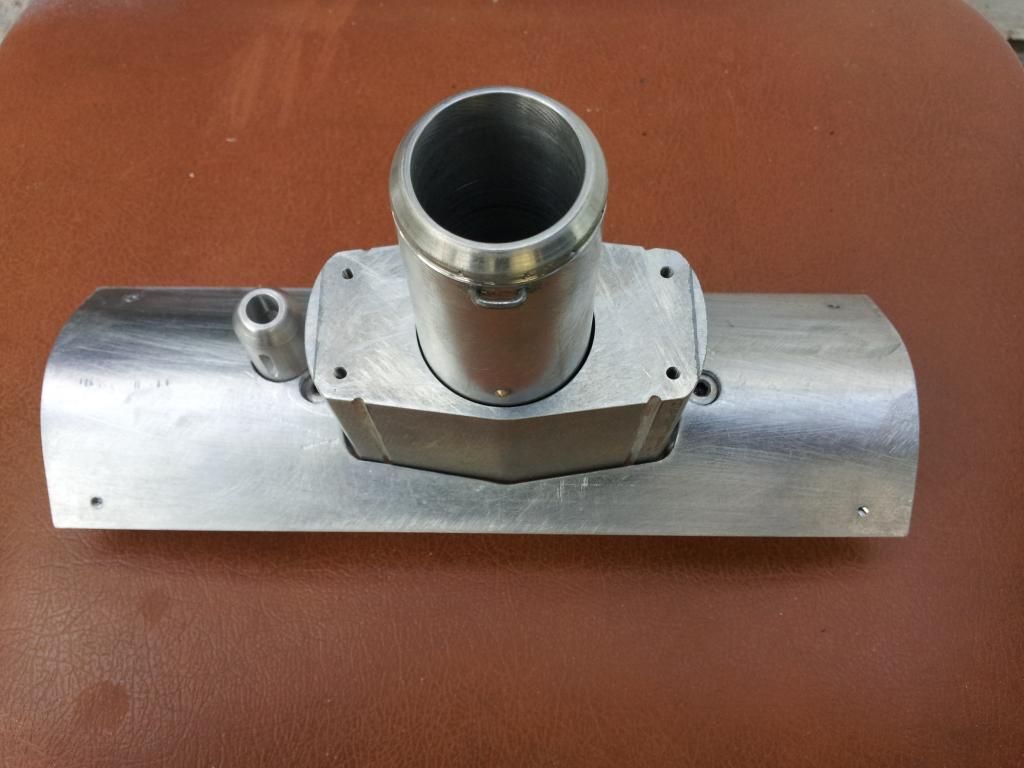
Piece "finished" and proof of the mantlet. Naturally, I have had to modify also the hole of the mantlet order to allow the passage of the new piece.
Now ..... missing the base of the turret MG!
With the dremmel I milled the base from the cannon in order to obtain the housing of the base of the MG, and the MG itself:
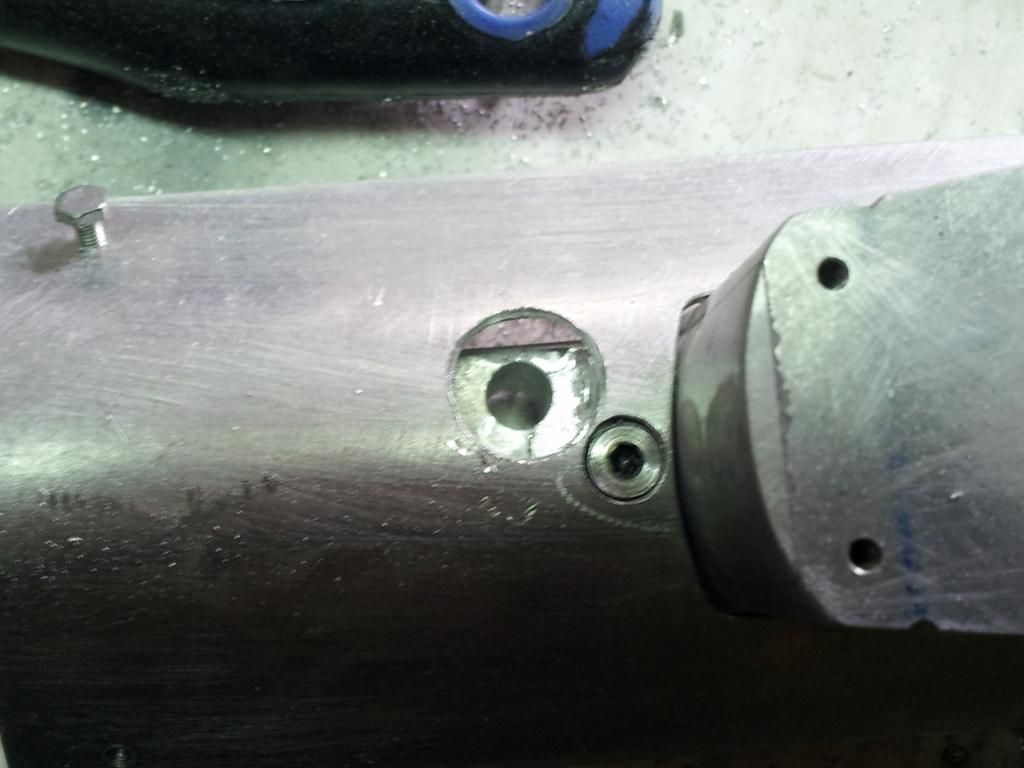
A bit of glue and metal putty will fix everything once all the components are ready.
For now that's it!
Thank you all and see you soon!
Resume work on the turret of the Panzer III.
I started working on the base of the cannon.
This is the original piece Armortek:


This is a picture of the real Panzer III (Bovington):

The sides of the base are rounded and not straight and the edges are "connected".
So, start by adding the material on the sides. Two strips of aluminum, screwed and glued with putty/ liquid steel:

The excess liquid steel and aluminum strips are filed down until you get the desired shape:


Meanwhile, four slots are milled, which will accommodate the fake welds.
Piece "finished" and proof of the mantlet. Naturally, I have had to modify also the hole of the mantlet order to allow the passage of the new piece.

Now ..... missing the base of the turret MG!


With the dremmel I milled the base from the cannon in order to obtain the housing of the base of the MG, and the MG itself:


A bit of glue and metal putty will fix everything once all the components are ready.

For now that's it!
Thank you all and see you soon!
-
Adrian Harris
- Posts: 5088
- Joined: Thu Jul 12, 2007 10:46 pm
- Location: Berkshire (UK)
- Has liked: 1449 times
- Been liked: 1620 times
Re: Iacopo's Panzer III, a new and first adventure for me.
Meraviglioso Iacopo 
You should post pictures of your cupola and its hatches, they are a work of art too
Adrian.
You should post pictures of your cupola and its hatches, they are a work of art too
Adrian.
Contact me at sales@armortekaddict.uk for details of my smoker fan control module
-
Andrea Daviero
- Posts: 105
- Joined: Fri Dec 03, 2010 7:24 pm
- Been liked: 5 times
Re: Iacopo's Panzer III, a new and first adventure for me.
Adrian Harris wrote:Meraviglioso Iacopo
You should post pictures of your cupola and its hatches, they are a work of art too
Adrian.
Regards
Andrea Daviero (Andrew)
Andrea Daviero (Andrew)
-
Iacopo Di Giampietro
- Posts: 226
- Joined: Fri May 11, 2012 9:14 pm
- Been liked: 48 times
Re: Iacopo's Panzer III, a new and first adventure for me.
Ah ah ah ah ah!
Dear Adrian, not so you can spoil my work?
Unfortunately I can not always update my work.
Slowly I come! 
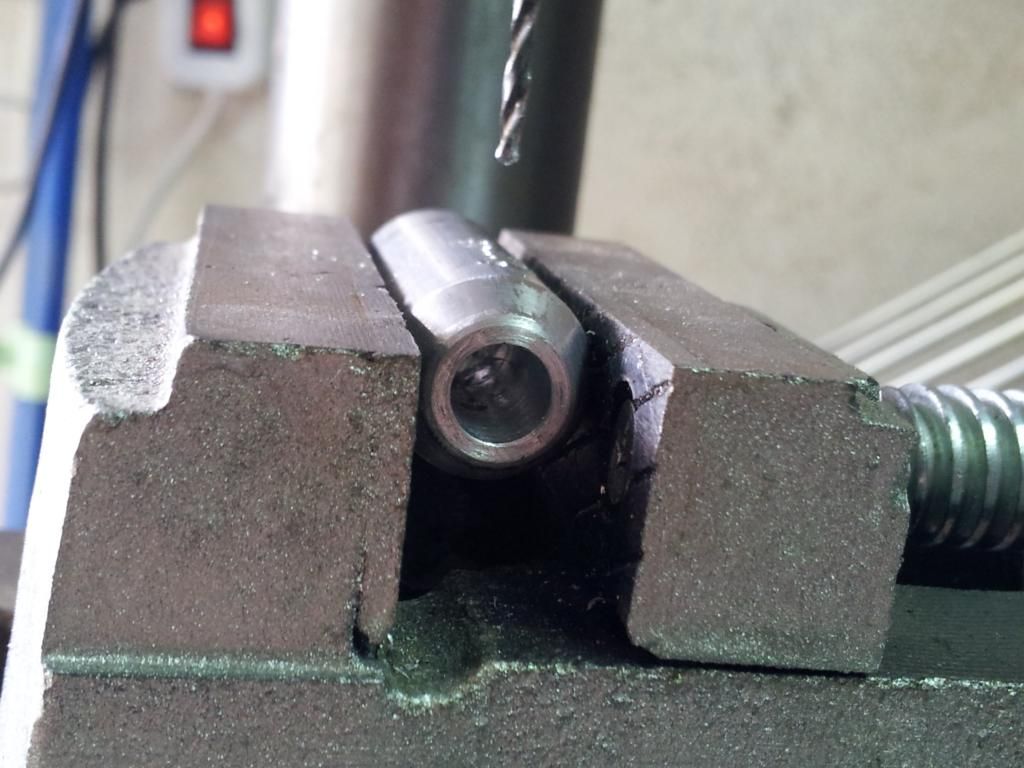
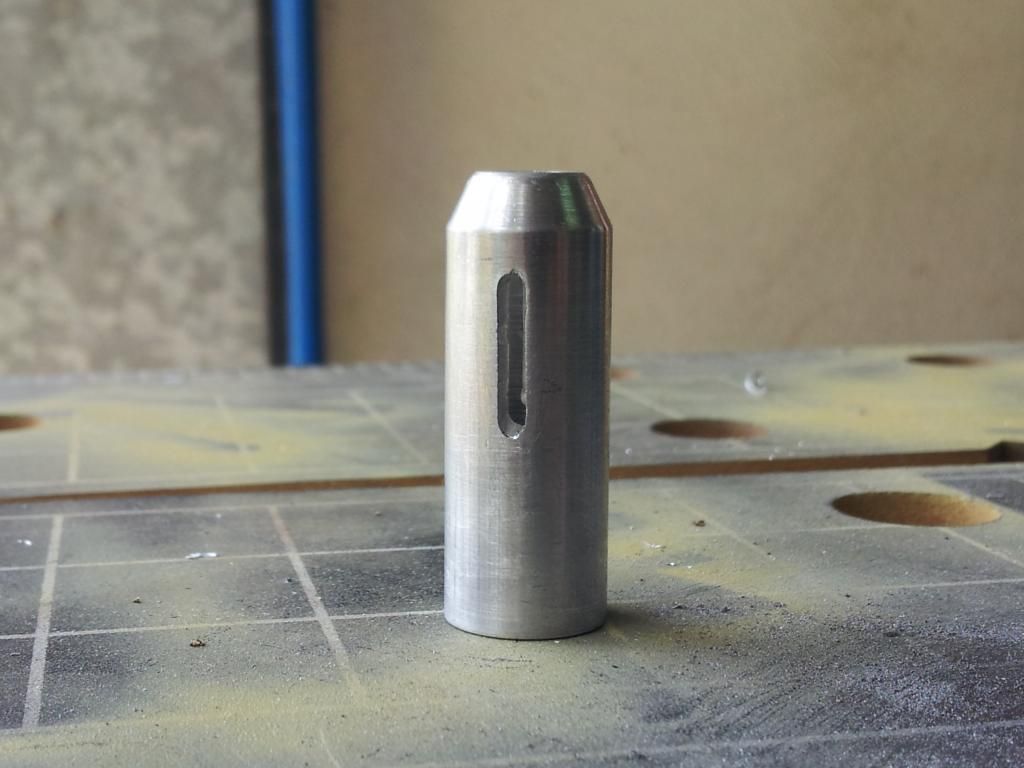
Meanwhile, let's go ahead with the base of the cannon.
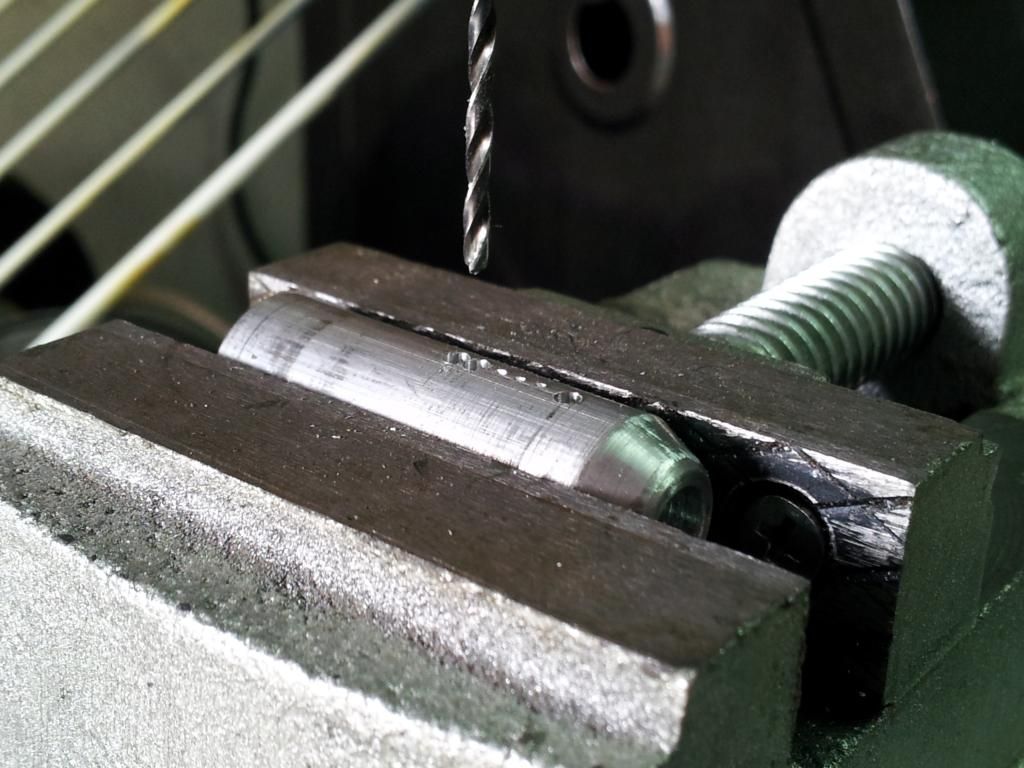
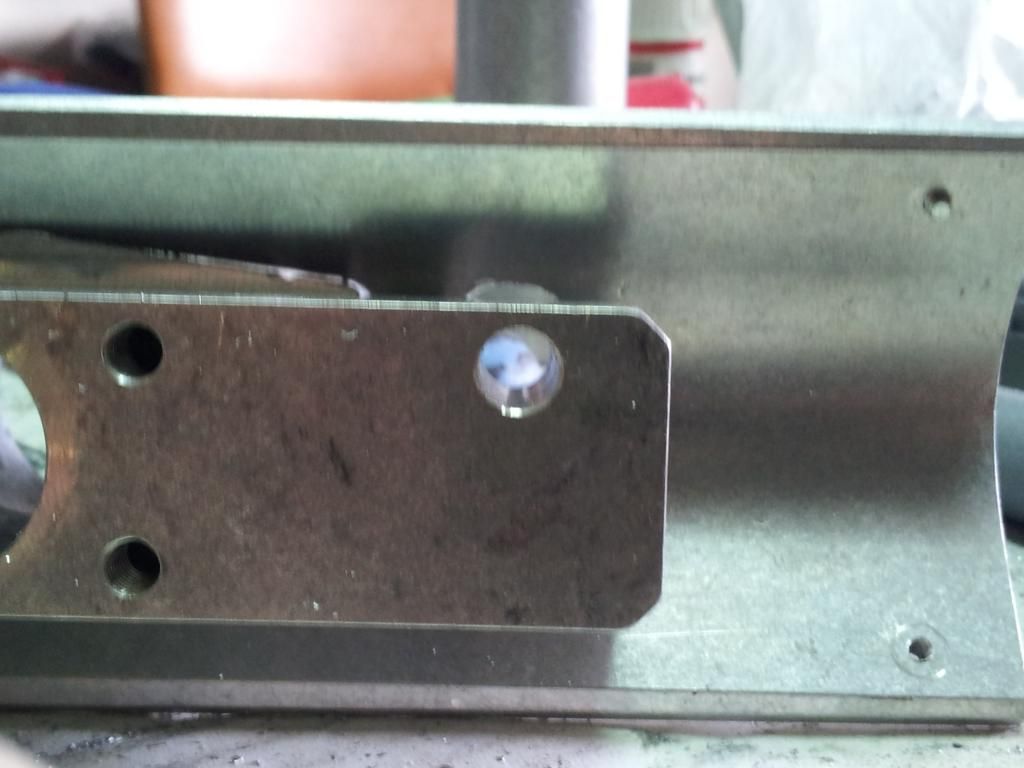
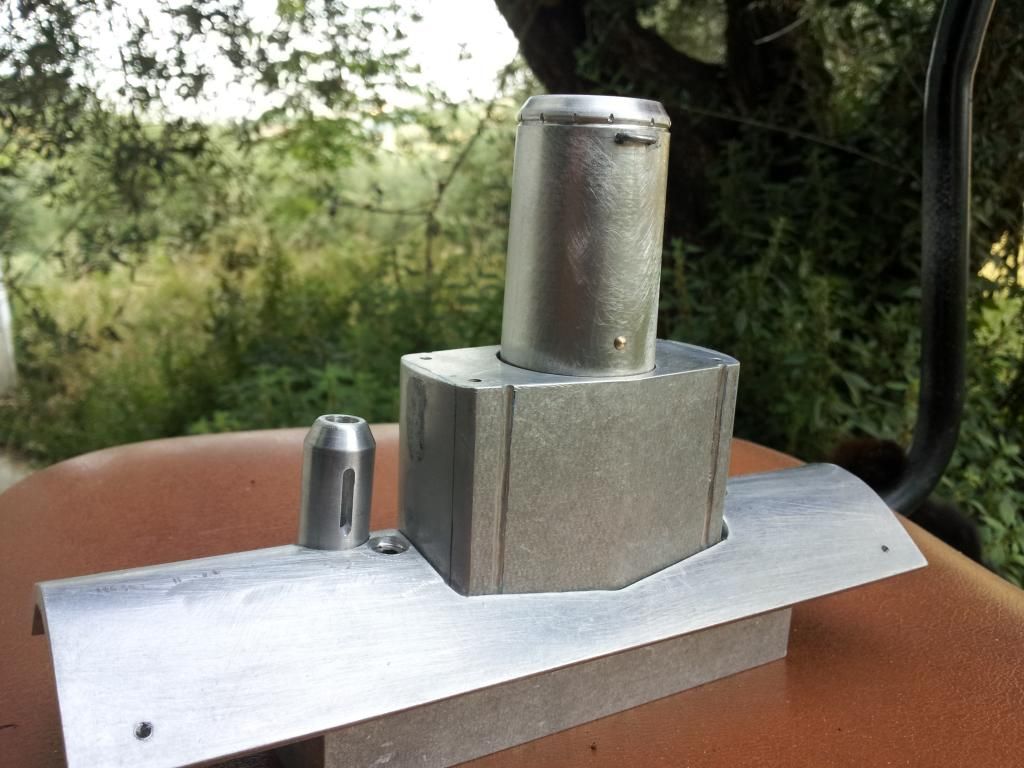
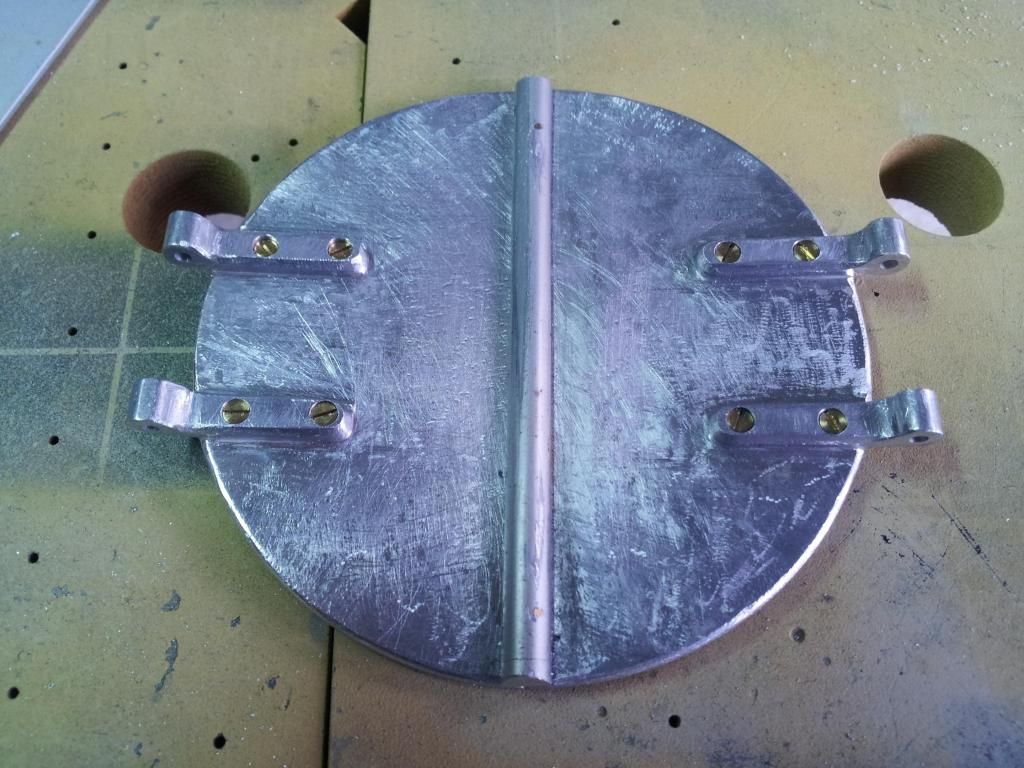
This is the original base, as you can see is perfectly cylindrical.
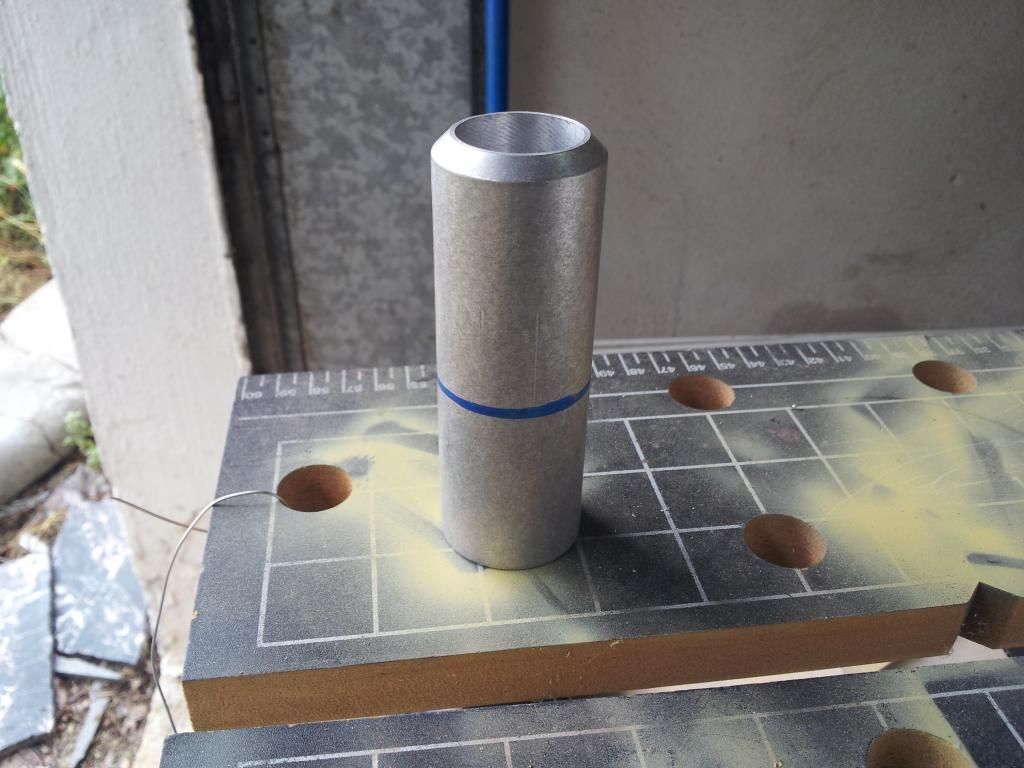
insert it into the mantle to mark the part that sticks out, and that the tank was not cylindrical but slightly truncated cone:
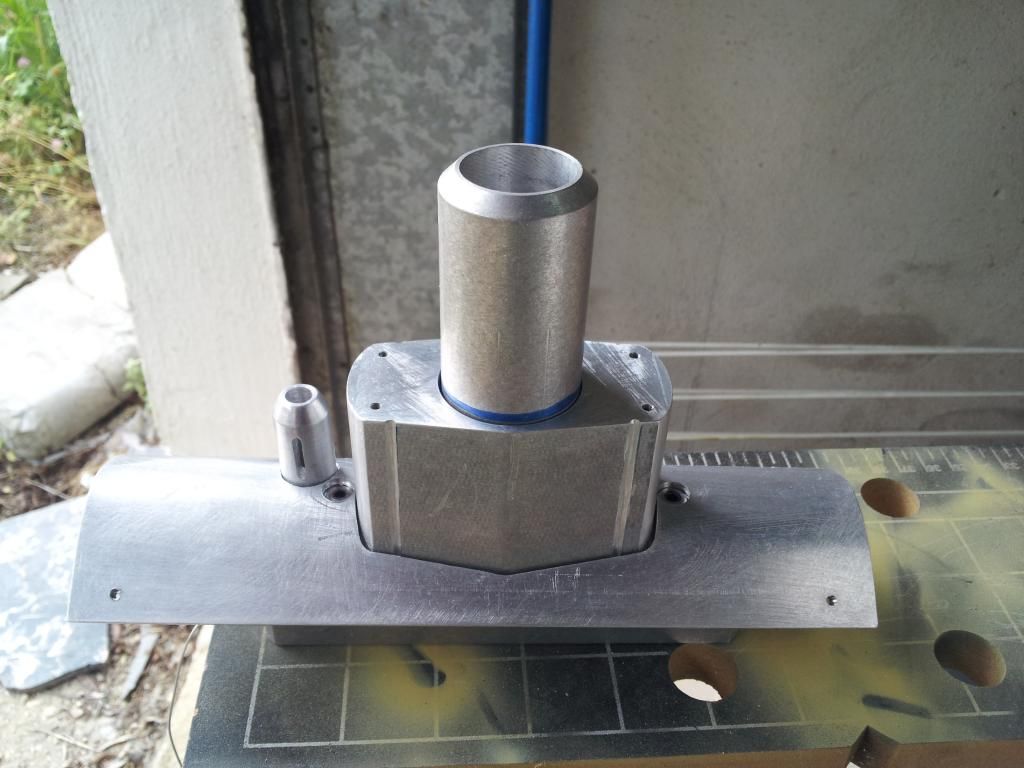
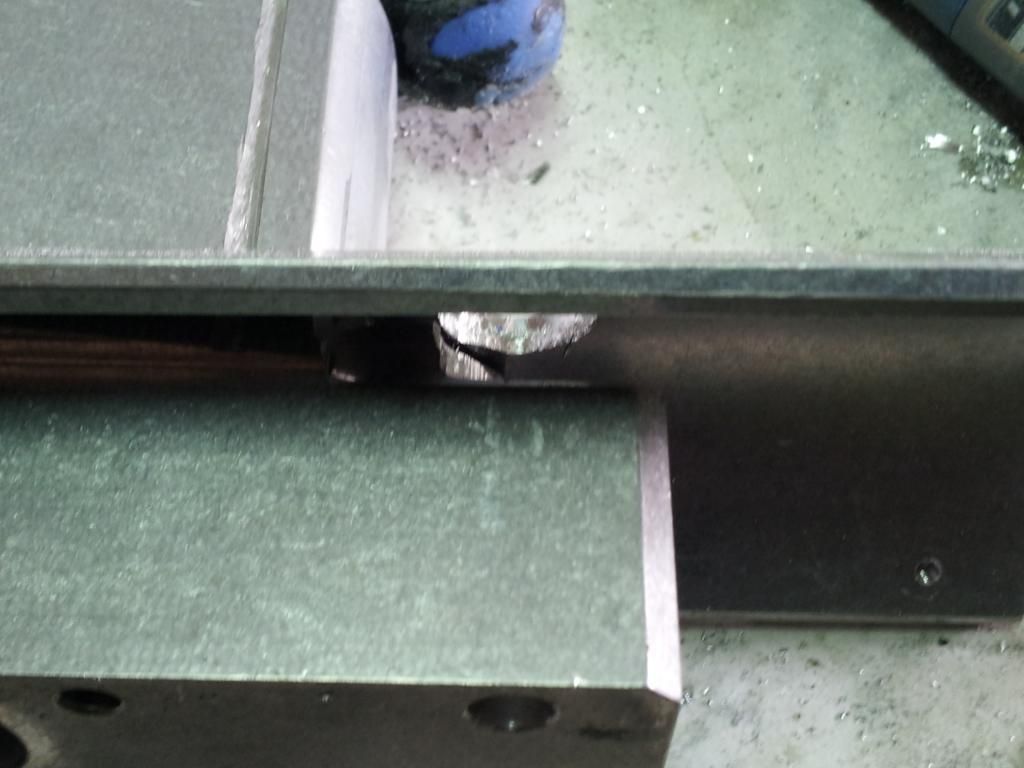
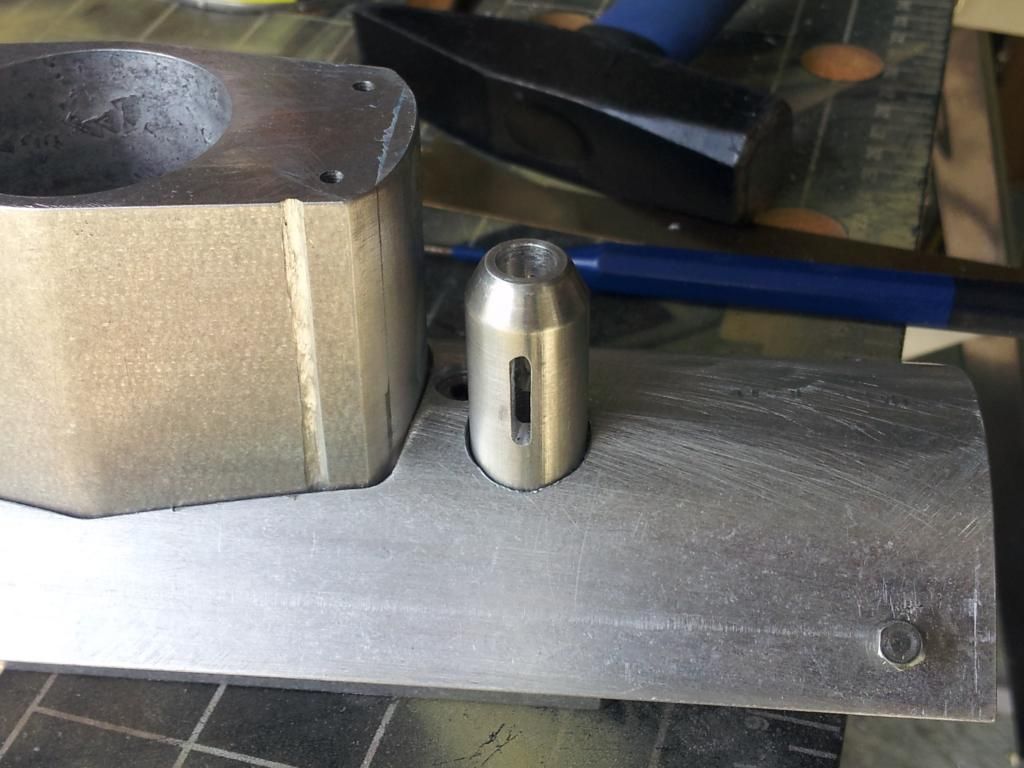
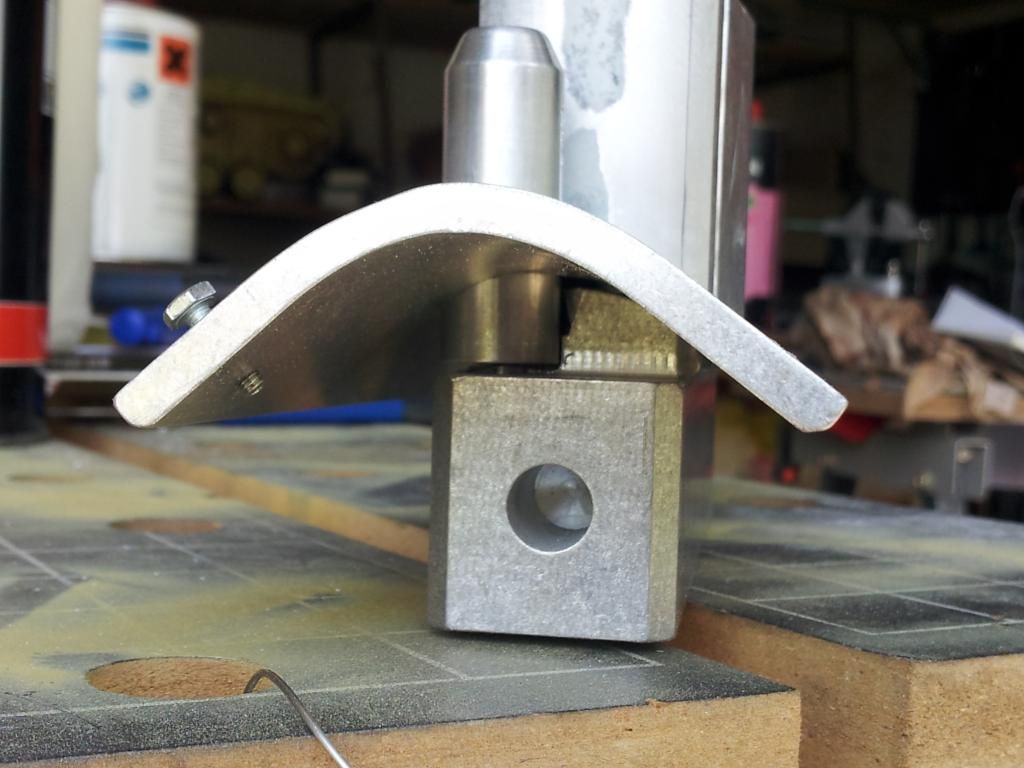
the part is machined on a lathe:
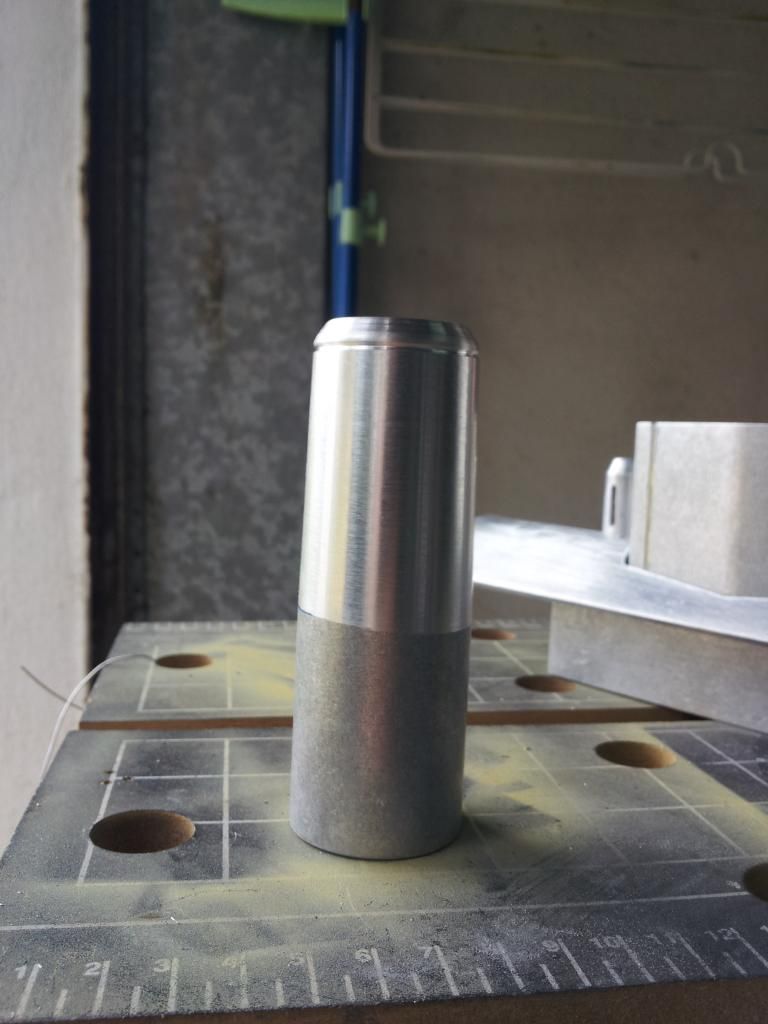
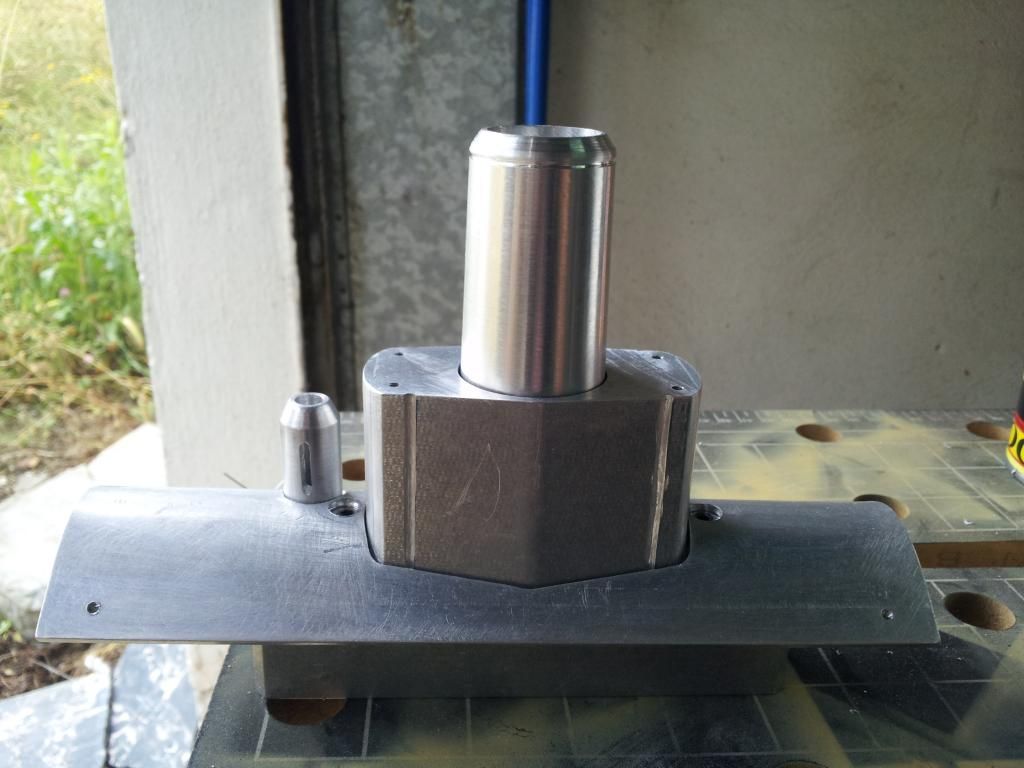
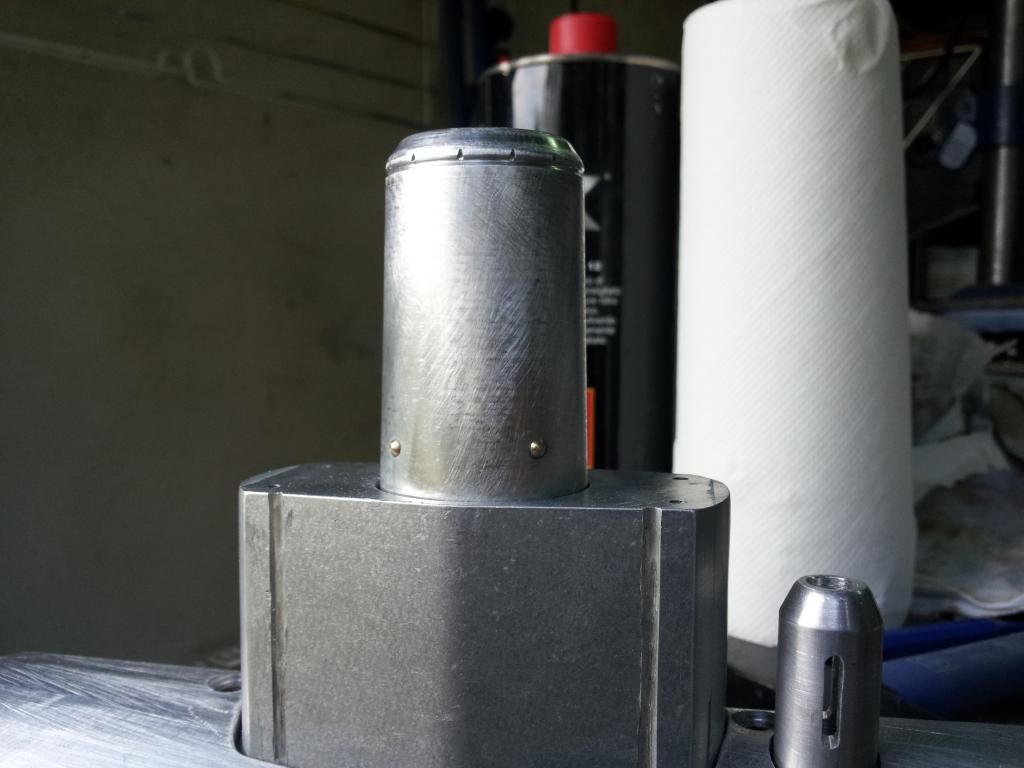
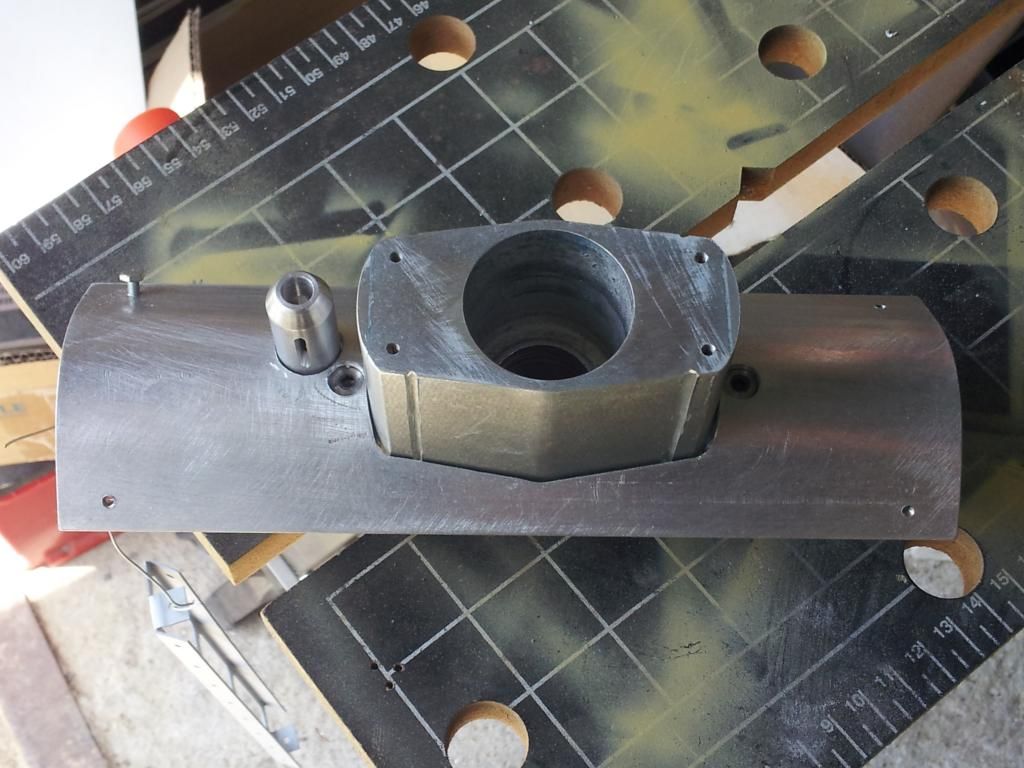
Also added the bolts / rivets and various hooks and the piece is ready!
Dear Adrian, not so you can spoil my work?
Unfortunately I can not always update my work.
Slowly I come!
Meanwhile, let's go ahead with the base of the cannon.
This is the original base, as you can see is perfectly cylindrical.

insert it into the mantle to mark the part that sticks out, and that the tank was not cylindrical but slightly truncated cone:

the part is machined on a lathe:


Also added the bolts / rivets and various hooks and the piece is ready!


-
Adrian Harris
- Posts: 5088
- Joined: Thu Jul 12, 2007 10:46 pm
- Location: Berkshire (UK)
- Has liked: 1449 times
- Been liked: 1620 times
Re: Iacopo's Panzer III, a new and first adventure for me.
> not so you can spoil my work?
I will wait for you to unveil the finished piece here
Adrian.
I will wait for you to unveil the finished piece here
Adrian.
Contact me at sales@armortekaddict.uk for details of my smoker fan control module
-
Andrea Daviero
- Posts: 105
- Joined: Fri Dec 03, 2010 7:24 pm
- Been liked: 5 times
Re: Iacopo's Panzer III, a new and first adventure for me.
Adrian, all the images you have seen out from here are also "old", works are a bit further...
Regards
Andrea Daviero (Andrew)
Andrea Daviero (Andrew)
-
Iacopo Di Giampietro
- Posts: 226
- Joined: Fri May 11, 2012 9:14 pm
- Been liked: 48 times
Re: Iacopo's Panzer III, a new and first adventure for me.
Spurred on by Adrian,
and taking advantage of the summer holidays, I update the work done on my Panzer III!
Looking forward to organize the electronics in the turret, we went to the assembly of the turret hatches.
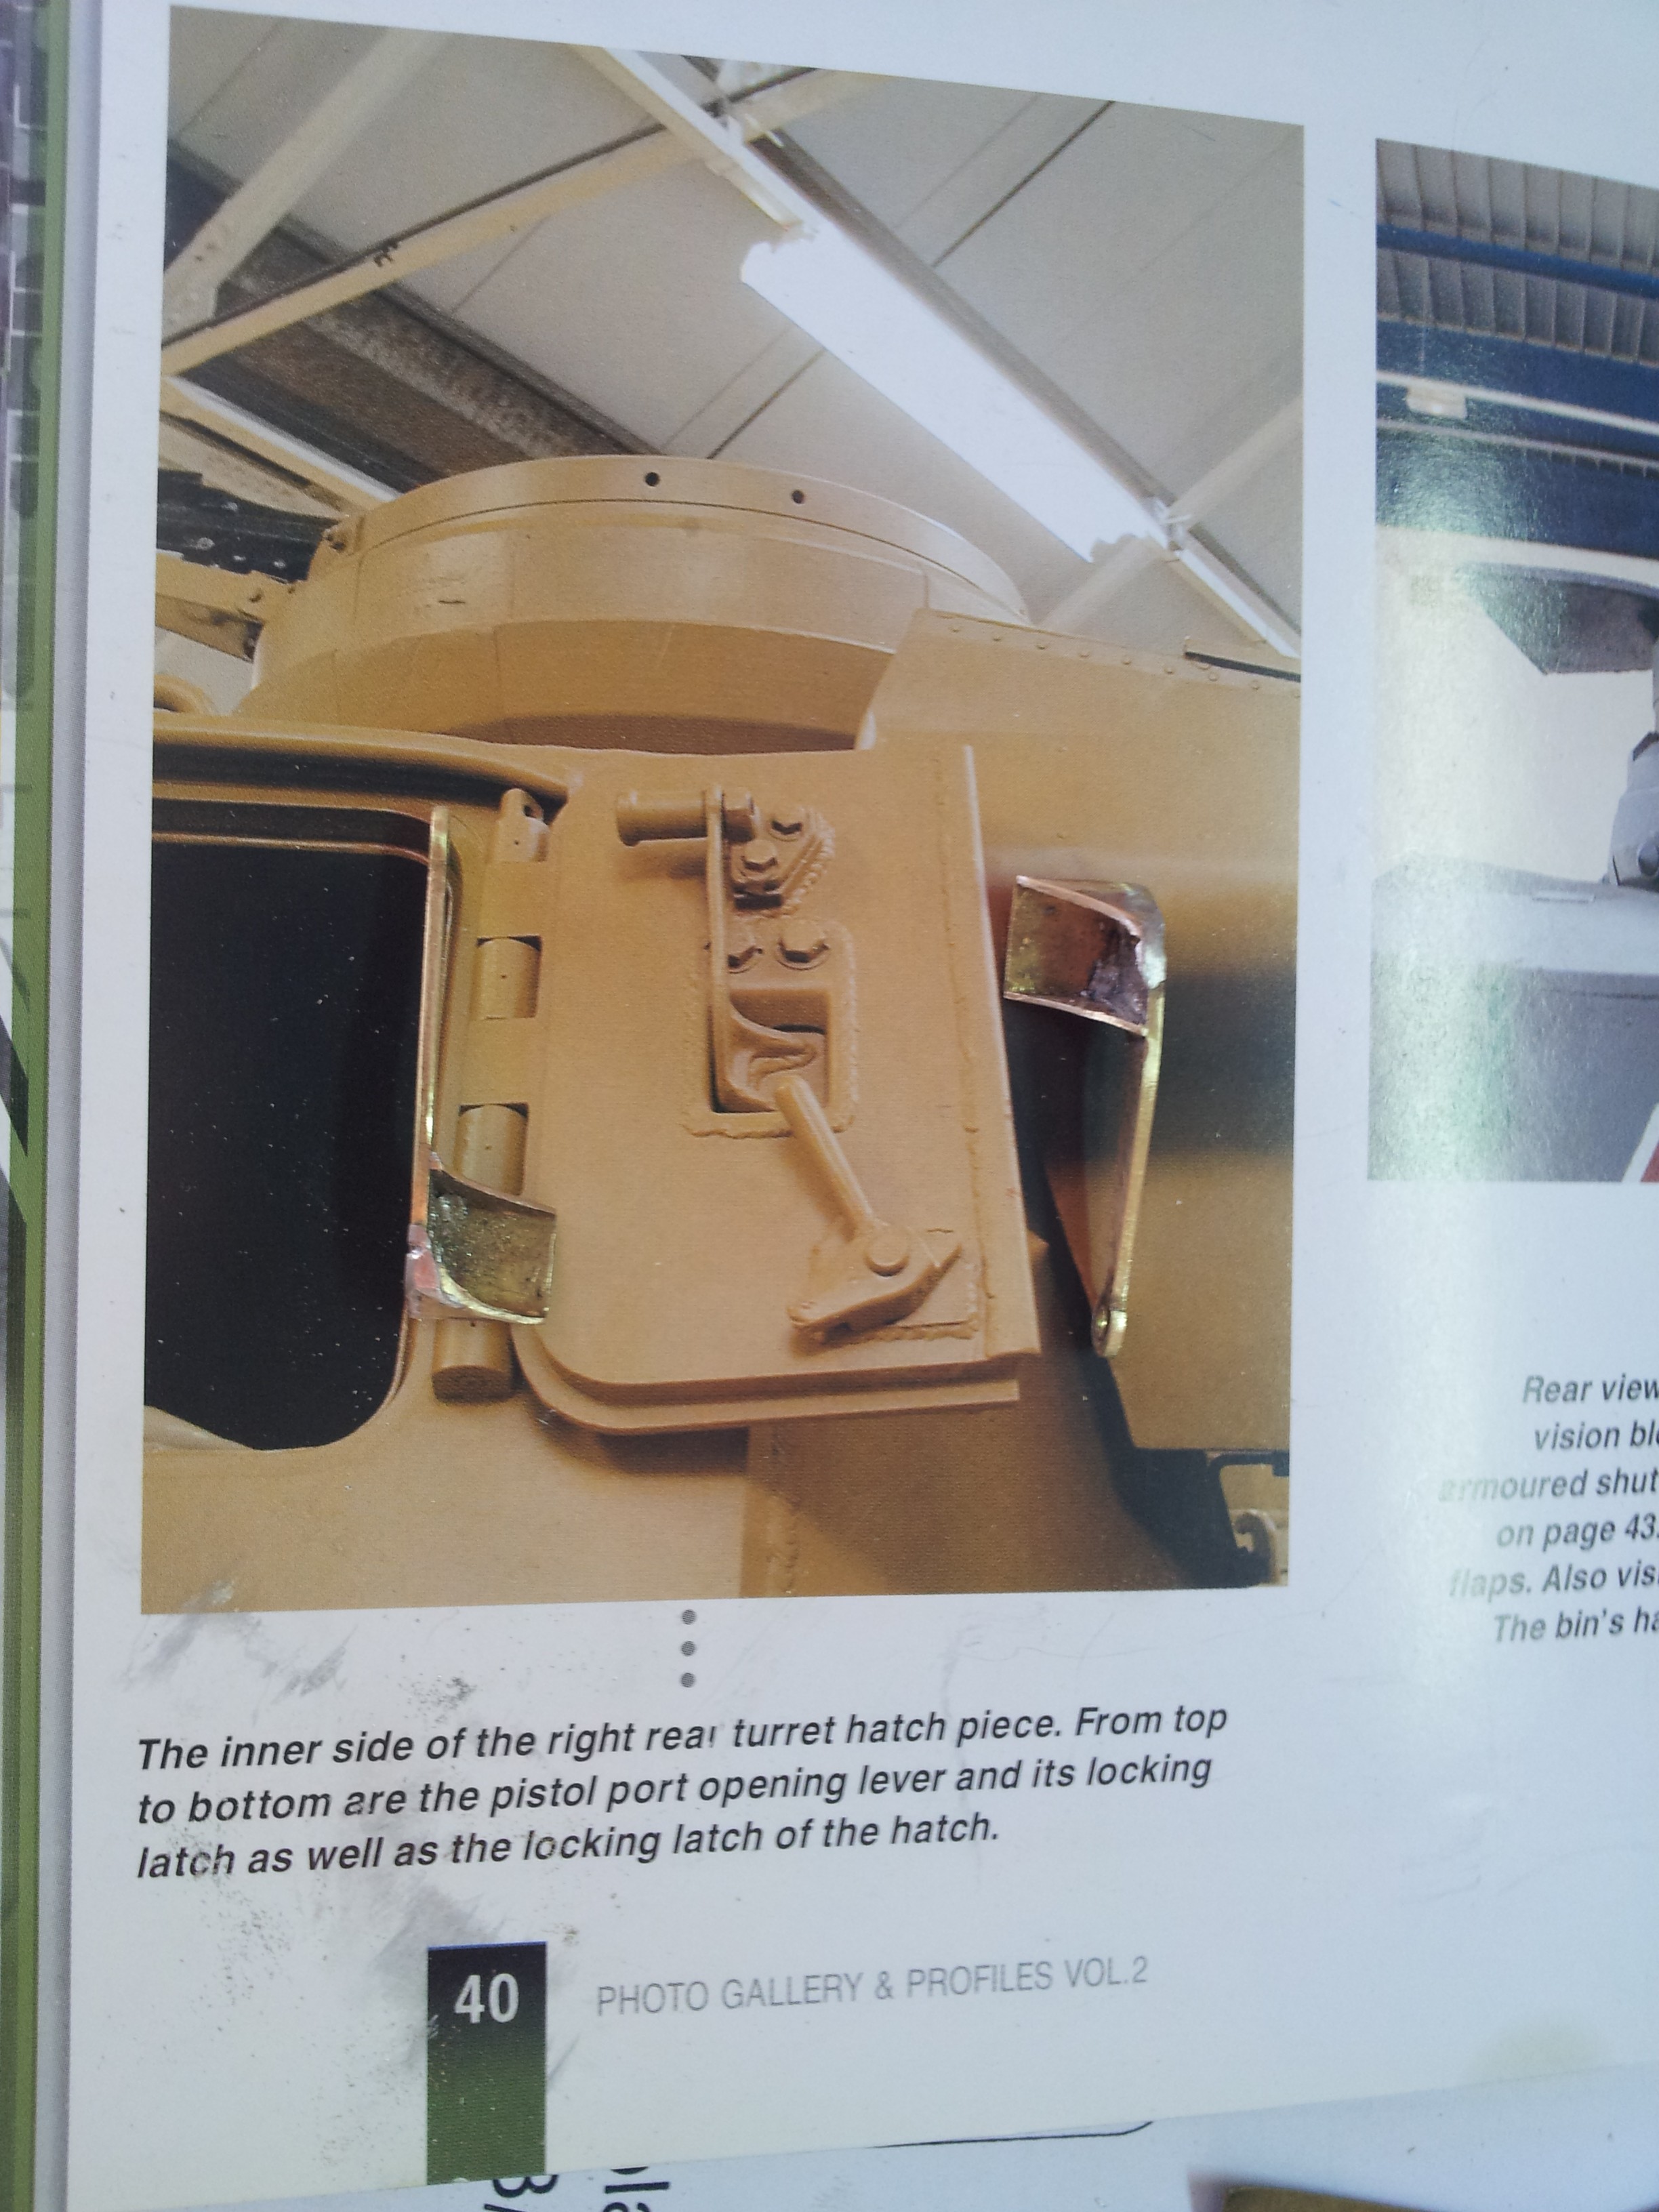
The turret hatches provided by the kit, are quite bare and devoid of detail, especially inside, when compared to the real tank.
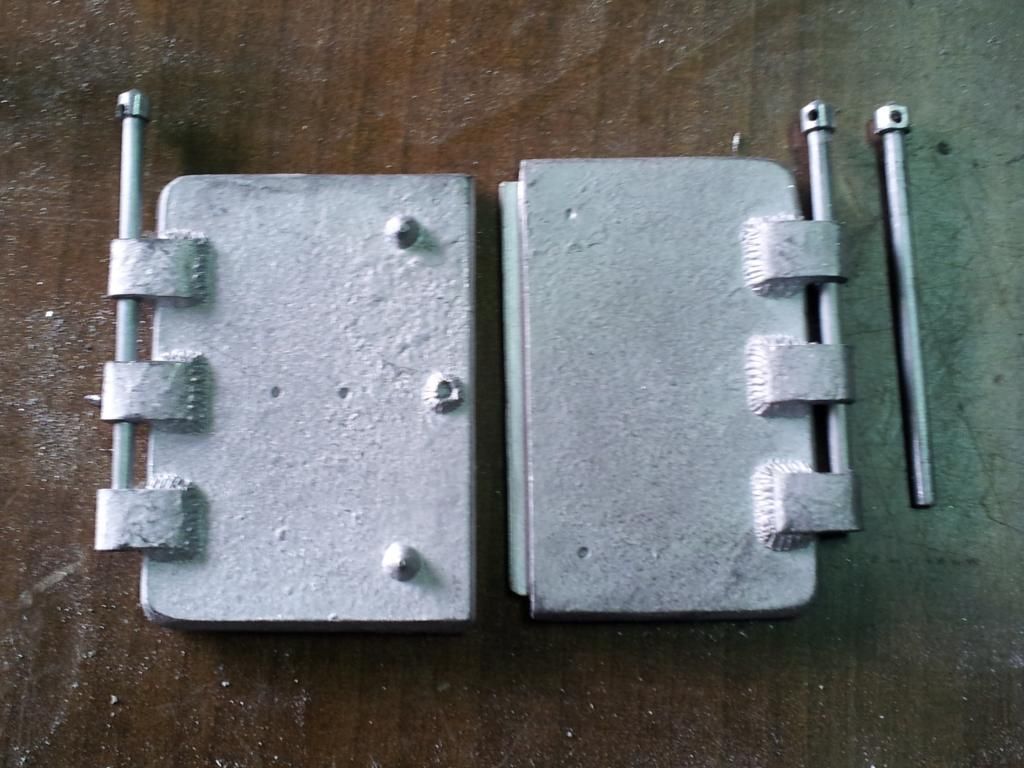
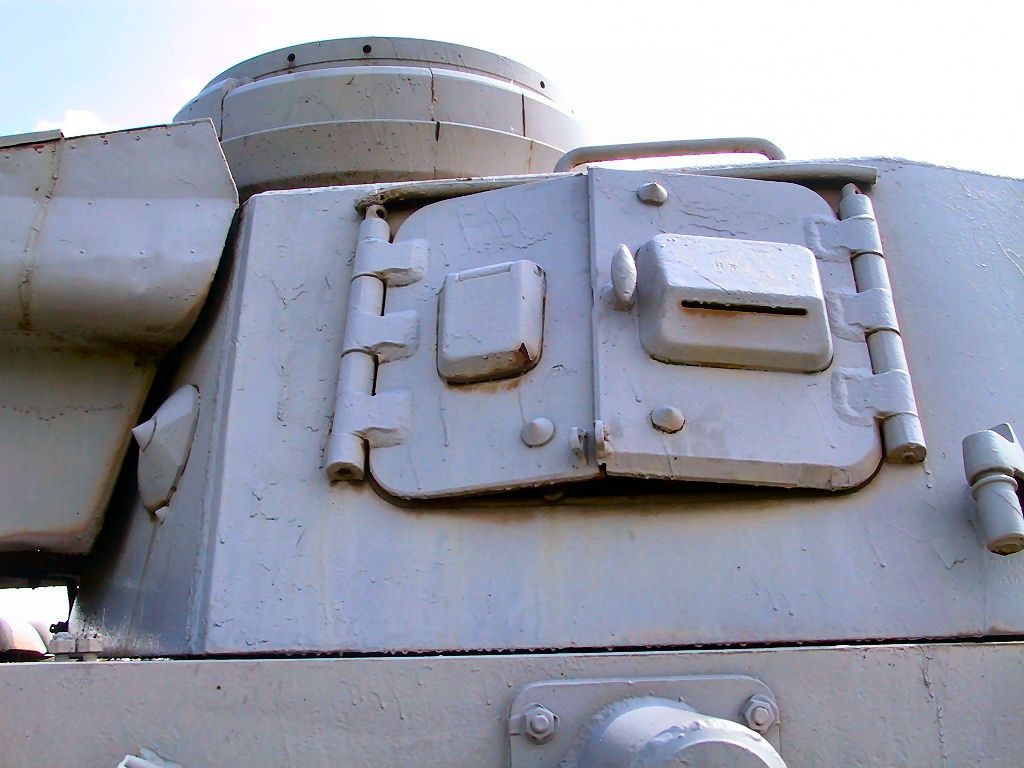
As you can see from photos, the first thing we realized the hinges.
Then, as far as possible we have tried to improve the situation.
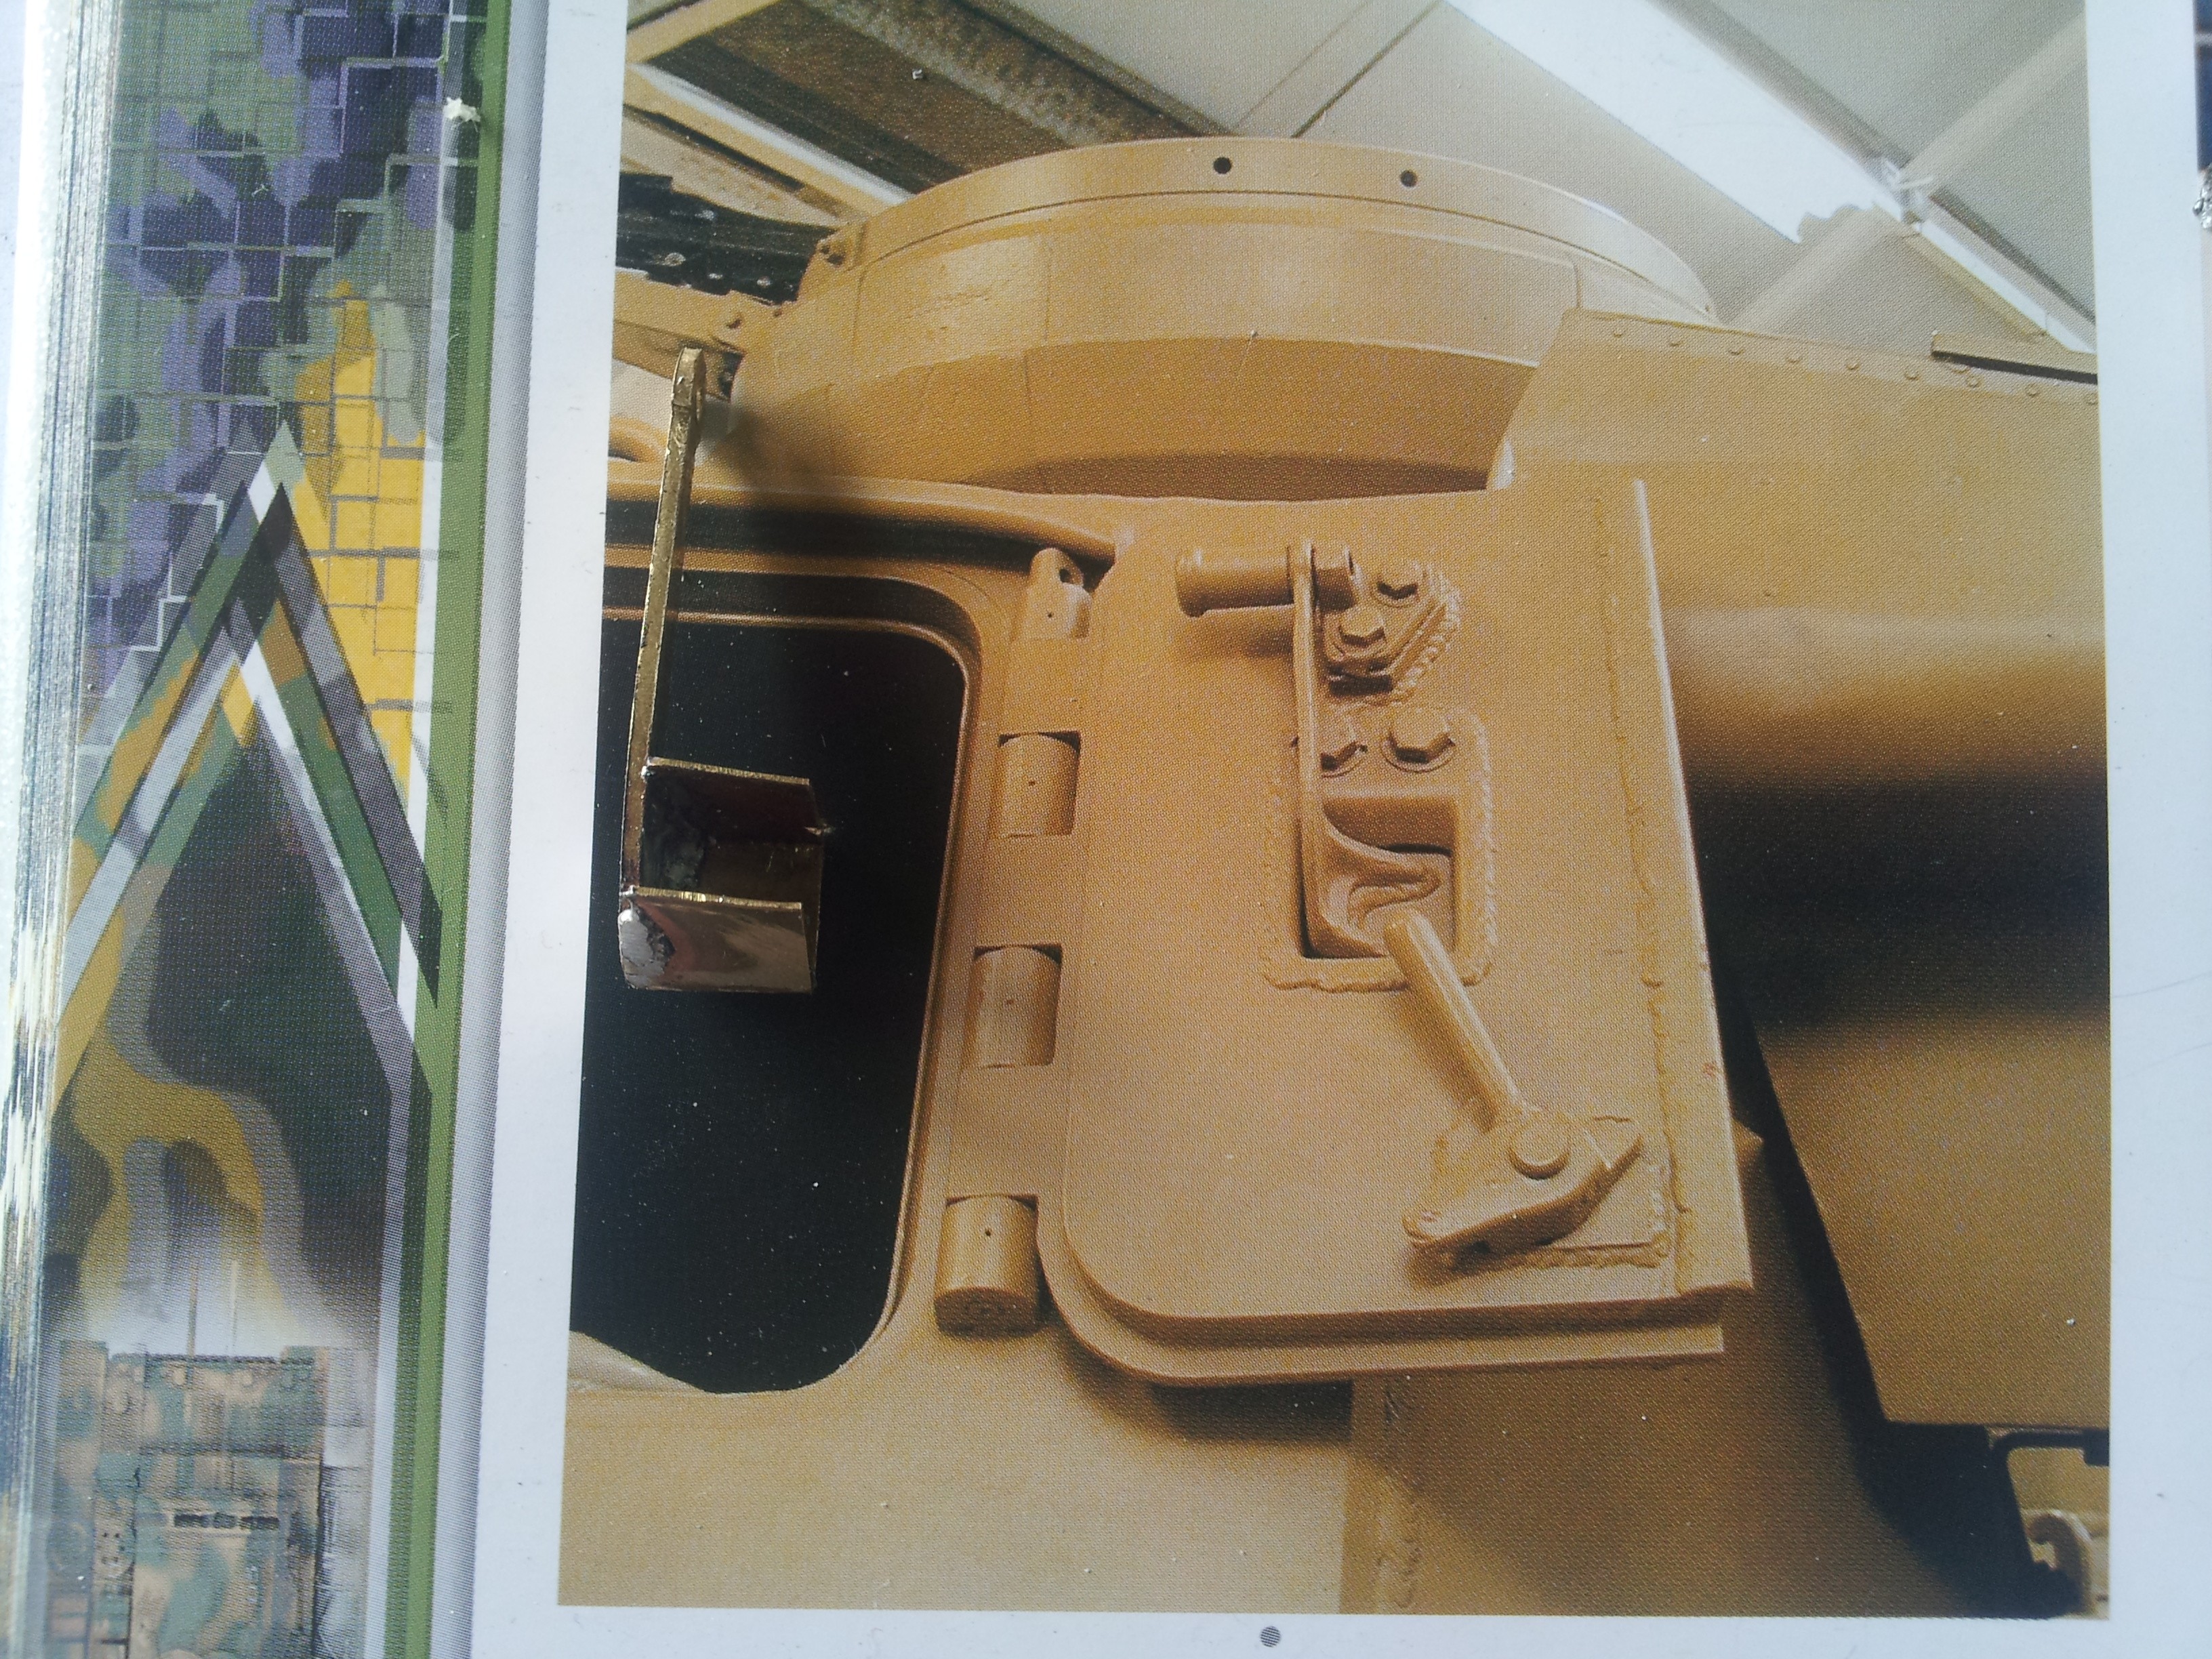
For the viewer side we cracked the door in white metal and we have adapted the beautiful components made by John Fitzsimons, with internal viewer can be opened:
The problem is made more complicated with the other doors, with more pieces that I had to create from scratch
First I drilled the door here, and I created the frame plate in plasticard, then slowly the other pieces were created always with plasticard and brass:

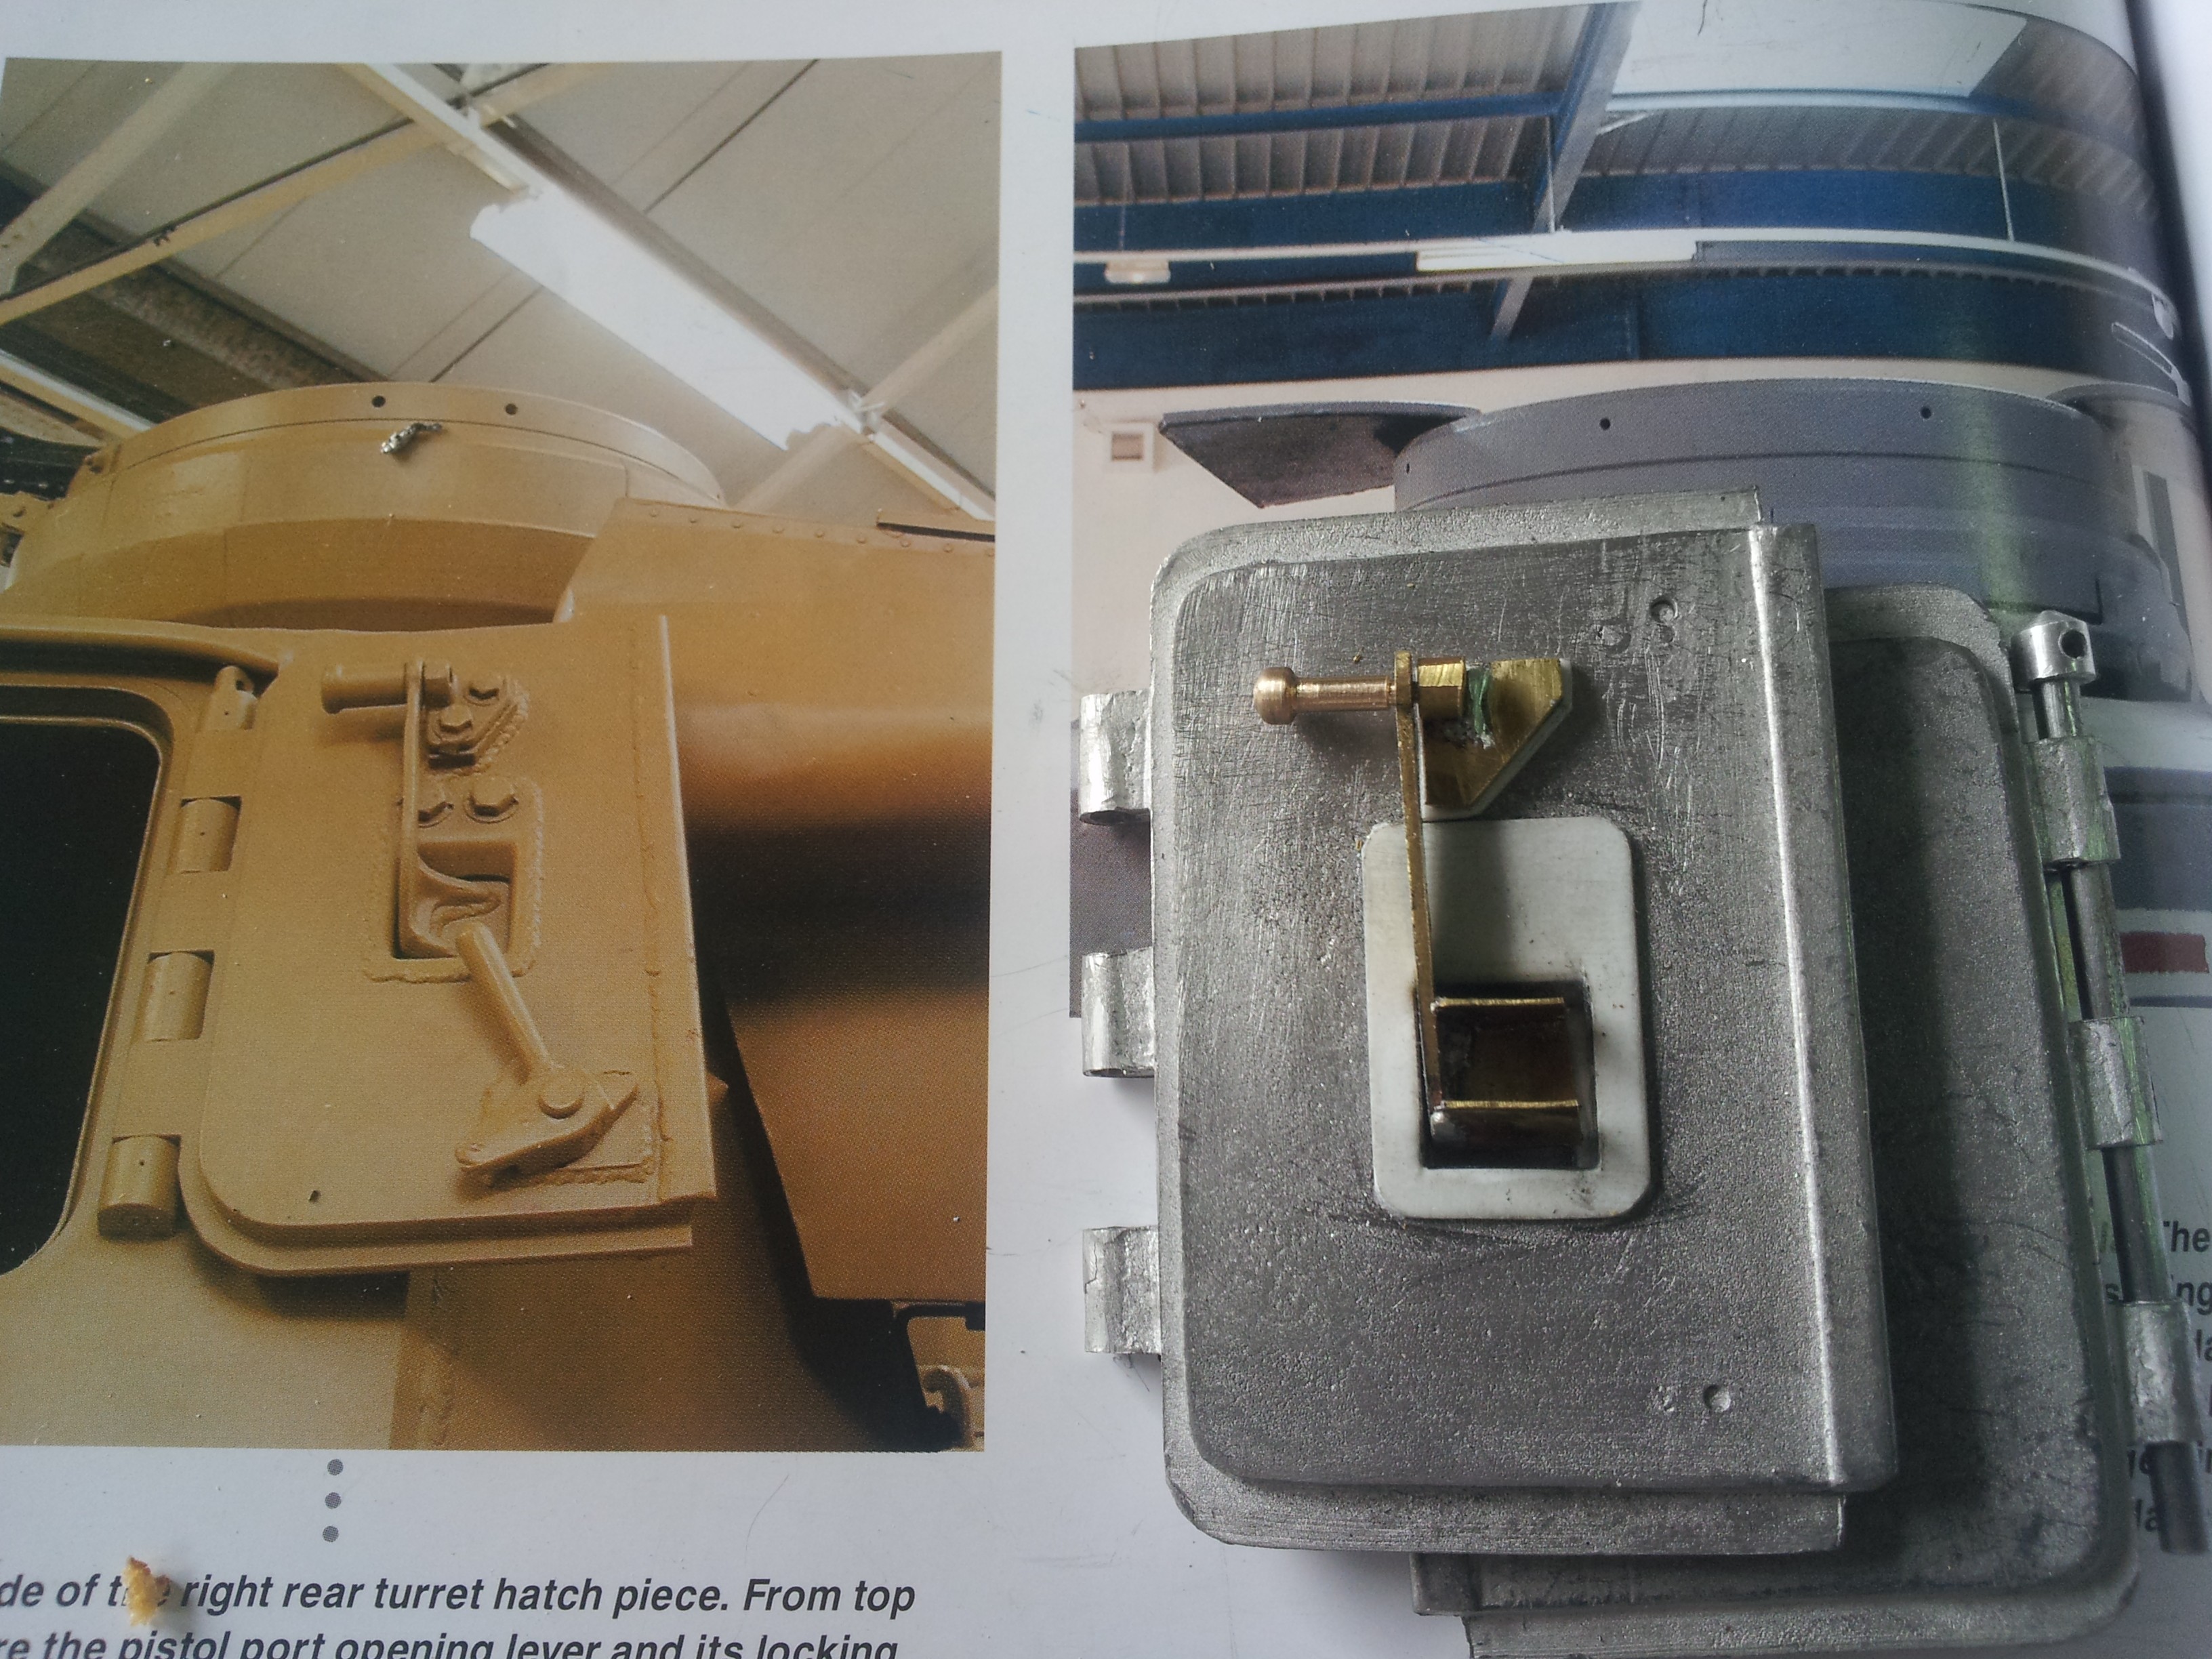
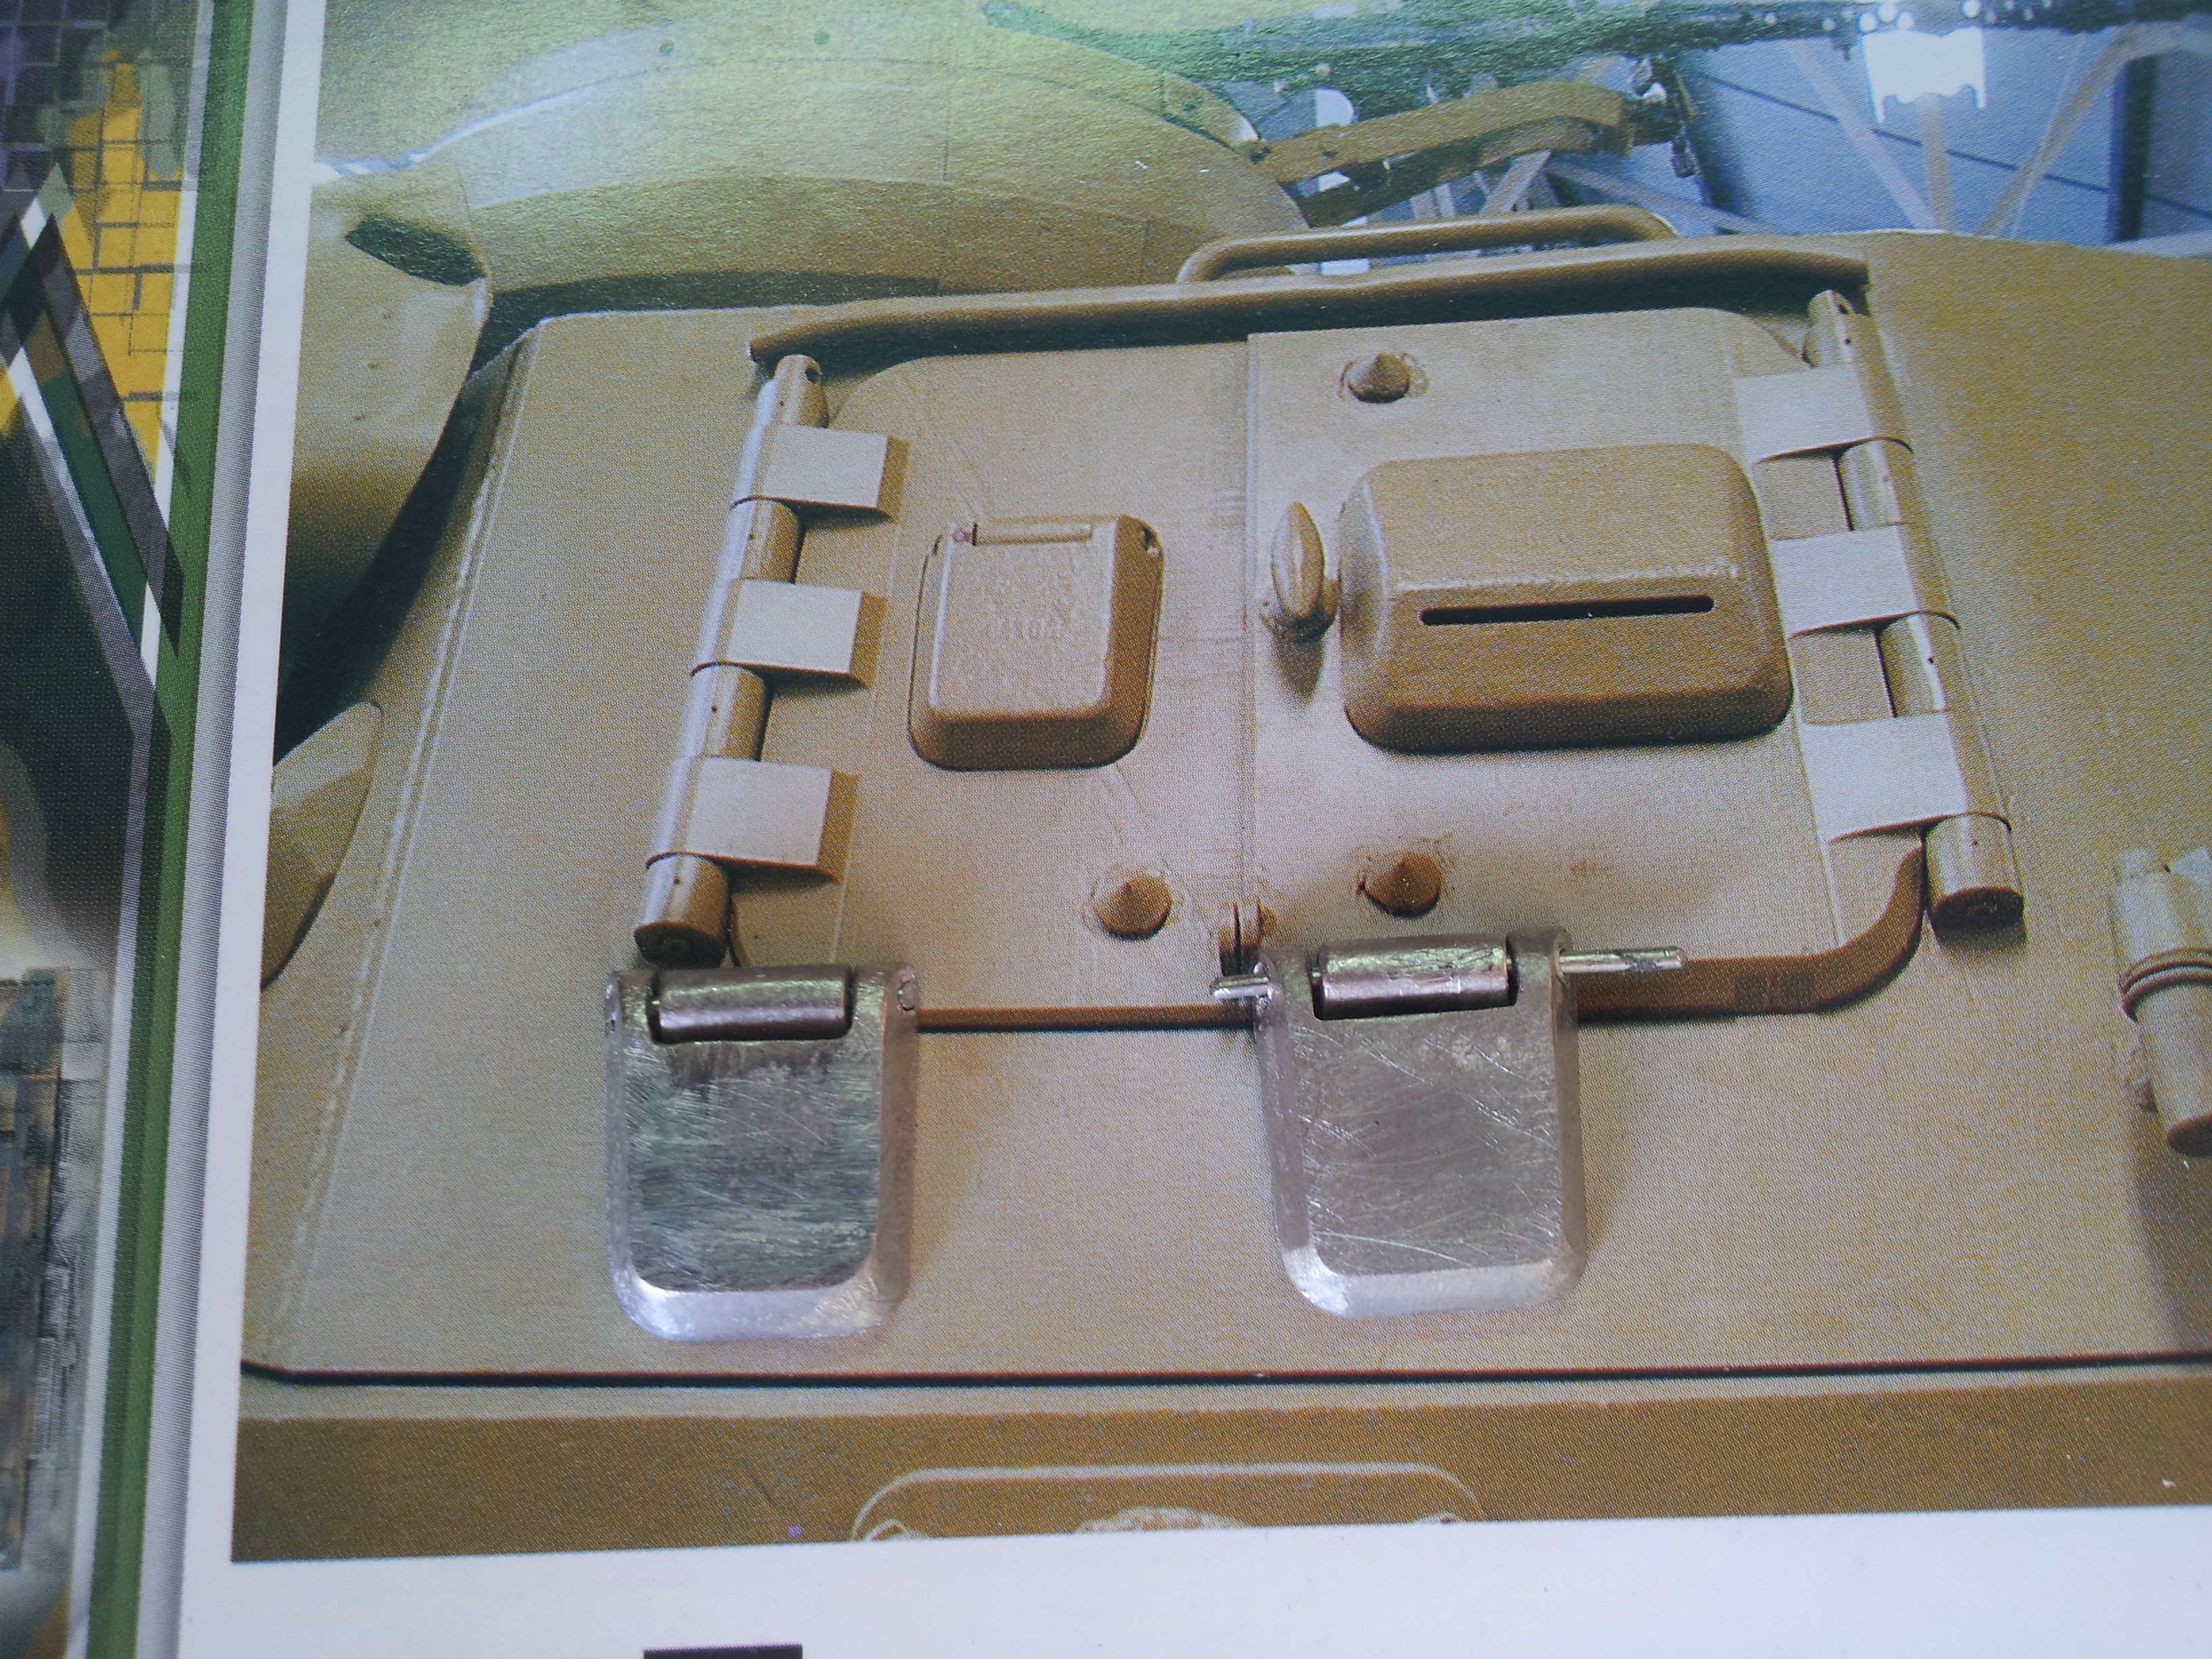
Handles, nuts and bolts and all the components are ready to be assembled:
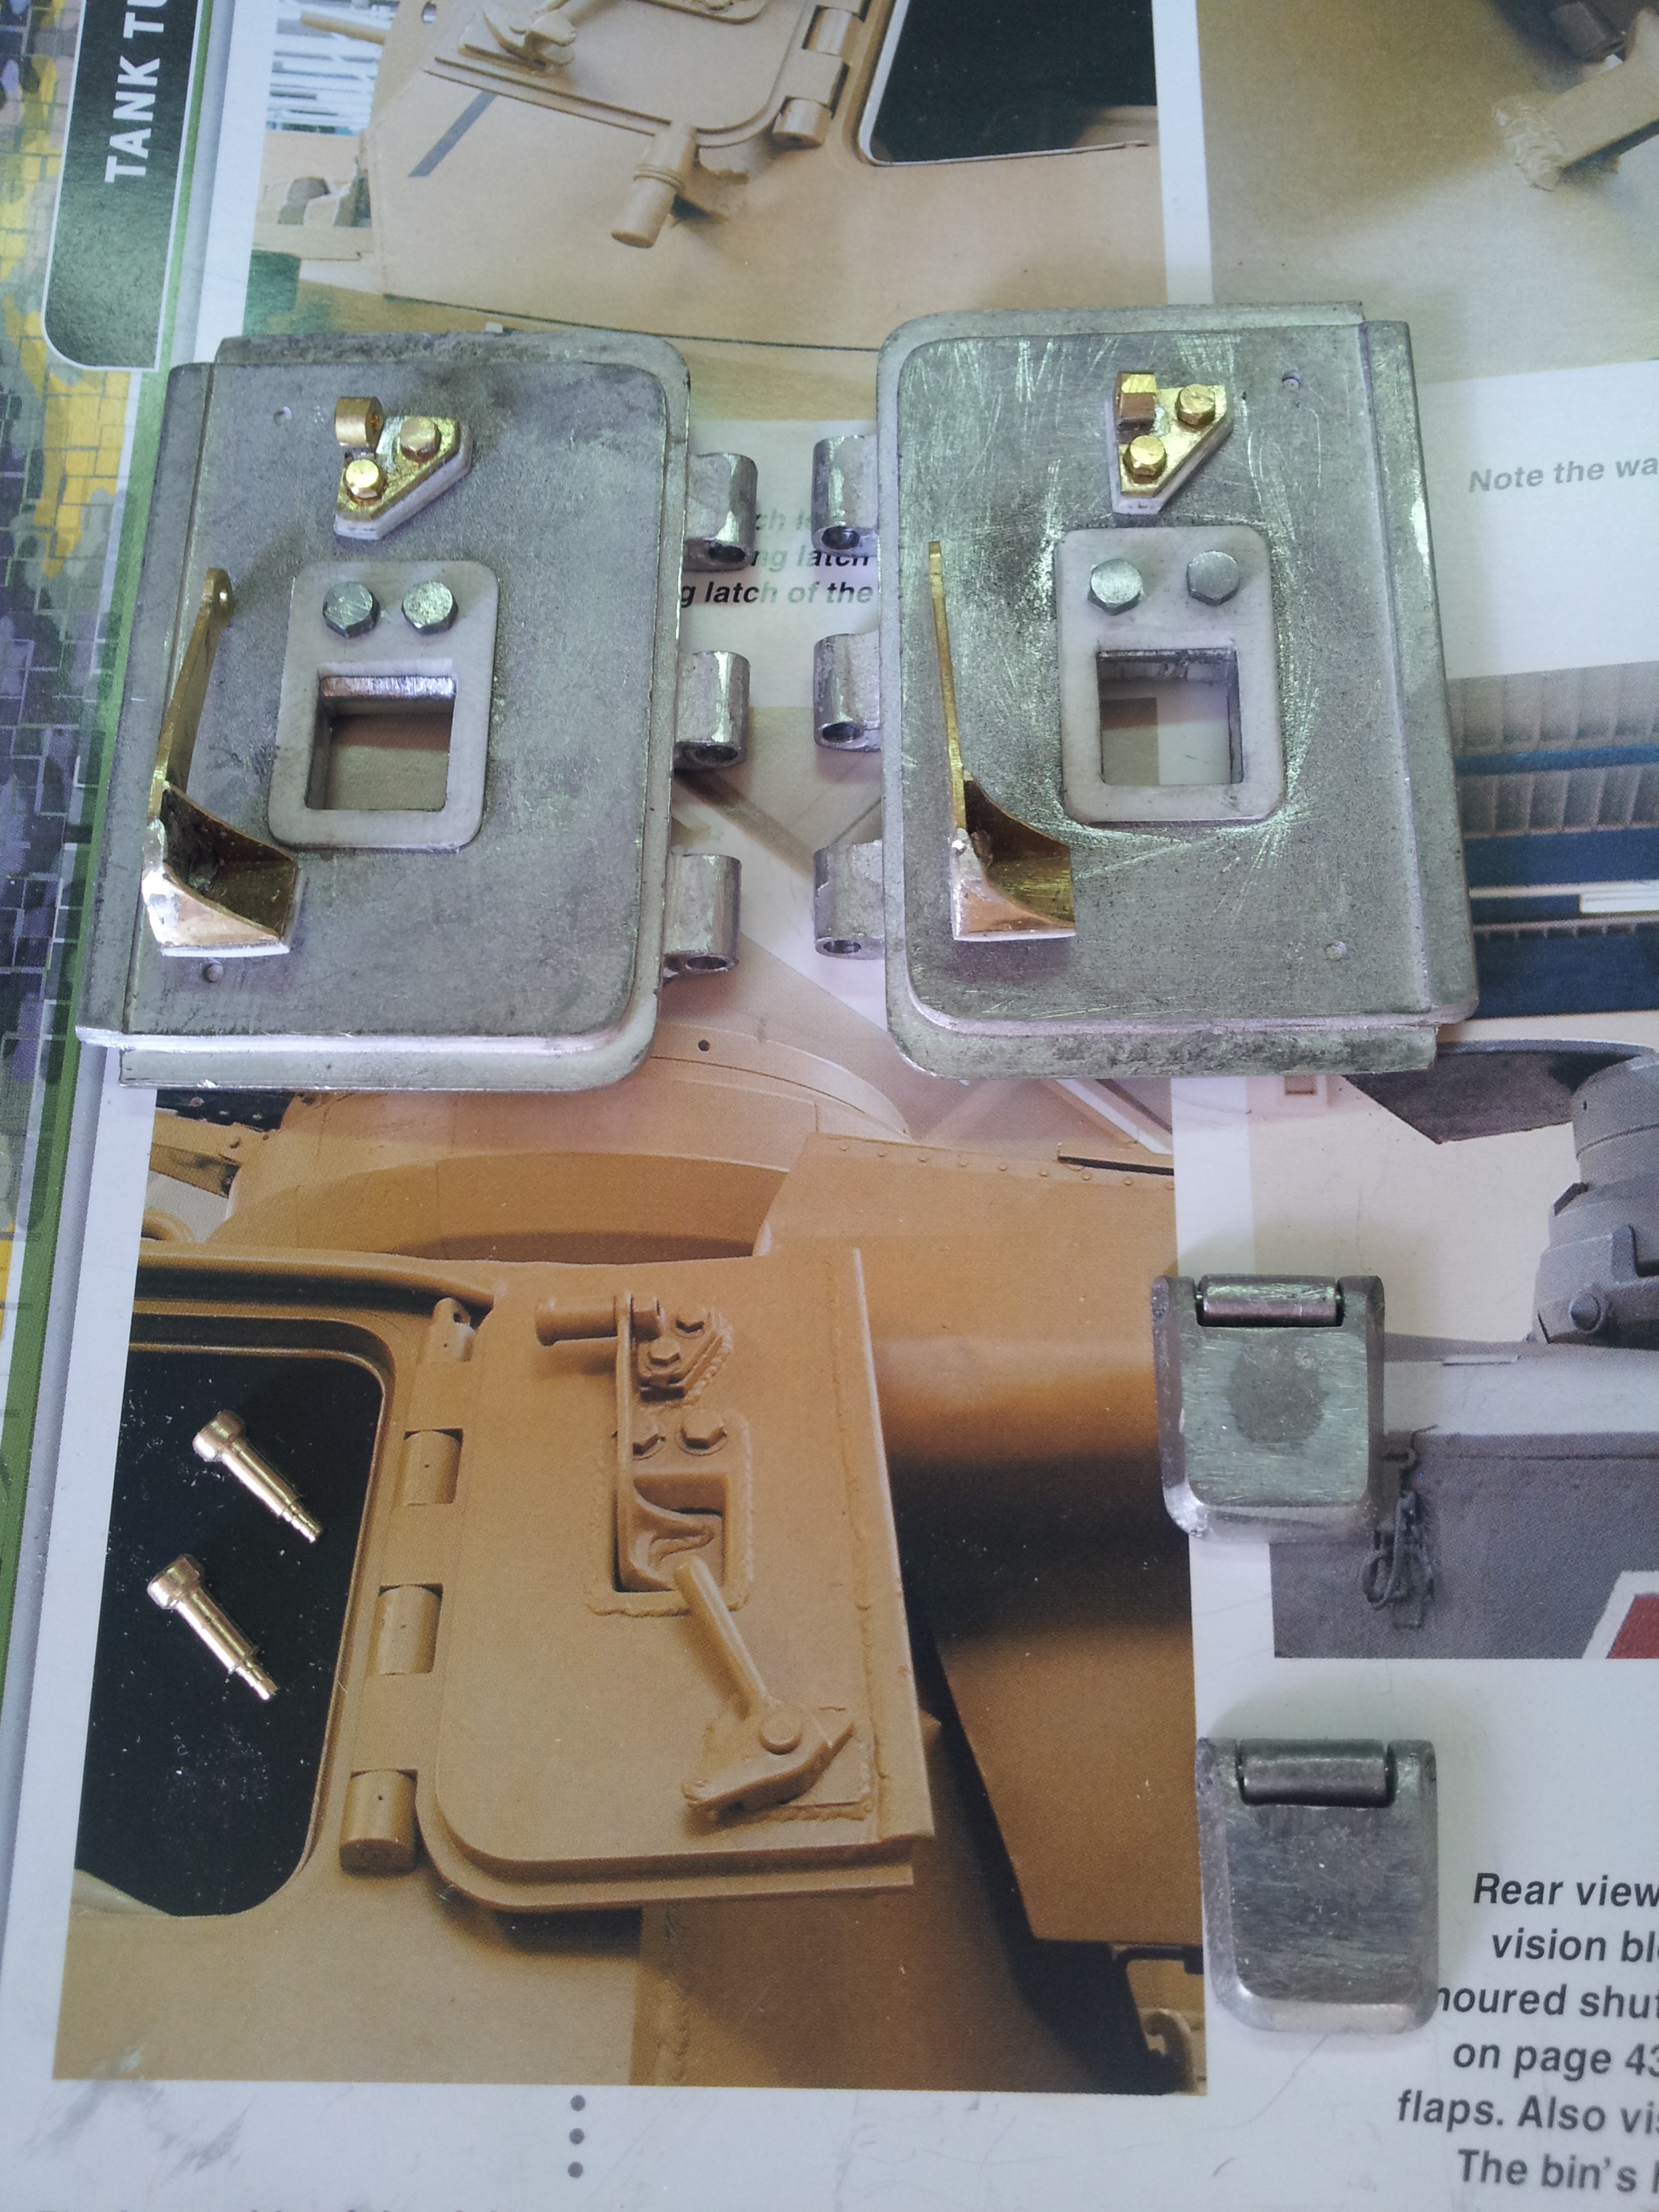
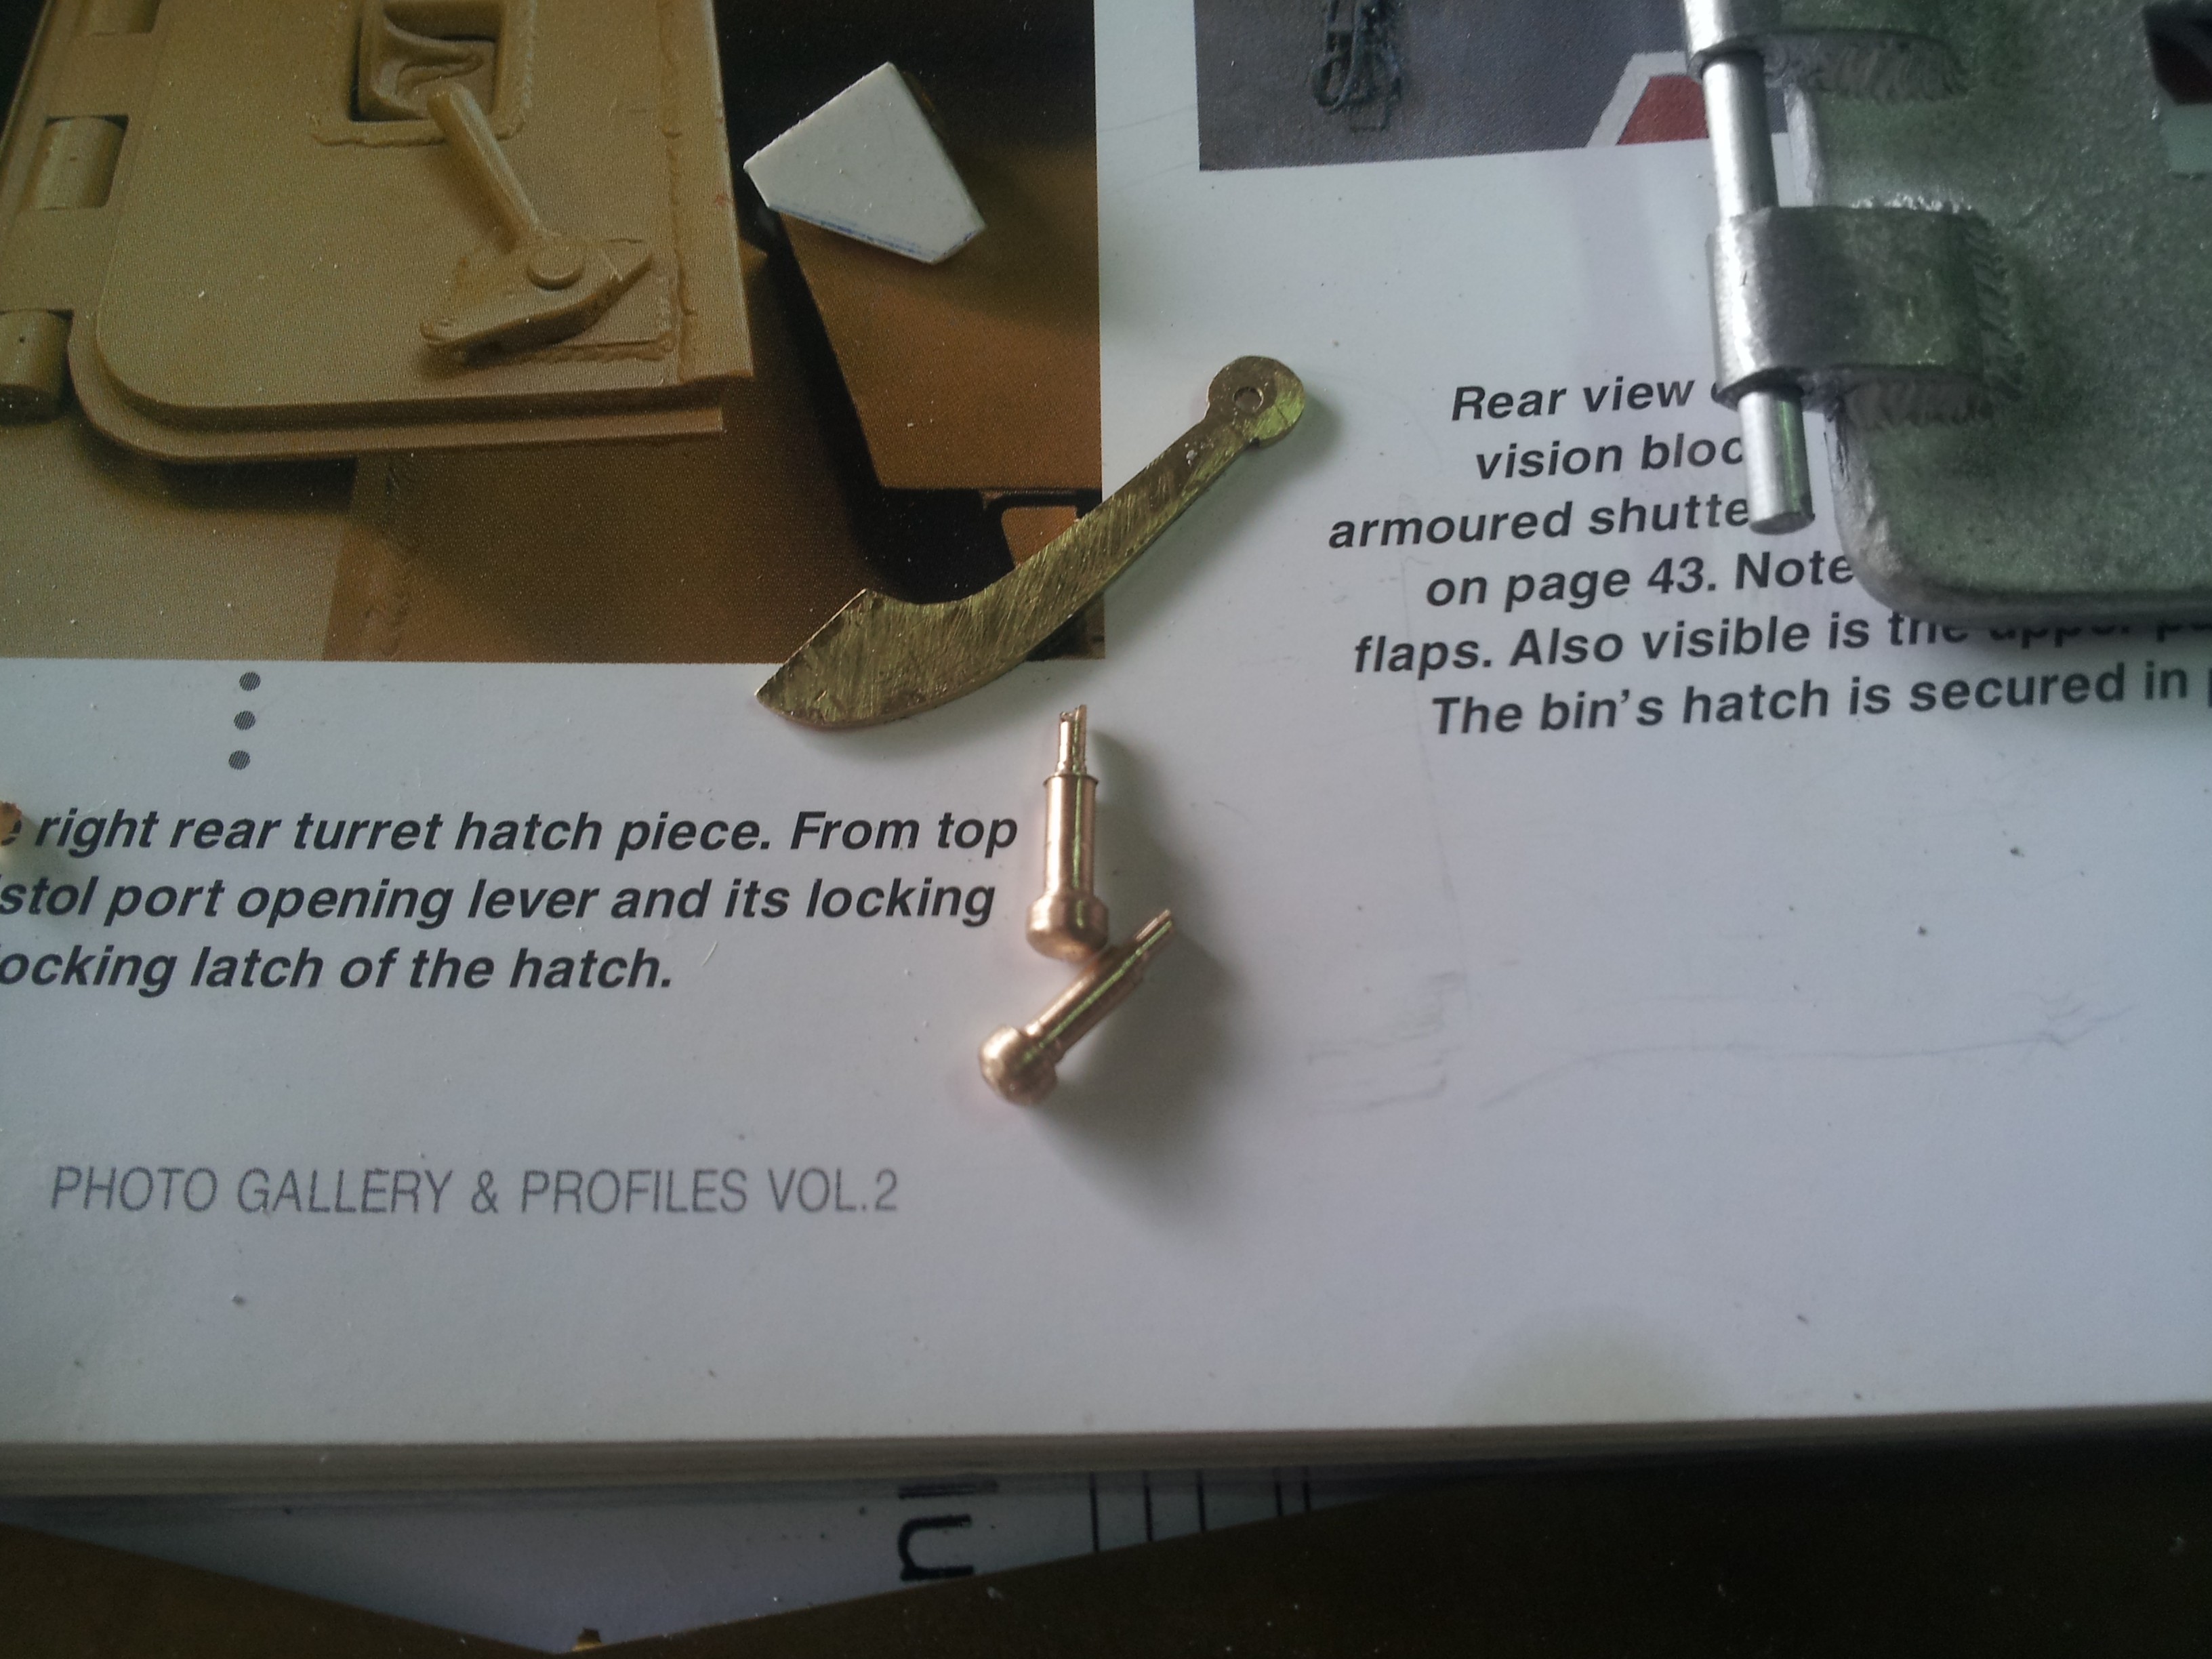
Going outside, I decided to remove the bolts cone fusion, because they seemed a bit small. In addition, two of these bolts were not perfectly conical, but in reality had two cuts on the sides.
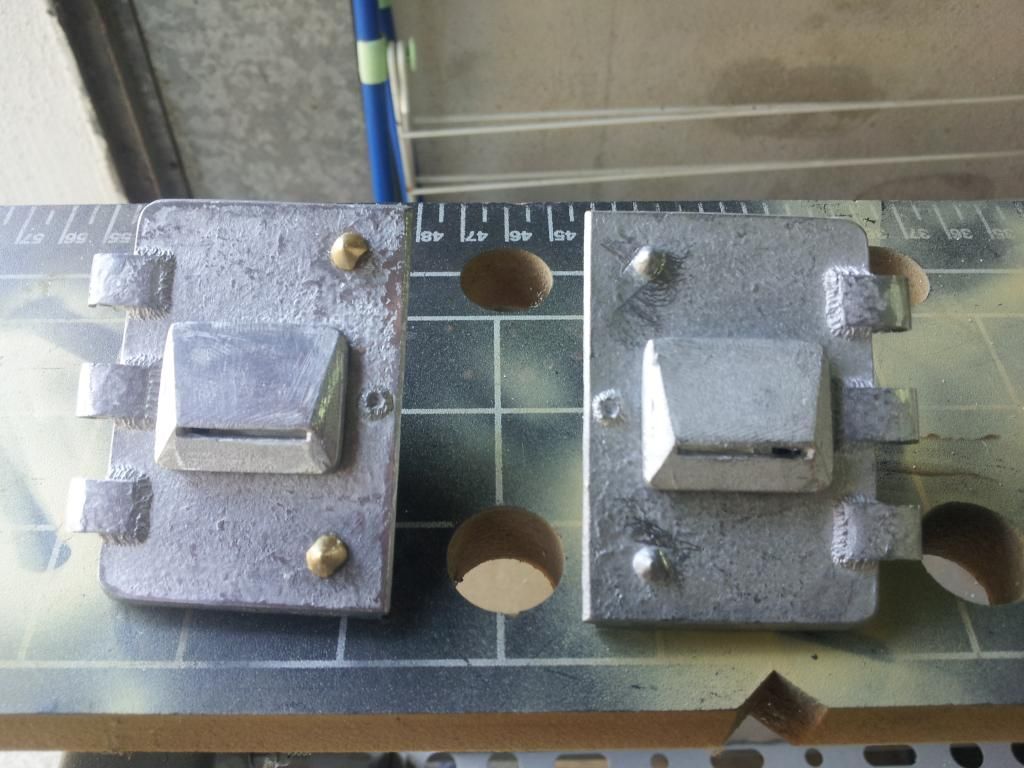
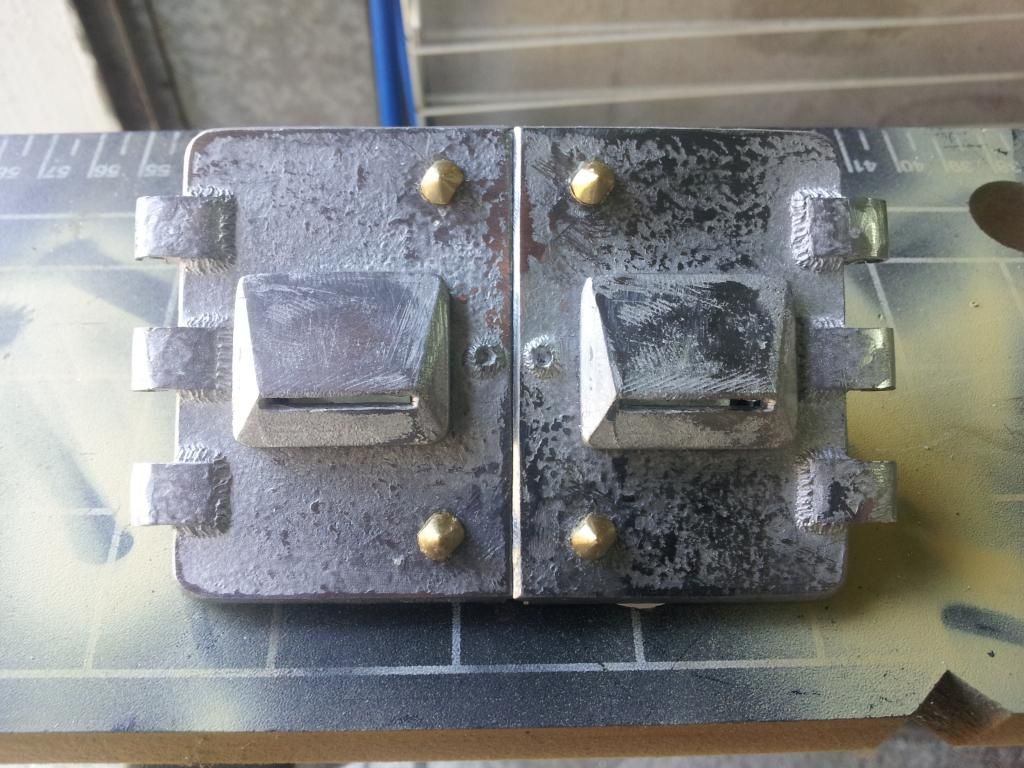
assembled all the components of the Pistol ports:
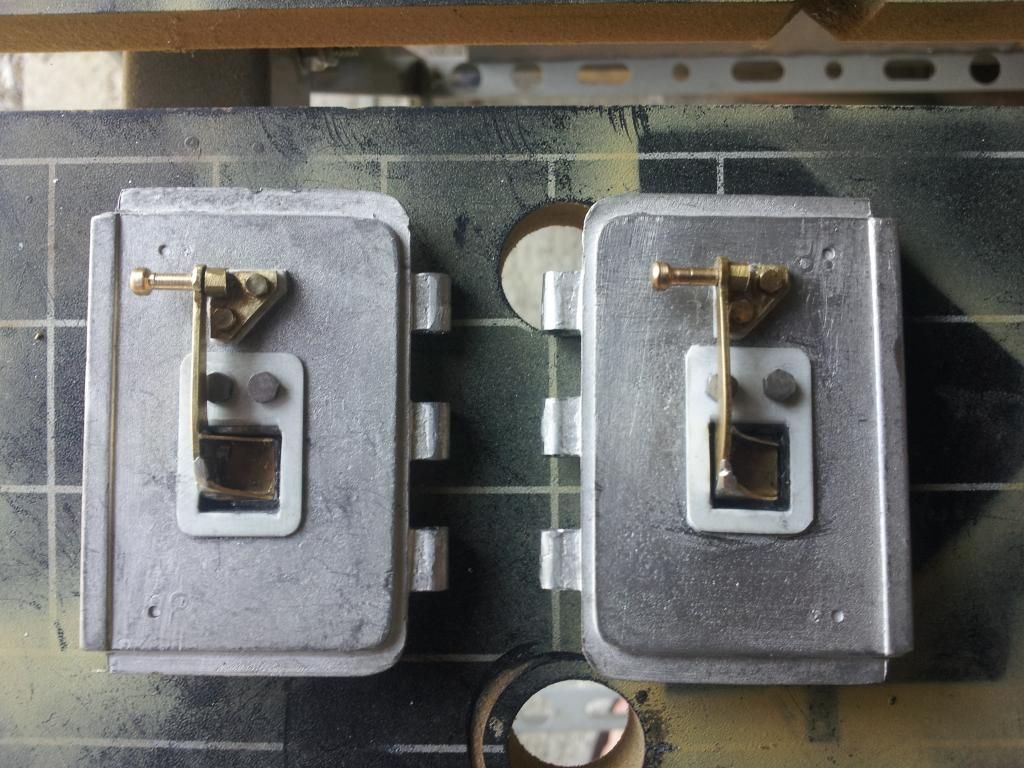
Finally, the tabs have been added for external locks and the handle was made from scratch because of the series seemed too small:
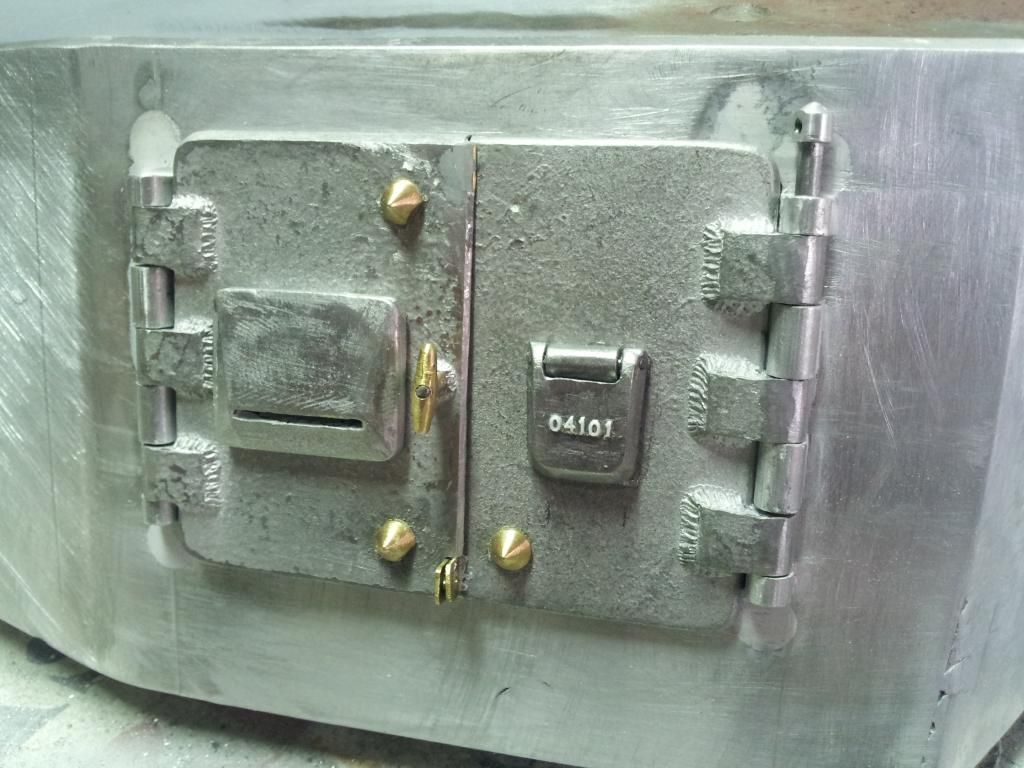
Well, now the turret hatches have a decidedly different look!
and taking advantage of the summer holidays, I update the work done on my Panzer III!
Looking forward to organize the electronics in the turret, we went to the assembly of the turret hatches.
The turret hatches provided by the kit, are quite bare and devoid of detail, especially inside, when compared to the real tank.


As you can see from photos, the first thing we realized the hinges.
Then, as far as possible we have tried to improve the situation.
For the viewer side we cracked the door in white metal and we have adapted the beautiful components made by John Fitzsimons, with internal viewer can be opened:

The problem is made more complicated with the other doors, with more pieces that I had to create from scratch
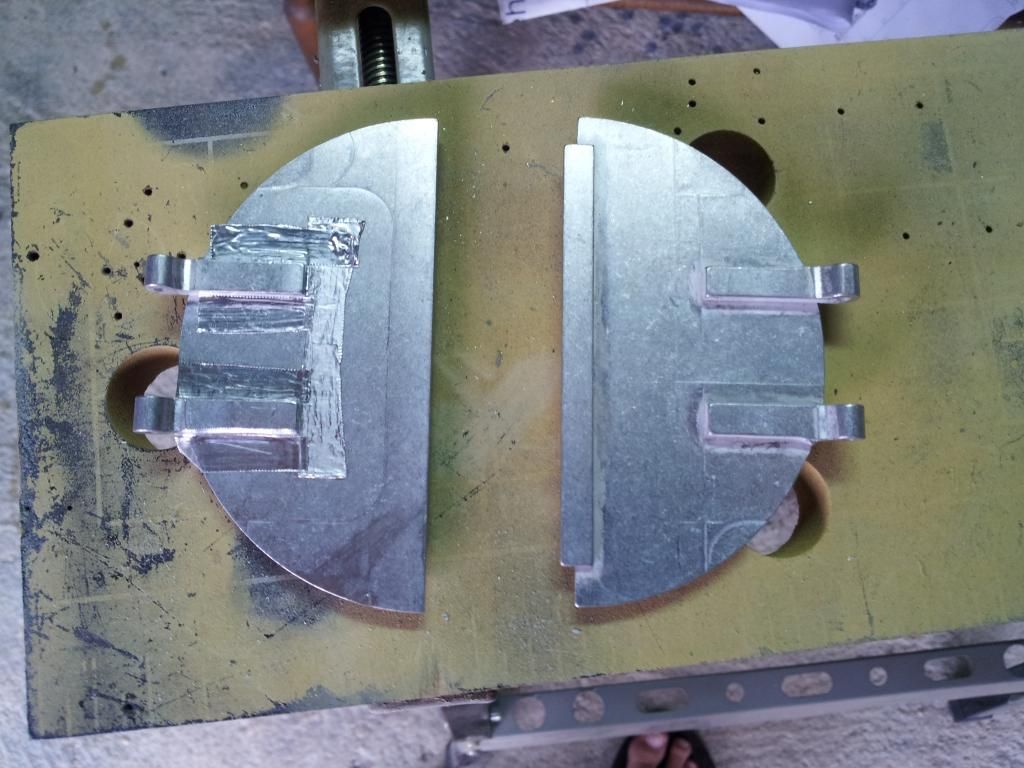
First I drilled the door here, and I created the frame plate in plasticard, then slowly the other pieces were created always with plasticard and brass:
Handles, nuts and bolts and all the components are ready to be assembled:
Going outside, I decided to remove the bolts cone fusion, because they seemed a bit small. In addition, two of these bolts were not perfectly conical, but in reality had two cuts on the sides.


assembled all the components of the Pistol ports:

Finally, the tabs have been added for external locks and the handle was made from scratch because of the series seemed too small:

Well, now the turret hatches have a decidedly different look!
-
Iacopo Di Giampietro
- Posts: 226
- Joined: Fri May 11, 2012 9:14 pm
- Been liked: 48 times
Re: Iacopo's Panzer III, a new and first adventure for me.
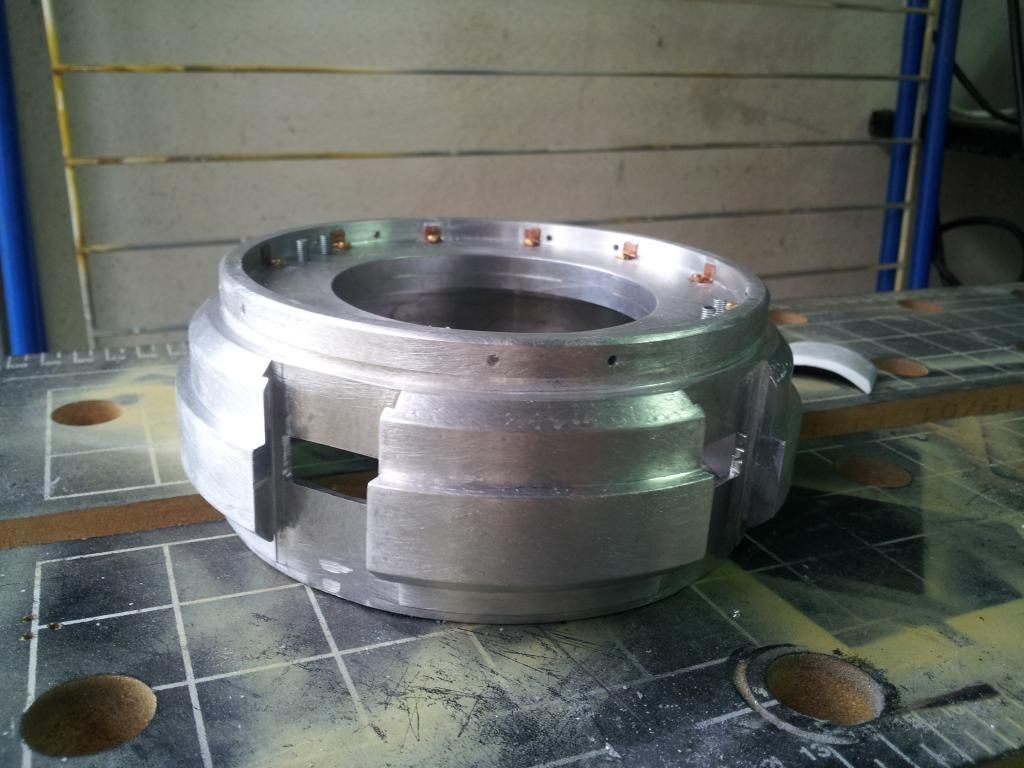
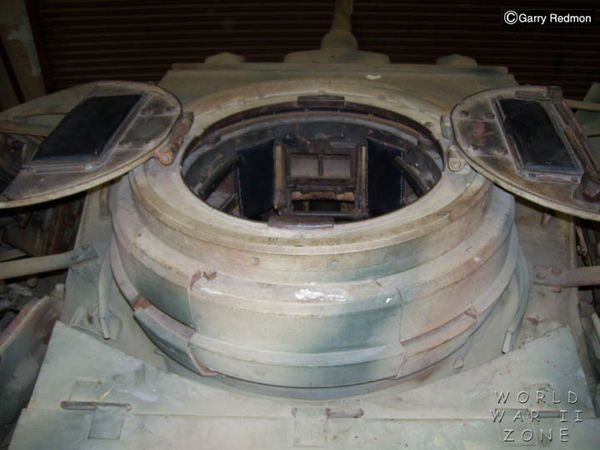
Now for the "famous" commander's cupola!
First I removed the signs of the machine tool and gave a minimum of texture to the surface.
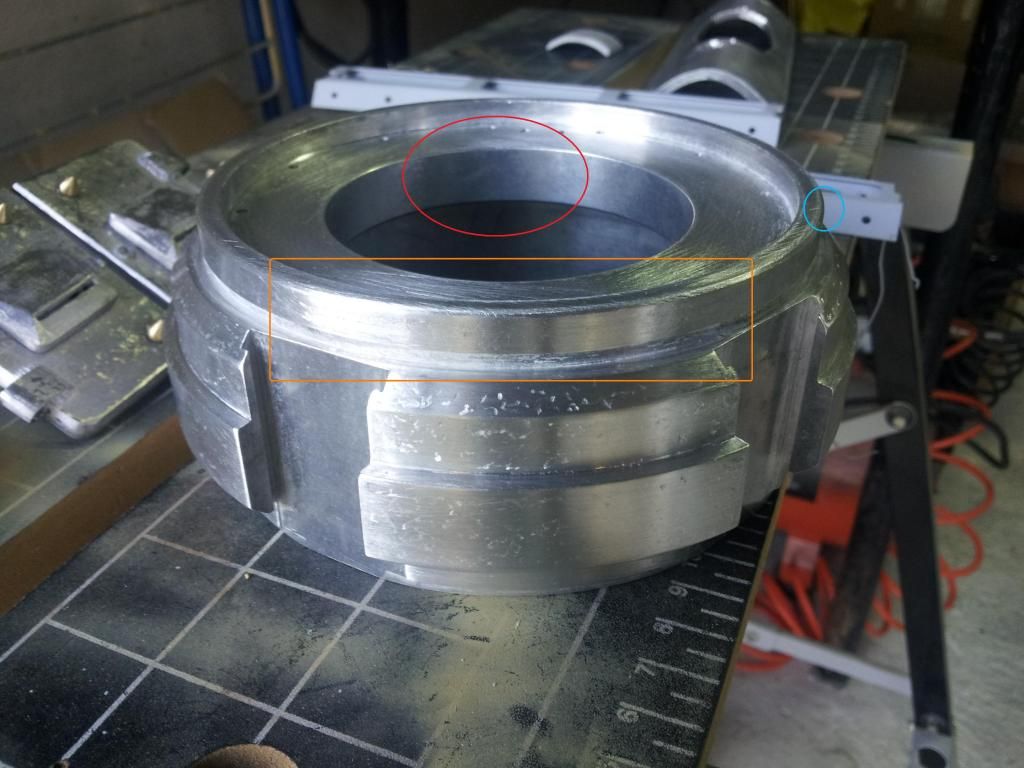
As you can see, except that the cupola is only slightly larger than normal (about 5mm), there are other work to do!
In red: the height of the turret's sky is disproportionate;
orange: completely missing the holes for mounting the MG and for water drainage;
in blue: it must be pronounced angle on the outer edge.
Of course, completely missing the bolts securing the turret's sky .....
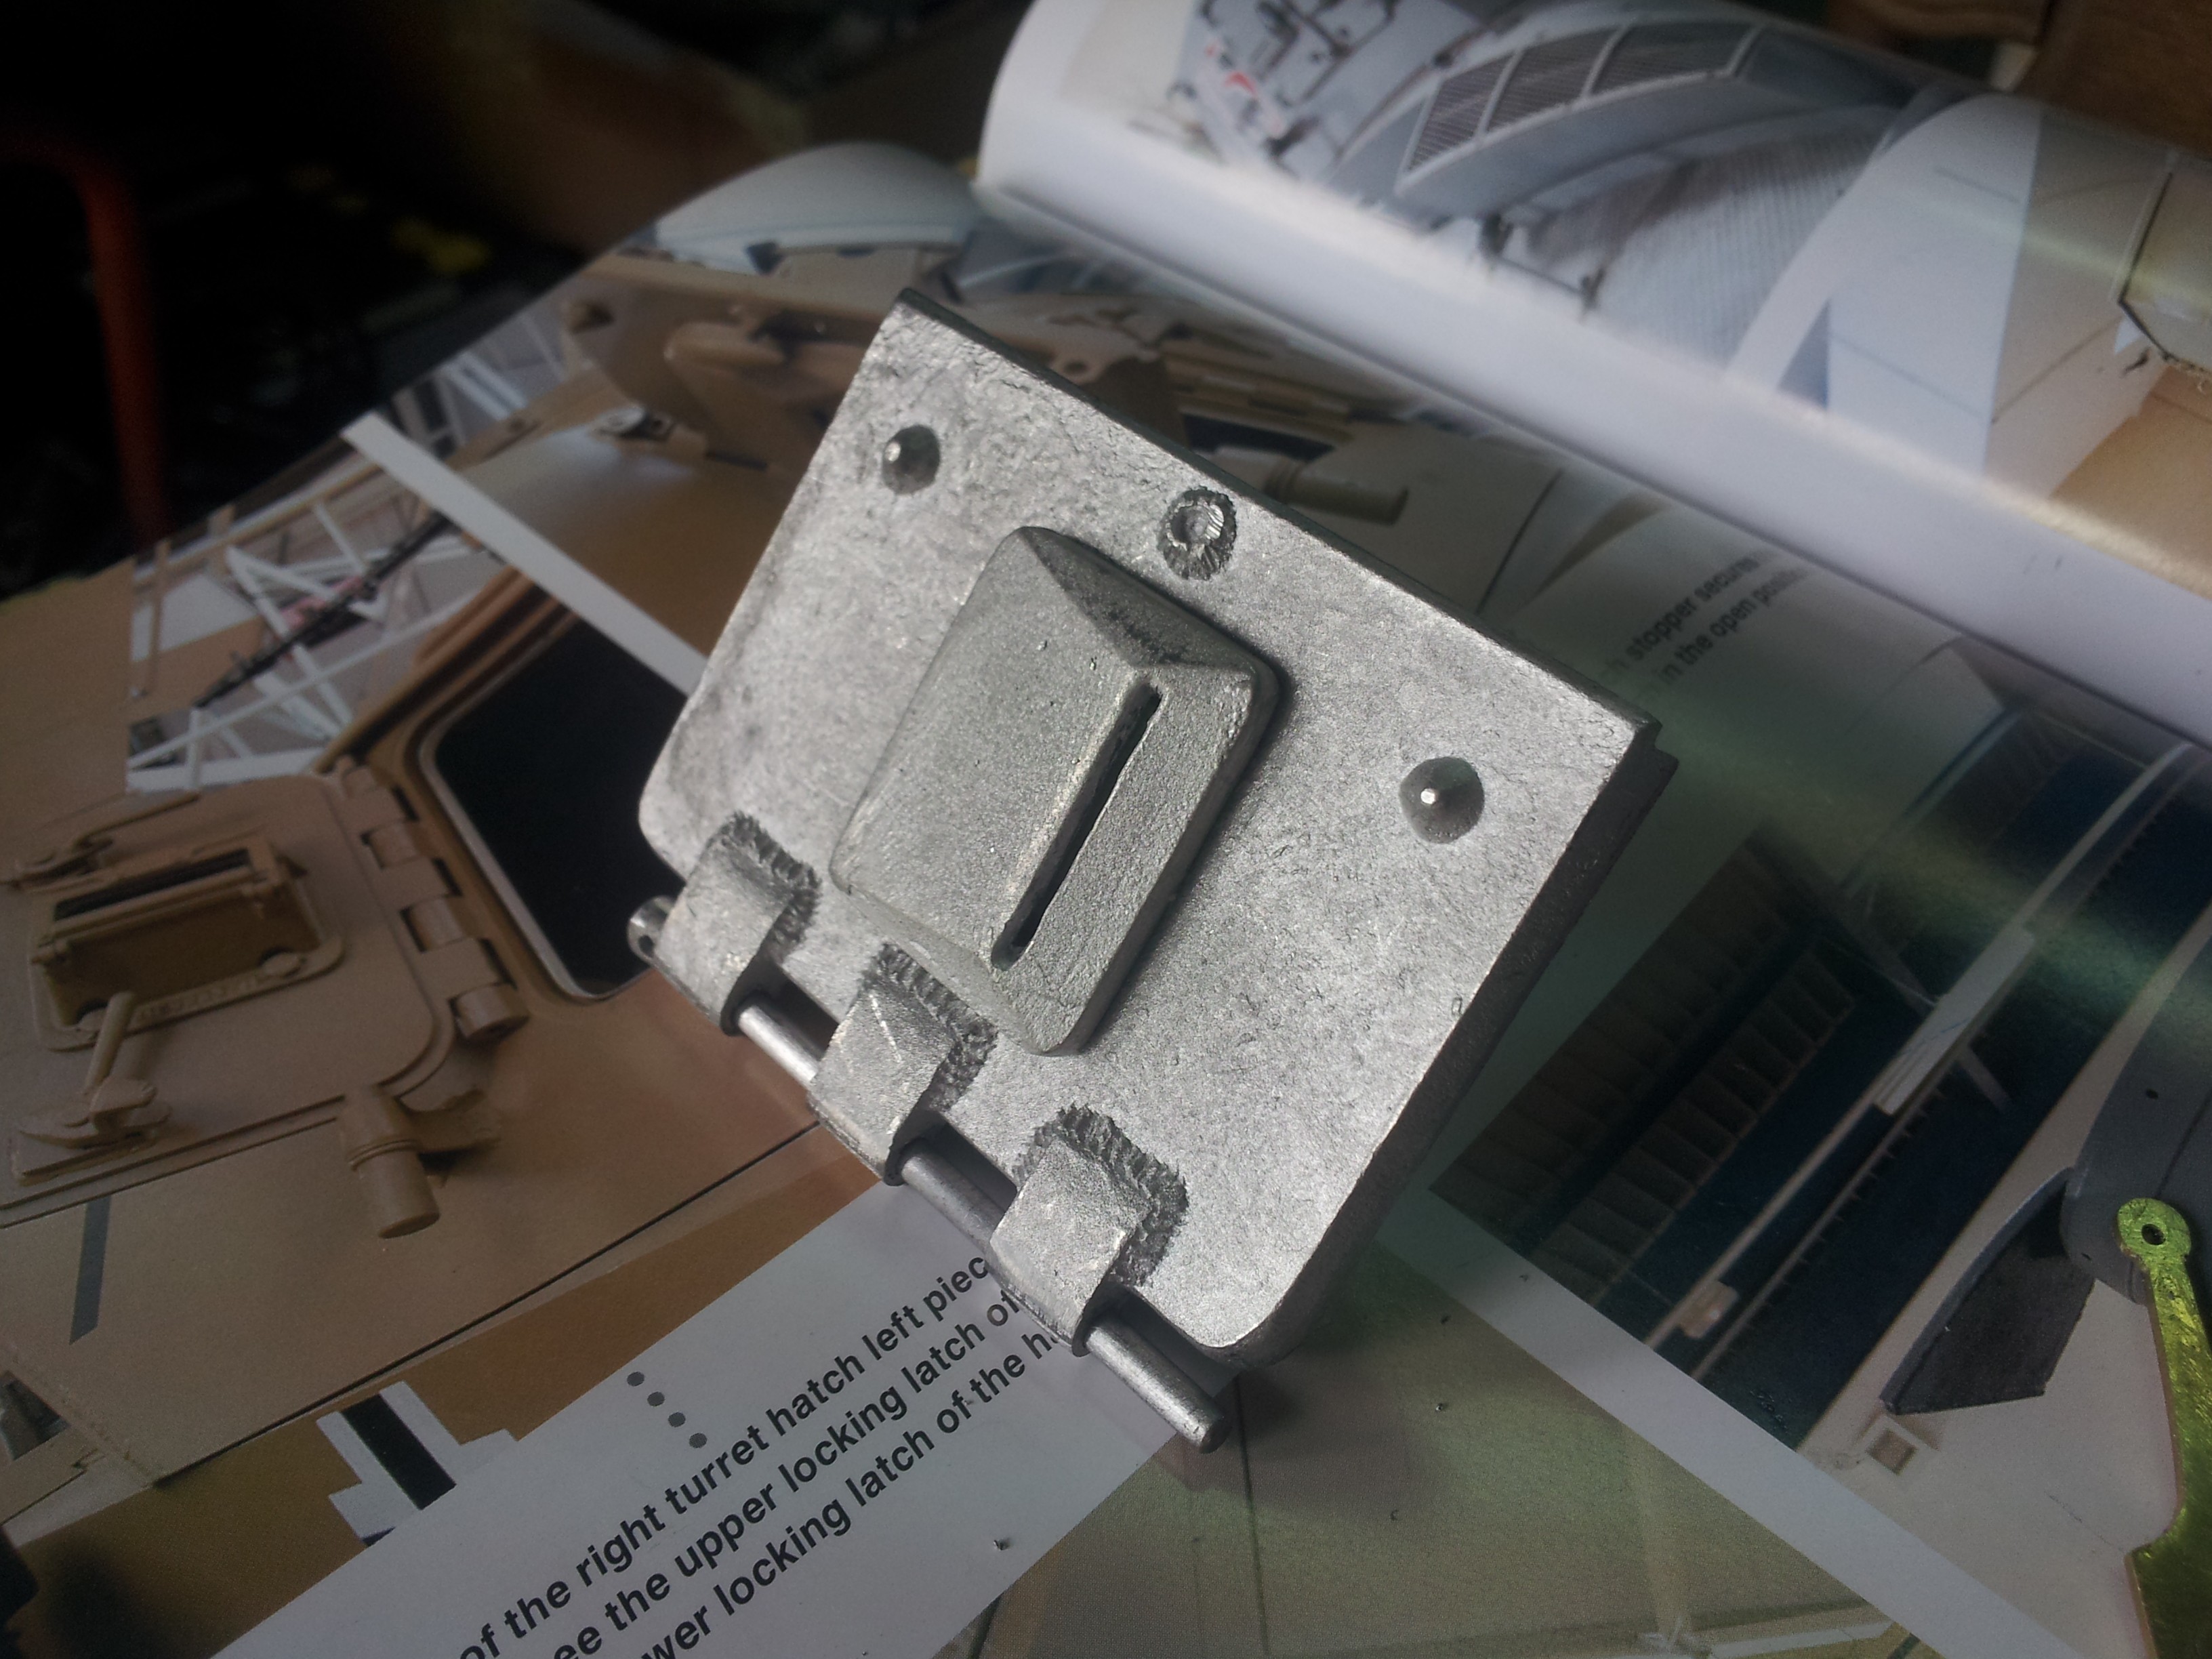
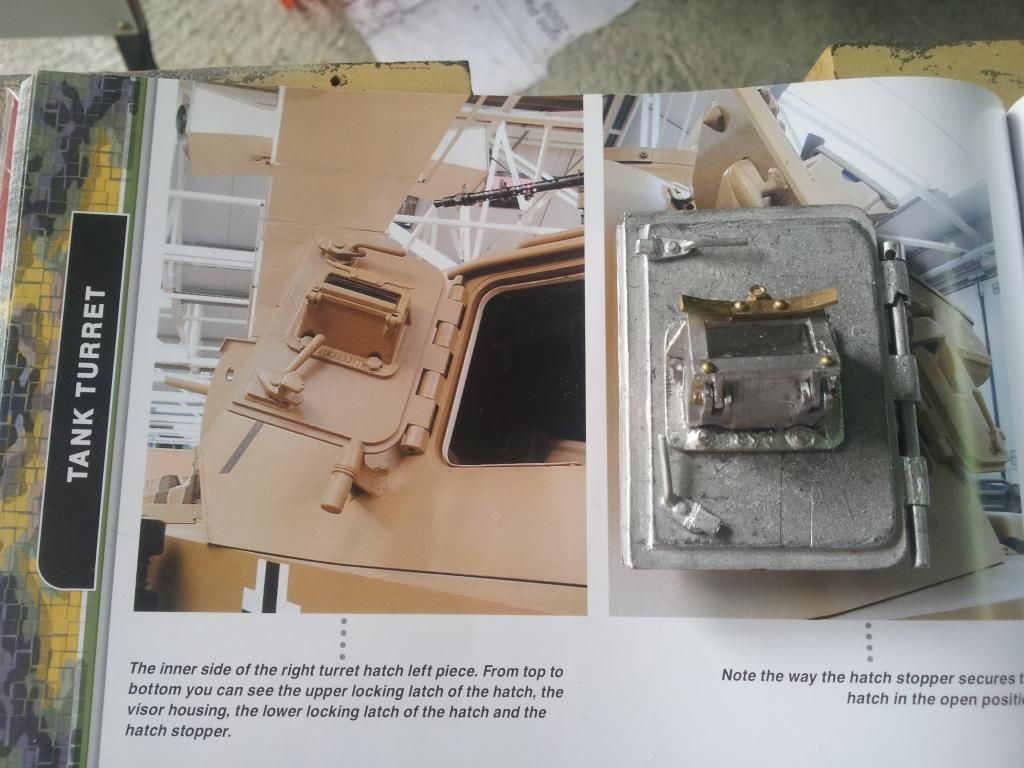
These however are the hatches:
the hinges are square and should be rounded, the central latch bar can be removed and redone because it is shorter than that rectangular instead of semicircular.
We start right out of doors!
The outer hinges are rounded and the center bar is removed. On this occasion, the signs of the machine tool are removed and given a minimum of texture to the plate:

the semi-circular bar was redone and put the screws on the hinges
Now we turn to the cupola:
We lowered as far as possible the thickness of the air, open a couple of viewers (the others leave them closed for personal taste), made the holes on the top and accentuated the bevels of the top.
Finally added all the bolts with its tabs in copper, with an angle shot back (yet to be cleaned up after bonding).
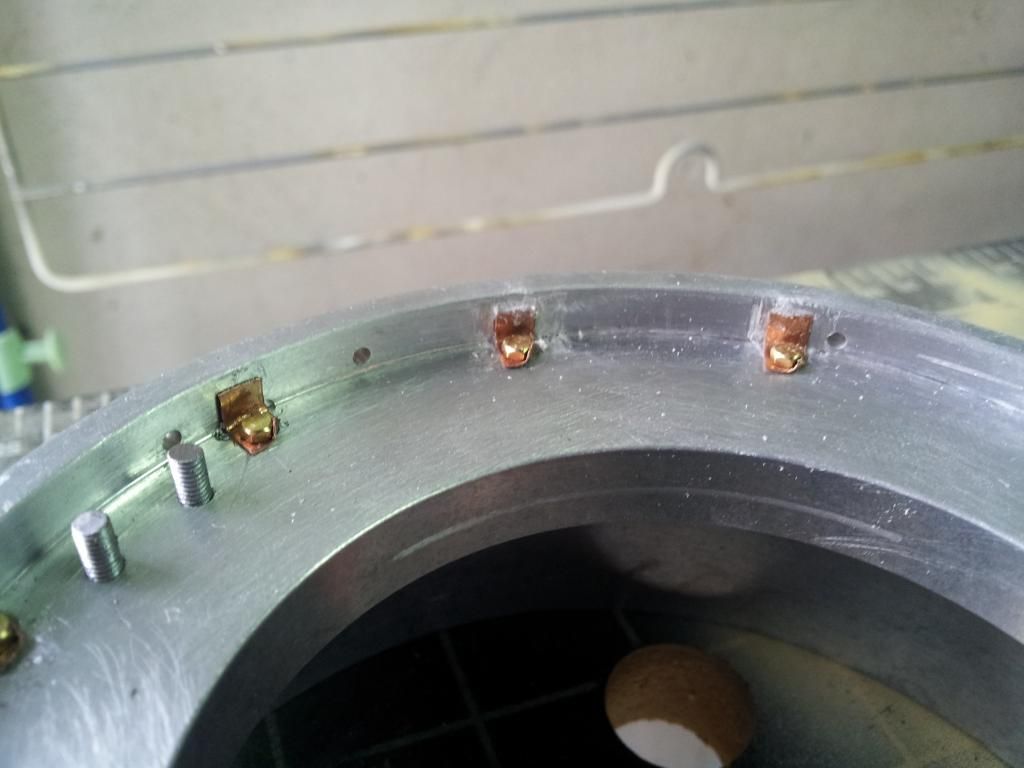
overing the latest pictures, we realized that probably the opening of the dome is small, since in the real tank comes up to the attack of the hinges.
First I removed the signs of the machine tool and gave a minimum of texture to the surface.

As you can see, except that the cupola is only slightly larger than normal (about 5mm), there are other work to do!
In red: the height of the turret's sky is disproportionate;
orange: completely missing the holes for mounting the MG and for water drainage;
in blue: it must be pronounced angle on the outer edge.
Of course, completely missing the bolts securing the turret's sky .....
These however are the hatches:

the hinges are square and should be rounded, the central latch bar can be removed and redone because it is shorter than that rectangular instead of semicircular.
We start right out of doors!


The outer hinges are rounded and the center bar is removed. On this occasion, the signs of the machine tool are removed and given a minimum of texture to the plate:

the semi-circular bar was redone and put the screws on the hinges

Now we turn to the cupola:

We lowered as far as possible the thickness of the air, open a couple of viewers (the others leave them closed for personal taste), made the holes on the top and accentuated the bevels of the top.
Finally added all the bolts with its tabs in copper, with an angle shot back (yet to be cleaned up after bonding).

overing the latest pictures, we realized that probably the opening of the dome is small, since in the real tank comes up to the attack of the hinges.

-
simon_manning
- Posts: 2050
- Joined: Fri Nov 02, 2007 8:51 pm
- Location: new forest,hampshire,u.k.
- Been liked: 1715 times
Re: Iacopo's Panzer III, a new and first adventure for me.
superb and interesting. regards simon manning.
-
Ray Brown
- Posts: 452
- Joined: Tue Jul 05, 2011 2:00 am
- Location: Penrith NSW
- Has liked: 26 times
- Been liked: 103 times
- Contact:
Re: Iacopo's Panzer III, a new and first adventure for me.
[quote="Iacopo Di Giampietro"]Hello everyone, my friends.
A little update on the work performed on my Panzer III.
Started the assembly of the rolling train.
G'day lacopo,
do you have a wiring diagram for your headlights? I'm hopeless at wiring electronics and was hoping that if you had a diagram it would make it easier for me.
Thanks in advance.
Ray
A little update on the work performed on my Panzer III.
Started the assembly of the rolling train.
G'day lacopo,
do you have a wiring diagram for your headlights? I'm hopeless at wiring electronics and was hoping that if you had a diagram it would make it easier for me.
Thanks in advance.
Ray
-
Andrea Daviero
- Posts: 105
- Joined: Fri Dec 03, 2010 7:24 pm
- Been liked: 5 times
Re: Iacopo's Panzer III, a new and first adventure for me.
Ray,I can answer you, and if you need I can arrange a drwing! We used a simple 3 way switch for headlights/notek (notek- off- headlights) The power (+ and -)is taken from one of the power exits from the armortek main box (the one with the button).
We used LEDs (warm White) istead of 24V lamps, so we needed to use resistors for powering them at the correct voltage.
It is pretty simple to do, however the lights are not RC controlled. (could be made with few mods)
Why using one of the armortek box power exits? Simply because when you turn off the tank or it stops working (battery out for example) the lights will turn off with the tank itself.
Regards
Andrea Daviero (Andrew)
Andrea Daviero (Andrew)