Hi Mick
I forgot your Recoil system that you had started to fit.
So for your MG connection and the neatest way,you need a Y Lead
to fit where the Recoil module wire is connected to the MG and Gun flash
connection.
I found it easier after swapping the white Armortek connection for a Futaba set
and then they both go back into the Y lead.
Carefull with the colours so they go back the same way.
The Futaba White will be where the green is,Red midle and black left,for the MG.
Hope that helps you out
Cheers
Phil
CHALLENGER 2 PRE-ORDERS
NOW OPEN
EMAIL US AT SALES@ARMORTEK.CO.UK TO PRE-ORDER
CLICK HERE FOR MORE DETAILS
NOW OPEN
EMAIL US AT SALES@ARMORTEK.CO.UK TO PRE-ORDER
CLICK HERE FOR MORE DETAILS
Ultimate Panther/Jagdpanther Build
-
phil fitzpatrick
- Posts: 2020
- Joined: Sat Dec 12, 2009 3:38 pm
- Location: Sambourne uk
- Been liked: 223 times
-
michael hilton
- Posts: 1197
- Joined: Thu Dec 15, 2011 4:29 pm
- Has liked: 1564 times
- Been liked: 835 times
Re: Ultimate Panther/Jagdpanther Build
Hello Phil, thanks for the reply, got your PM as well. I did try various configurations, only managed to achieve a solid 'blue' M/G light. I just felt a 'Y' lead coming on.
I have marked all the connections with sticky coloured dots, and drawn a plan in the Armortek instruction booklet, hopefully eliminating mistakes when I dismantle the wiring assembly. It's an interesting part of the build which, if I ponder to long turns my brain to mush.
Thanks for your help mate.....onwards into the west.....'Lord of the Rings 'and all that.
I have been asked politely, to clear the dining room table.....women
Regards Mick
-
michael hilton
- Posts: 1197
- Joined: Thu Dec 15, 2011 4:29 pm
- Has liked: 1564 times
- Been liked: 835 times
Re: Ultimate Panther/Jagdpanther Build
Hello Phil, I had a spare Y lead lying around......so very carefully changed the plugs/sockets. Attached the Y lead....and wiped out the neighbours cat with the M/G 
 .
.
Oh, the joy when everything works......all guns blazing.
Thanks for the help Phil, good old Forum....never fails.
Regards Mick
Oh, the joy when everything works......all guns blazing.
Thanks for the help Phil, good old Forum....never fails.
Regards Mick
-
phil fitzpatrick
- Posts: 2020
- Joined: Sat Dec 12, 2009 3:38 pm
- Location: Sambourne uk
- Been liked: 223 times
Re: Ultimate Panther/Jagdpanther Build
Glad to hear that you are having loads of fun Mick 
Sorry to hear about the Moggies.
Cheers
Phil
Sorry to hear about the Moggies.
Cheers
Phil
-
michael hilton
- Posts: 1197
- Joined: Thu Dec 15, 2011 4:29 pm
- Has liked: 1564 times
- Been liked: 835 times
Re: Ultimate Panther/Jagdpanther Build
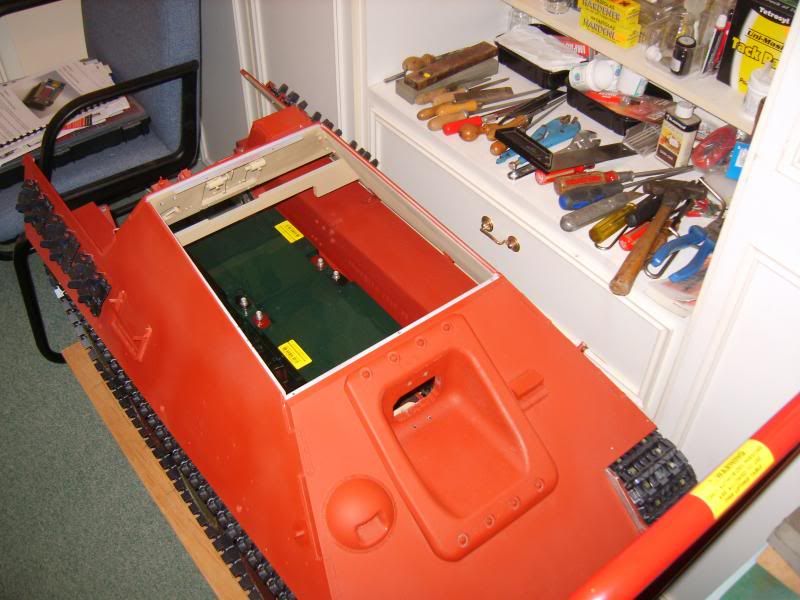
Thanks Phil, I have completed 'The Bench assembly' and moved on into the 'Workshop' aka third bedroom, (small).
The drive motors are installed and a provisional dry fit of the upper hull.

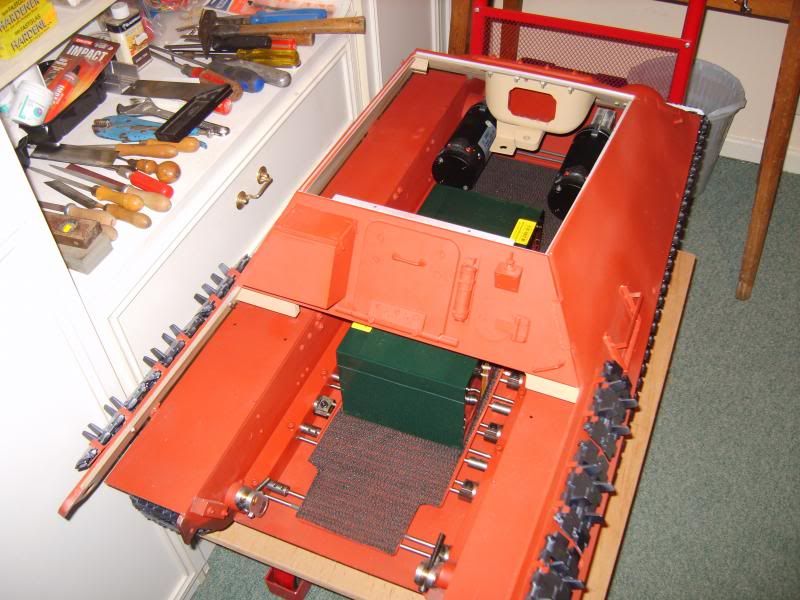
The drive motors are installed and a provisional dry fit of the upper hull.
-
phil fitzpatrick
- Posts: 2020
- Joined: Sat Dec 12, 2009 3:38 pm
- Location: Sambourne uk
- Been liked: 223 times
Re: Ultimate Panther/Jagdpanther Build
Is that a peice of the dining room carpet on your battery tray Mick 
I think you might be pushing your luck this time,She is bound to notice
that
Cheers
Phil
I think you might be pushing your luck this time,She is bound to notice
that
Cheers
Phil
-
michael hilton
- Posts: 1197
- Joined: Thu Dec 15, 2011 4:29 pm
- Has liked: 1564 times
- Been liked: 835 times
Re: Ultimate Panther/Jagdpanther Build
Hello Phil, nice try mate....no it's a piece of rubber non slip mat.
I have a nice fit with the upper/lower hull....waved my new 'file' at the Glacis plate, and it just slid in.
I forgot to tell you, while returning the Jagd' on the Clarke Table Lift, to the workshop, (bedroom) I scored a 'line' in the hall plaster. As luck would have it, I had a tube of ready mixed plaster....filled in the groove......job done.
No one will ever know
That's one mean Tiger, Phil
Regards....Mick
-
phil fitzpatrick
- Posts: 2020
- Joined: Sat Dec 12, 2009 3:38 pm
- Location: Sambourne uk
- Been liked: 223 times
-
Marcel de Groene
- Posts: 188
- Joined: Mon Nov 26, 2007 11:26 am
- Location: Netherlands
- Contact:
Re: Ultimate Panther/Jagdpanther Build
Hello Michael,
Great built. Are you also putting on the block pattern Zimmerit in the final stage. Hope to see your finished mdel at the open day. I did a topic on Zimmerit when building my Panther. Might come in handy when the time is there. Always willing to do some explanation.
Regards,
Marcel
Great built. Are you also putting on the block pattern Zimmerit in the final stage. Hope to see your finished mdel at the open day. I did a topic on Zimmerit when building my Panther. Might come in handy when the time is there. Always willing to do some explanation.
Regards,
Marcel
Stay on tracks
-
michael hilton
- Posts: 1197
- Joined: Thu Dec 15, 2011 4:29 pm
- Has liked: 1564 times
- Been liked: 835 times
Re: Ultimate Panther/Jagdpanther Build
Hello Marcel, thank you for your interest and advice. My Jagd' will be modeled on a very late tank. I did give the idea of 'Zimmerit' some thought however, I have no experience in this area. Like my Comet build, I need to keep things simple. It would be a nice addition. Nevertheless, if I have a change mind, I will certainly seek your advice. Many thanks. I hope to meet you in September at the 'open' day.
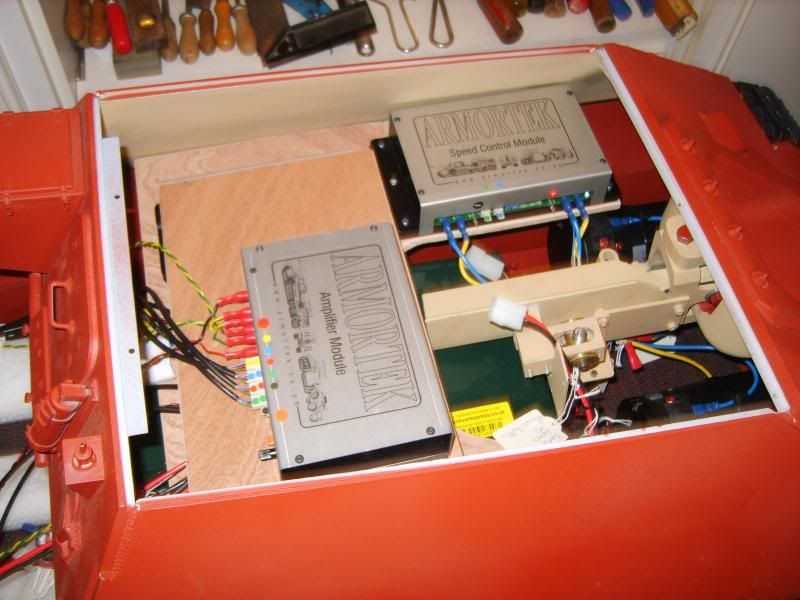
With the upper hull in place....there is lots of space to locate the electronic modules. I will try fixing the modules to a base board.......1/4 ply or similar. The large batteries are beneath the module board. I have roughed out the area available on my building board. Access will be easier, by removing the upper hull. I have no plans to model the interior details.....Mick
With the upper hull in place....there is lots of space to locate the electronic modules. I will try fixing the modules to a base board.......1/4 ply or similar. The large batteries are beneath the module board. I have roughed out the area available on my building board. Access will be easier, by removing the upper hull. I have no plans to model the interior details.....Mick
-
Dennis Jones
- Posts: 892
- Joined: Wed Feb 04, 2009 11:19 am
- Location: Poole, Dorset
- Has liked: 10 times
- Been liked: 223 times
Re: Ultimate Panther/Jagdpanther Build
Hi Mick,
Build looking good. Just remember to put the on/off switch near to a hatch and also the volume control.
Dennis.
Build looking good. Just remember to put the on/off switch near to a hatch and also the volume control.
Dennis.
-
michael hilton
- Posts: 1197
- Joined: Thu Dec 15, 2011 4:29 pm
- Has liked: 1564 times
- Been liked: 835 times
Re: Ultimate Panther/Jagdpanther Build
Hello Dennis, I have this in mind, I can reach the the switch/volume control through the rear hatch. I usually forget these minor details until its to late. Plenty of room for the large batteries as well.
I was pleasantly surprised at the amount of space in the upper hull area....compared to the Comet. You can't 'swing a cat' in the Comet. The Jagdpanther is proving to be a really straight forward build, and most enjoyable. When the 'sounds' kick in it all springs to life......Mick
I was pleasantly surprised at the amount of space in the upper hull area....compared to the Comet. You can't 'swing a cat' in the Comet. The Jagdpanther is proving to be a really straight forward build, and most enjoyable. When the 'sounds' kick in it all springs to life......Mick
-
michael hilton
- Posts: 1197
- Joined: Thu Dec 15, 2011 4:29 pm
- Has liked: 1564 times
- Been liked: 835 times
Re: Ultimate Panther/Jagdpanther Build
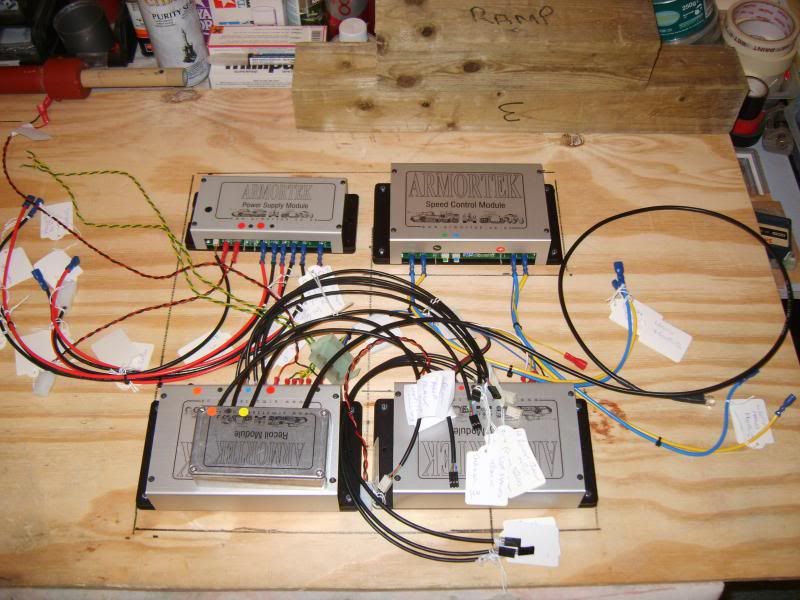
Started on the layout for the electronic modules. I would like to be able to remove the upper hull without disturbing the electronics. I am also having a problem with Photobucket, takes an age to upload. Here goes.....
First layout
Adjustments
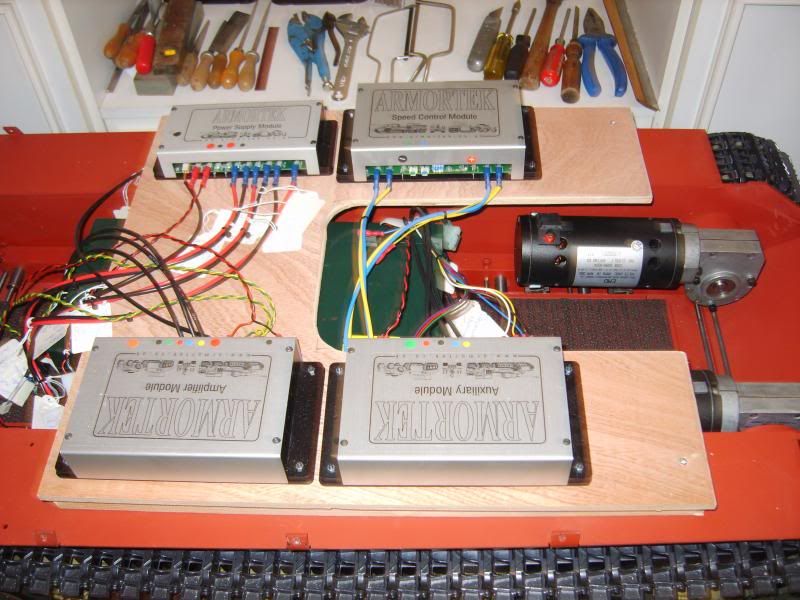

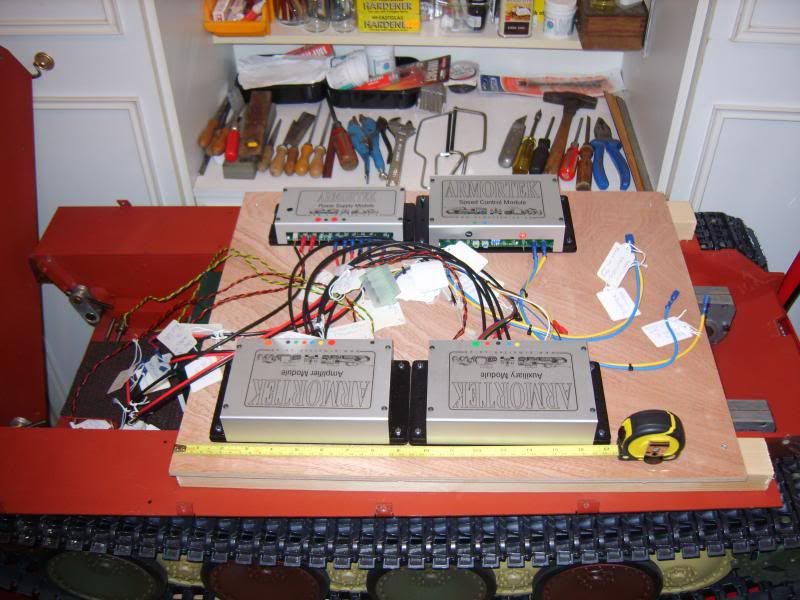
The Speed Control and Amplifier are secure under the Auxiliary Module. Modules are held with wood screws. The upper hull lifts off without disturbing the electrics. So far so good.....Mick
First layout
Adjustments
The Speed Control and Amplifier are secure under the Auxiliary Module. Modules are held with wood screws. The upper hull lifts off without disturbing the electrics. So far so good.....Mick
-
phil fitzpatrick
- Posts: 2020
- Joined: Sat Dec 12, 2009 3:38 pm
- Location: Sambourne uk
- Been liked: 223 times
-
michael hilton
- Posts: 1197
- Joined: Thu Dec 15, 2011 4:29 pm
- Has liked: 1564 times
- Been liked: 835 times
Re: Ultimate Panther/Jagdpanther Build
Hello Phil, with so many wires it's best to be as tidy as possible.
While I'm on the subject.....any idea why the colour coding has changed ie, Blue Red Green on the Rx leads.
Also, I can see that Red = positive , Blue ? Green ? .One wire must be Negative, and one the signal.
The servo recoil lead colours are Black, Red, Yellow. Neg, Pos, Signal ?.
Everything works fine.....just idle thoughts.....Mick