Steve's Mid Production Tiger

Forum for discussion relating to Tiger 1, Mid, Early, Late Production and Sturmtiger
Post Reply
Steven Day
Posts: 65
Joined: Sun Nov 08, 2009 9:59 pm
Location: Chelmsford
Been liked: 12 times

Steve's Mid Production Tiger

Post by Steven Day »

Image

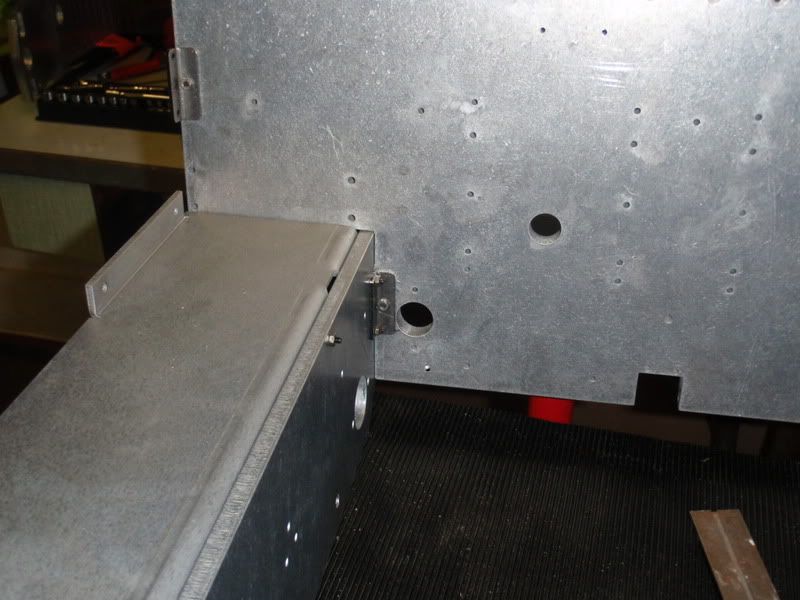
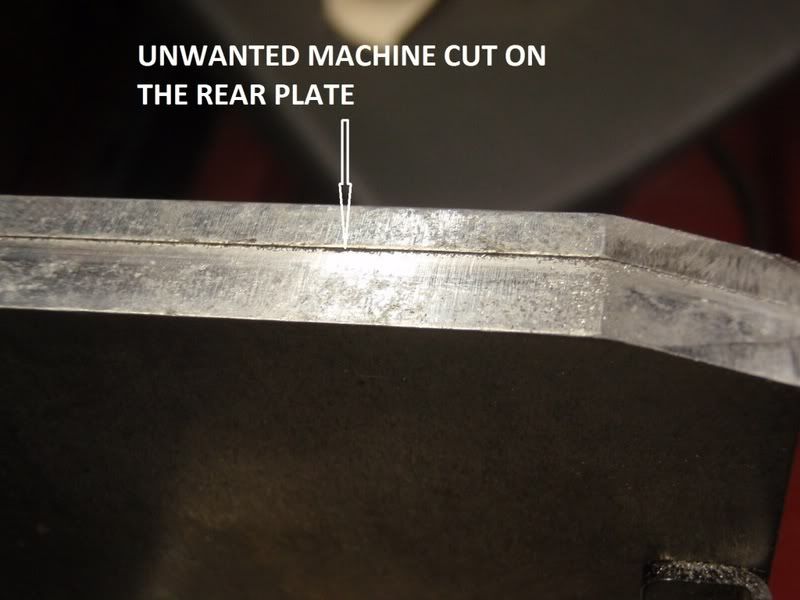
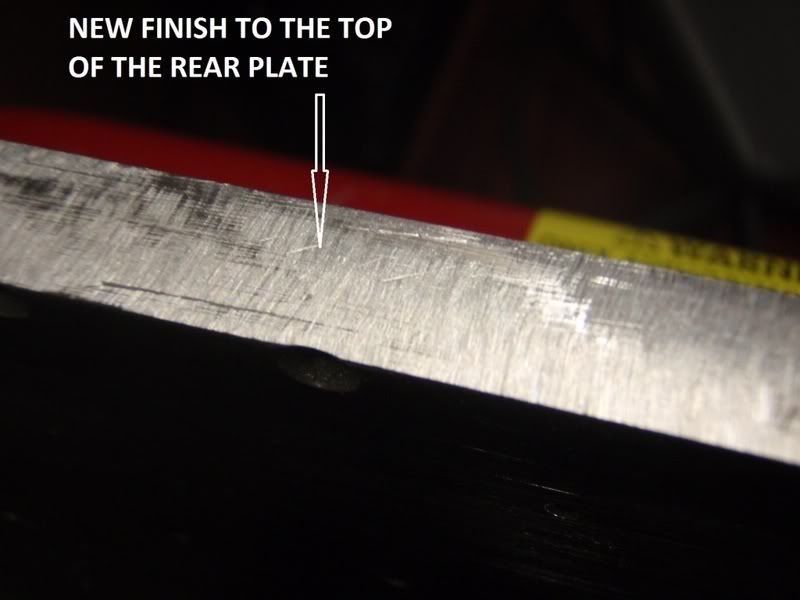
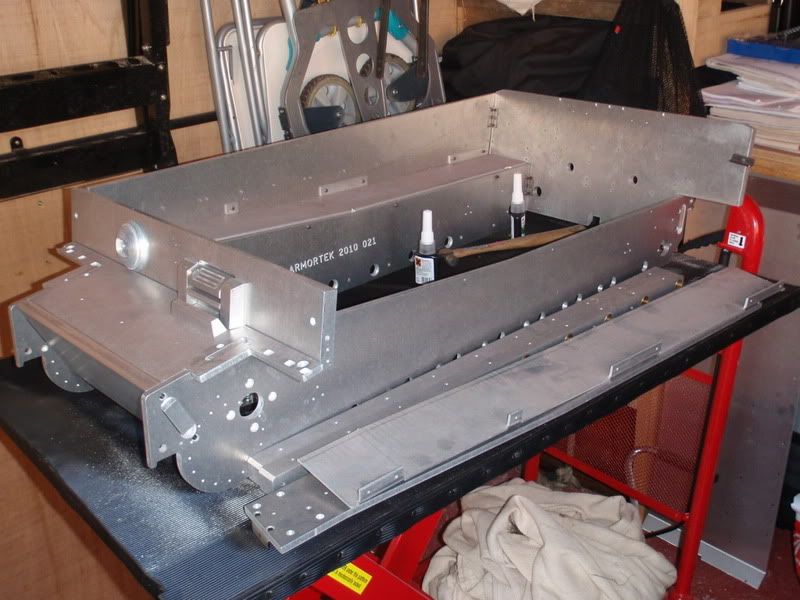
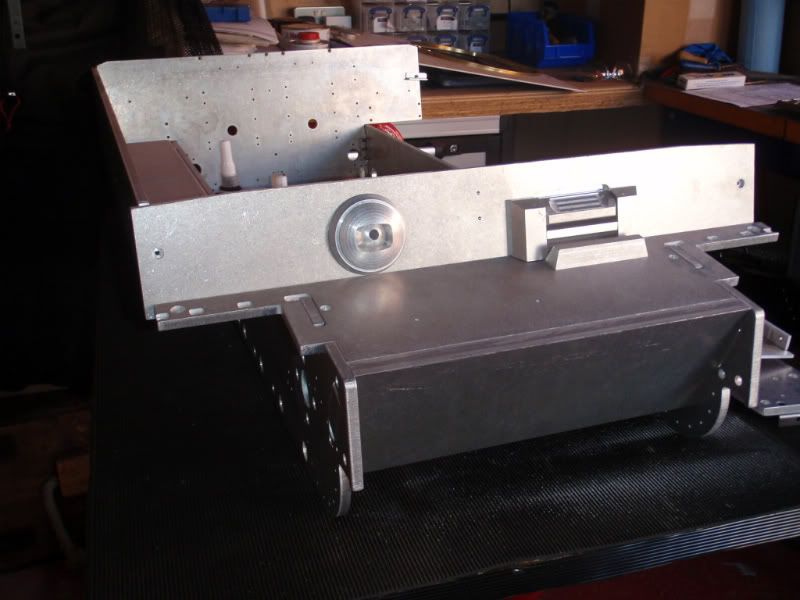
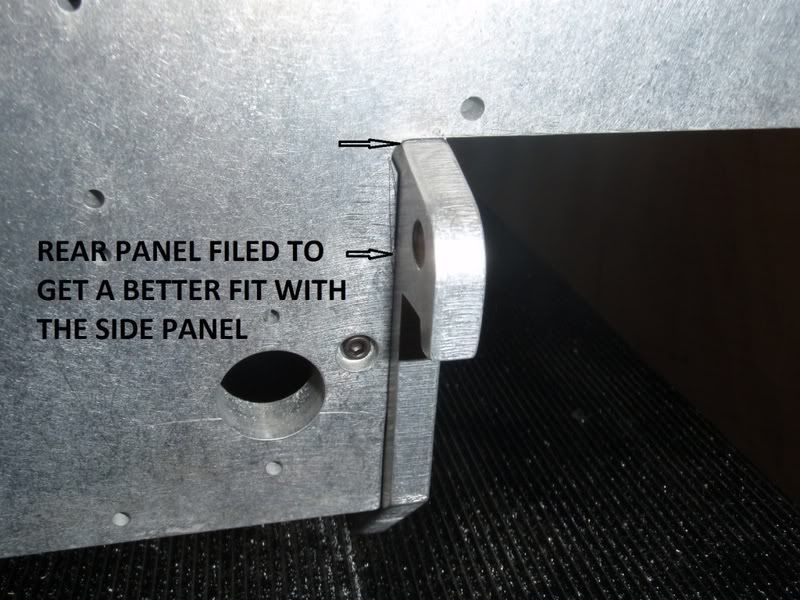
Well I’ve started my build in earnest. When I started I thought this isn’t going to take too long, it’s just bolt everything together, but so far I must have built and stripped down the hull 3 or 4 times over the last few months. As others have found some of the panels and fixing holes need some minor filing to get a closer and square fit.
Image
Image
Image
Image
Image

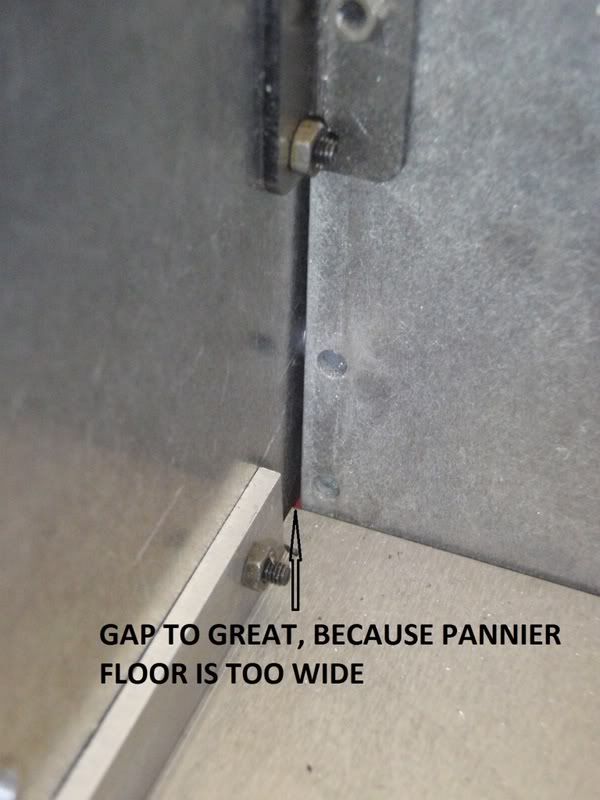
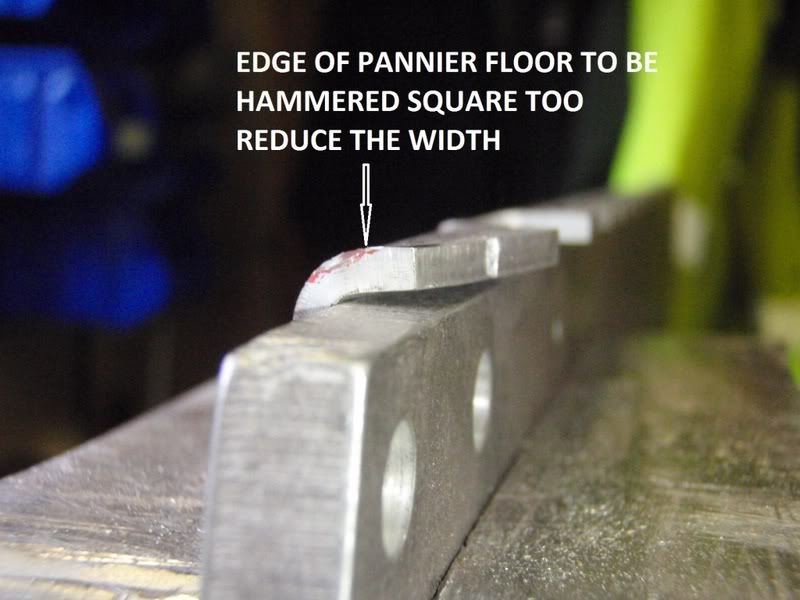
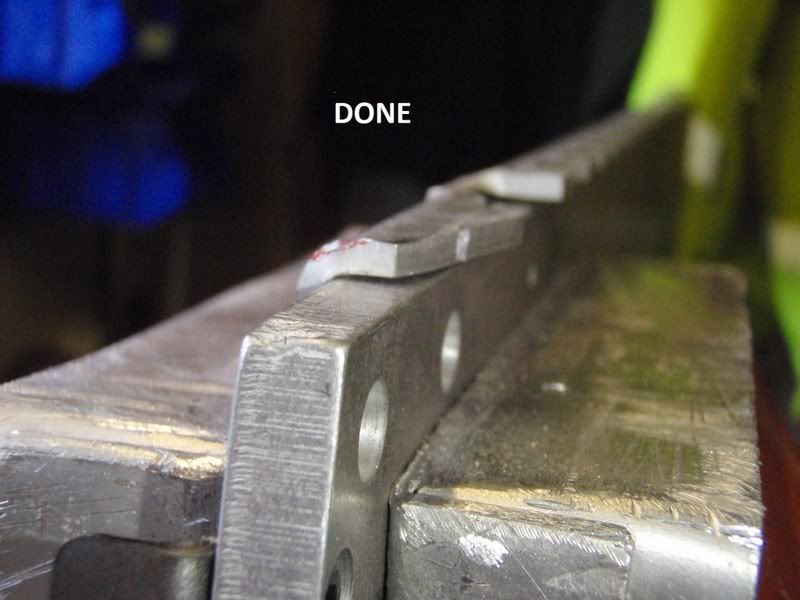
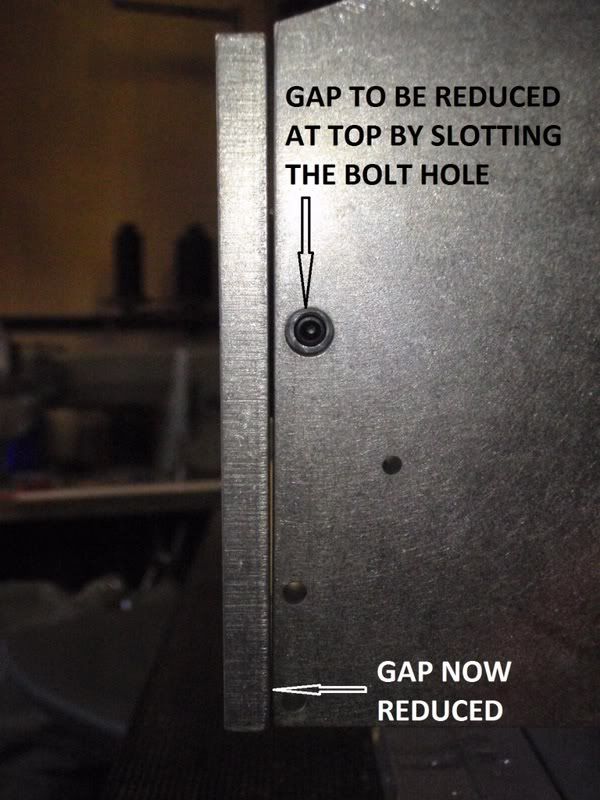
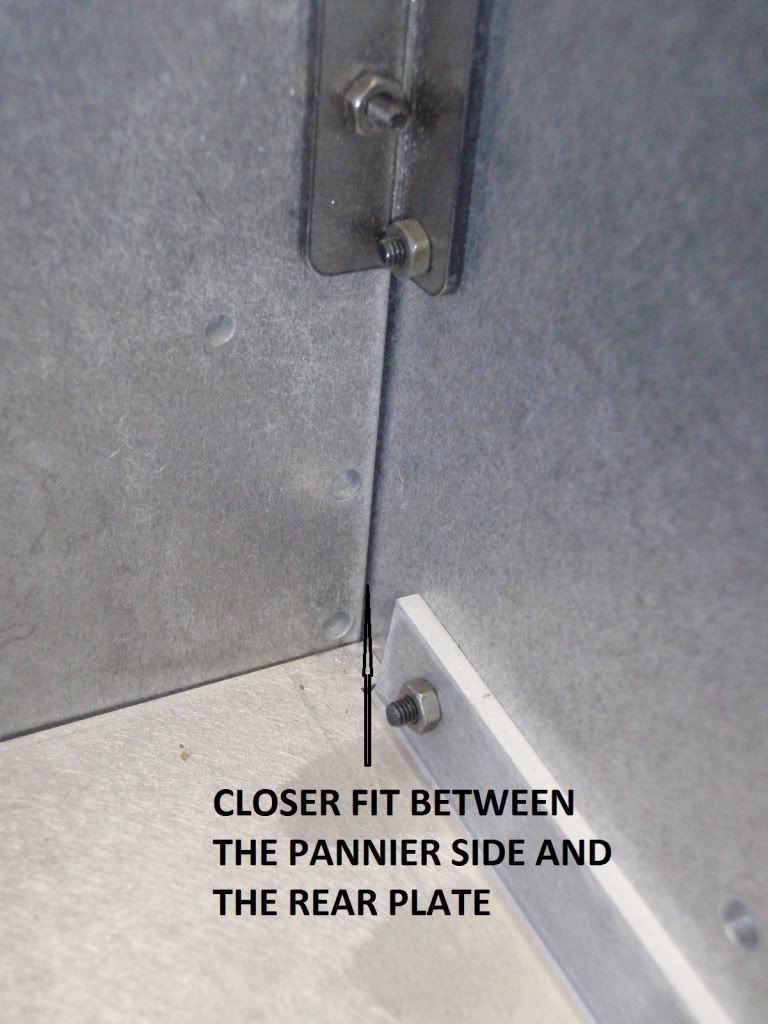
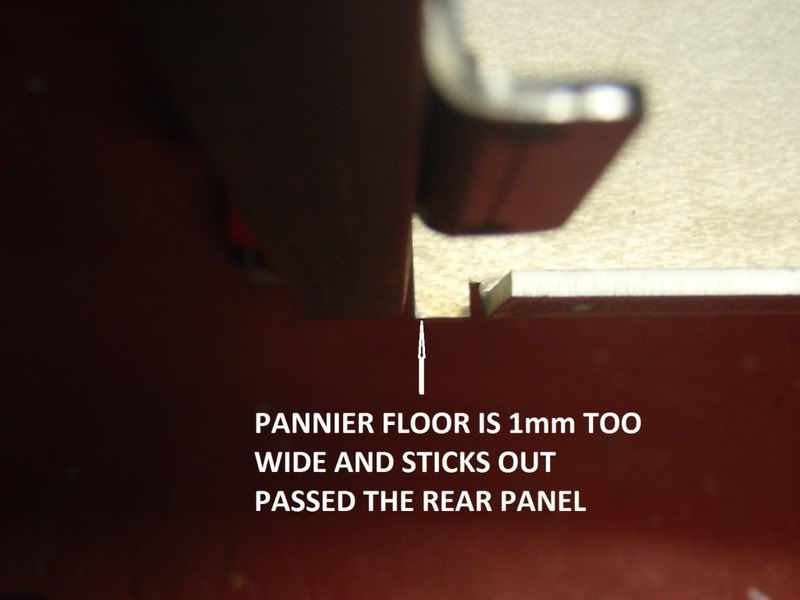
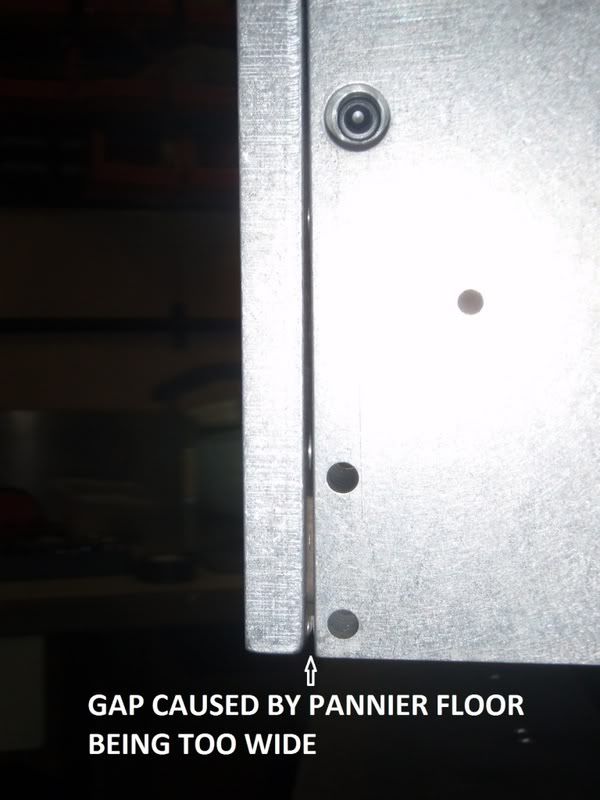
I also found that the Pannier Floors were about 1mm too wide, which resulted in the Pannier Sides not bolting down vertically, as you can see from the uneven gaps in the photos. Following advice given on the forum, I placed the Pannier Floors in a vice and used a hammer to square up the folded edge, which reduced the width and closed the gap.
Image
Image
Image
Image
Image
Image
Image

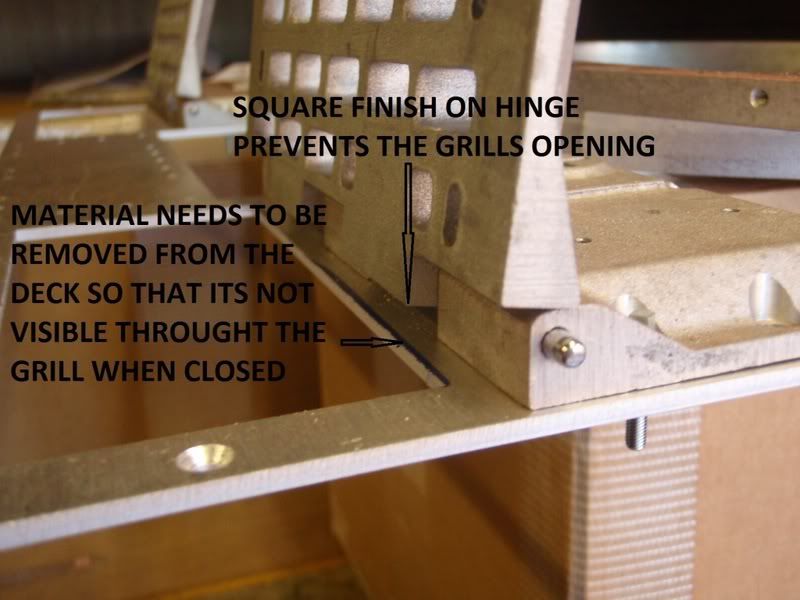
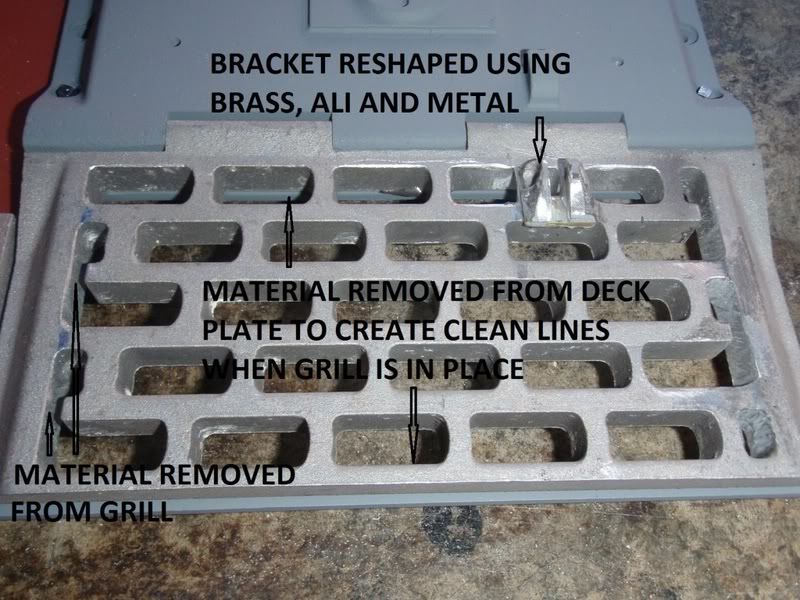
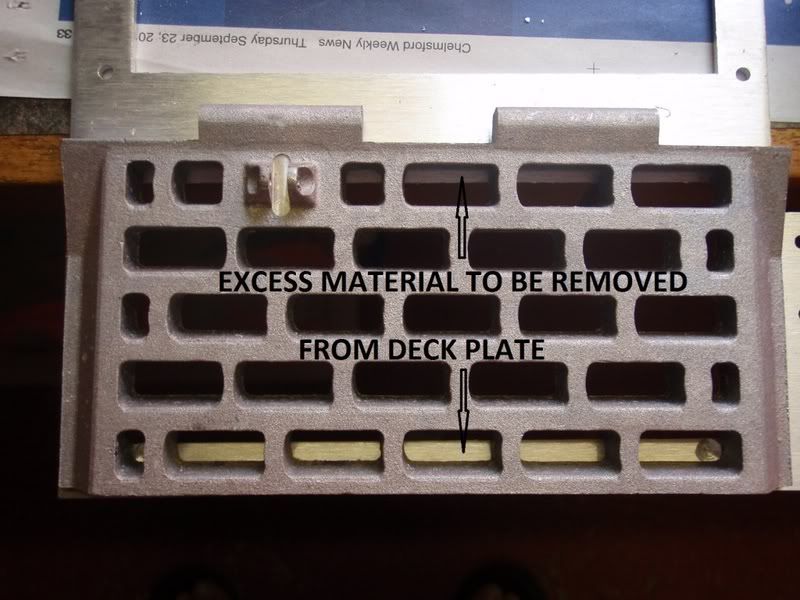
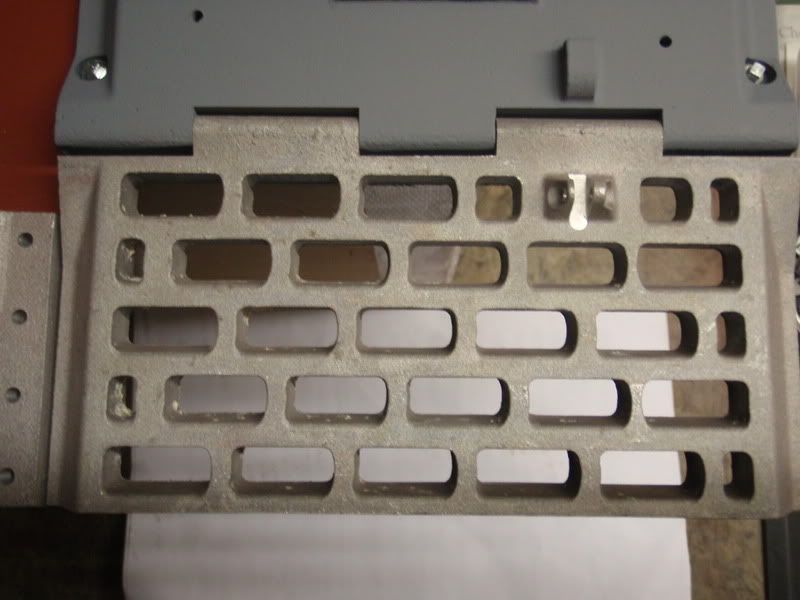
In between my work on the Hull, I started work on the Engine Deck. After checking out several websites, books and other people’s work on the forum I started on some improvements. The kit parts are great, but lacked some finer details. I also removed material from the Deck Plate that could be seen through the air intake grill, as I thought this was unsightly and would not adversely affect the strength of the Deck Plate.
Image
Image
Image
Image

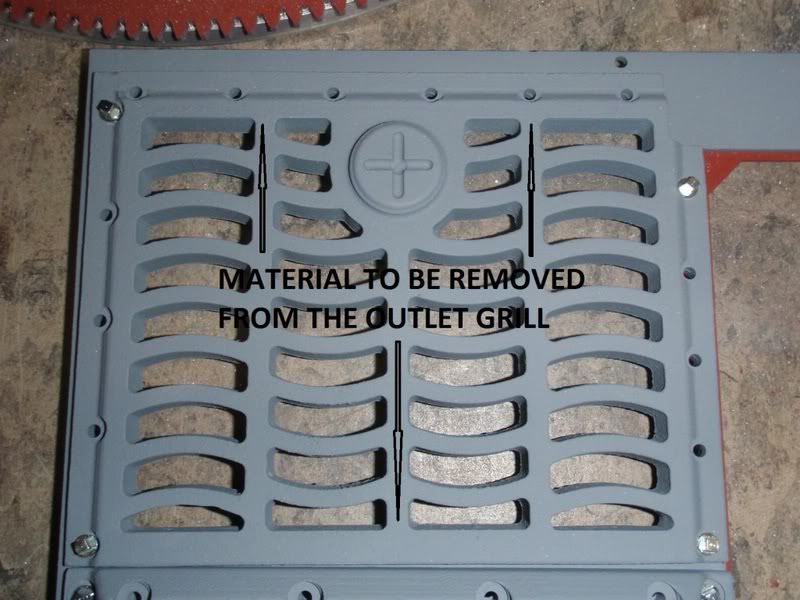
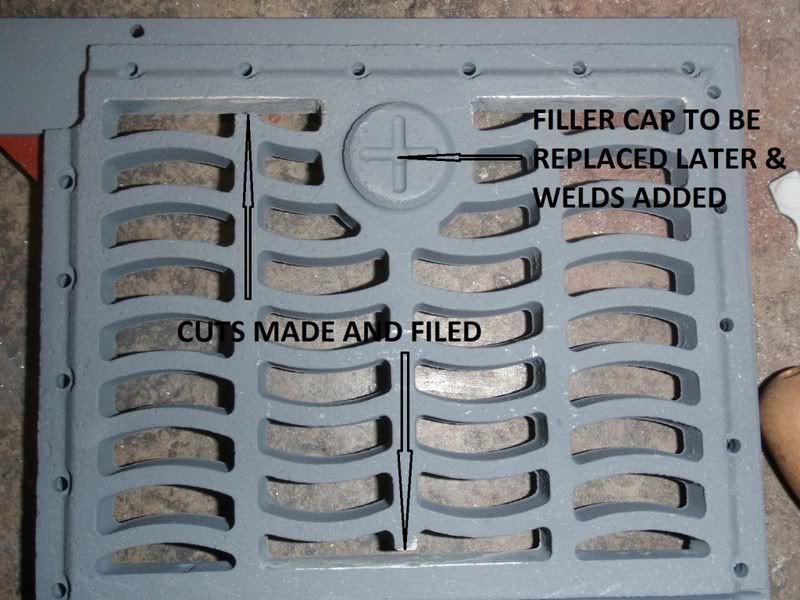
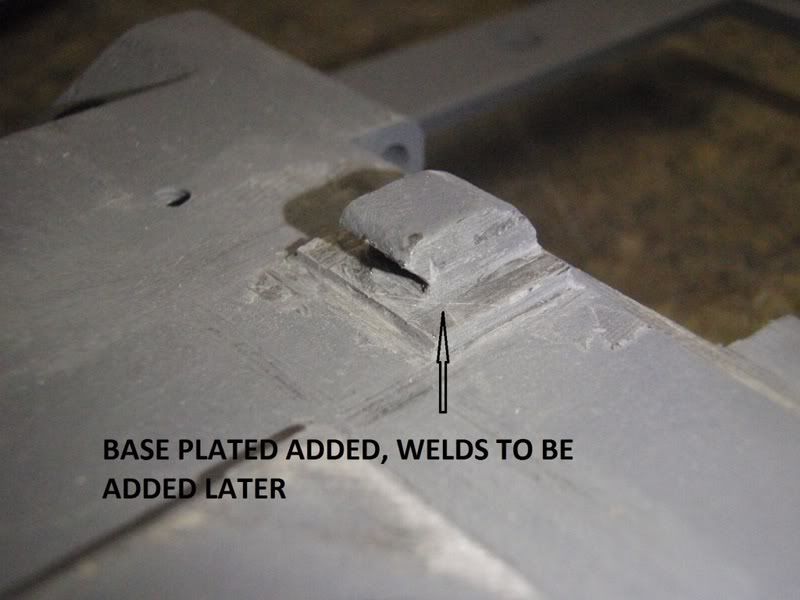
Both the intake and outlet Grills needed some material removed as the real thing has gaps in the castings + the hook brackets were the wrong shape as the real thing is a welded bracket rather than a part of the casting. I also noticed that the air intake Grills are suppose to be identical rather than mirror images of each other, but decided it would be too much work for me to radically alter or make a new Grill.
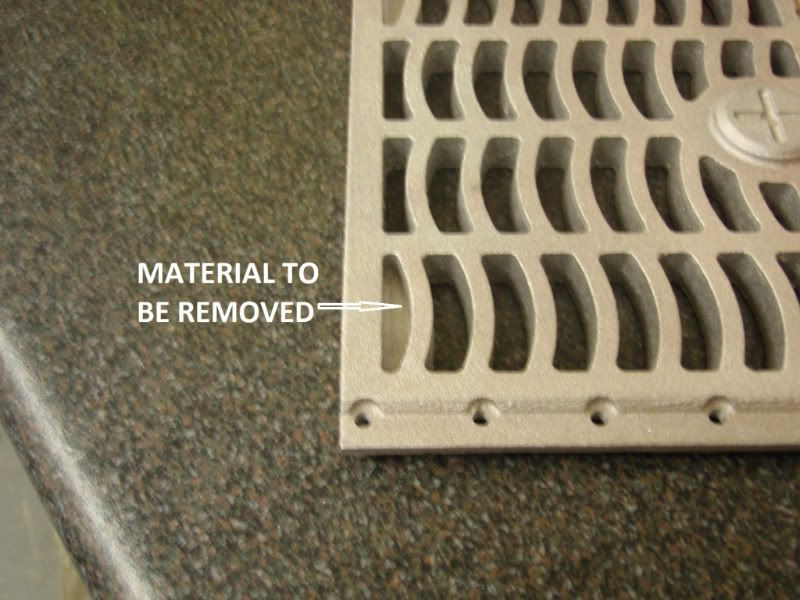
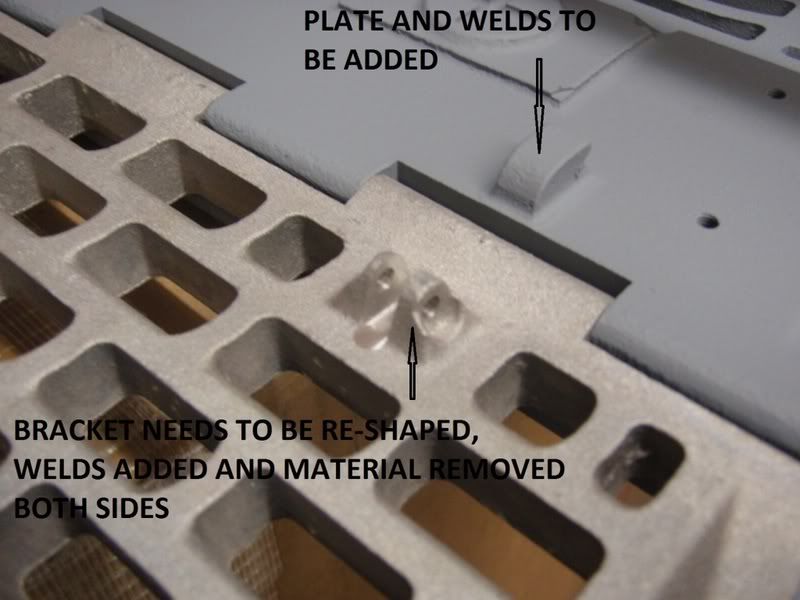
Image
Image
Image
Image
Image
Image
Image

I’ll also be adding some welds to the engine deck area, including the hook brackets and catches, although my first attempt was a bit pants. I used milliput for the first time, but it was rock hard when I took it out of the box and I had difficulty rolling it out to form the weld seams. Did I get a duff box or is there a knack in using milliput?
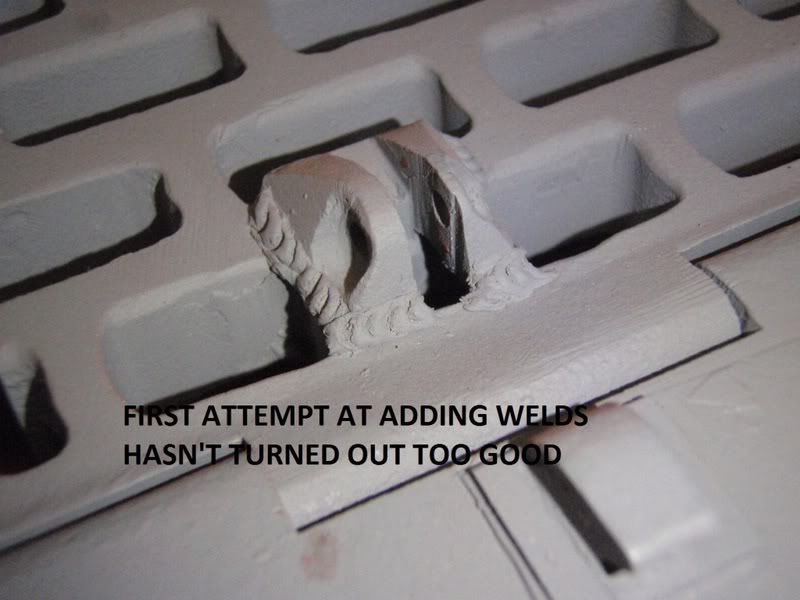
Image

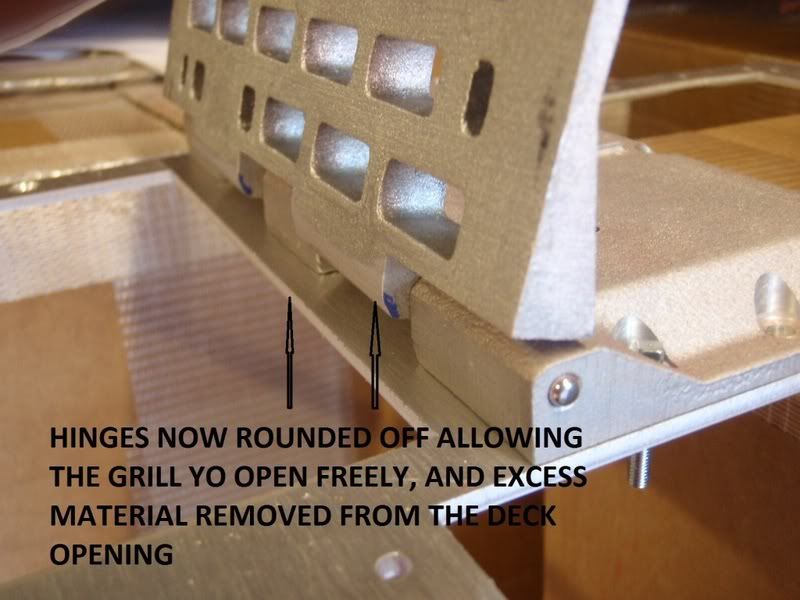
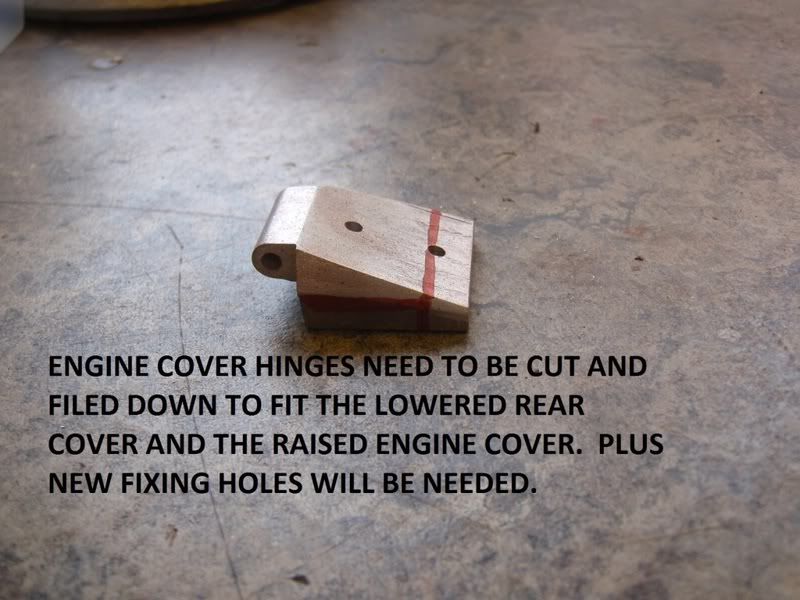
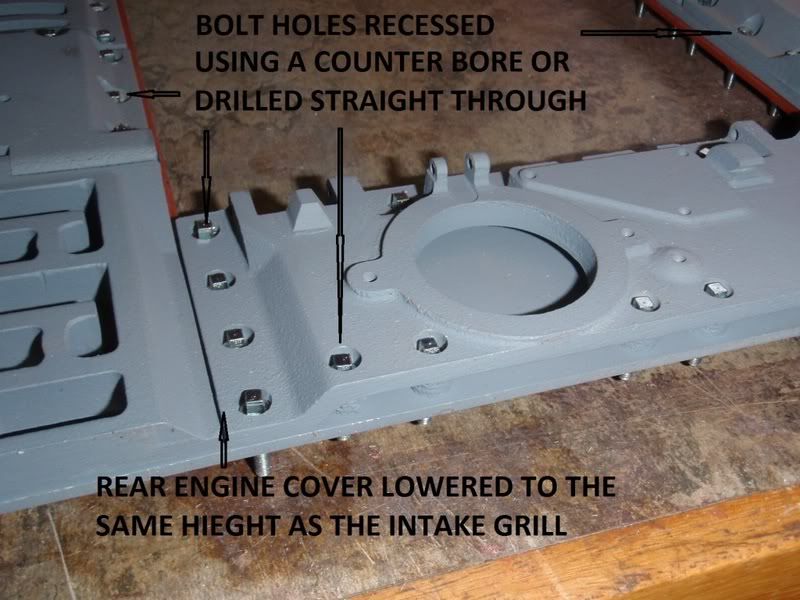
I’m using 3mm magnets (+ 3mm aluminium or brass bar to be sourced) to raise the height of the Engine Cover. I’ve also decided to lower the Rear Engine Cover as I believe this looks correct, although I could find no pictures or plans to back this up. The next stage is to cut down the Engine Cover Hinges, but I’m just building up the courage to do this.
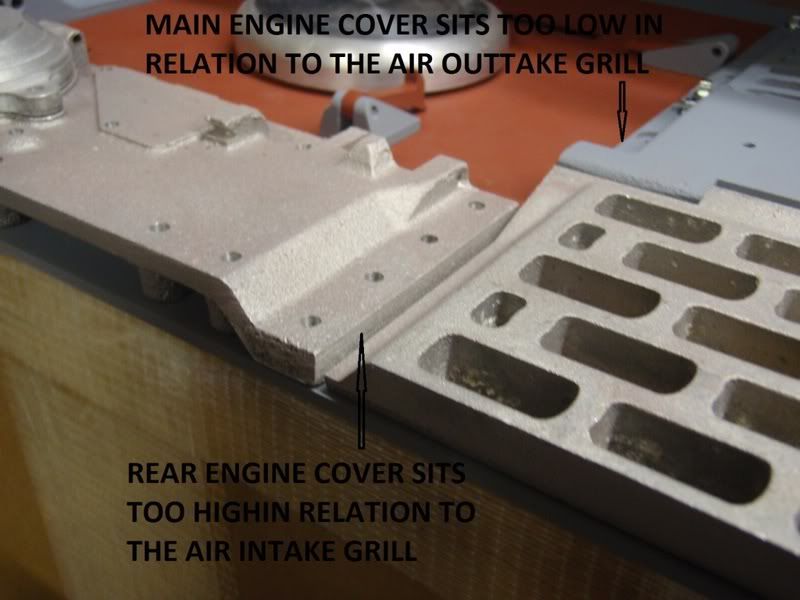
Image
Image

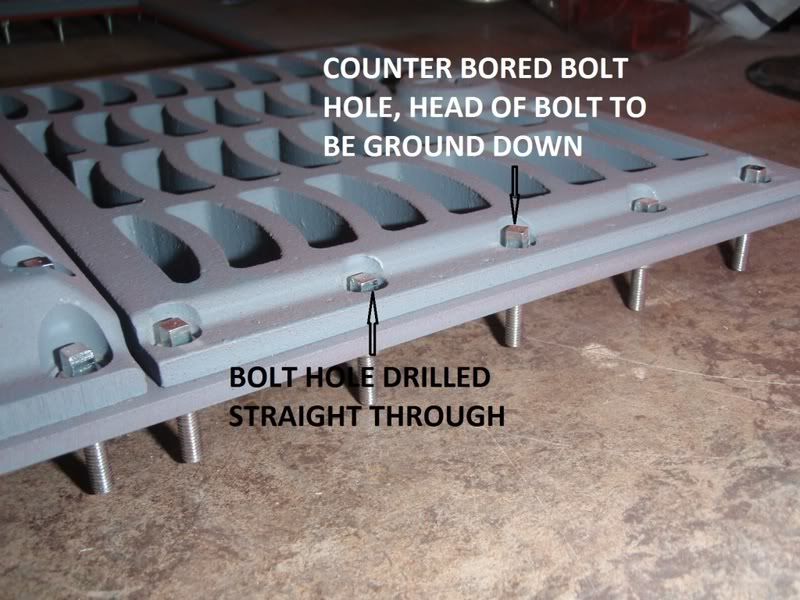
To lower the square headed bolts, I decided to counter bore the bolt holes to the Air Outlet Grills, Radiator Covers and the Rear Engine Cover. Then I went a bit mad by only counter boring the those holes I felt were absolutely necessary for securing these parts down to the Deck Panel. All the remaining holes were drilled straight through so the bolts are only fixed to the Deck. The plan is to file down the heads of those bolts still sitting proud in the counter bored holes. I’m hoping that the filed down bolt heads will not be noticed without a close up inspection.
Image
Image

Steven Day
Posts: 65
Joined: Sun Nov 08, 2009 9:59 pm
Location: Chelmsford
Been liked: 12 times

Post by Steven Day »

I had to post these parts purchased from Steve Winstone. The picture speak for themselves.

Image
Image

Image
Image
Image
Image
Image
Image
Image
Image
Image
Image

John Fitzsimons
Posts: 1816
Joined: Tue Dec 14, 2010 3:11 pm
Location: IRELAND,Dublin/Meath
Has liked: 5 times
Been liked: 629 times
Contact:

Post by John Fitzsimons »

Thanks for posting these pictures. I have almost the same parts on order with Steve and am expecting delivery in early Feb. Not getting the tool box though as I'm working on a late tiger. The parts look great. Looking forward to getting mine now.

Just got a mail from Steve. My parts ready for shipment also.
Last edited by John Fitzsimons on Wed Jan 26, 2011 12:04 am, edited 1 time in total.

Steven Day
Posts: 65
Joined: Sun Nov 08, 2009 9:59 pm
Location: Chelmsford
Been liked: 12 times

Post by Steven Day »

Managed to do a bit more work.

Does anyone have any details for the rear engine cover, i.e. for a Mid Tiger. My cover has a round hump with a hole in the centre, as can be seen in the photo below.
Image

Found that my front deck is about 2mm too long, so it currently sit ontop of the rear deck and the fixing holes are out of alignment.
Image
Image

Image

Steven Day
Posts: 65
Joined: Sun Nov 08, 2009 9:59 pm
Location: Chelmsford
Been liked: 12 times

Post by Steven Day »

Few nice bits purchased from Mike Stannard.

Image
Image
Image
Image
Image
Image
Image

I have 12 of these tarpaulin brackets, but so far I can only find the location of 4 of these on the sides of the tank near to the engine deck. Does anyone have an idea where the other would be mounted or are these spares?
Image

Stephen White
Site Admin
Posts: 3110
Joined: Sat Oct 11, 2008 7:05 pm
Location: Dorset
Has liked: 1023 times
Been liked: 2093 times
Contact:

Milliput

Post by Stephen White »

Steven

Milliput softens when you warm it. Five mins on top of a radiator will do the trick. Another tip is to moisten your tools and fingers when you're handling to reduce adhesion. Be careful however to avoid getting any water between the Milliput and the surface on which you want it to sit or it will slide around and not stick.

Regards

Stephen

Steven Day
Posts: 65
Joined: Sun Nov 08, 2009 9:59 pm
Location: Chelmsford
Been liked: 12 times

Post by Steven Day »

Thanks for the tip Stephen, I'll give it a go.

Cheers,
Steve

Mike Stannard (toyrific)

Post by Mike Stannard (toyrific) »

Hi Steve

Here is the positions for the tarp tie downs. Just noticed from your picture one or maybe two of the tie downs are incomplete castings that I missed. Let me know if you need replacements.

Image

Regards
Mike

Steven Day
Posts: 65
Joined: Sun Nov 08, 2009 9:59 pm
Location: Chelmsford
Been liked: 12 times

Post by Steven Day »

Thanks for the info Mike, that really helps.

I've checked my tie downs and they look OK. Once they're cleaned up and some welds are added they should look great.

Cheers,
Steve

Steven Day
Posts: 65
Joined: Sun Nov 08, 2009 9:59 pm
Location: Chelmsford
Been liked: 12 times

Re: Steve's Mid Production Tiger

Post by Steven Day »

Having finished another little project, I’m back to my Tiger build. My build is a bit all over the place at the moment, with lots of things started but not much finished.

I’ve started on the suspension and wheels.

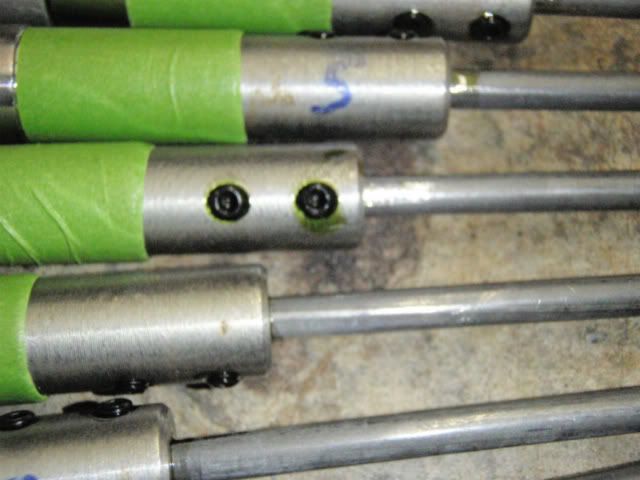
Using an orbital sanding disc fitted to a pedestal drill, I cut flats to one end of each torsion bar.

Having removed the burs and the cleaned up the axles, the torsion bars were fitted. Yes I’ve used thread lock on the grub screws and now realise these will NOT fit passed through the bushes, so I’ll have to attempt to remove the grub screws before fitting them to the tank. HELP, is heat my only option to release the screws, or is there a solvent I can use?
Image

Here’s my assembled axles waiting for the flats to be cut at the other end of the torsion bars.


Here’s my jig for setting the suspension arms. I know there’s been a lot of these posted on the forum, but it may help someone out to learn from my mistake. At first I was quite pleased with my jig; the theory was to use both sides of the jig to cut flats at 35o for each set of axle assemblies, which I found out was WRONG. I’d just cut flats on one set of torsion bars using the left hand side of the jig, and then I cut the first torsion bar of the second set using the right hand side of the jig, and luckily checked it against the first set and found that both axles pointed in the same direction, which is incorrect. The trick was to use the same side of the jig for all the axles, but to move the jig to the opposite side of the drill. This ensures both sets point in opposite directions when fitted into the tank.


First set of flats being cut using the left hand side of the jig, with the jig to the left of the drill.

Second set of flats being cut using the same side of the jig, but with the jig placed to the right of the drill.


Road wheel hubs with the bearings fitted and glued in place + primed using etching primer and normal auto grey primer.
Last edited by Steven Day on Sat Dec 17, 2011 12:46 pm, edited 2 times in total.

Rocky Sembritzky

Re: Steve's Mid Production Tiger

Post by Rocky Sembritzky »

Steven,

Heat is your best option for loosening the loctite. I use a mini hand held torch and it works great.
If you are using a Mac and get a 503 error message with photobucket, just reboot your pc.

Rocky

yves mouton
Posts: 998
Joined: Fri Nov 06, 2009 7:55 pm
Location: Belgium
Has liked: 1 time
Been liked: 563 times

Re: Steve's Mid Production Tiger

Post by yves mouton »

Hello Steven,

I cut down the two grub screws on each axle so they can pass
through the copper bushes. And it's also easy if you want to remove your axles,
you have to loosen just the main grub screw M 5 or M 6 on the other end
of the axle

regards Yves

Steven Day
Posts: 65
Joined: Sun Nov 08, 2009 9:59 pm
Location: Chelmsford
Been liked: 12 times

Re: Steve's Mid Production Tiger

Post by Steven Day »

Thanks, I now have a couple of options.

I try uploading the pictures later today

Steve

Steven Day
Posts: 65
Joined: Sun Nov 08, 2009 9:59 pm
Location: Chelmsford
Been liked: 12 times

Re: Steve's Mid Production Tiger

Post by Steven Day »

test post
Image

Post Reply