I am in the building phase of a couple of models, but in both the same issue arises. I cleaned all the pieces and started to assemble the different blocks, BUT "when should I start the painting job???"
After checking all the pieces and the blocks I know that everything fits properly and works. So I start to partially disassemble it and prepare for the painting job.
Sometimes this requires a partial of even a full disassemble. Thereafter, start with the primer as to reach every area in complex pieces and blocks. And here the first issue : if the paint (or too much paint) reaches some areas (like treads and holes) a proper fit could be hampered and screws could get hard.
So first question : what do professional painters use to temporary mask these delicate spots ?
Now going on.... after the primer I believe I would have to go straight with the basic overall paint of the pieces and blocks. Then slowly reassemble the full model.
Now second question : at which stage start with the final camo painting job? In real world the camo would be done on the ready to go tank. This would also be my idea, but with the model fully built some places are REALLY hard to reach ! maybe such a situation would result pretty "as the real one", since I don't think the tanks exited the factory already in full camo, but just with a standard basic common paint. After all the crew of the tank would have to adjust the camo scheme with the different seasons of the year, and this would be done on the field with the equipment which could be found on the field and not in a proper painting facility.
Please help !
(hope my english was clear enough; after all I am just a "spaghetti eater")
Professional model painting for dummies (like me)
-
Jan_Donadoni
- Posts: 151
- Joined: Fri May 21, 2010 8:20 am
- Location: Italy
- Has liked: 2 times
- Been liked: 6 times
-
Paul Morris
- Posts: 1559
- Joined: Thu Jul 12, 2007 4:44 pm
- Location: North Lancs
- Been liked: 68 times
Hello Jan.
Everyone will have their own way of doing things so I don't think there are any hard and fast rules, but here is how I do it.
Start painting as you start building using etch primer the tank parts can be built in sub assemblies like all the suspension arms can be done and etched and primed and given a top coat before they are fitted to the tank, once you have checked you have everything right that is
I always paint the wheels to a point when they are just about finished before they go on the tanks, this way any painting shading weathering etc can be done on the lower hull sides before the wheels go on...much easier,keep going in this way getting everything built and coated in your chosen main background colour. Then with the tank together cover the wheels with an old towel or sheet etc and start with the camo { if you are having any} do the camo paint with the turret off then you will not get overspray from the turret sides on the deck, its easy to draw register marks on the tank so that the camo lines match up when the turret is fitted.
Then your chosen weathering can be done and thats about it.
[ img][/img]
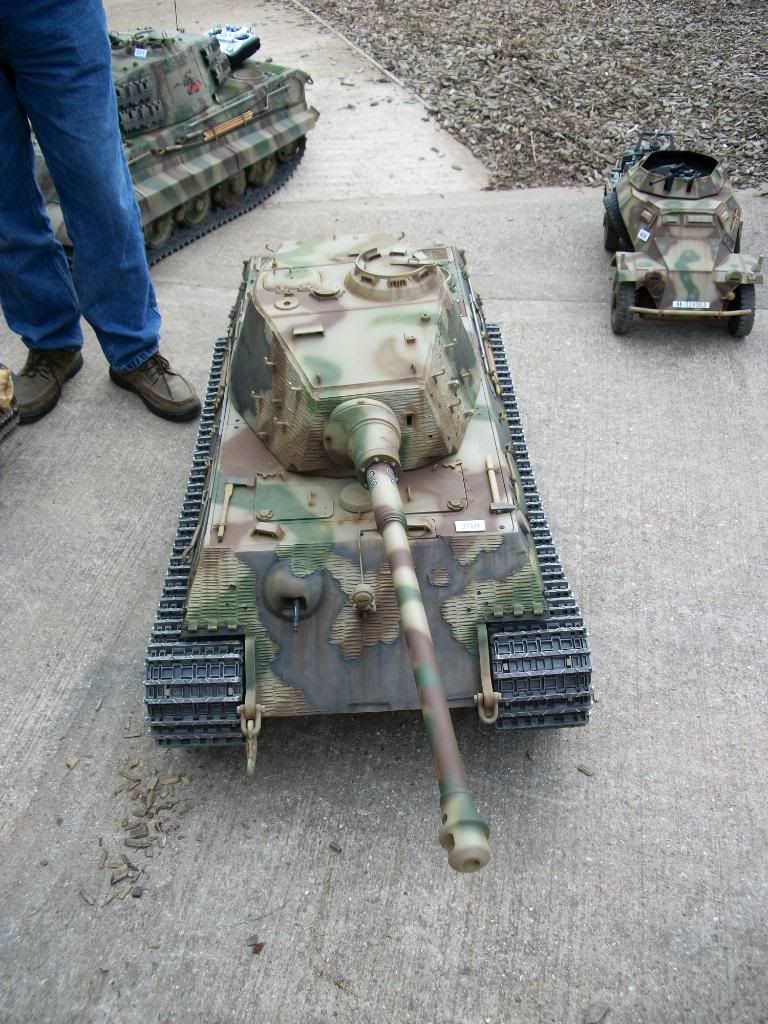
The same method was used on all three models in this photo.
[ img][/img]
[ img][/img]
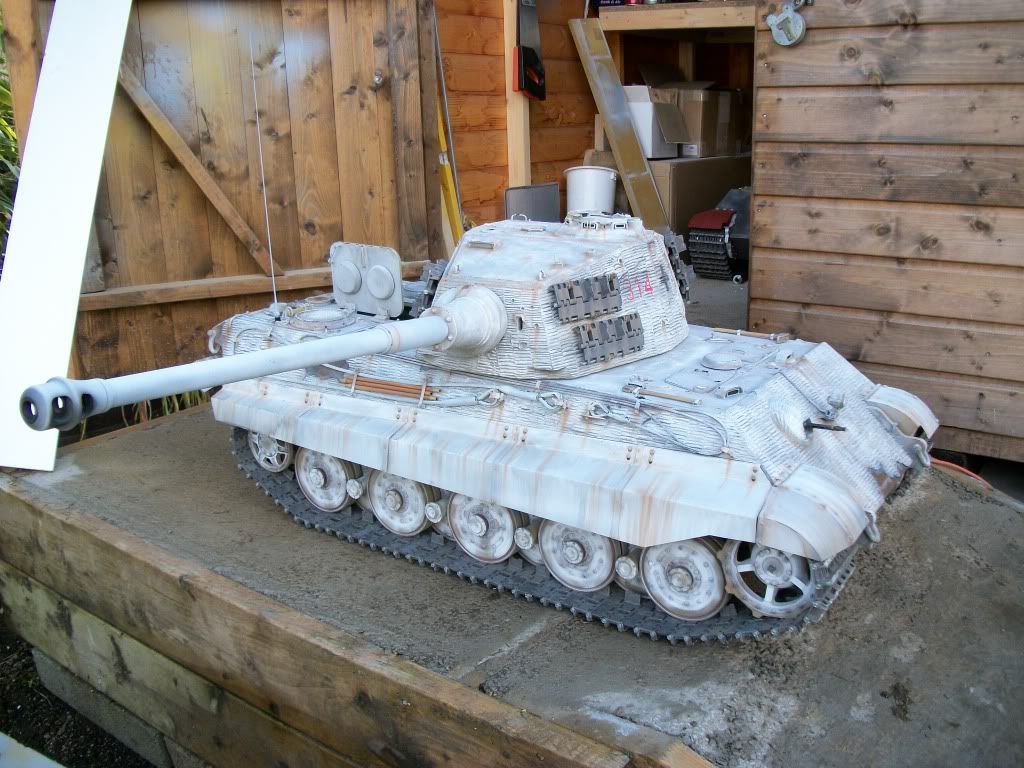
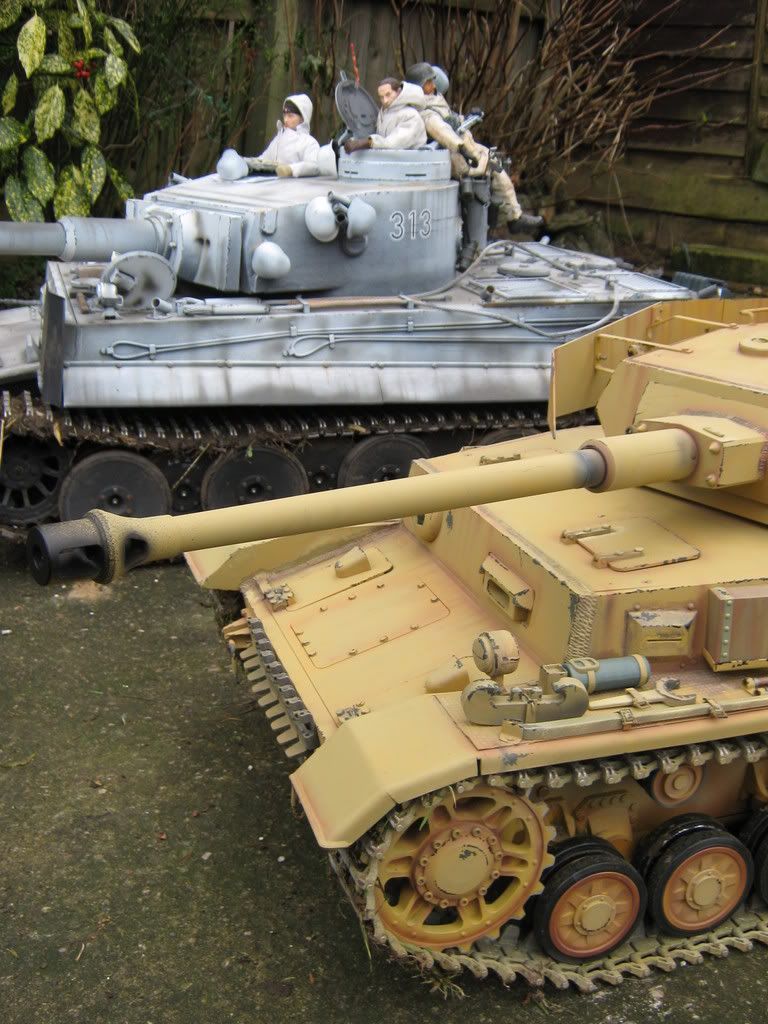
In the two pics above the same methods are used for single colour models i.e no camo just weathering.
I hope this helps a little bit if not I am only too happy to help just give me a shout.
Cheers Paul
Everyone will have their own way of doing things so I don't think there are any hard and fast rules, but here is how I do it.
Start painting as you start building using etch primer the tank parts can be built in sub assemblies like all the suspension arms can be done and etched and primed and given a top coat before they are fitted to the tank, once you have checked you have everything right that is
I always paint the wheels to a point when they are just about finished before they go on the tanks, this way any painting shading weathering etc can be done on the lower hull sides before the wheels go on...much easier,keep going in this way getting everything built and coated in your chosen main background colour. Then with the tank together cover the wheels with an old towel or sheet etc and start with the camo { if you are having any} do the camo paint with the turret off then you will not get overspray from the turret sides on the deck, its easy to draw register marks on the tank so that the camo lines match up when the turret is fitted.
Then your chosen weathering can be done and thats about it.
[
 img][/img]
The same method was used on all three models in this photo.
[
 img][/img]
[
 img][/img]
In the two pics above the same methods are used for single colour models i.e no camo just weathering.
I hope this helps a little bit if not I am only too happy to help just give me a shout.
Cheers Paul
Paul's Tank Workshop. Complete Tank builds and re builds zimmerit and paint to museum quality standard. pjtigerman@aol.com
01524 720977
https://www.facebook.com/PaulsTankWorkshop
01524 720977
https://www.facebook.com/PaulsTankWorkshop
-
Jan_Donadoni
- Posts: 151
- Joined: Fri May 21, 2010 8:20 am
- Location: Italy
- Has liked: 2 times
- Been liked: 6 times
ok, thanks.
This was more or less the idea. But, how do you mask delicate spots? I.e. on the tires assembly of the Flak, the block is pretty complicated to be painted once finished. So I have to spray paint also in an area where bearings should fit, risking to give e little to much paint, blocking the bearing from proper fit.
My idea was to mask the holes which I do not wan to paint with something soft and sticky... like used chewing gum (bleah ), which should remain in place for the time needed, but still soft enough to be removed after a couple of days with no great effort :
This was more or less the idea. But, how do you mask delicate spots? I.e. on the tires assembly of the Flak, the block is pretty complicated to be painted once finished. So I have to spray paint also in an area where bearings should fit, risking to give e little to much paint, blocking the bearing from proper fit.
My idea was to mask the holes which I do not wan to paint with something soft and sticky... like used chewing gum (bleah
-
Paul Morris
- Posts: 1559
- Joined: Thu Jul 12, 2007 4:44 pm
- Location: North Lancs
- Been liked: 68 times
Hi Jan.
Something soft and sticky...try blue tack I have done this before also if you wanted to paint the wheels before you fitted the bearings you could just use masking tape on the bore where the bearing sits but... then you need to be carefull with your "bearing fit" as I have found it does not like paint and brings it off quite well.
Happy painting Paul.
Paul's Tank Workshop. Complete Tank builds and re builds zimmerit and paint to museum quality standard. pjtigerman@aol.com
01524 720977
https://www.facebook.com/PaulsTankWorkshop
01524 720977
https://www.facebook.com/PaulsTankWorkshop
-
leesellars
- Posts: 934
- Joined: Thu Jul 12, 2007 11:19 am
- Location: Nottingham
- Has liked: 2 times
- Been liked: 15 times
Hello Paul and Jan
What i do is put some grease on the area you dont want painting. All you do is wipe it off when finished painting. Just be carefull when you put it on.
Lee
What i do is put some grease on the area you dont want painting. All you do is wipe it off when finished painting. Just be carefull when you put it on.
Lee
http://www.Facebook.com/newthorpemodels
Dont hit me so early in the morning with those negative waves.
Listen carefully i shall say this only once.
If its not broke dont fix it.
Ich Hatt Einen Kameraden
Dont hit me so early in the morning with those negative waves.
Listen carefully i shall say this only once.
If its not broke dont fix it.
Ich Hatt Einen Kameraden
-
Steven Ford
- Posts: 154
- Joined: Tue Jul 17, 2007 9:41 pm
- Location: Northern England
- Has liked: 7 times
- Been liked: 5 times
Water based lubricant such as KY will be easier to get off than grease if you want to mask off small parts or threads. If you are easily embarrassed buy it on-line.
My own painting scheme tends to the 'just like in the brochure/showroom' but in real life WW2, in the field, all army vehicles will have looked a shocking mess with overspray, clarts and decomposing animal and people bits all over everything - at least accordiong to my father in law who drove a Sherman and was the first into Caen. Depends on the effect you are looking for.
In fact, there's an idea for extra realism and profit. Who will be the first to market realistic battlefield stench in a bottle? Could be dispensed in the smoker perhaps.
-
Jan_Donadoni
- Posts: 151
- Joined: Fri May 21, 2010 8:20 am
- Location: Italy
- Has liked: 2 times
- Been liked: 6 times
Hi Steven,
KY would be really a great idea and solution.
Just the buying of large quantities needed for the whole work could be embarrassing. Or maybe it could be a great joke. I can image the face of the salesman/woman when I explain that I need it for my Tiger tank? maybe I should also add that it has such a HUGE gun barrel... or maybe not. This could be really too hard to explain.
Anyway I believe it could be the best solution. It could be cleaned off with just a little warm water, and would not interfere with glue or tread locker in a second time.

