Late Production Tiger Project
-
- Posts: 1762
- Joined: Fri Jul 13, 2007 4:53 am
- Location: Northern California
- Been liked: 177 times
- Contact:
Hi guys. Thanks again for the encouragement.
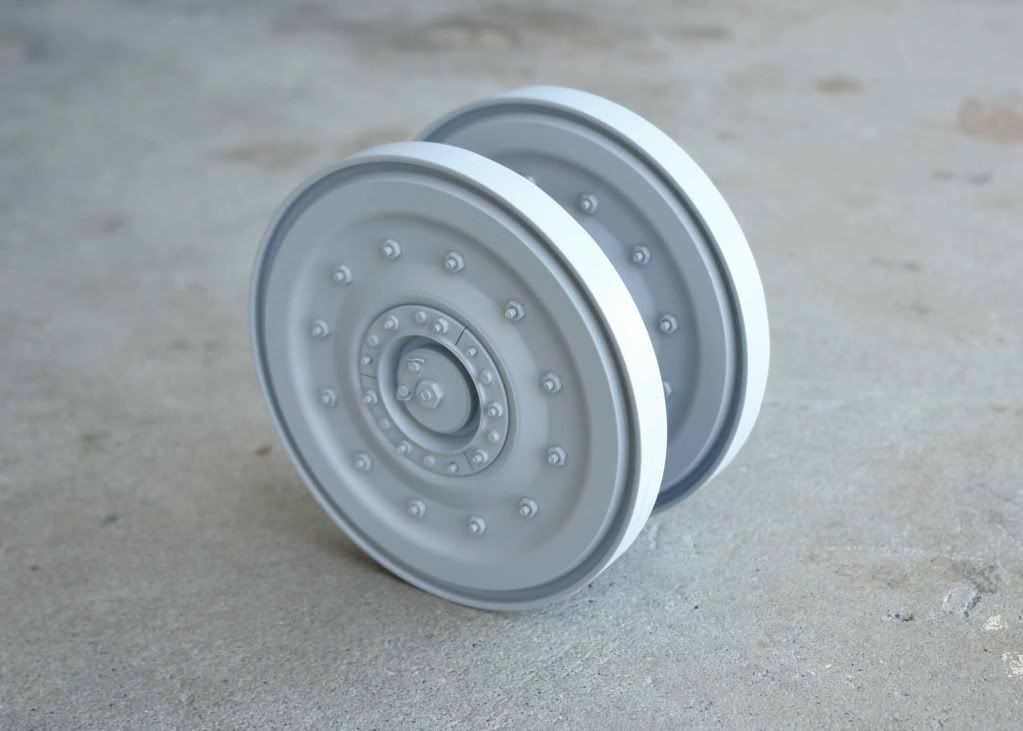
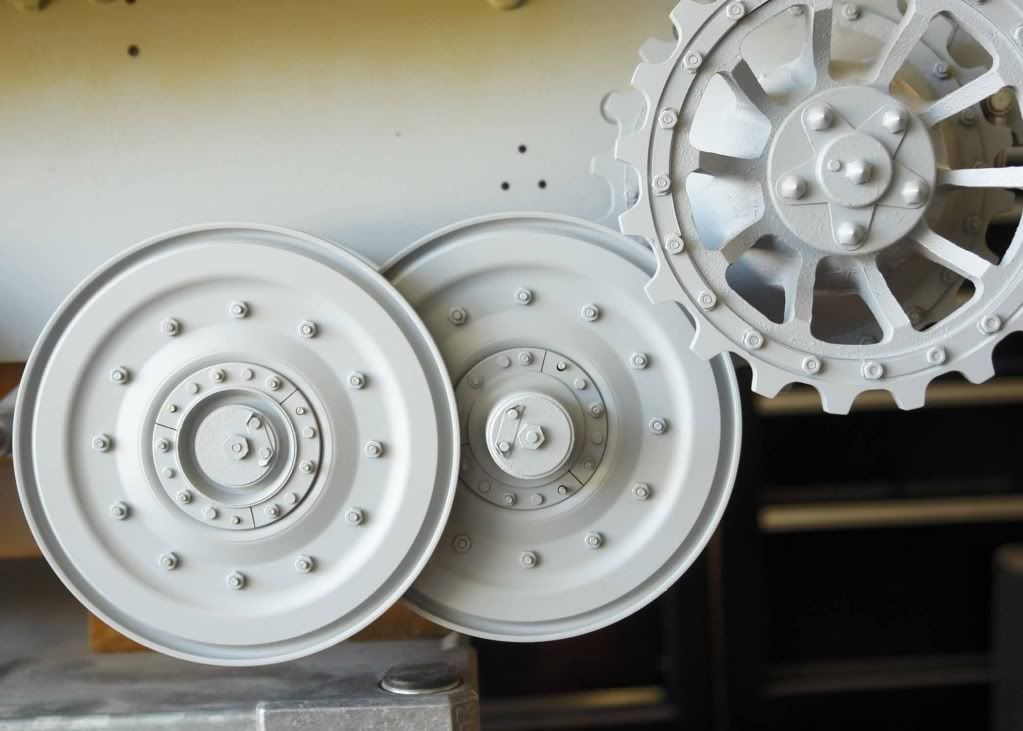
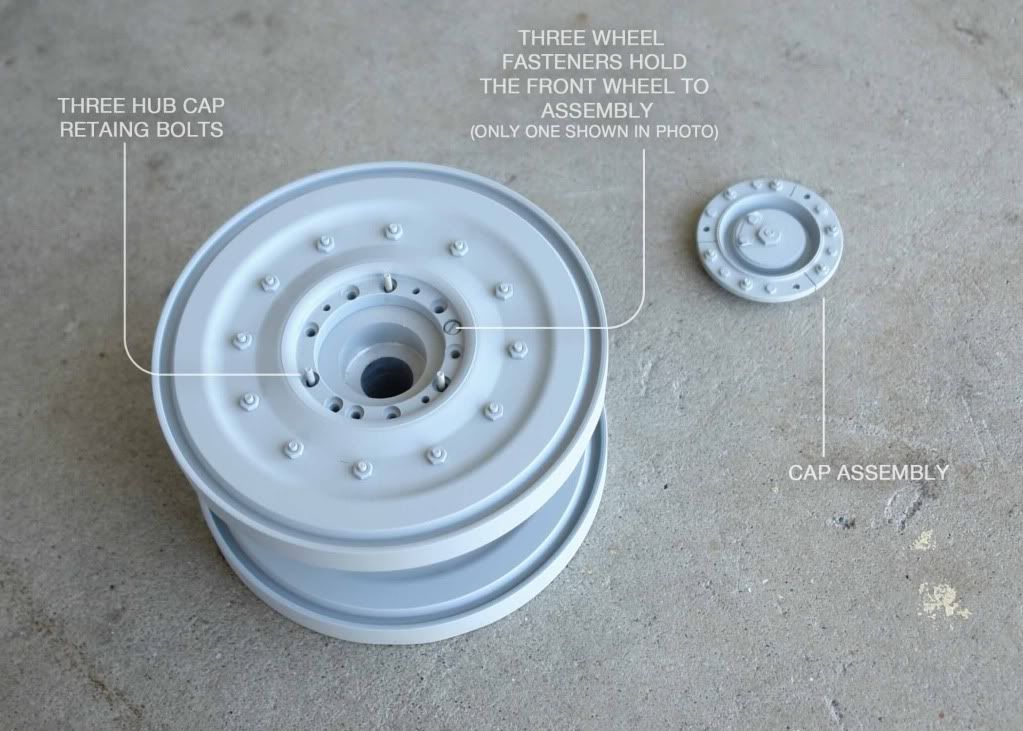
I went back and forth on how to approach the wheel assembly and finally resolved myself to Steve's fine example. I don't think it's exactly the same but the principle is. Mine is the lazy man's version. It allows for easy removal of hub cap for wheel removal. Thanks Steve.
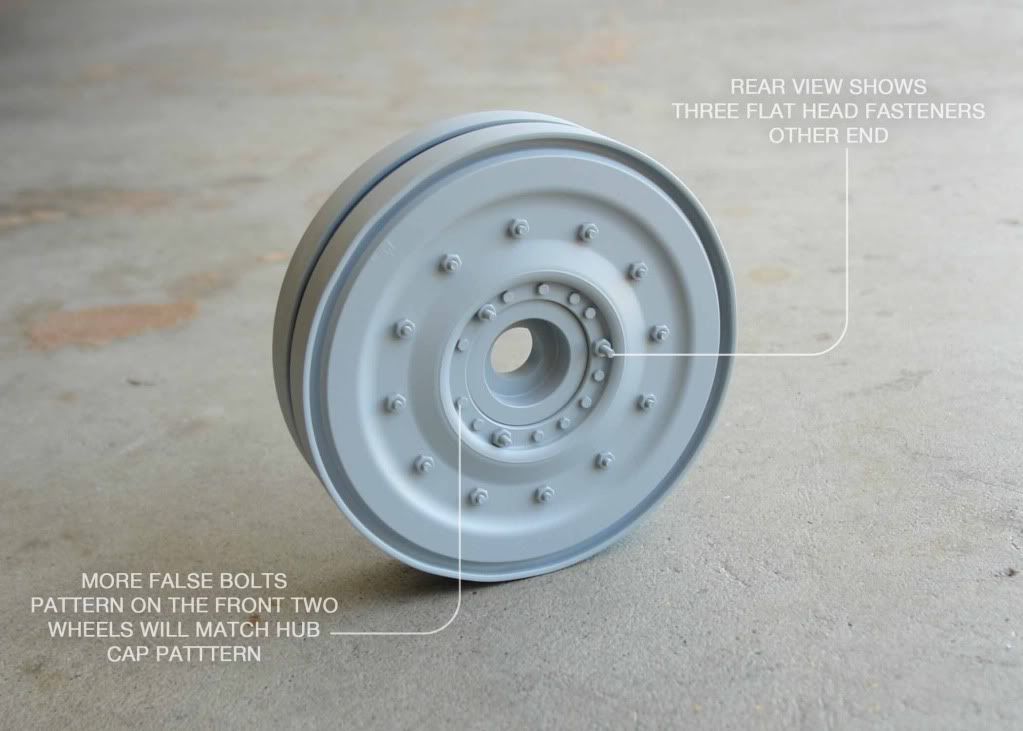
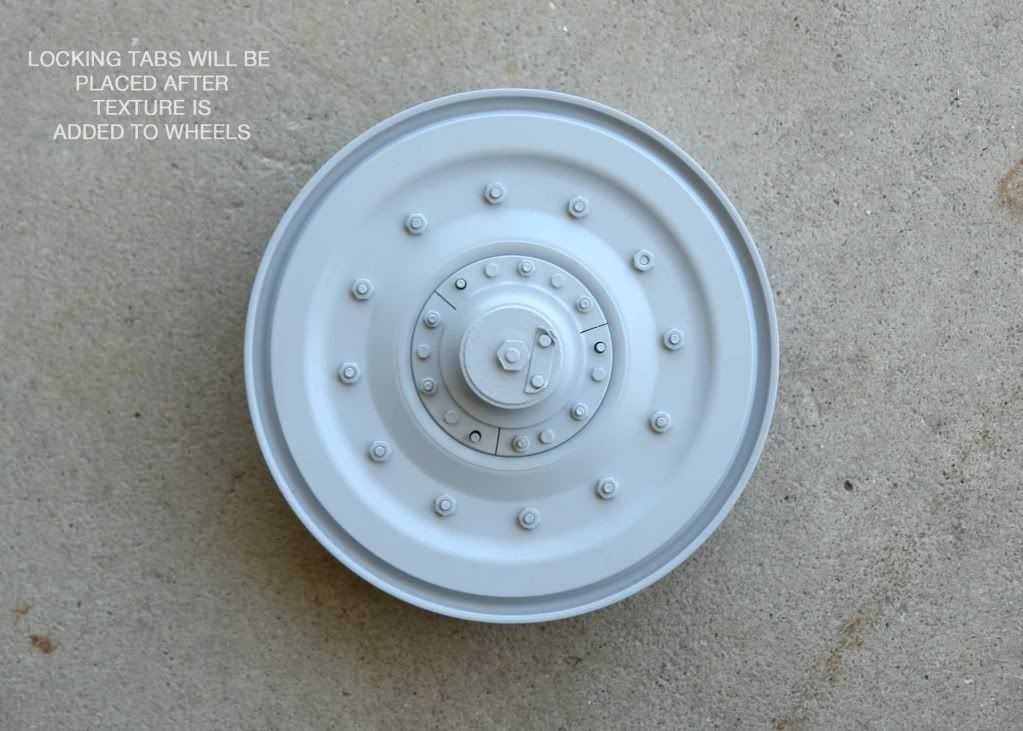
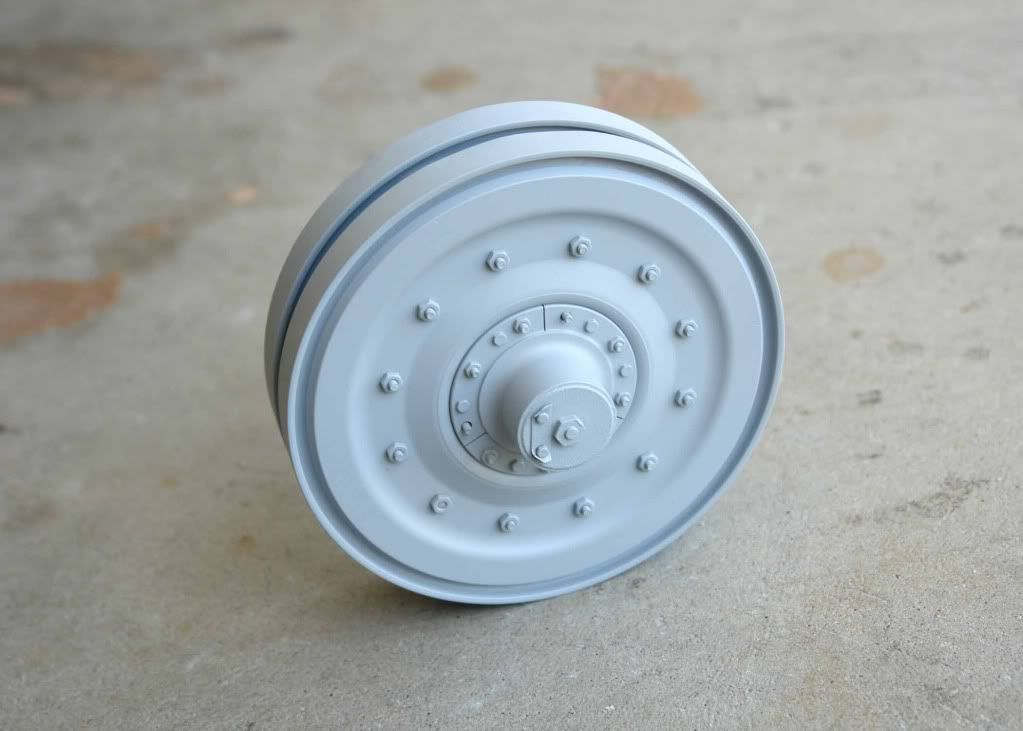
This was the first proof of concept with some detailing (perimeter locking tabs not installed yet). I'll probably add a light texturing to the wheels themselves once I have them all completed.
Center wheel test assembly is next and then I'll assemble them all.
Tim
"So long as one isn't carrying one's head under one's arm, things aren't too bad." – Erwin Rommel
-
- Posts: 104
- Joined: Thu Jul 26, 2007 2:17 am
- Location: Maryland, USA
- Been liked: 54 times
-
- Posts: 1428
- Joined: Fri Jul 13, 2007 1:10 am
- Location: Port Macquarie Australia
- Been liked: 429 times
- Contact:
-
- Posts: 1762
- Joined: Fri Jul 13, 2007 4:53 am
- Location: Northern California
- Been liked: 177 times
- Contact:
Hi Mike
Thanks. They were an important detail for me. They look even better from a distance when you can see both of them. I have seen your handy work. The hooks will be a piece of cake for you.
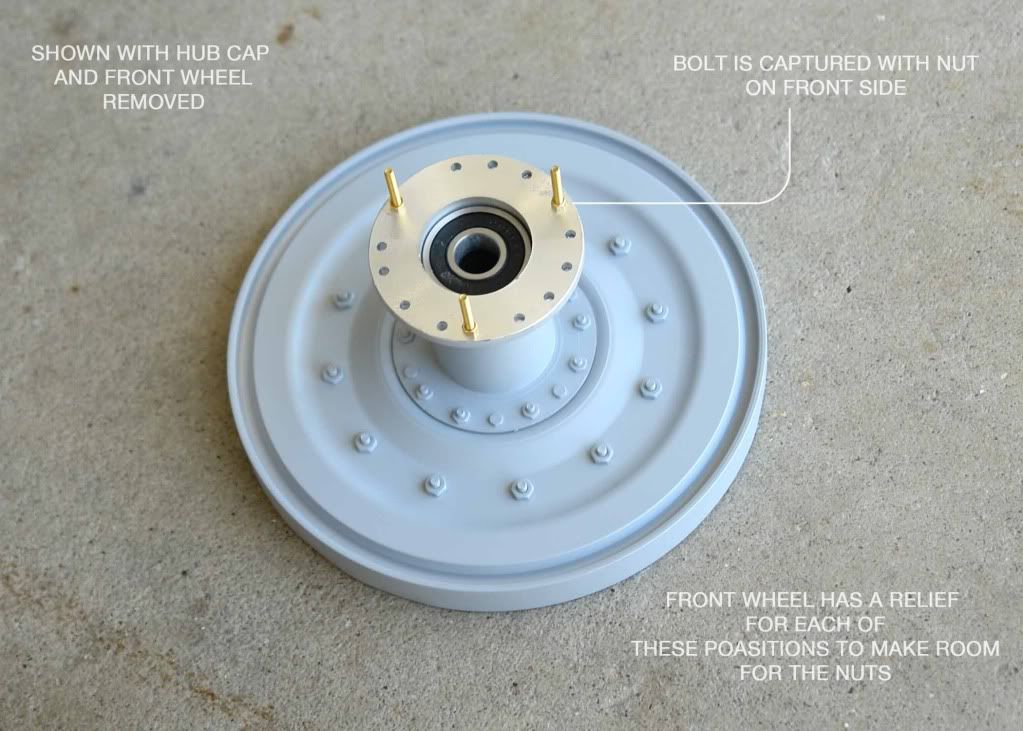
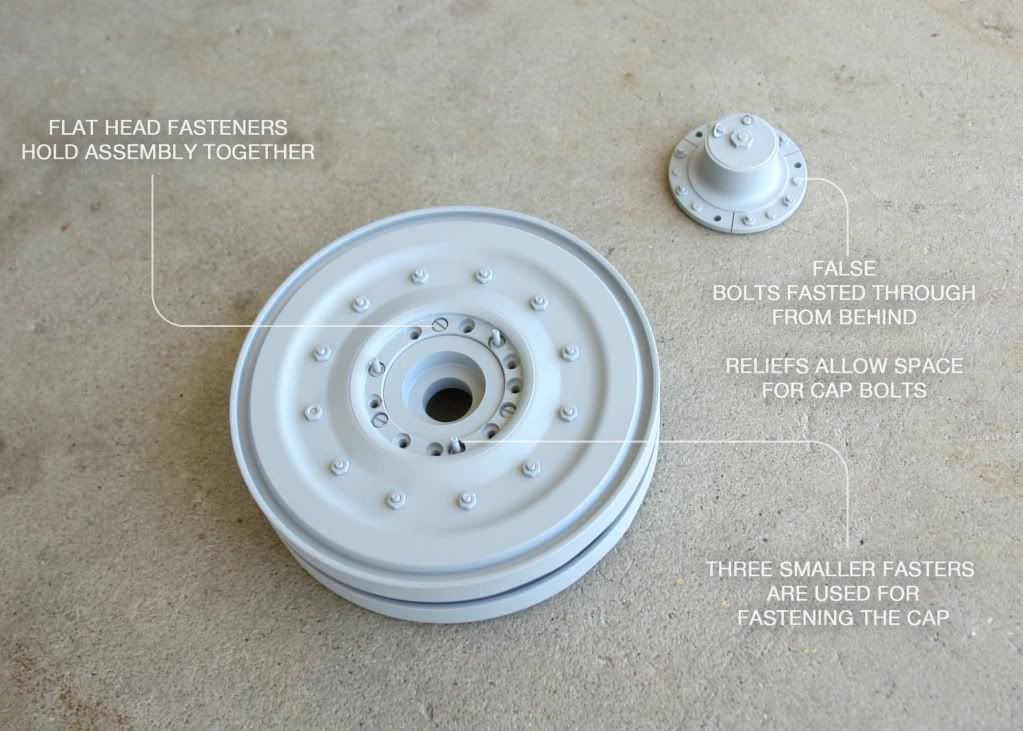
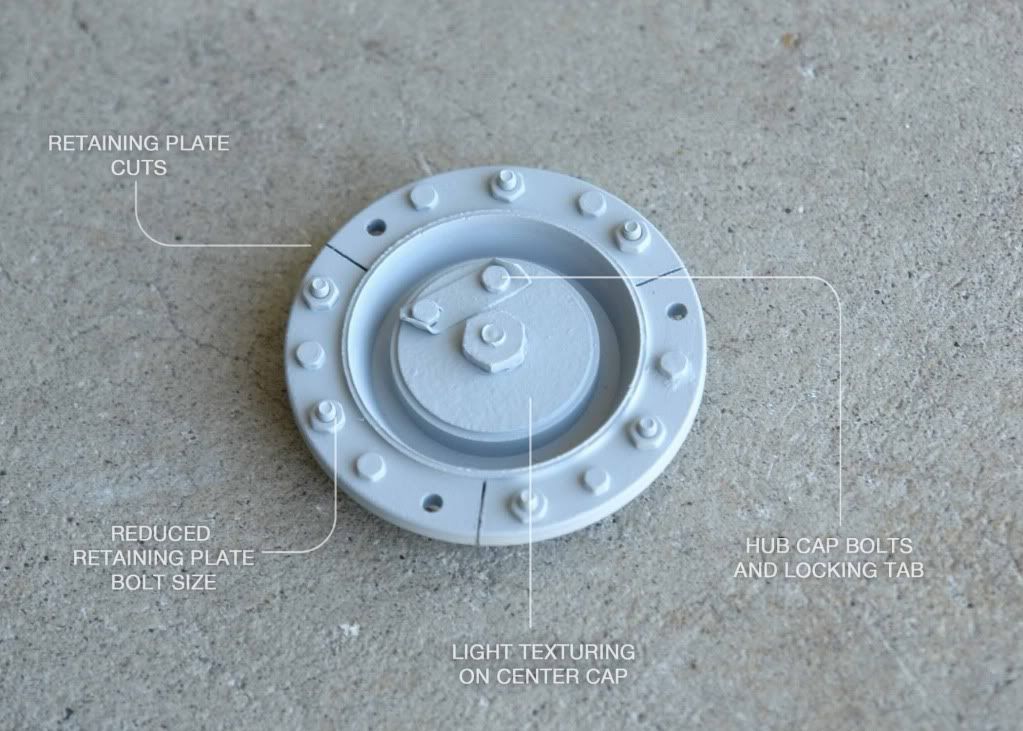
I'll take a photo without the front wheel mounted so you can see. They are held in place with a nut that holds them to the wheels center part. The wheel is simply slid over them and then the flat head fasteners are secured. I almost think the three fasteners would be enough. That way, when you remove those three nuts the hub and wheel come off together. Either way will work.
The recesses seen in the first photo around the holes are also to accommodate the bolts on the back side of the hub cap assembly. Sounds more complicated then it is. I'll be doing the rest of my wheels very soon.
The slots were cut with an Xacto saw.
regards
Tim
Thanks. They were an important detail for me. They look even better from a distance when you can see both of them. I have seen your handy work. The hooks will be a piece of cake for you.
Dale, LOL I had the same thought. Fortunately the three bolts that hold the hub cap on run all the way through and are easy enough to find on the back side of the front wheel.Dale jordan wrote:Plus how will you know which three nuts are the ones to undo when you need do take off the wheels ??
I'll take a photo without the front wheel mounted so you can see. They are held in place with a nut that holds them to the wheels center part. The wheel is simply slid over them and then the flat head fasteners are secured. I almost think the three fasteners would be enough. That way, when you remove those three nuts the hub and wheel come off together. Either way will work.
The recesses seen in the first photo around the holes are also to accommodate the bolts on the back side of the hub cap assembly. Sounds more complicated then it is. I'll be doing the rest of my wheels very soon.
The slots were cut with an Xacto saw.
regards
Tim
"So long as one isn't carrying one's head under one's arm, things aren't too bad." – Erwin Rommel
-
- Posts: 1428
- Joined: Fri Jul 13, 2007 1:10 am
- Location: Port Macquarie Australia
- Been liked: 429 times
- Contact:
-
- Posts: 1762
- Joined: Fri Jul 13, 2007 4:53 am
- Location: Northern California
- Been liked: 177 times
- Contact:
Hi Dale
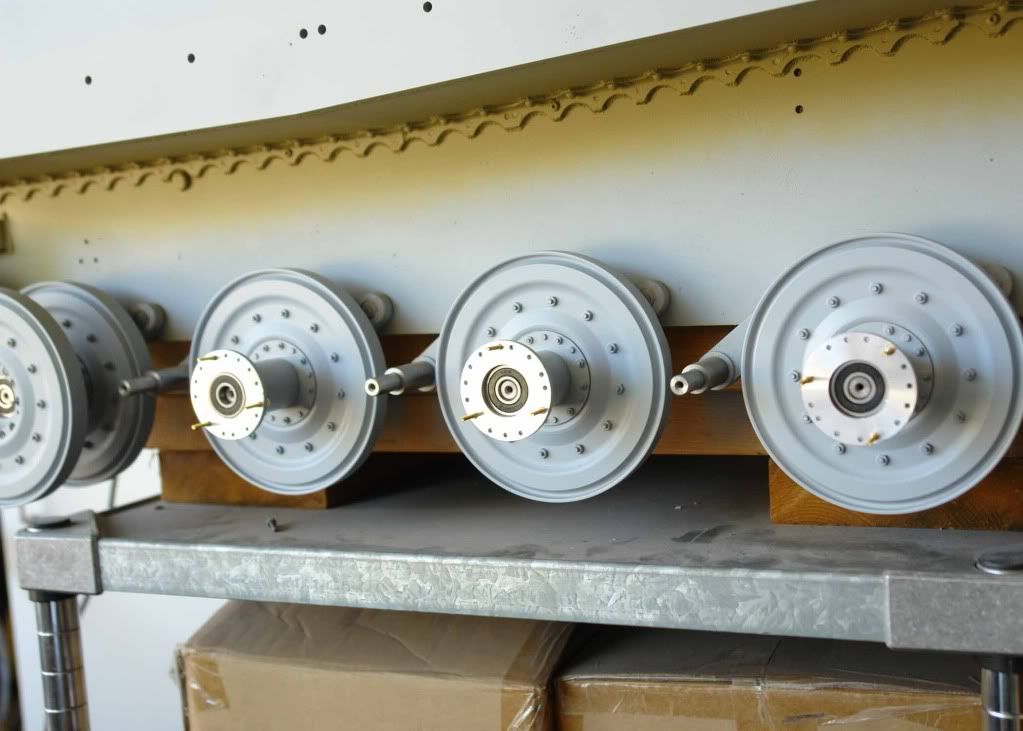
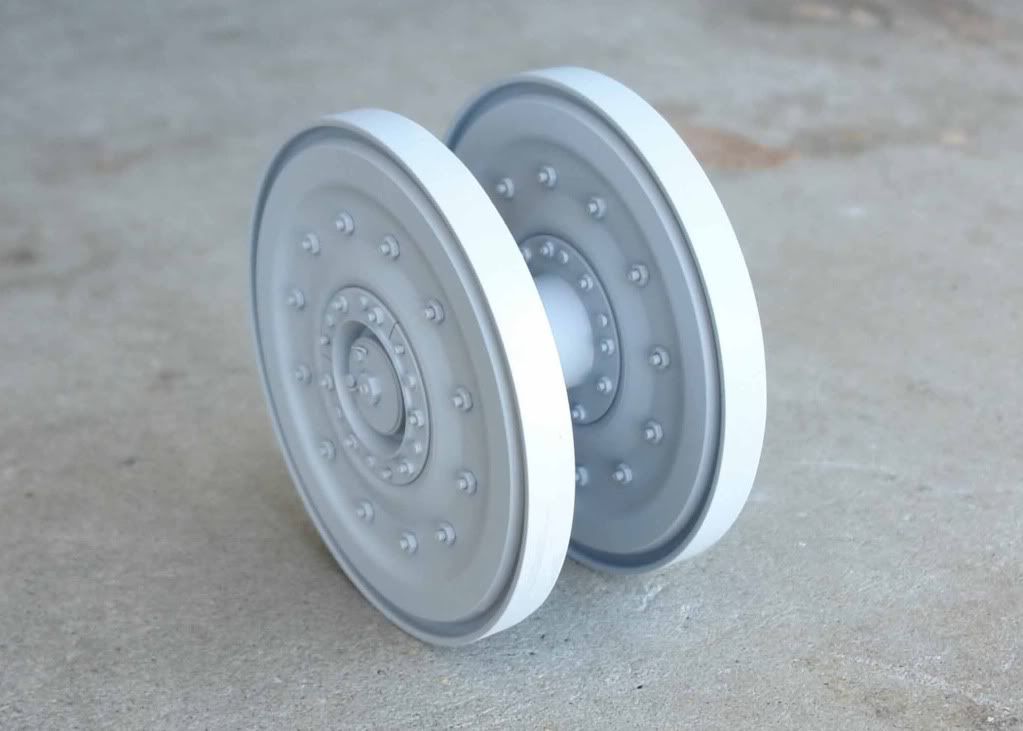
Heres a few pictures of the wheel assembly with cap and front wheel removed. you could certainly increase the number of usable fasters.
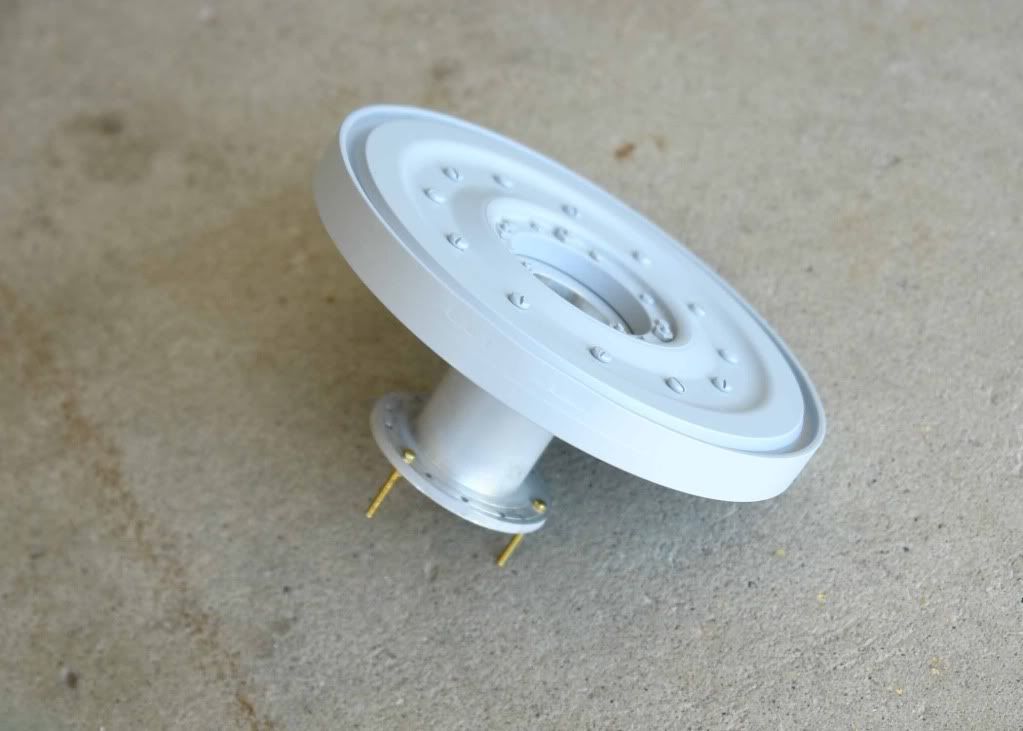
and here's the second type of wheel first test assembly.
regards
Tim
Heres a few pictures of the wheel assembly with cap and front wheel removed. you could certainly increase the number of usable fasters.
and here's the second type of wheel first test assembly.
regards
Tim
"So long as one isn't carrying one's head under one's arm, things aren't too bad." – Erwin Rommel
- Adrian Harris
- Posts: 5060
- Joined: Thu Jul 12, 2007 10:46 pm
- Location: Berkshire (UK)
- Has liked: 1369 times
- Been liked: 1567 times
-
- Posts: 2024
- Joined: Fri Nov 02, 2007 8:51 pm
- Location: new forest,hampshire,u.k.
- Been liked: 1633 times
-
- Posts: 301
- Joined: Mon Jan 12, 2009 11:08 am
- Location: Belgium,Gent
- Been liked: 11 times
- Contact:
- Robert E Morey
- Posts: 2299
- Joined: Wed Jul 18, 2007 12:59 am
- Location: Seattle, WA USA
- Has liked: 125 times
- Been liked: 755 times
-
- Posts: 1762
- Joined: Fri Jul 13, 2007 4:53 am
- Location: Northern California
- Been liked: 177 times
- Contact:
Thanks guys
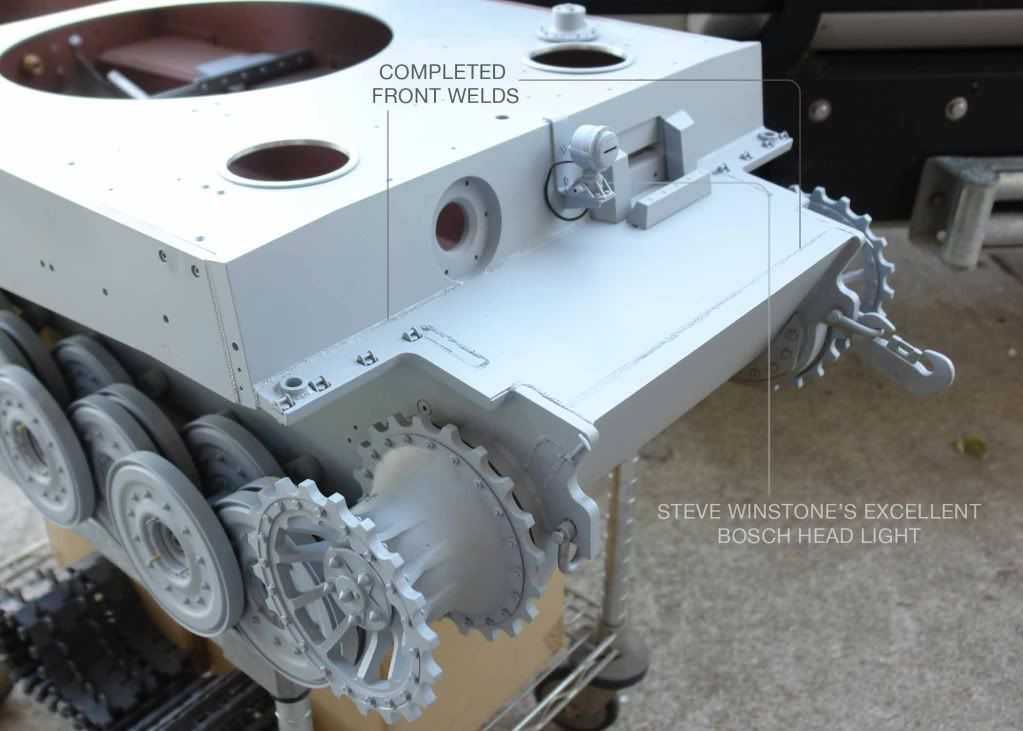
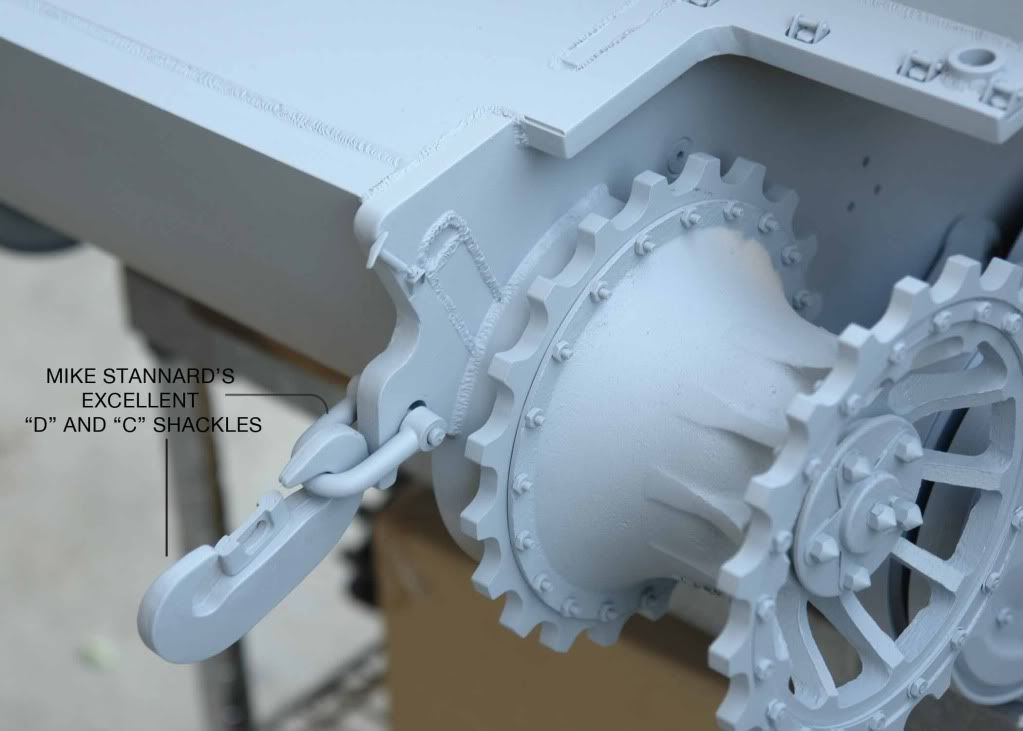
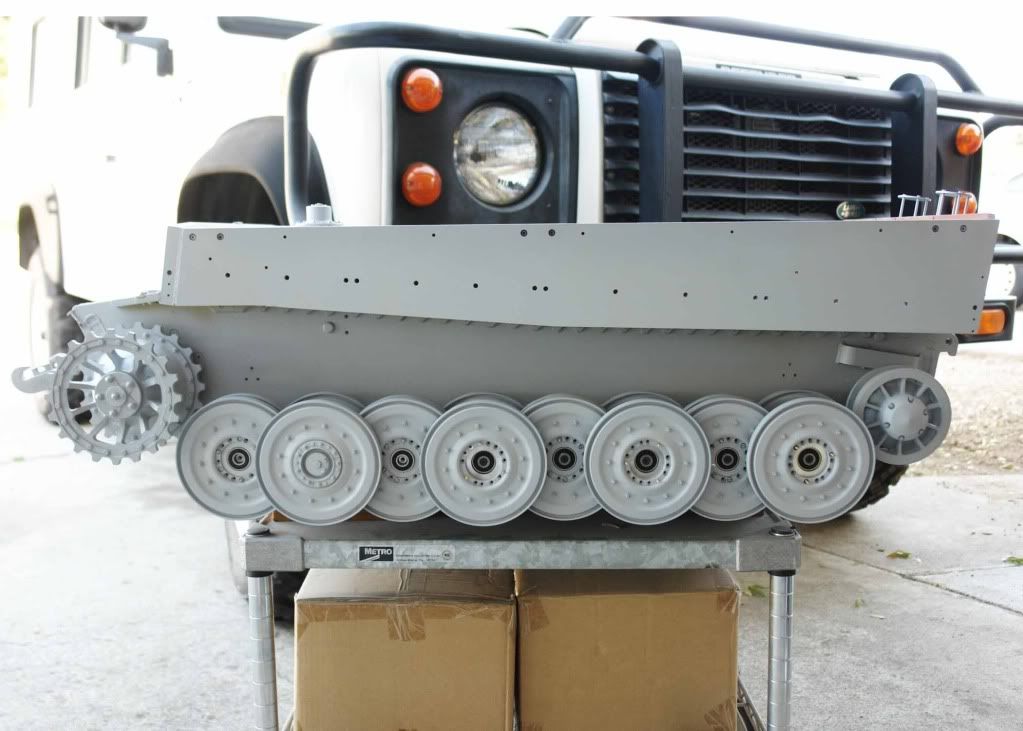
Hi Bob I did the Panther in red oxide. I found it's much easier for me to see the details with the light grey primer. I havn't decided whether or not I will do one last coat in red before paint. I doubt it.
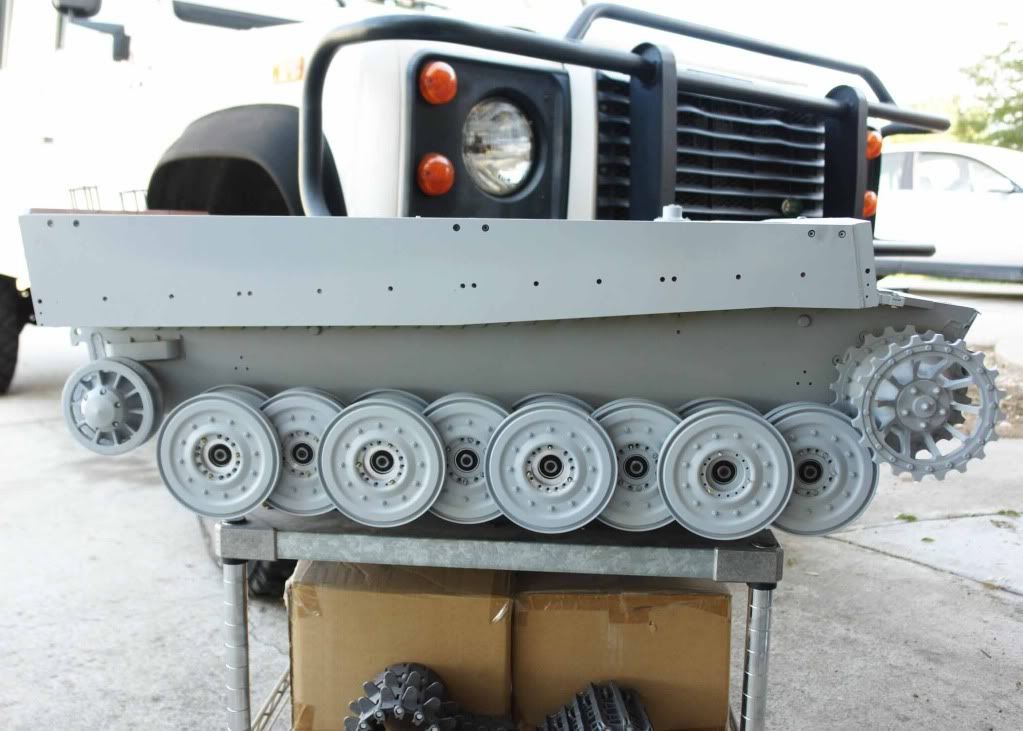
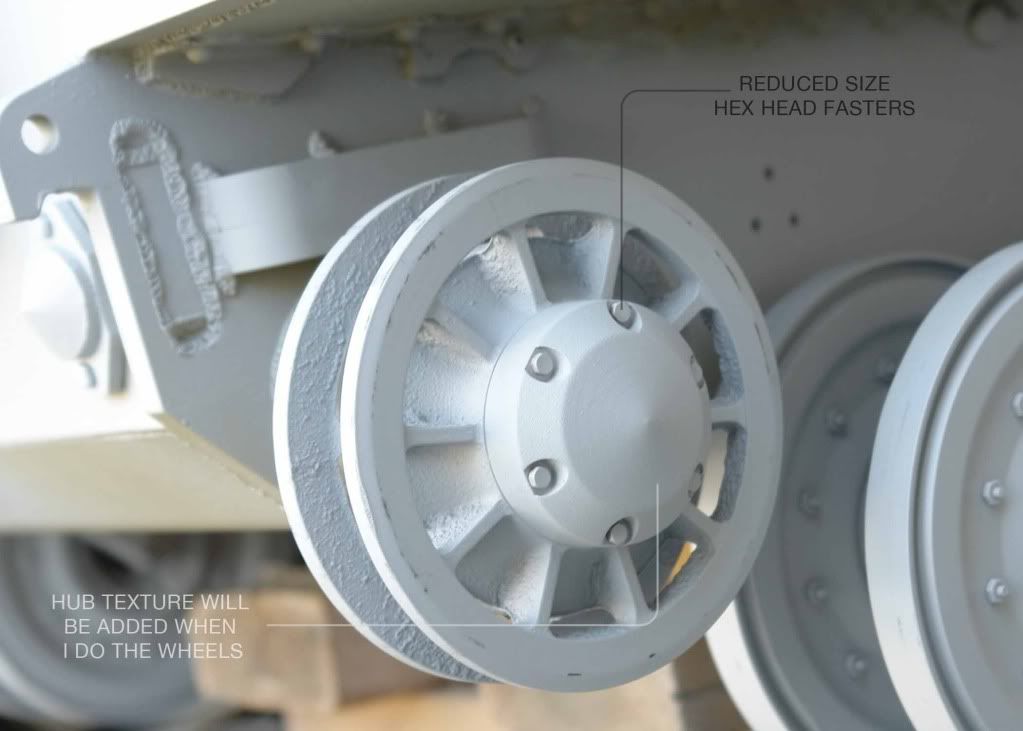
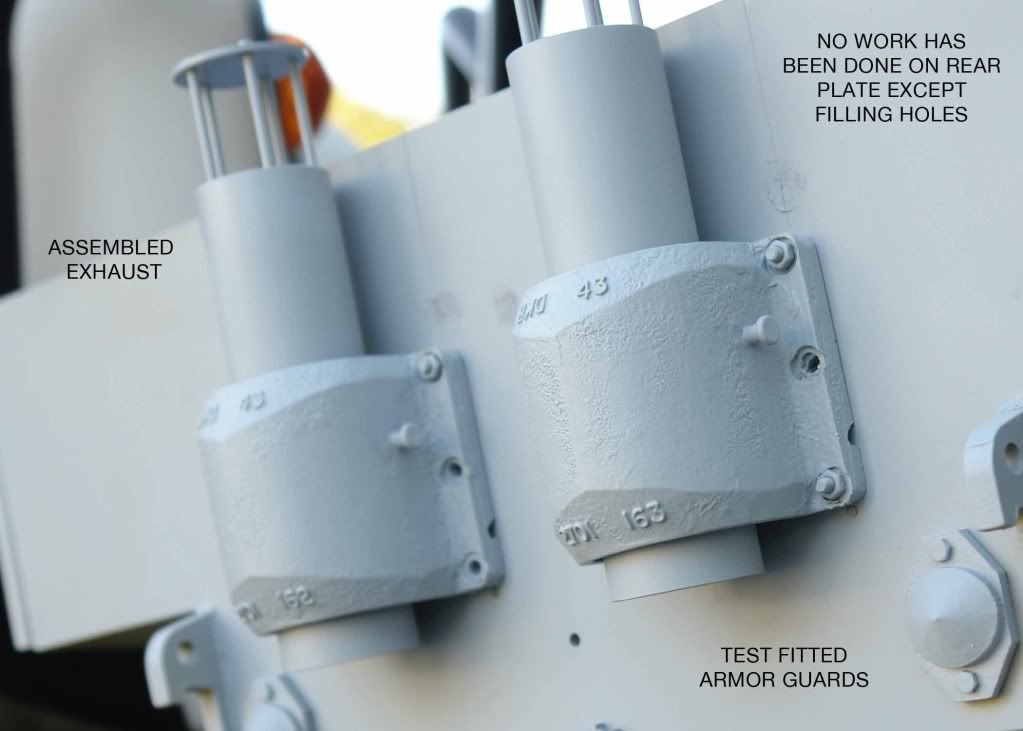
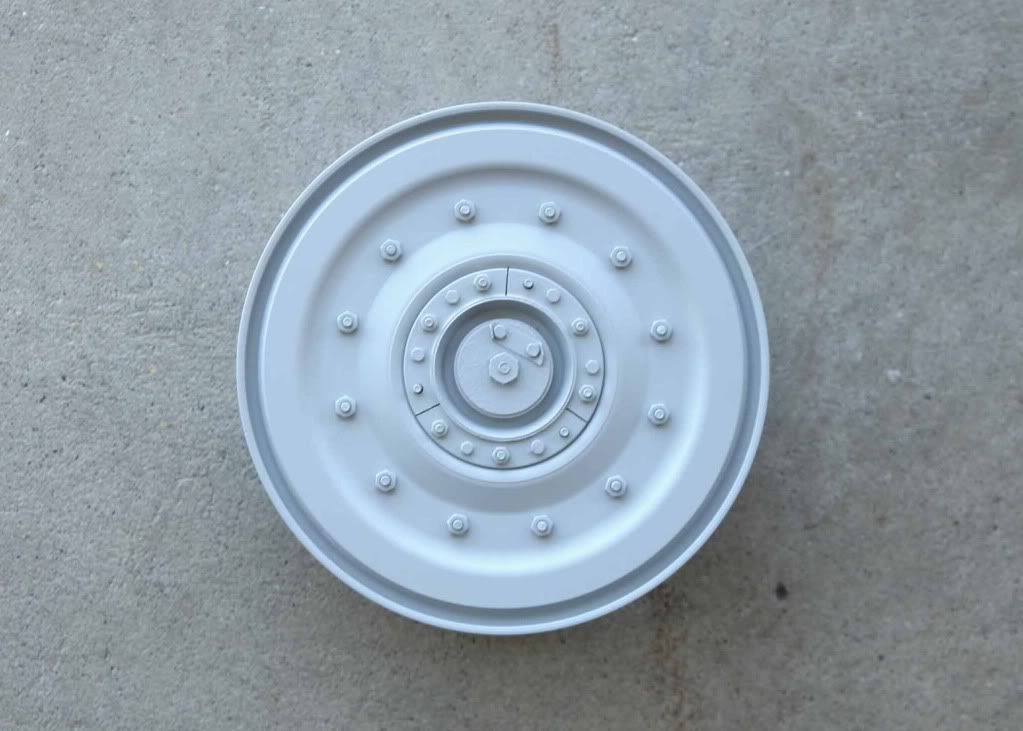
YIPEE! Main parts of the wheels are completed. Hub detailing and overall texturing is next. Then onto the rear plate.
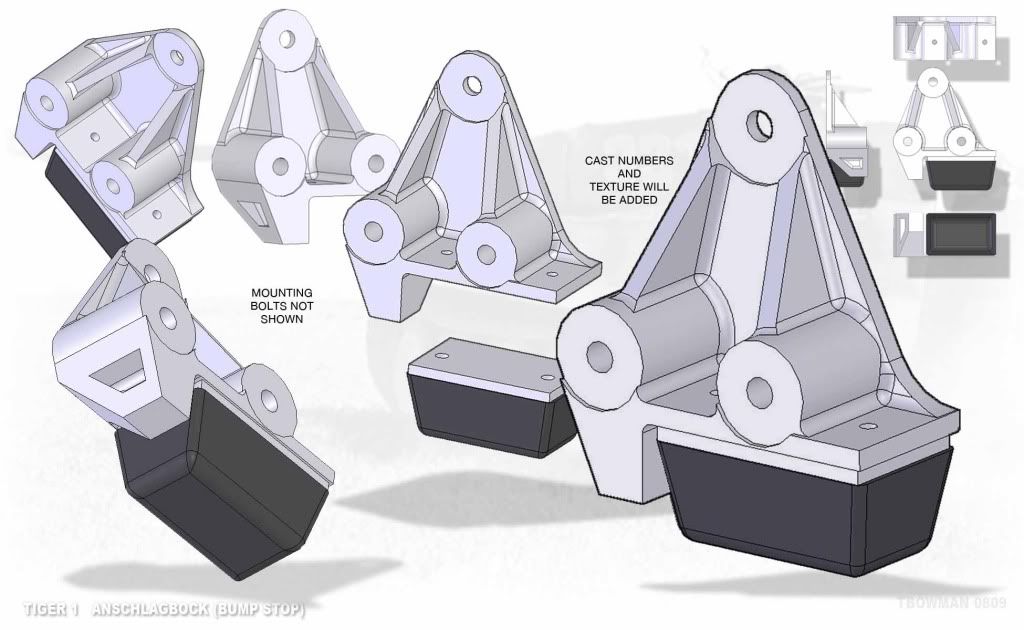
I have also been working on accurate bump stops I will be making. A great, big thank you to Roland Mann for your assistance with this part and to Kent Wiik for the great reference photos. Some minor changes and then off to the 3D printer.
I decided to take the big leap and make these my first metal casting experiment. Should be interesting. The rubber bumpers will be custom made and molded.
Regards
Tim
"So long as one isn't carrying one's head under one's arm, things aren't too bad." – Erwin Rommel
- Robert E Morey
- Posts: 2299
- Joined: Wed Jul 18, 2007 12:59 am
- Location: Seattle, WA USA
- Has liked: 125 times
- Been liked: 755 times
-
- Posts: 1276
- Joined: Thu Jul 12, 2007 12:44 pm
- Location: london
- Has liked: 218 times
- Been liked: 180 times